
To Mt Store Trolltind Via Mt Norafjellet and Mt Trollklørn (01.07.2021)

Written by Solan (Atle Solholm)

| Start point | Soggemoen (47m) |
|---|---|
| Endpoint | Soggemoen (48m) |
| Duration | 15h 45min |
| Distance | 29.1km |
| Vertical meters | 2,645m |
| GPS |
|
| Ascents | Norafjellet (959m) | 01.07.2021 |
|---|---|---|
| Norafjellet sør (958m) | 01.07.2021 | |
| Trollklørn (1,701m) | 01.07.2021 | |
| Vestre Trolltind (1,708m) | 01.07.2021 | |
| Store Trolltinden (1,788m) | 01.07.2021 | |
| Visits of other PBEs | Bruraskaret (1,550m) | 01.07.2021 |
| Norafjellet - parkeringslomme (50m) | 01.07.2021 | |
| Store Trolltind - klyving i sørrenna (1,750m) | 01.07.2021 | |
| Frokostplassen (1,315m) | 01.07.2021 10:46 |
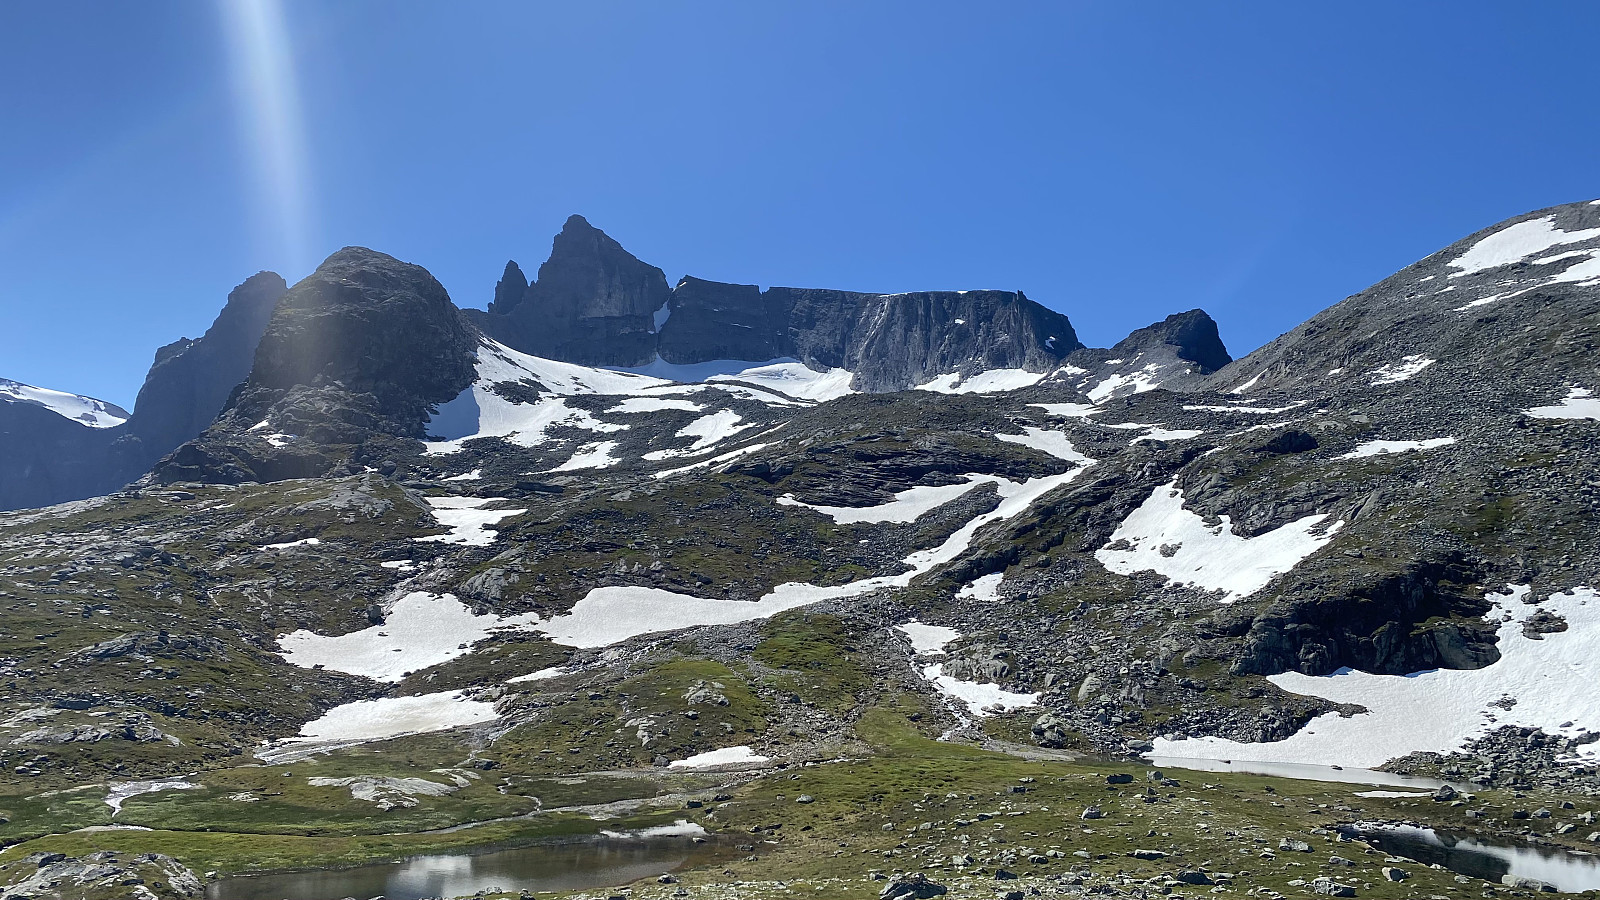
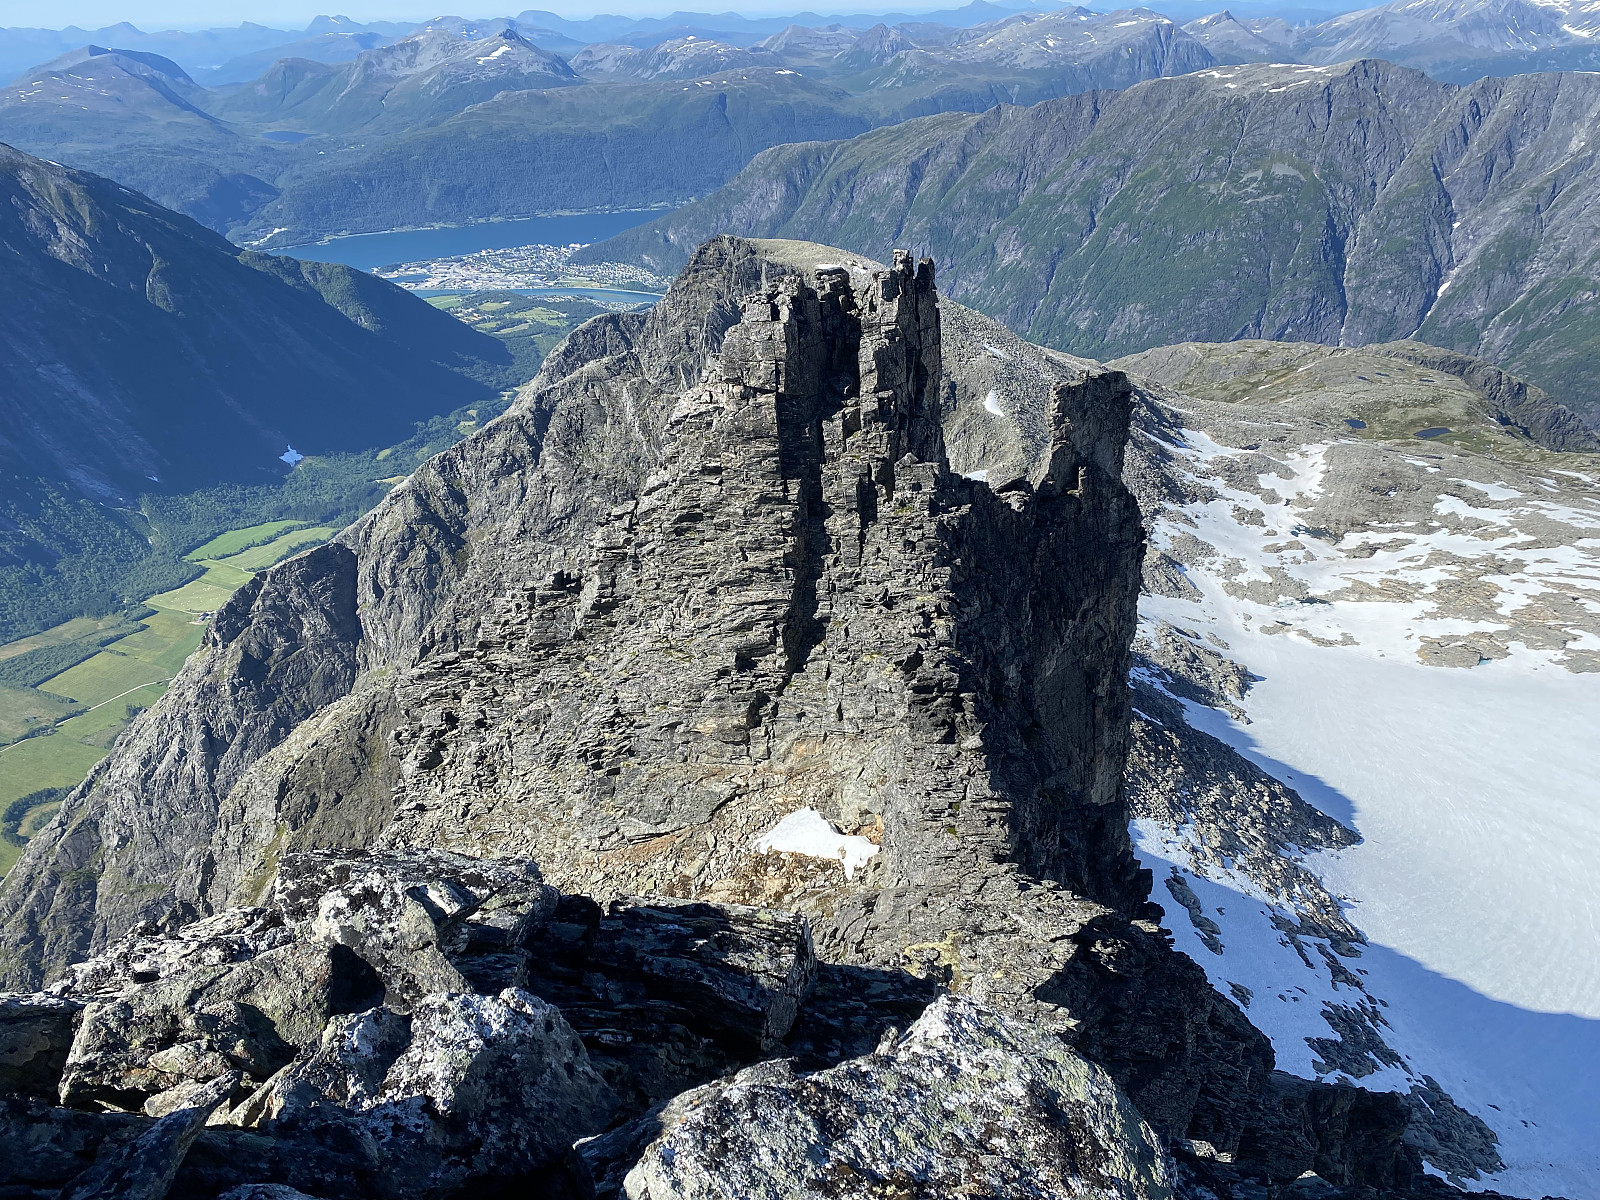
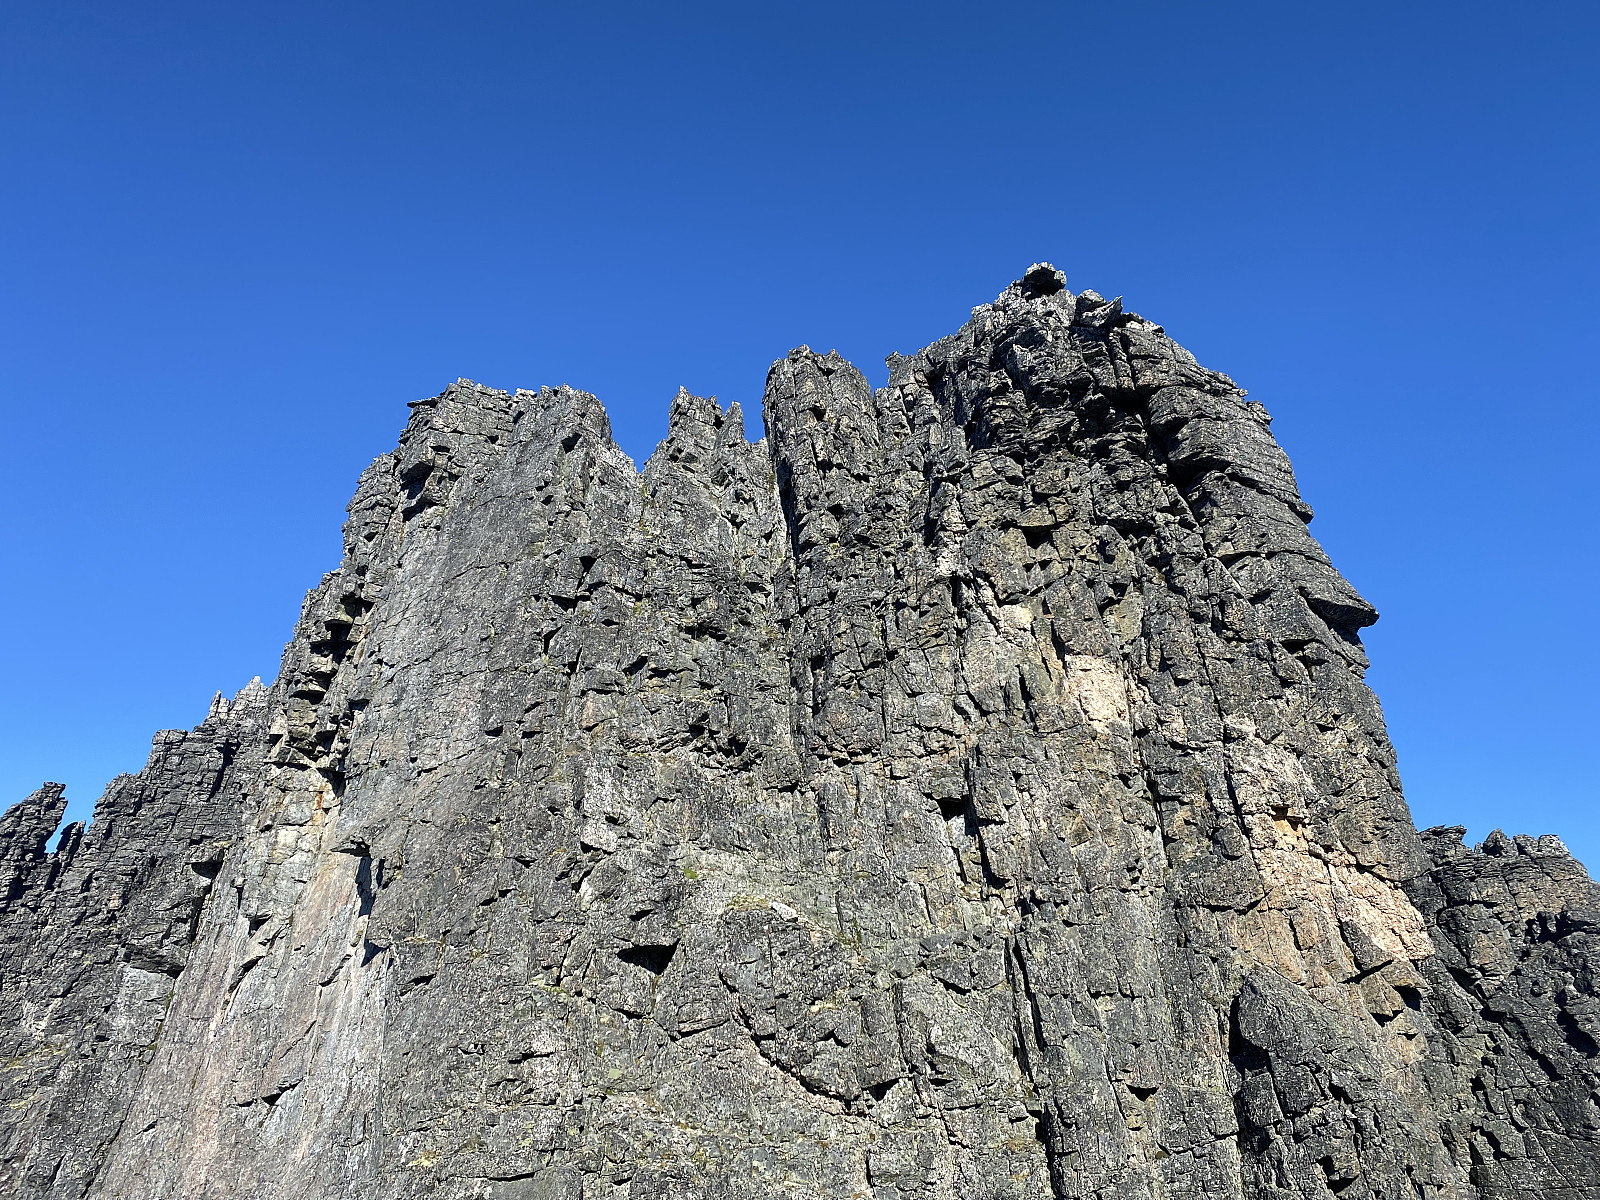
I had prior to this climb been three times to Mount Norafjellet [959 m.a.m.s.l.] and Adelsbreen Glacier [1150 - 1500 m.a.m.s.l.]; twice on my way to Mount Nordre Trolltind [i.e. "Northern Troll Peak"], and the third time on my way down from Mount Setergjelstinden in June this year (Fot- og klyvetur til Soggefjellet og Setergjelstinden). On my visits to the glacier and these surrounding peaks, I little by little developed a desire to ascend even Mount Store Trolltinden [i.e. "The Greater Troll Peak"] form this aspect. The summit of Mount Store Trolltinden has an elevation of 1788 m.a.m.sl.l., and it somehow thrones majestically above Adelsbreen Glacier (images ## 1 & 7). The Greater Troll Peak is usually approached from the south side, but an ascent from the north side would indeed be much more spectacular.
There are, the way I see it, at least three possible ways to ascend The Greater Troll Peak from Adelsbreen Glacier:
- You could climb the rather steep mountain ridge from Mount Nordre Trolltinden [1482 m.a.m.s.l.] up to the summit of Mount Store Trolltinden (Image #28).
- You could ascend the mountain via the deep chute, or crevasse between Mount Store Trolltinden and Mount Vestre Trolltinden [i.e. "The Western Troll Peak"].
- You could climb up the north ridge of Mount Trollklørn [i.e."The Troll Claws"], and from there continue onto Mount Vestre Trolltinden and Mount Store Trolltinden.
The three mountains of The Troll Claws, Western Troll Peak, and Greater Troll Peak do actually look pretty much like one single huge mountain massif, but there is a deep notch that separates The Greater Troll Peak from The Western Troll Peak; and another one that separates The Western Troll Peak from The Troll Claw mountain (Image #1). I have twice been standing on Mount Nordre Trolltinden with a pair of binoculars, carefully studying the mountain ridge extending from this knoll up to Mount Store Trolltinden, with a deep desire of one day to climb up that ridge. The use of ropes and security measures is generally recommended for the climb up this ridge, however; though there are rumors of people who once in a while go free soloing up there.
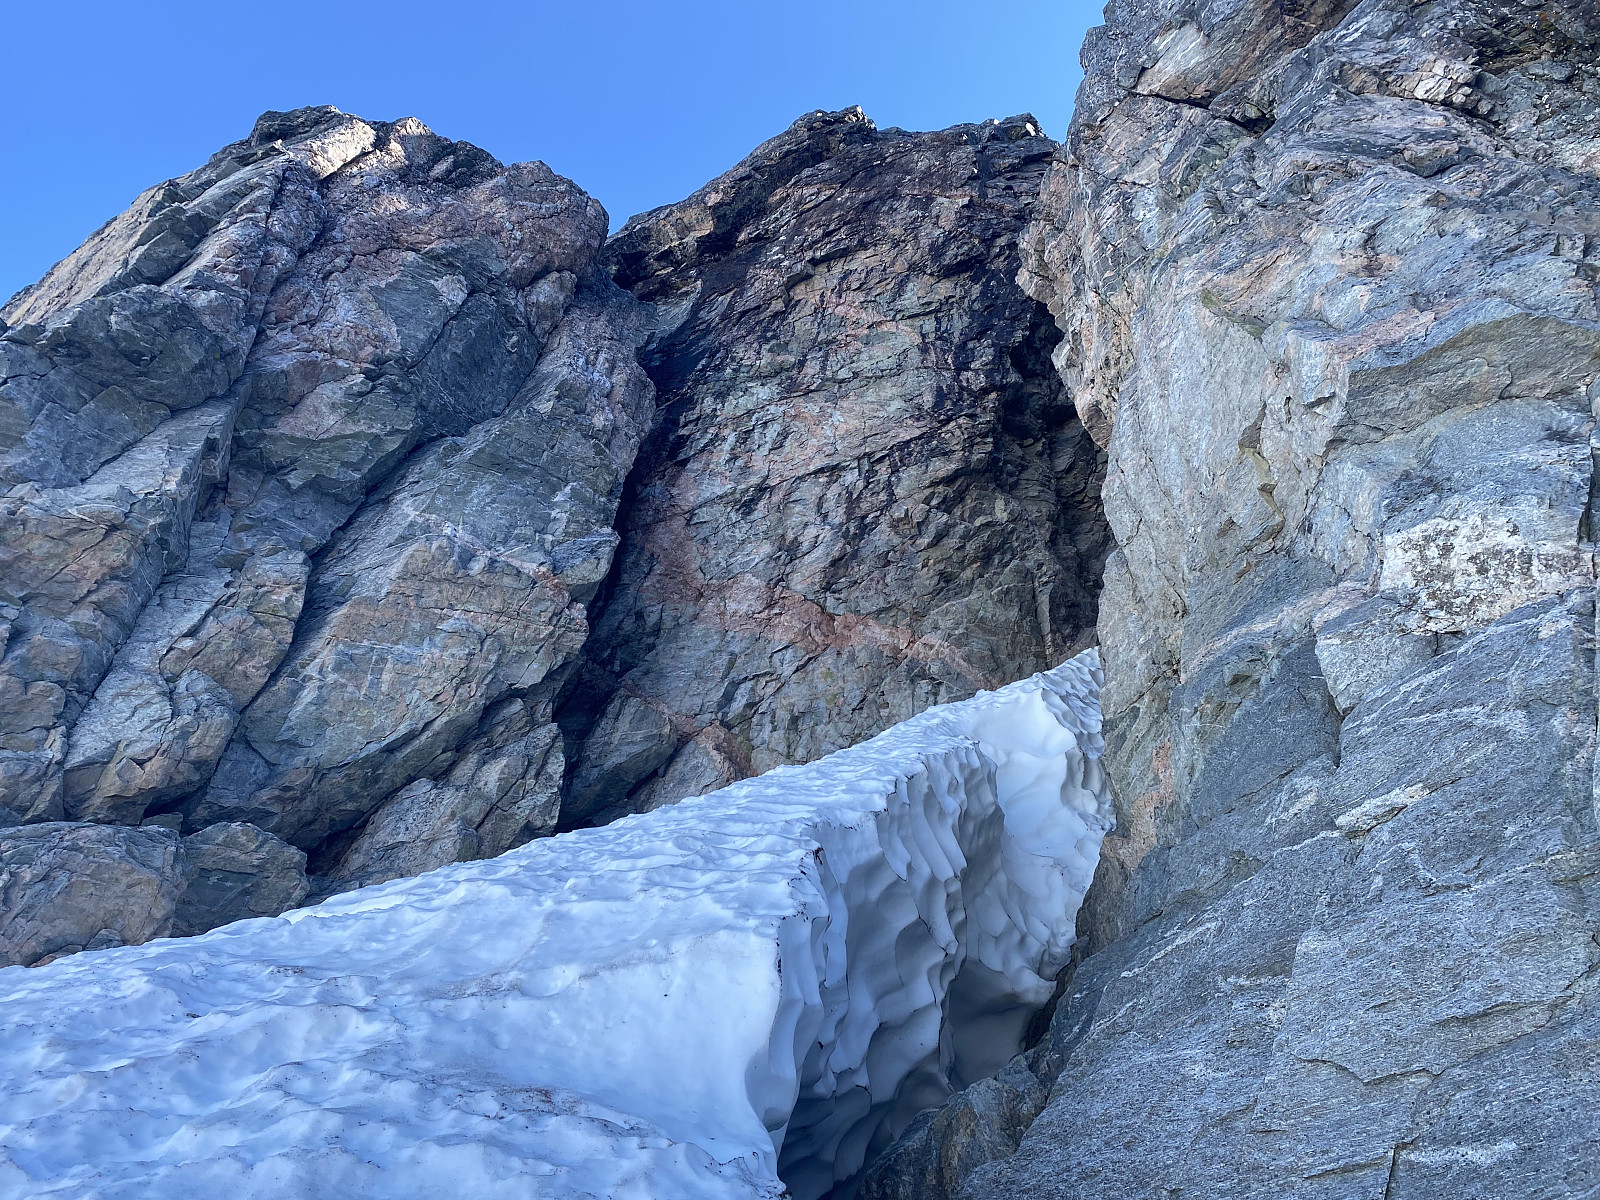
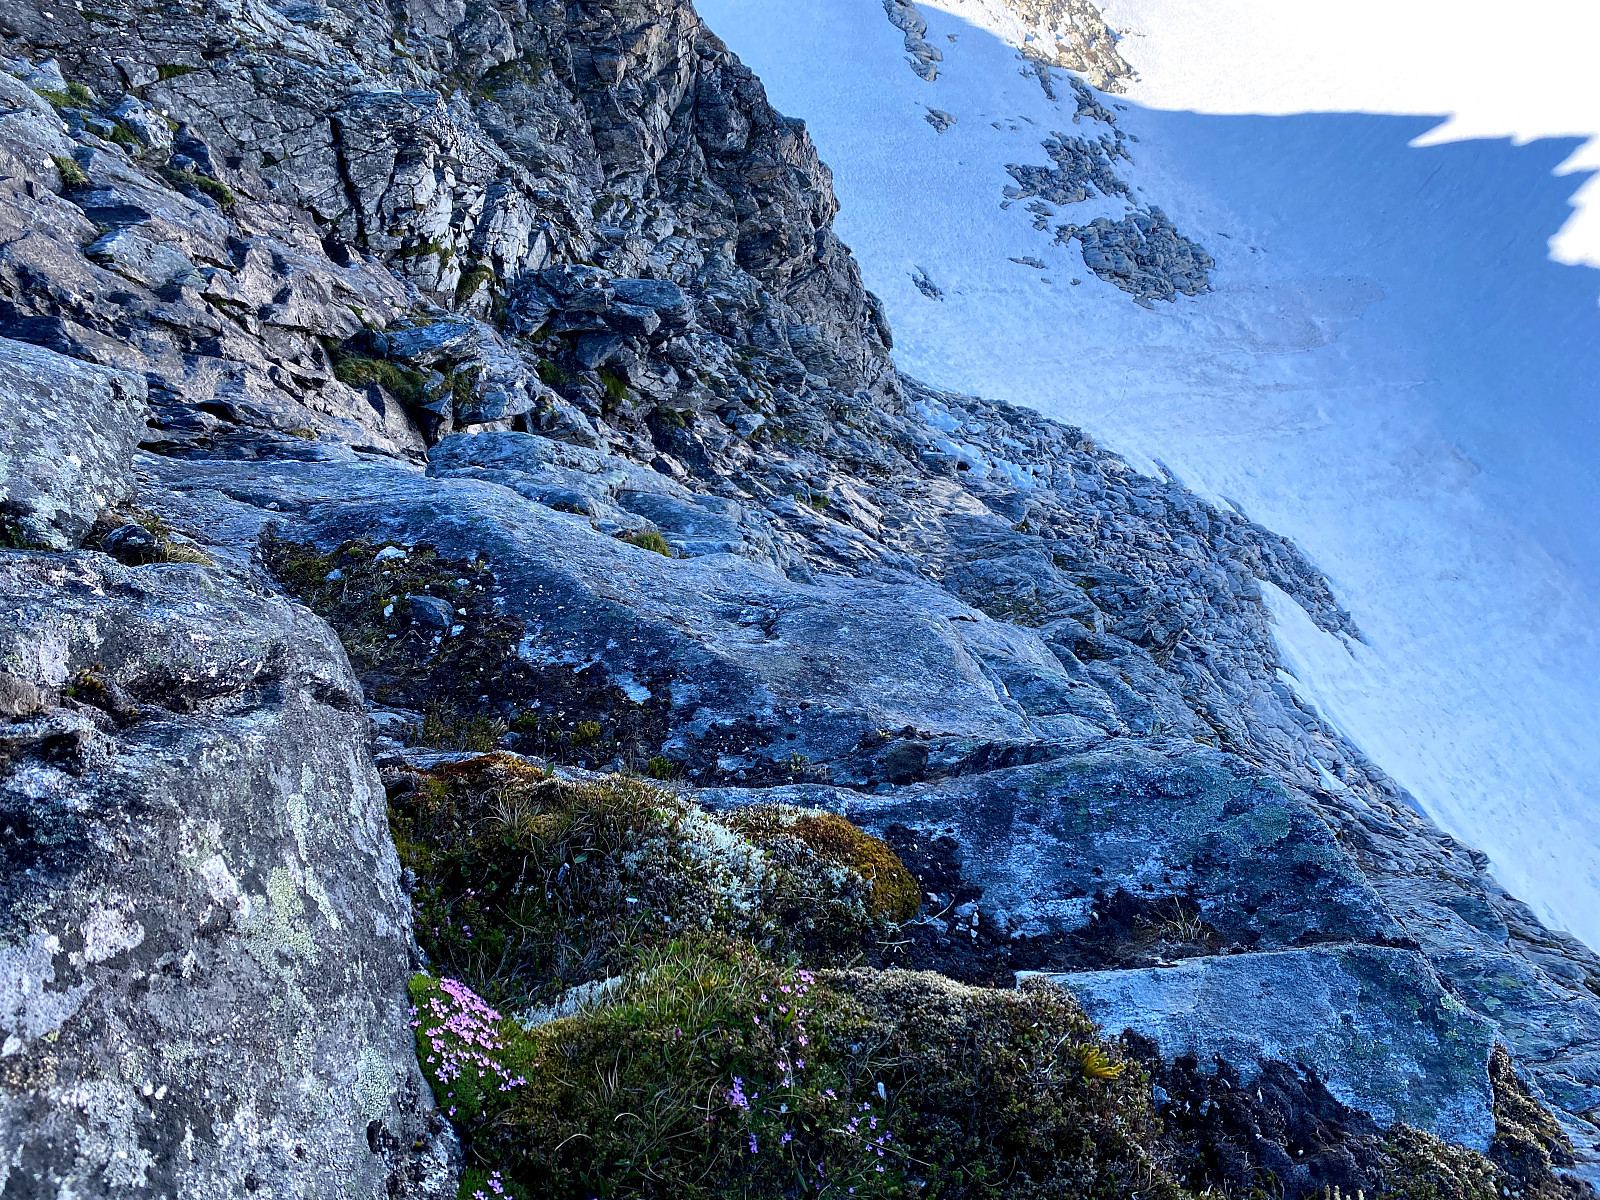
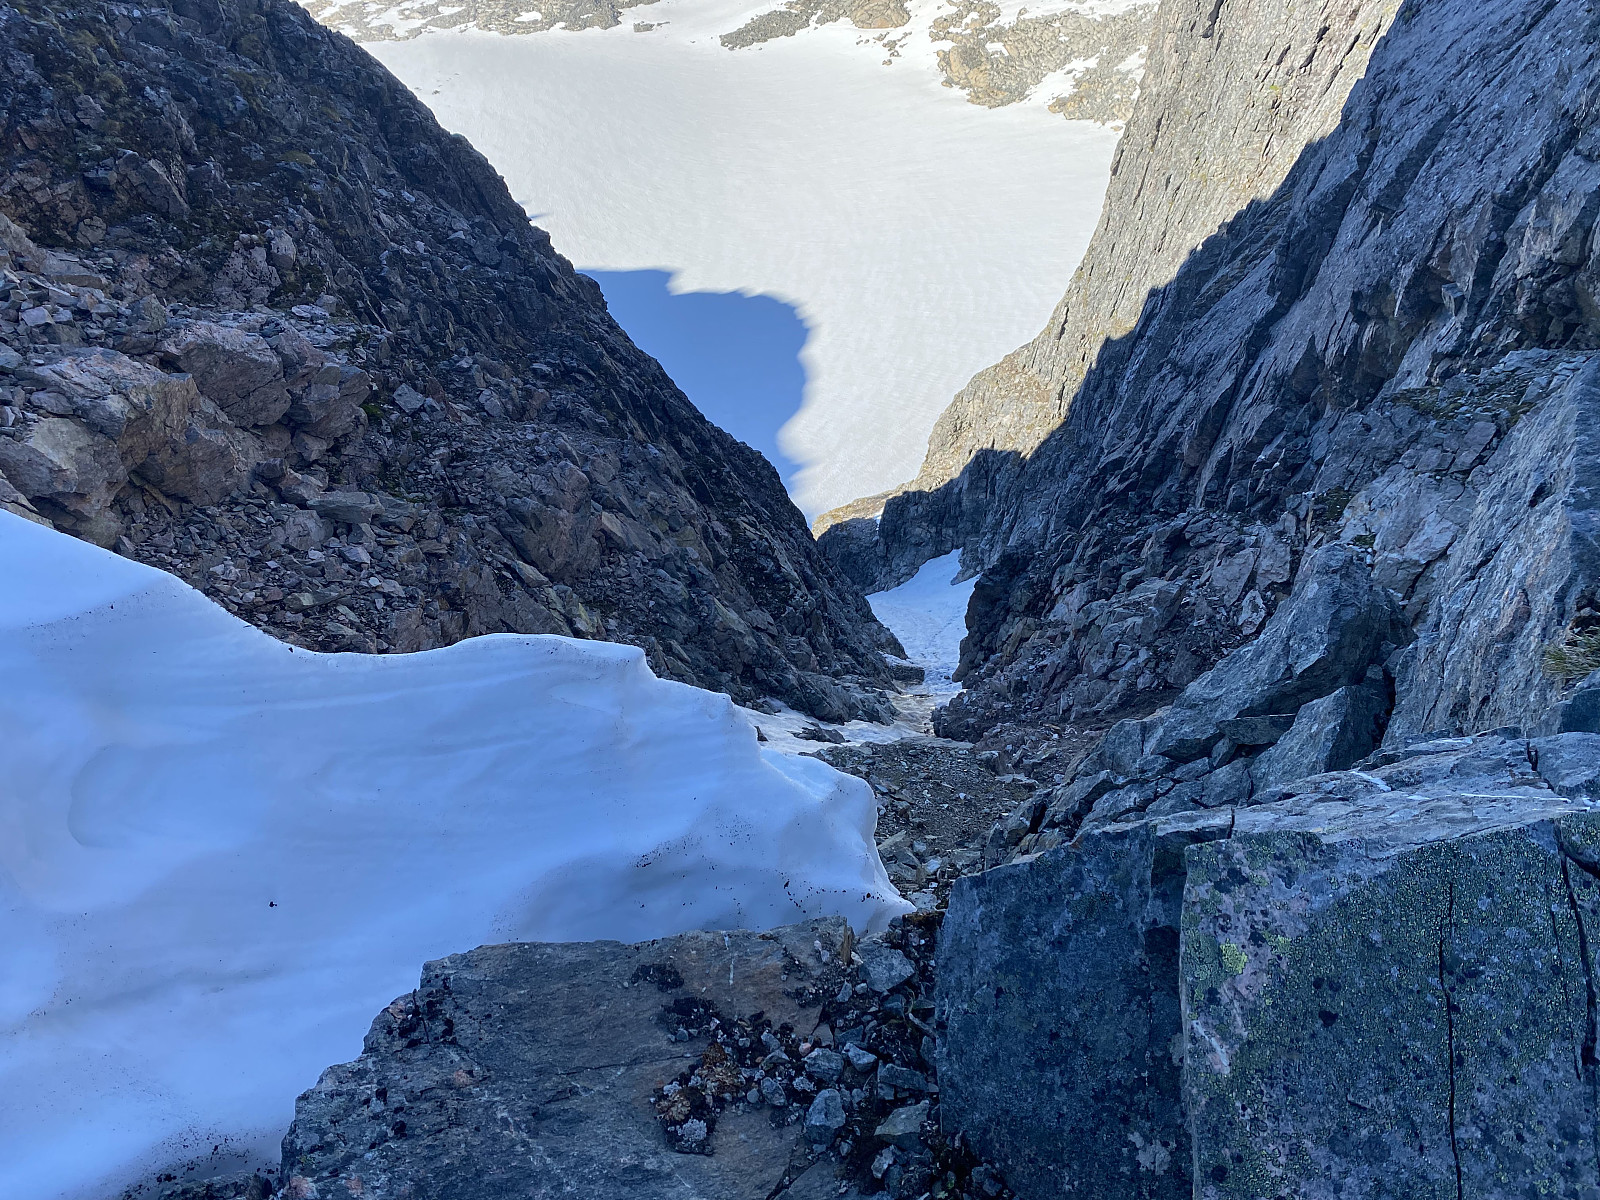
As for me, the climg up this northeast ridge of Mount Store Trolltinden was not an option on this day, as I would have to go there for at least one more surveillance hike before I could even think of climbing up there, even with ropes; and on this particular day Mount Nordre Trolltinden was packed by visitors, so it was definitely not a day for a surveillance trip. I had, however, been thinking of making an attempt at climbing up the crevice between Mount Store Trolltinden and Mount Vestre Trolltinden (Images ## 1, 4, 5, 6 & 23). There is, actually, a tour description with nice pictures here on Peakbook, by a group that made a climb to Mount Store Trolltinden up that chute back in January 1996. I did have a feeling, though, that too much snow and ice might have melted away during the last month, making it difficult, or impossible to climb up that crevice; but I was nevertheless determined to give it a shot, as a closer look at the chute was what I needed in order to plan a climb up there at a later time, when snow was more abundant.
I drove from home in the morning, and arrived at Soggemoen about three quarters past ten; and immediately started trekking up Mount Norafjellet. From the parking lot at Soggemoen, there are two alternative paths up to the top of Mount Norafjellet, though they meet at about 430 m.a.m.s.l., and continue as a single trail from there. The path marked out as a dotted line on old maps (including the Peakbook map) is the steeper of the two routes, but also the dryer one of them, and it ascends along the river Oråa. The other, which is less steep, but more muddy, is the one described as a route here on Peakbook, i.e. the route called Norafjellet - sti fra nordvest. I chose the former of the two paths, as I prefer a steep trail to a muddy one; and I started hiking (see map with GPS trail). I reached the summit of Mount Norafjellet after about 1 hour 40 minutes, and from there I immediately continued towards Adelsbreen Glacier [i.e. "The Nobility Glacier"]. The glacier is located in a hanging valley flanked by a number of mountains making a horseshoe shape around it; i.e. Mount Adelsfjellet, Mount Middagsbarna and Mount Nordre Trolltinden on the east side; Mount Store Trolltinden, Mount Vestre Trolltinden, and Mount Trollklørn in the South; and finally Mount Seterrgjelstinden, Mount Soggefjellet and Mount Nonshaugen on the west side.
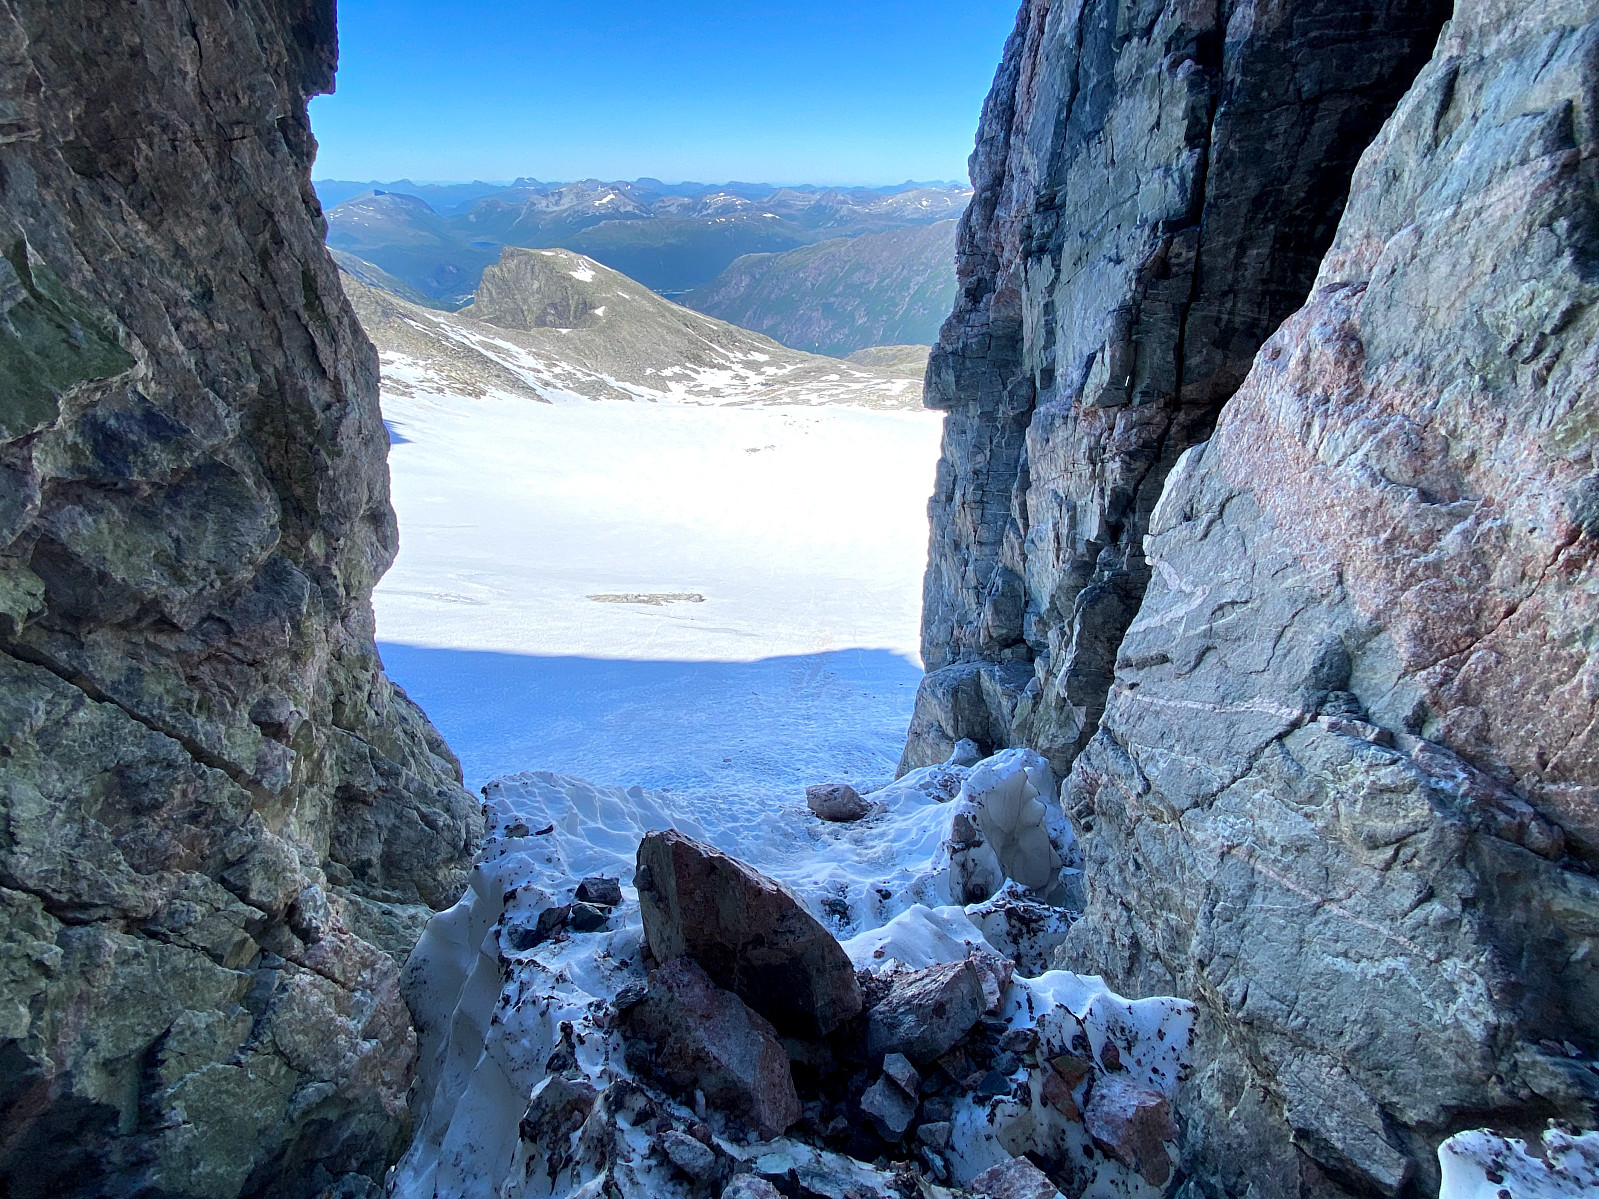
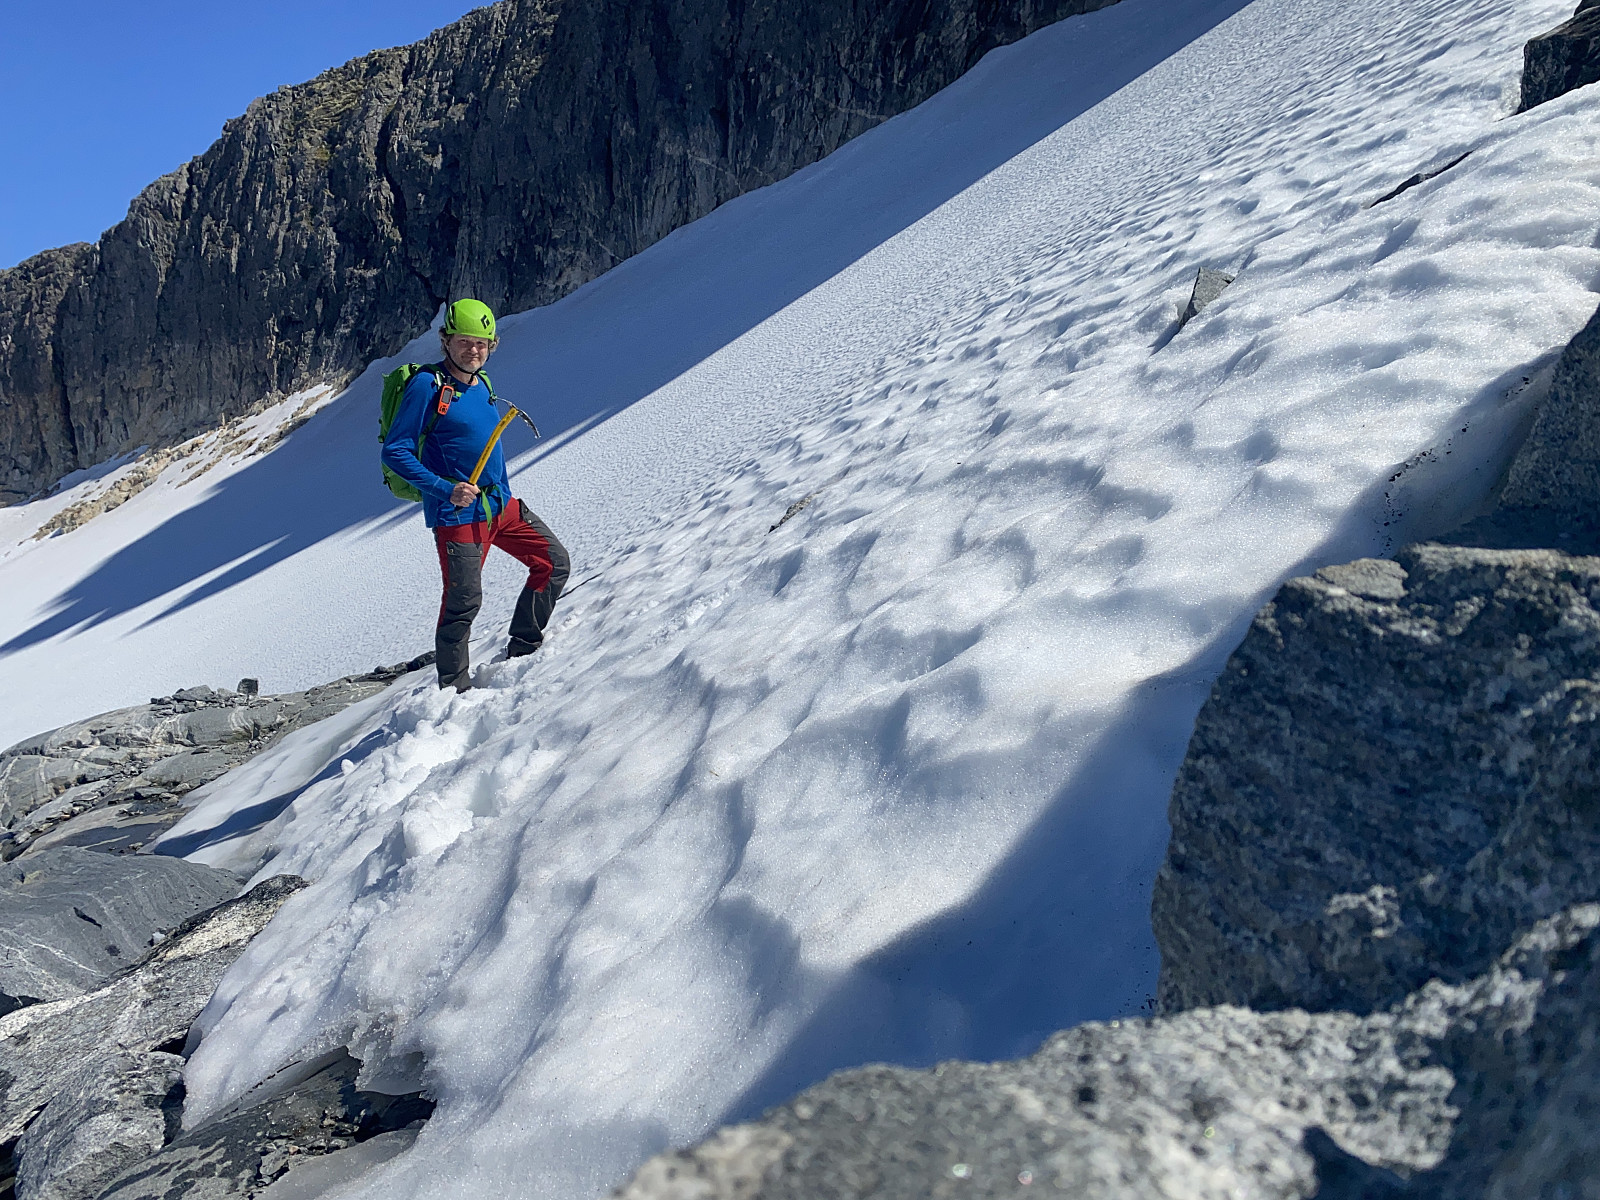
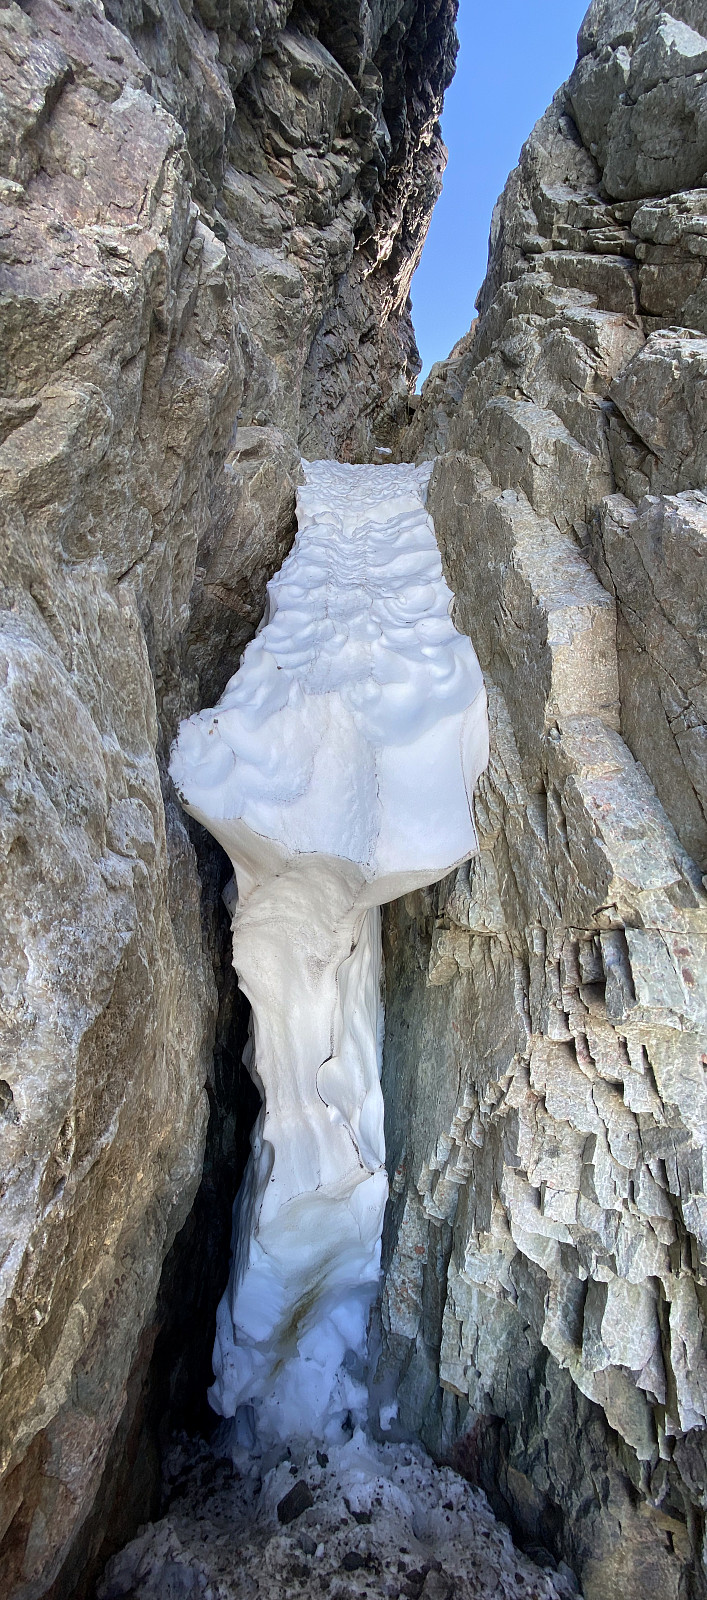
As I reached the glacier, I immideately embarked upon the walk across it. This walk is a little bit harder than what meets the eye, however; as the glacier is a bit steeper than what it seems at first. I headed directly towards the crevice at the upper end of the glacier. Just a short distance beneath the cleft, there was a huge rock protruding through the ice of the glacier, and I stopped there for a few minutes, just to have a short break and something to drink. Moreover, before continuing, I pulled my helmet and my ice axe out of my backpack, in order to be ready for the crevice (Image #3). My crampons had been on, of course, ever since I started walking upon the lower part of the glacier. As I continued upwards, I almost stepped into a crevasse in the glacier. It was difficult to spot, as it was covered by some snow. It wasn't very deep, though, as this glacier is in itself rather shallow. As I approached the crevice in the mountain ahead of me, I kept a little to the right of its entrance, just in case there would be any rock- or icefall coming out of the opening; and then I approached it from the side (Image #4). Being inside the crevice was fabulous (Images ## 5 & 6). There was a vertical cliff on each side, so the only way you could continue, was right ahead; and even that was only possible for a few meters. There were indeed two large rocks lying upon the snow inside the crevice. They had probably fallen down either during winter or during the spring, and they may of course start rolling down onto the glacier at some time during this summer; i.e. whenever the snow that keeps them in place is melted away. A very short distance inside the crevice I arrived at a spot where the ice formed a two meter high step that I couldn't climb across. Had I arrived at this place a month earlier, it might have been possible to climb up here. One should keep in mind, though, that if you try to climb up this chute too early in spring, i.e. before too much snow melts away; there might be a risk of an avalanche coming down the chute.
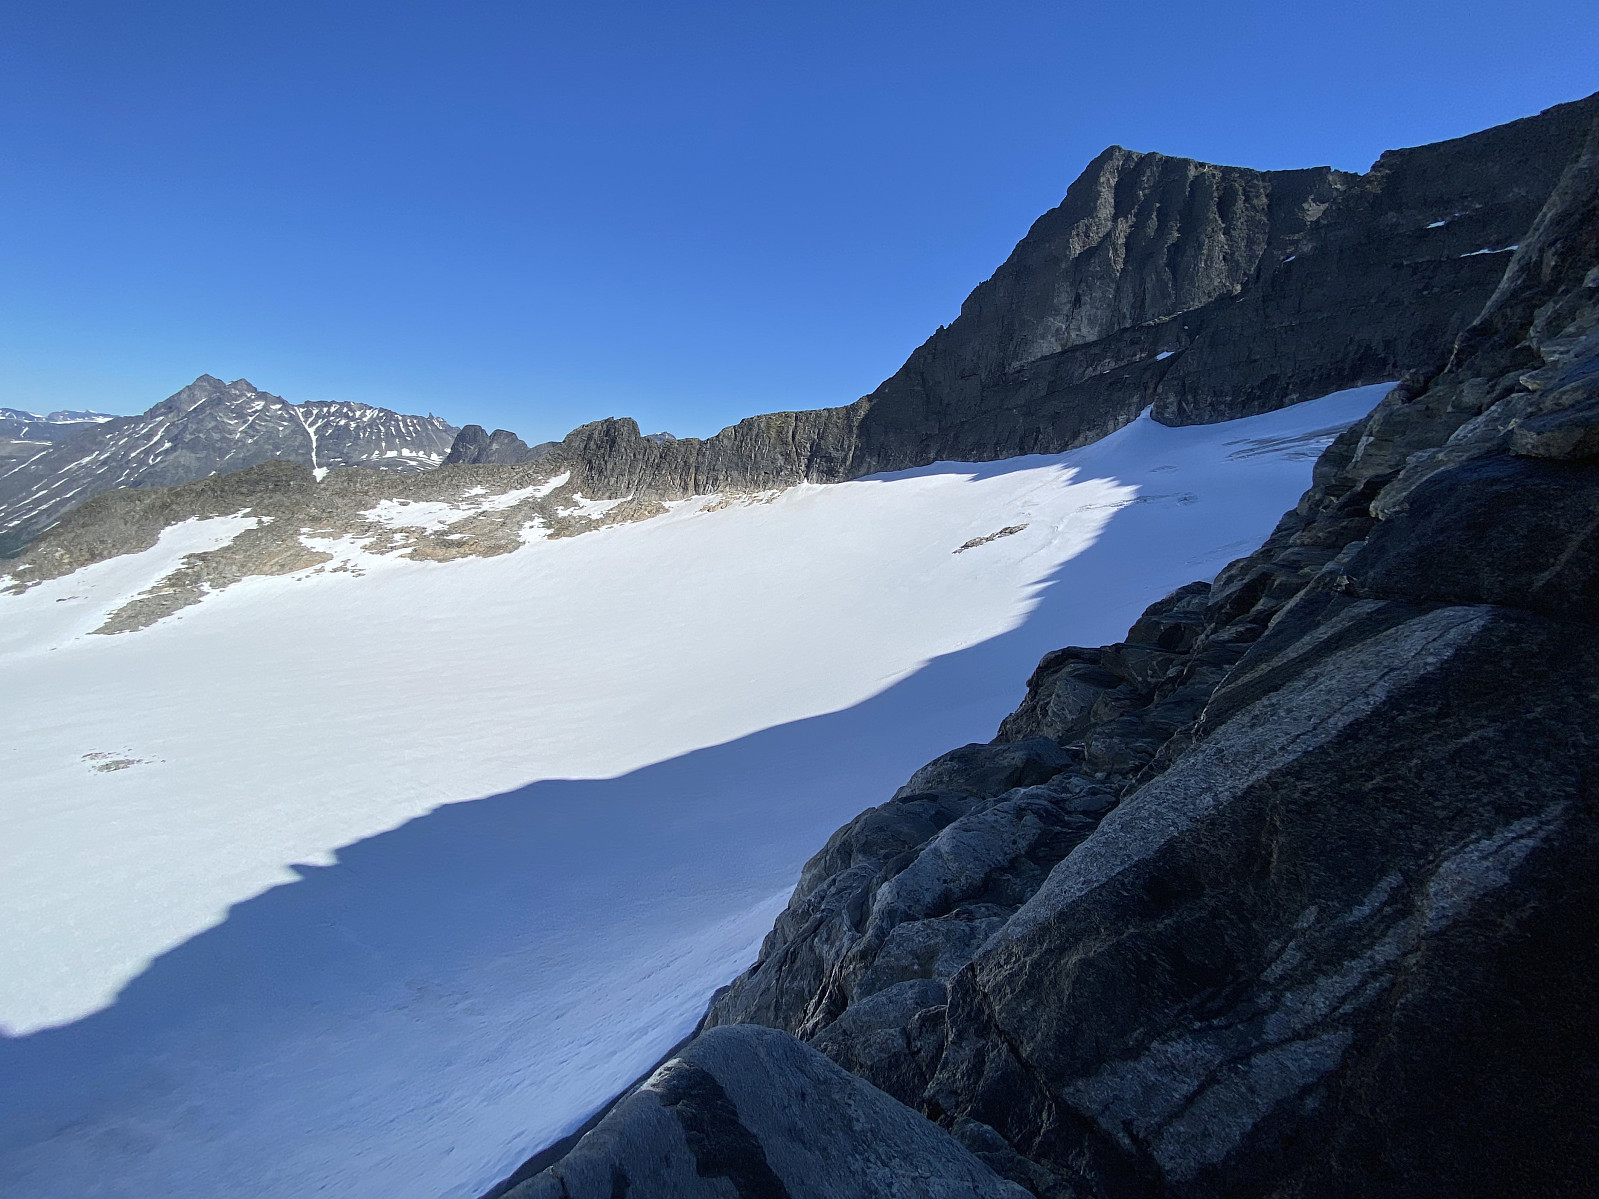
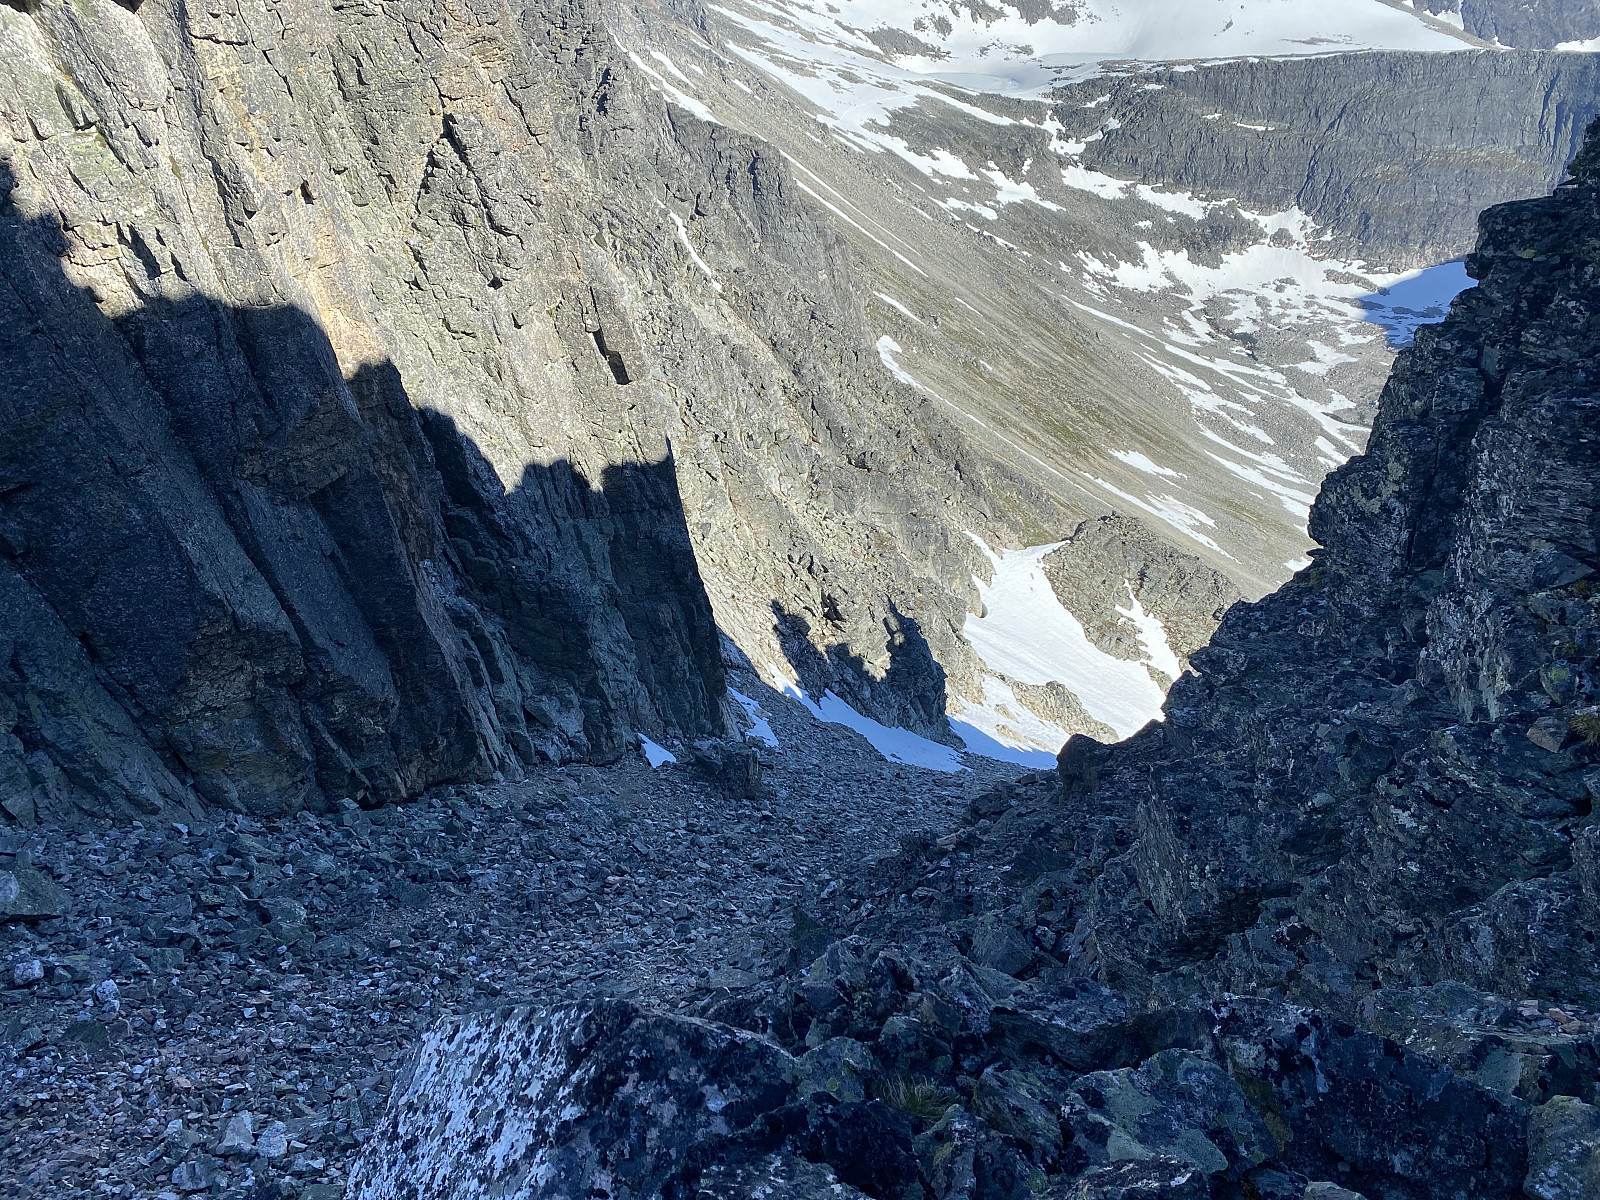
It didn't take me long to realize that I wouldn't be able to climb up the chute this day. I could of course have used my ice axe to modify the "ice cliff" ahead of me, so that I could climb it; but that would probably take hours, and then there was the risk of arriving at another spot that would be equally difficult to climb just a little bit higher up the chute. I shot some images with the camera on my mobile device, and then I climbed carefully backwards out of the crevice. Back down on the glacier, I followed a curved route towards the foot of the north ridge of Mount Trollklørn. Curved, because I tried to maintain most of the elevation that I had gained while crossing up to the upper part of the glacier; though the western half of this upper part of the glacier does have an accumulation of crevasses, so I made care to let my route be below this area (have a look at my GPS track in order to study my actual route).
![Image #10:Glacier buttercup [Ranuculus glacialis] in the mountain side of Mount Trollklørn.](https://images2.peakbook.org/images/14939/Solan_20210711_60eb5a3005f65.jpg?p=xtralarge)
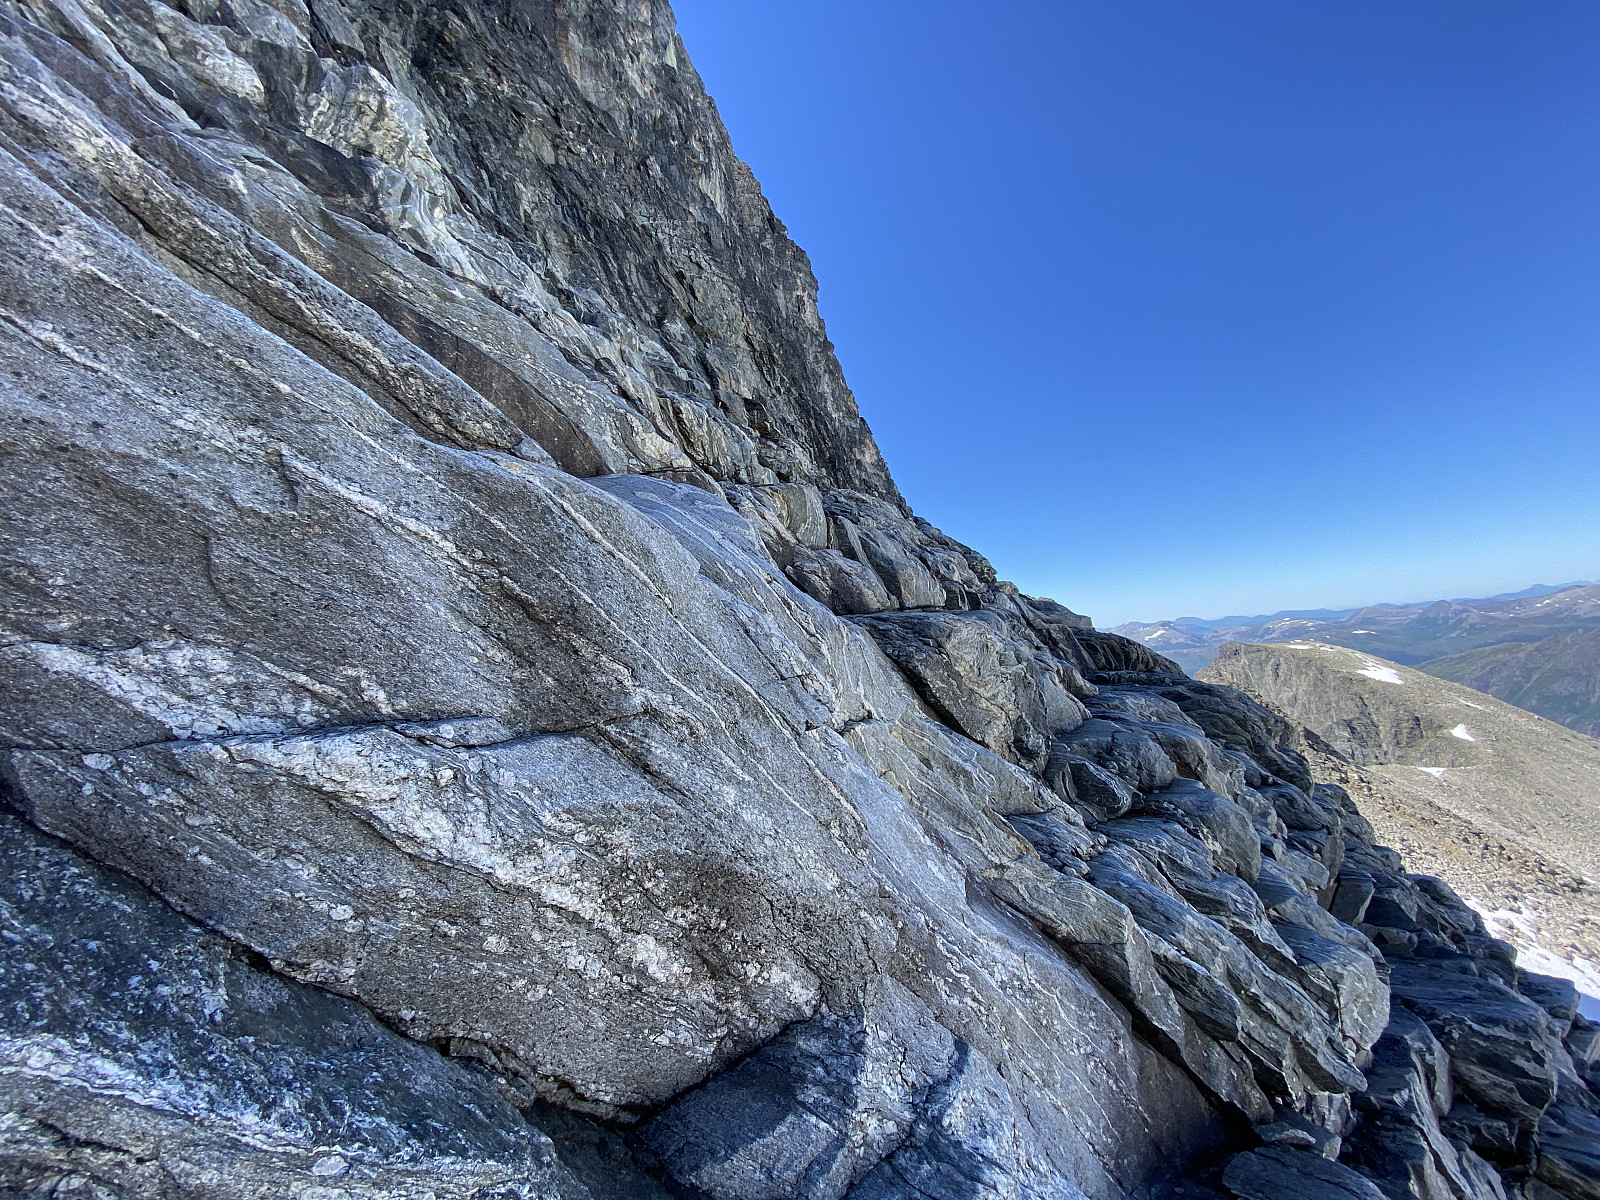
I chose a spot were it seemed feasible to cross over from the glacier to the mountain, a spot a little distance south of the edge of the ridge; as I had on a previous occasion found the ridge itself to be a bit tricky to climb. One has to take great care when crossing over from the ice to the mountain, however, because the ice, as well as the mountain, is quite steep up here, and during the summer months, a sufficient amount of ice have melted away from the "backside" of the glacier, i.e. between the glacier and the mountain; for there to be a gap large enough for a man or a women to fall into. I have no idea how many meters you would actually fall before you would become trapped between the ice and the mountainside; what I know for sure is that I wouldn't recommend any one to try it out. At some places there were some treacherous bridges of snow connecting the glacier to the rock. I ignored those snow bridges that seemed too week to bear my weight, and found a much thicker one that I knew was going to hold; and there I crossed over to the mountain.
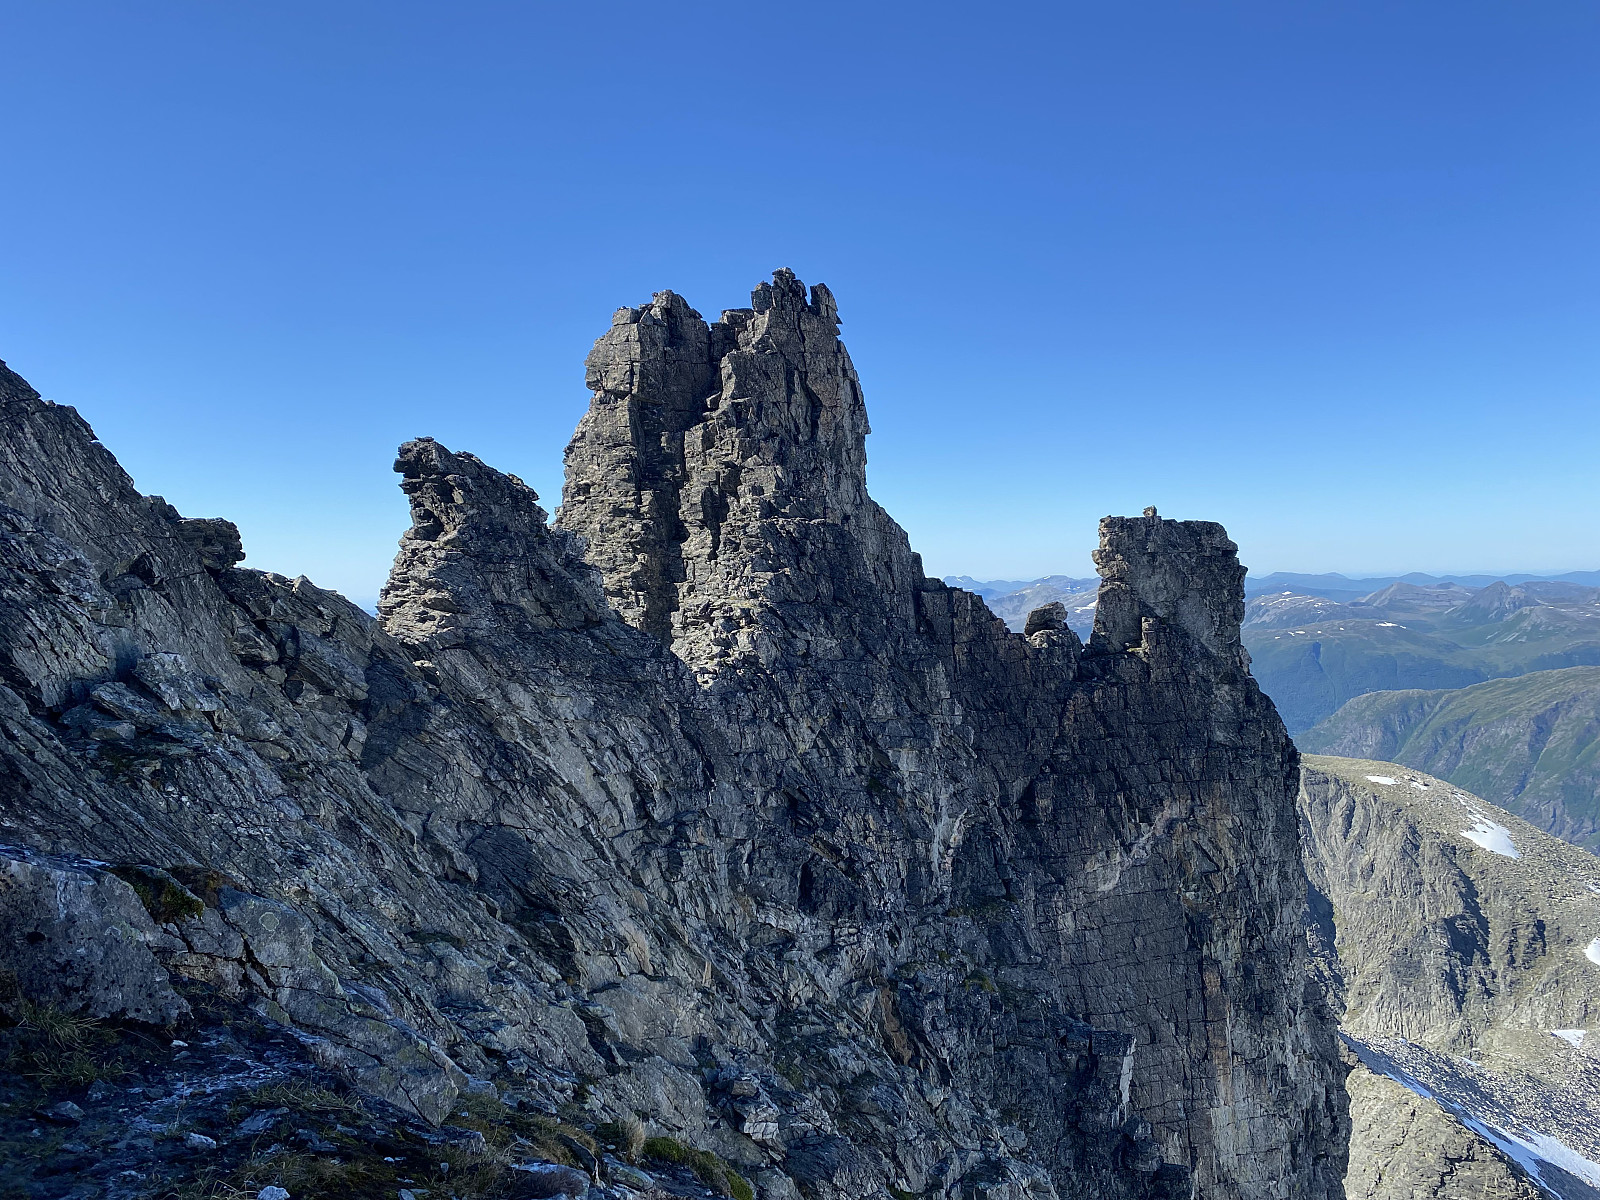
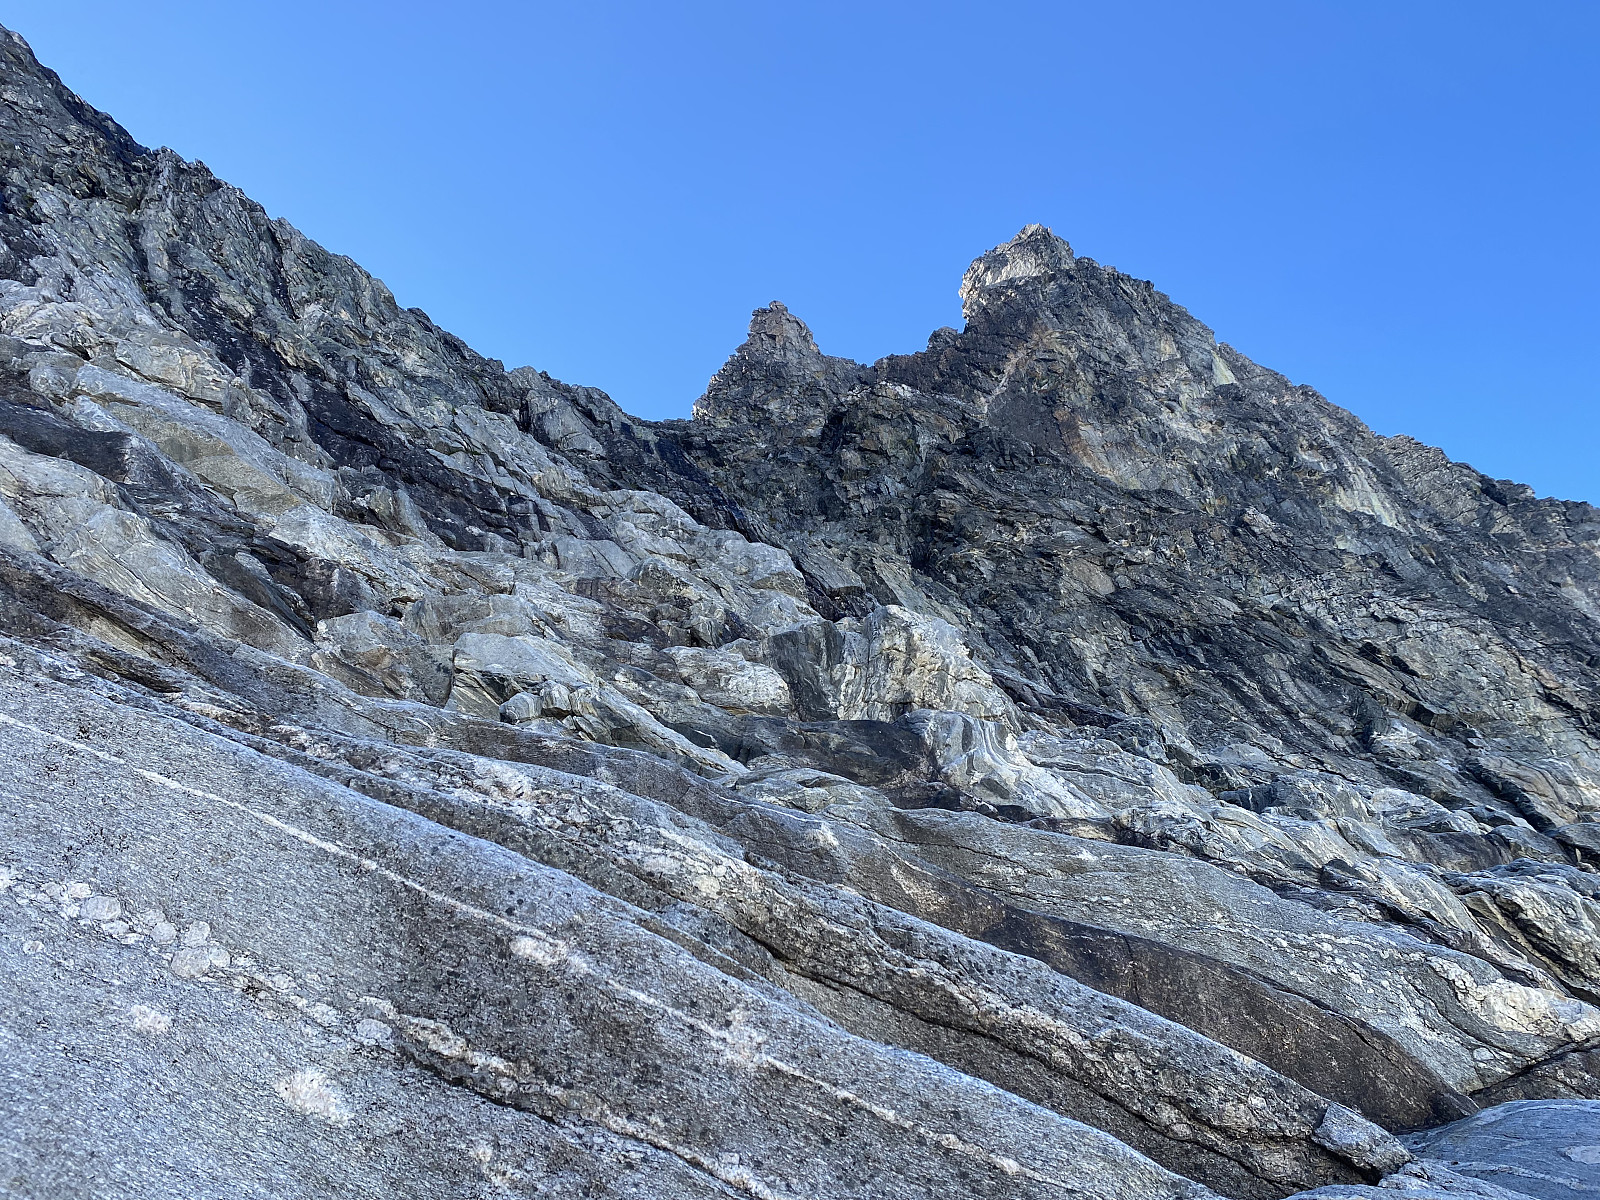
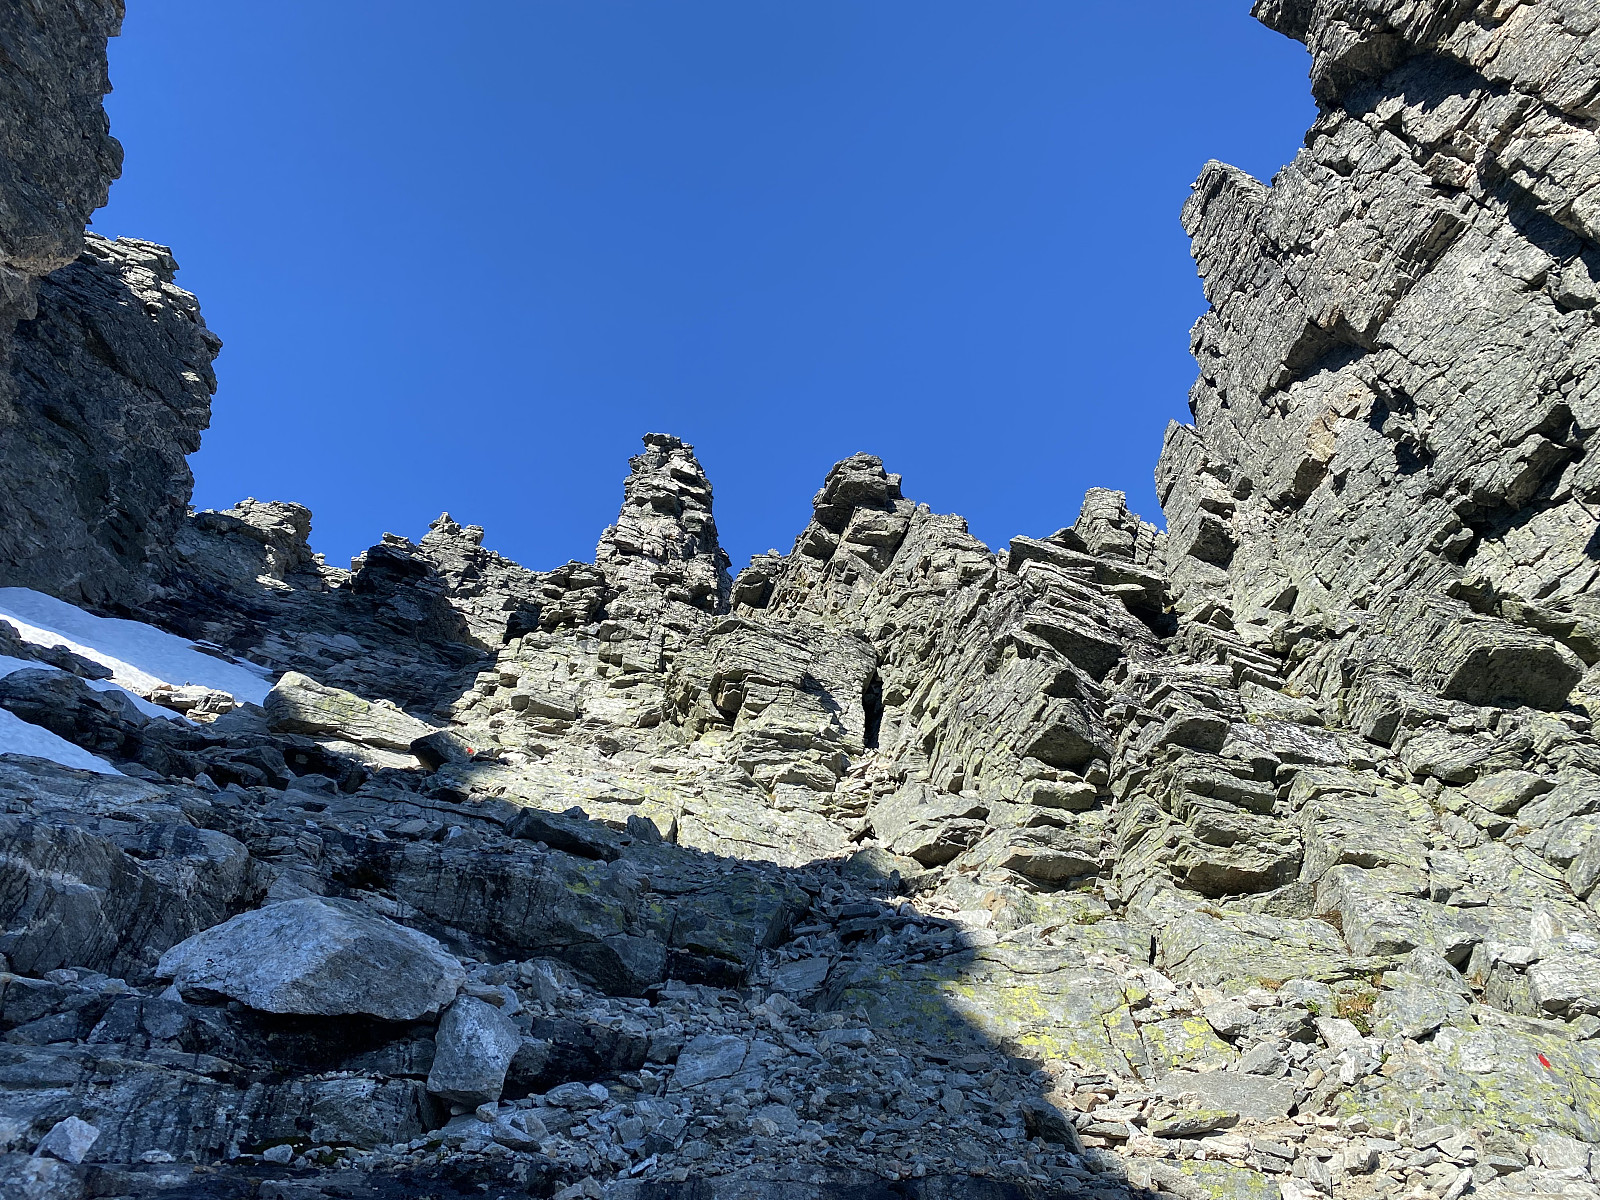
Once I was back on solid rock, I removed my crampons, and put them back into my backpack along with the ice axe; and then I embarked upon climbing. The climb up this mountain side was quite steep (Images ## 8, 9 & 11), though not quite as steep as I had found the climb up the north ridge proper to be. I.e. the north ridge of Mount Trollklørn has three pinnacles (Images ## 9, 12 & 13) that are indeed very steep, and which you have to somehow climb across in order to ascend Mount Trollklørn using the north ridge. The name Trollklørn actually means The Troll Claws, and according to what I've been told, these three pinnacles are actually the "claws" that have given this mountain its name. So now then, I was kind of cheating a bit, I have to admit, as I was bypassing the claws on my way up Mount Trollklørn by climbing just south east of them; but the climb was nevertheless quite steep, and I had to take great care not to loose my grip, or slip on the stones, that were quite wet at places.
![Image #14: On the plateau of Mount Trollklørn [1701 m.a.m.s.l.], with Mount Store Trolltinden [1788 m.a.m.s.l.] in the left half of the picture.](https://images2.peakbook.org/images/14939/Solan_20210711_60eb60af14020.jpg?p=xtralarge)
It took me quite a while to climb up there, but I finally reached the plateau on top of Mount Trollklørn; and I was glad I wouldn't have to climb back down the same route, as I had previously read in a tour description here on Peakbook that it is possible to cross over between Trollklørn, The Western Troll Peak, and The Greater Troll Peak without any special climbing equipment. Upon the large plateau of Mount Trollklørn, there were still some large patches of snow. The snow was compact and easy to walk upon, for the most part, but every here and there, it was water soaked and at these places you would thread half a meter or more into it. The broad plateau of Mount Trollklørn might be seen as part of, or a continuation of the north ridge; once you approach the southern aspect of the mountain, the plateau narrows in, and when you turn left towards the summit, the mountain becomes more like a narrow ridge.
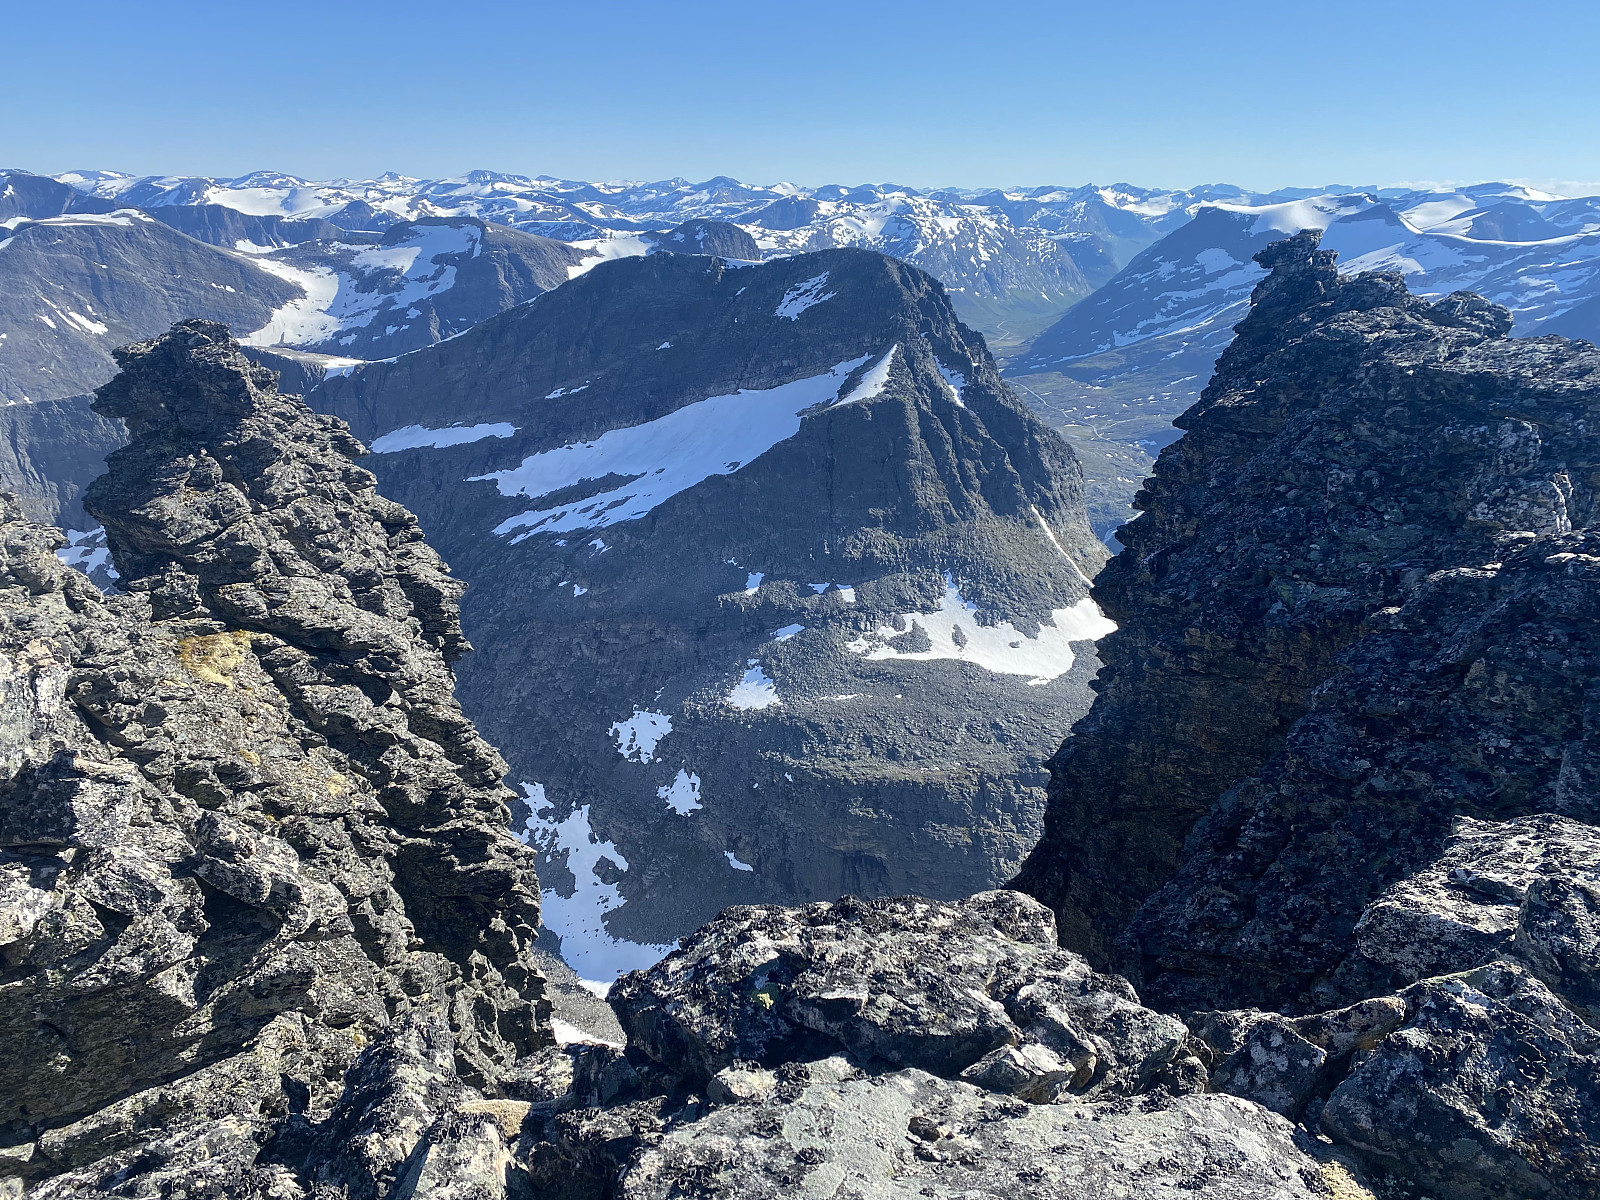
Mount Trollklørn offers a fabulous view in many directions, and the view actually changes as you walk along the plateau and the ridge towards the summit (Images 15 & 16). Moreover, the mountain has some pinnacles on the south side and in the southwest corner, some of which you don't even have to climb; you can just walk over to them on top of an isthmus that connects them to the main mountain (pretty much the way a peninsula is connected to the main land). The summit of Mount Trollklørn is located just beside the notch that separates it from Mount Vestre Trolltinden. The moment I arrived there, I realized the mountain side down into the notch was very steep, and for a brief moment I thought I may still have to climb back down the way I came up after all. But as I had a closer look at the notch, I found out it should be feasible to climb down directly north of the summit; then use the notch to cross over to the south side, an finally climb The Western Troll Peak from just south east of the notch.
![Image #17: At the summit of Mount Trollklørn [1701 m.a.m.s.l.], looking at the summits of Mount Vestre Trolltinden [1708] and Mount Store Trolltinden [1788].](https://images2.peakbook.org/images/14939/Solan_20210712_60ecaeb9d5ded.jpg?p=xtralarge)
I managed to climb into the notch, and then I embarked upon the climb up Mount Vestre Trolltinden. This climb was a bit tricky at places, and the route is quite exposed, so you wouldn't want to fall down there. It was, however, less difficult than the climb up the north ridge of Mount Trollklørn, and after a few minutes I was at the summit of The Western Troll Peak. This summit looks very much like the previous one, as it is located just at the edge of the next notch, the one separating this summit from Mount Store Trolltinden. This second notch is actually formed where a chute on the north side of the mountain meets a chute on the south side of the mountain (Images ## 22, 23 & 24). The chute on the north side is the one that I had tried to climb up a few hours earlier this day, and from the way it looked from up here, climbing up this chute should be quite feasible once you get past the lower part of it; i.e. where it looks more like a crevice.
![Image #19: On the summit of Mount Vestre Trolltind [1708 m.a.m.s.l.], with Mount Store Trolltind [1788 m.a.m.s.l.] behind me.](https://images2.peakbook.org/images/14939/Solan_20210712_60ecb15b794cc.jpg?p=xtralarge)
![Image #20: Mount Breitinden [1797 m.a.m.s.l.] as seen from the crevice between Mount Vestre Trolltind and Mount Store Trolltind.](https://images2.peakbook.org/images/14939/Solan_20210712_60ecb1fb9c15e.jpg?p=xtralarge)
The climb from Mount Vestre Trolltinden into this second notch was easier than the climb into the previous one, but the wall on the east side of the notch was vertical (Image #21) and impossible to climb, at least for me; and I think even skilled climbers would have used security equipment to get up that way, anyway. As I was heading towards Mount Store Trolltinden, I figured that the reasonable thing to do at this point, was to follow the chute on the south side a bit downwards, and then either find a place where the mountain was feasible to climb, or make my way eastwards until I find the chute with the regular route that people use to climb Mount Store Trolltinden. An so I descended along the south side chute. I noticed one place were it might have been possible to climb upwards, but as I wasn't quite sure, I continued a little bit eastwards, across a tiny ridge between two chutes; and as I stepped into the next chute, which looked promising with respect to the possibility of climbing it; I notices a red dot on one of the rocks, i.e. one of the marks used to mark out the regular route to the summit of Mount Store Trolltinden (lower right corner of Image #25)..

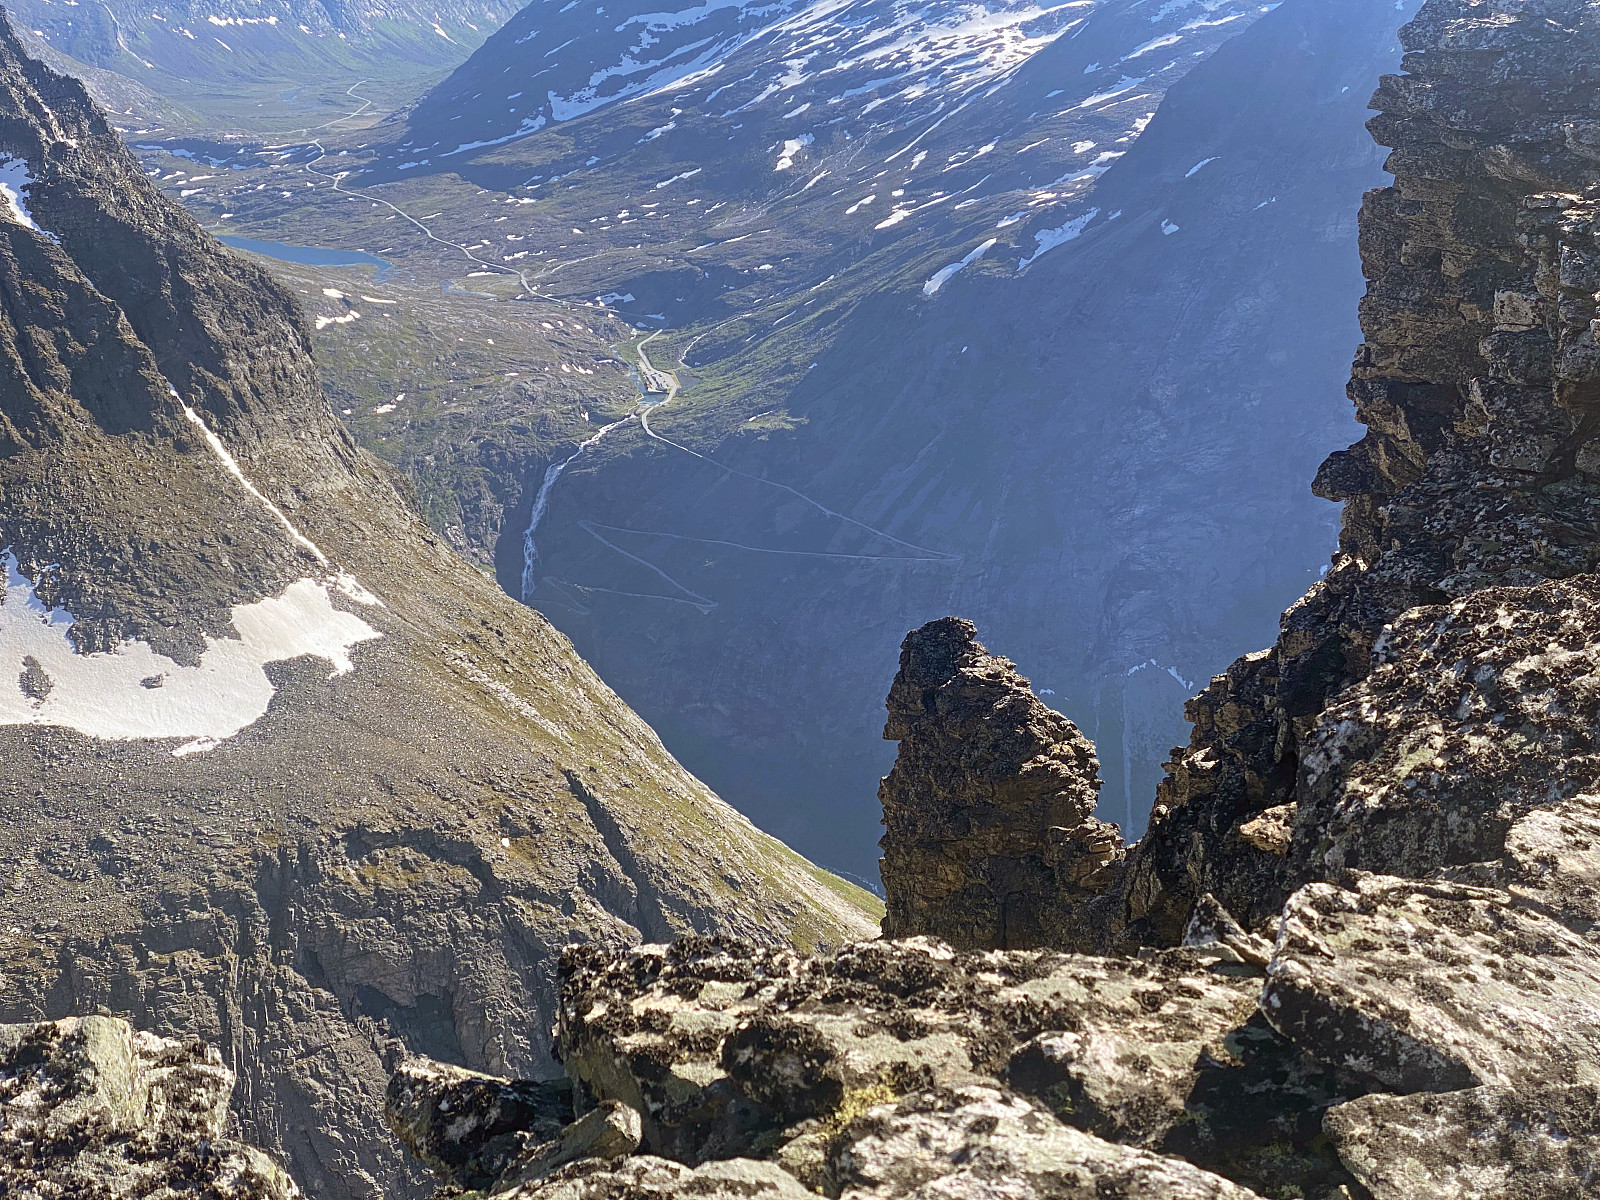
From now on, my hike was going to be easier, I thought, as I could now just follow the red dots to the summit of the mountain, and thereafter back down to where I was now; and then just follow the regular route down to Trollstigen Tourist Centre, from where people usually start out when they want to climb this mountain. The red dots are, however, sometimes located a little bit too far apart, and sometimes they're a bit tricky to spot in the terrain; and after just a few red dots I somehow managed to loose the trail, and ended up in a notch between The Greater Troll Peak and a pinnacle just south of it. This notch offered a fabulous view (Image #26), however, as it is located on top of the renown Troll Wall [Norw.: Trollveggen]. I even climbed the little pinnacle south of the notch, just so that I could say that I had been there. Climbing up was not too difficult, but getting back down from it was a bit more tricky; so I wouldn't recommend the climb up that pinnacle unless you're extremely comfortable with that sort of climbing. From this notch, I found a nice path were you could climb up to the top of Mount Store Trolltinden, and after a few more minutes I was at the summit. Whereas most of my climb today had been along a route seldom used by others, this final route to the summit was one where I could just follow a trail left by others.
Video #1: Refilling of a beverage can just beneath the summit of Mount Store Trolltind.
![Image #27: On top of Mount Store Trolltinden [1788 m.a.m.s.l.]. The cairn behind me marks the summit.](https://images2.peakbook.org/images/14939/Solan_20210715_60ef681c33258.jpg?p=xtralarge)
![Image #28: Looking down at the ridge from Mount Nordre Trolltinden [1452 m.a.m.s.l.] up to Mount Store Trolltinden [1788 m.a.m.s.l.].](https://images2.peakbook.org/images/14939/Solan_20210715_60ef6d3331ec3.jpg?p=xtralarge)
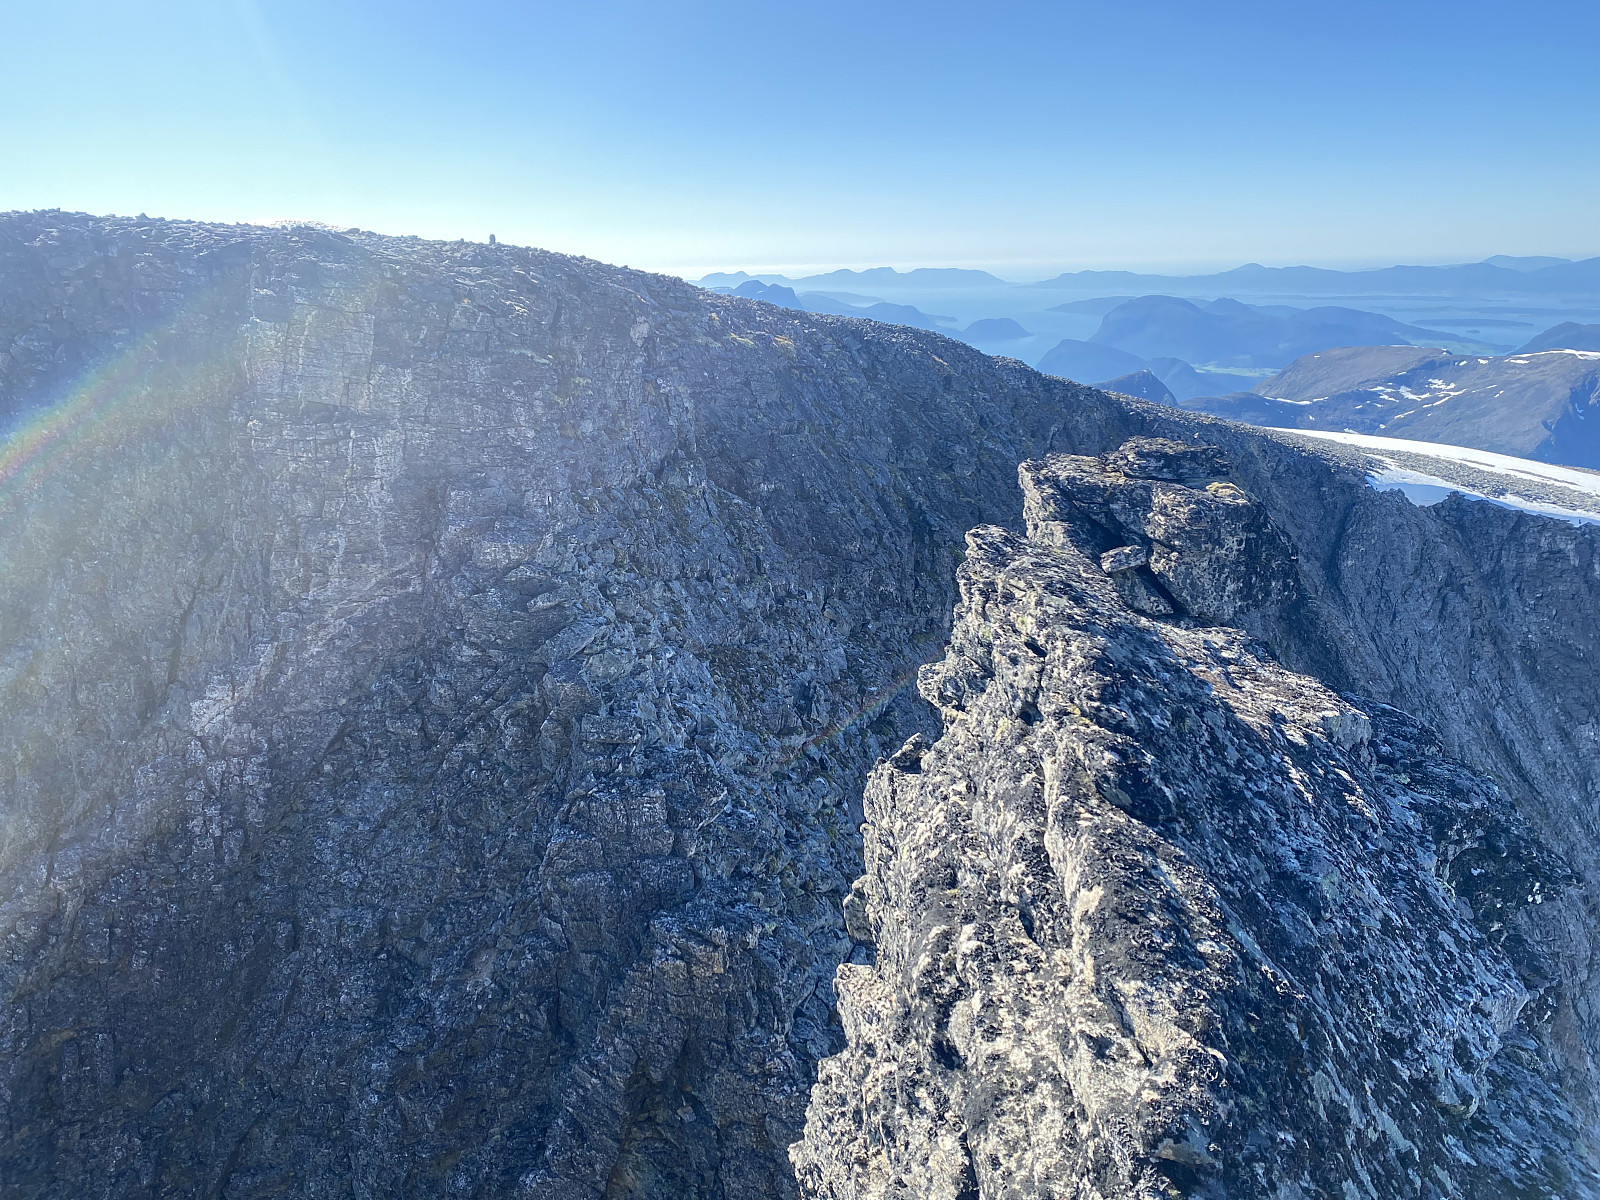
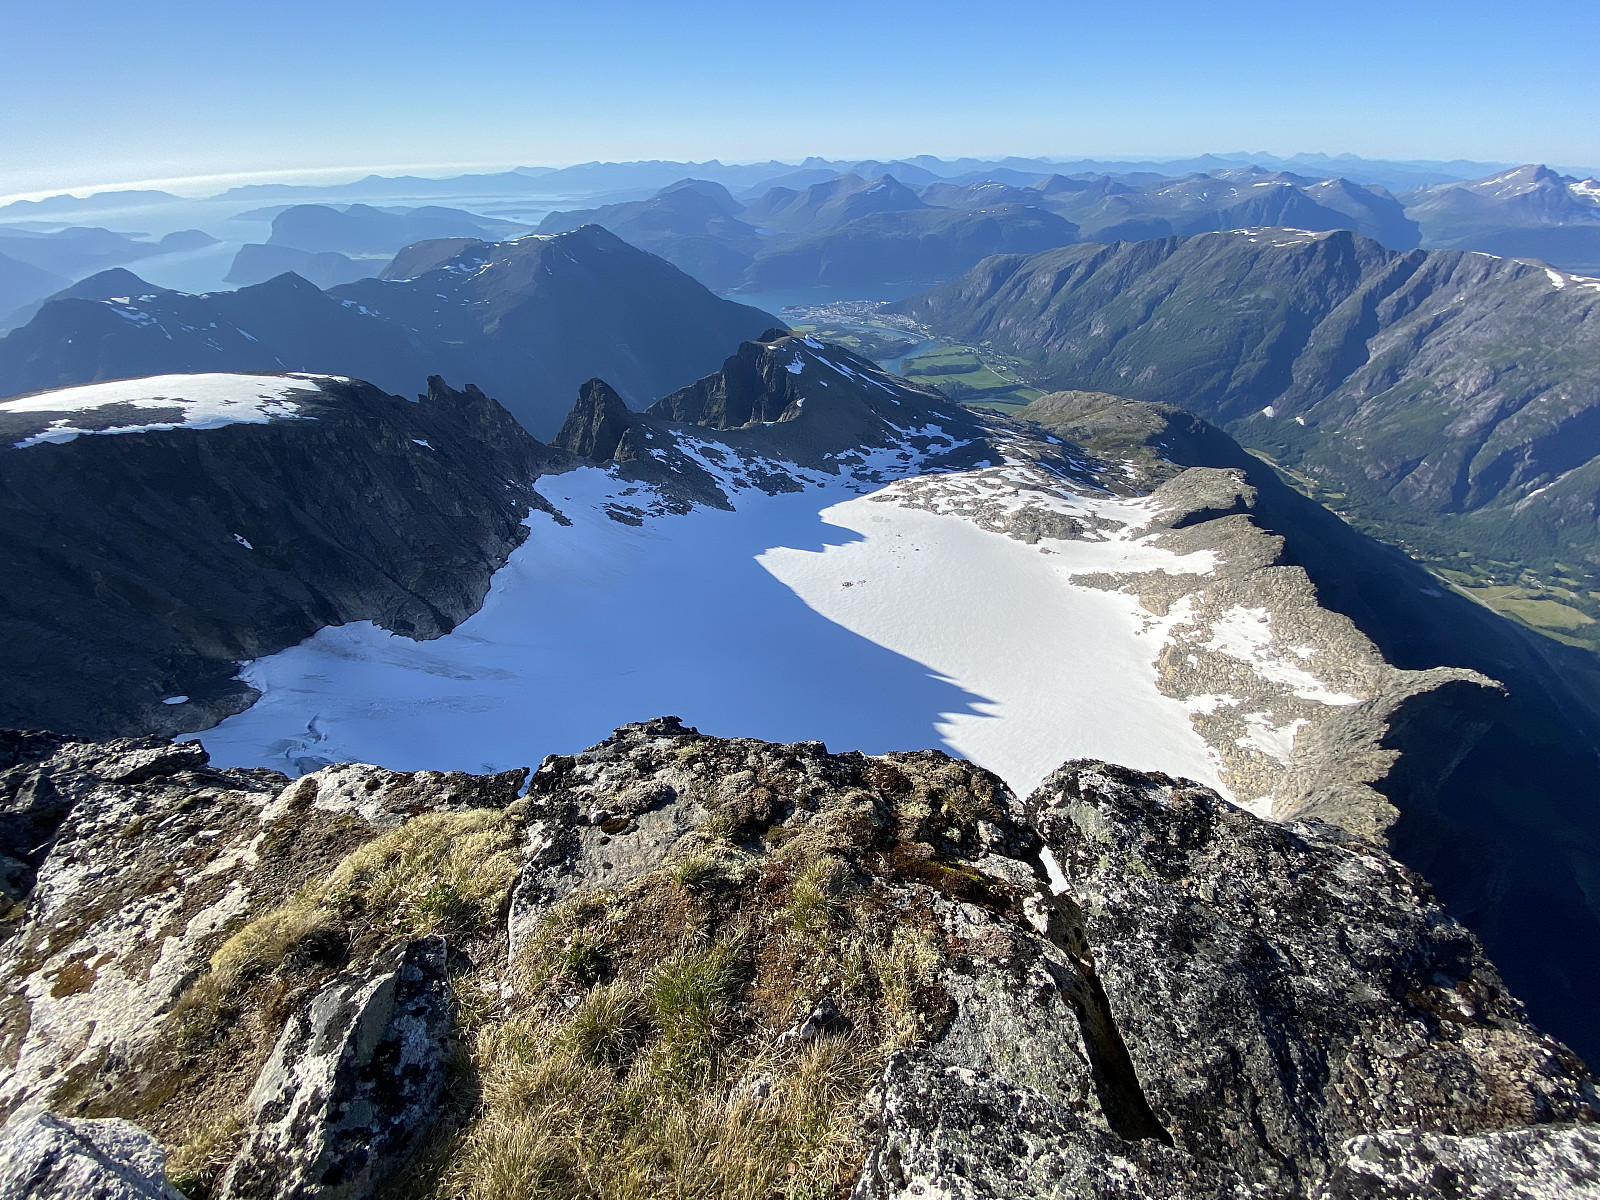
On top of The Greater Troll Peak the view was fabulous in all directions. To the north you had Adelsbreen Glacier flanked by the earlier mentioned mountains, and with the Romsdalseggen mountain range and the town of Åndalsnes beyond it (Image #29). To the east you could se the cliff of Trollveggen [i.e. "The Troll Wall], lined with a number of pinnacles and peaks on top, and with the Valley of Romsdalen beneath. In this direction you could even see Mount Breitinden [1797 m.a.m.s.l.] in the far end of the Troll Wall. To the south was Mount Storgrovfjellet [1629 m.a.m.s.l.] and a multitude of other mountains surrounding the Trollstigen Tourist Centre; and to the west you could see Mount Trollklørn and Mount Vestre Trolltinden, and most of the trail that I had followed to get up from Adelsbreen Glacier to my current location (Image #30). The mountain ridge up here from Mount Nordre Trolltinden looked even more steep when viewed from up here, and yet that is where most of those who ascend the mountain from the north side are coming up. In fact, as I was crossing Adelsbreen Glacier towards the crevice that I intended to climb earlier this morning, I both heard and saw some people that were climbing up this ridge.
I didn't remain long on Mount Store Trolltinden, as I knew I still had a long hike in front of me to get back down from the mountain. My plan now was to hike the regular route down to The Trollstigen Tourist Centre, and then; if I was up to it, use an ancient pack animal trail to get back down into the valley where I had left the car this morning. The upper part of the route down from the mountain was, as earlier mentioned, marked by red dots on stones and rocks, and the start of the route was actually very well marked by a stone with a huge arrow on it. The markings led me down the chute to about where I had first encountered these red markings, and then they led eastwards along the south side of this mountain massif, pretty much following the contour lines of the mountain.
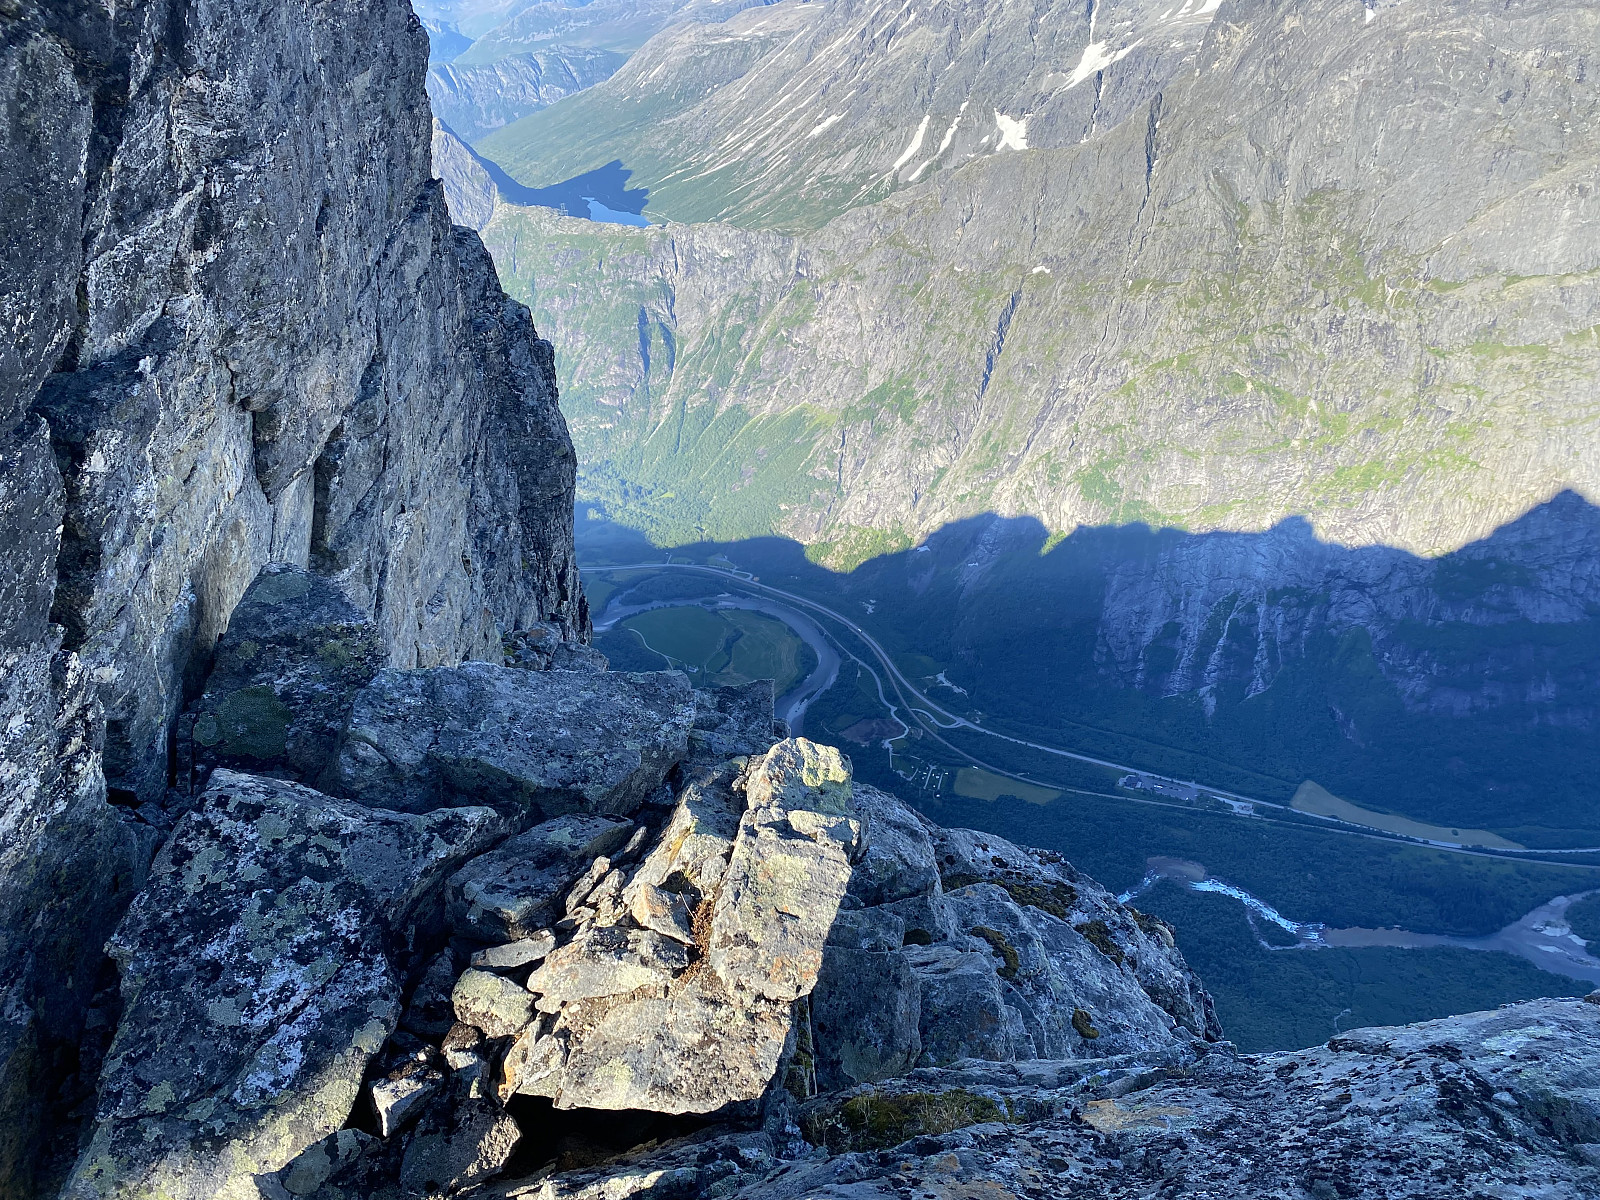
![Image #32: View from Mount Store Trolltinden towards the cliff called Trollveggen [i.e. the "Troll Wall"] and the Rauma river valley beneath. Among the peaks and summits lining the top of the Troll Wall are seen Mount Brudgommen [1728 m.a.m.s.l.], Mount Trollryggen [1725] and Mount Breitinden [1797][](https://images2.peakbook.org/images/14939/Solan_20210716_60f1fb9bc39be.jpg?p=xtralarge)
The trail, which was easy to spot most of the time, crossed chutes and ridges in an alternating manner; all the time with the deep valley of Storegrova on the right hand, and the peaks and pinnacles lining the top of the Troll Wall on the left hand. The mountain side was quite steep, but the trail was many places following mountain ledges; so that the hike was not too difficult. This "back side" of the Troll Wall Peaks is the side of the mountain that people generally use to climb these Troll Peaks [i.e. a term commonly used for the peaks lining the top of the Troll Wall], as the front side [i.e. the mountain side facing the Rauma Valley] has a vertical drop of more than 1000 meters; where only experts would dream of climbing.
I soon arrived at a notch called Bruraskaret [i.e. "The Bride Notch"], so called because it used to be located between two pinnacles called Brudgommen [i.e. "The Bride Groom"] and Bruda [i.e. "The Bride"], respectively; until the Bride broke off, and dropped into the Rauma Valley in 1941. At this notch, the cliff of Trollveggen [i.e. The Troll Wall] has a vertical drop of more than 1000 meters, and the site has been a popular spot for base jumping; though base jumping at the Troll Wall has been prohibited by law since 1987. There's a huge sign at the site, that used to proclaim the prohibition; though now most of the letters have either fallen off, or been peeled of the sign, and so it's no longer straight forward to get the message.
![Image #35: At the crevice called Bruraskaret [i.e. The Bride Crevice], not far from the summit of Mount Store Trolltind. The cliff at this edge is part of the renowned cliff called Trollveggen [i.e. “The Troll’s Wall”], and the vertical drop here is more than a 1000 meters. This particular crevice is a popular spot for base-jumping, even though base jumping from the cliff of Trollveggen is strictly prohibited.](https://images2.peakbook.org/images/14939/Solan_20210720_60f73dbe91d13.jpg?p=xtralarge)
![Image #36: There was still some snow along the trail from Mount Store Trolltinden towards the Trollstigen Tourist Center, i.e. the trail usually used to ascend Mount Store Trolltinden. This trail goes in a horse-shoe fashion around Mount Storgrovfjellet [1629 m.a.m.sl.l], a mountain just to the right of the right edge of this picture. The Mountain seen right ahead on this picture is Mount Breitinden [1797 m.a.m.s.l.].](https://images2.peakbook.org/images/14939/Solan_20210720_60f73ff74e921.jpg?p=xtralarge)
I continued along the nice trail down to Trollstigen, but a few minutes after I had passed The Bride Notch, I heard the voices of two men that were talking; and suddenly I heard one of them say: "There comes a climber." I realized I still had my helmet on, that's why he referred to me as a climber, and not just a hiker. The two guys were way above me, and seemed to be on their way up to the summit of one of the Troll Wall Pinnacles; and so I asked them where they were heading. "We're on our way to Bruraskaret" one of them said; "and then out," he added, as he pointed in the direction of the Rauma Valley. That was when it dawned upon me that their huge backpacks weren't packed with ordinary hiker's gear; but rather contained stuff like wing suits and parachutes. I told them they weren't actually heading towards Bruraskaret, but rather up one of the nearby pinnacles. "Lucky we met you, then," said the one with whom I had been conversing, as I showed him the path, and the small cairns that were marking it. It would've been fun to guide them all the way to the spot, and them watch them jumping, of course, but I was tired, and wanted to continue my hike; and so I just wished them good luck, and then I headed on along the trail.
The trail from The Greater Troll Peak and The Bride Notch towards The Trollstigen Tourist Centre makes a huge semi-circle, encompassing most of the mountain called Storgrovfjellet [1629 m.a.m.s.l.] (Image #36). Many of the chutes that I passed on my way were snow covered, and as I approached a spot that for some reason has been named Frokostplassen [i.e. "The Breakfast Spot"] located at about 1315; snow was still covering a substantial part of the area (Image #36). The snow was semi packed and easy to walk on, and in the steep chutes there were deep, safe footprints to follow; so I didn't at any place feel the need to put my crampons back on. As I was crossing one of the rock ridges between the snow-covered chutes, I met another hiker, with whom I talked about 10 minutes; exchanging ideas and experience, before I continued my journey. I passed the Breakfast Spot, and then ascended the ridge that connects Mount Storgrovfjellet to Mount Breitinden; and then I started descending into the valley of Stigebotnen, on the other side of that mountain ridge. As I continued on, I could suddenly se the hair pin road called Trollstigen Tourist Road afar. I still had some distance to walk, though, and so there was no time for a celebration; I just had to push myself on. I stopped every now and then and had some chocolate to eat, along with some creek water to drink. I was hoping that would give me some more "energy", but I didn't feel it helped much; I just continued out of my own stubbornness.
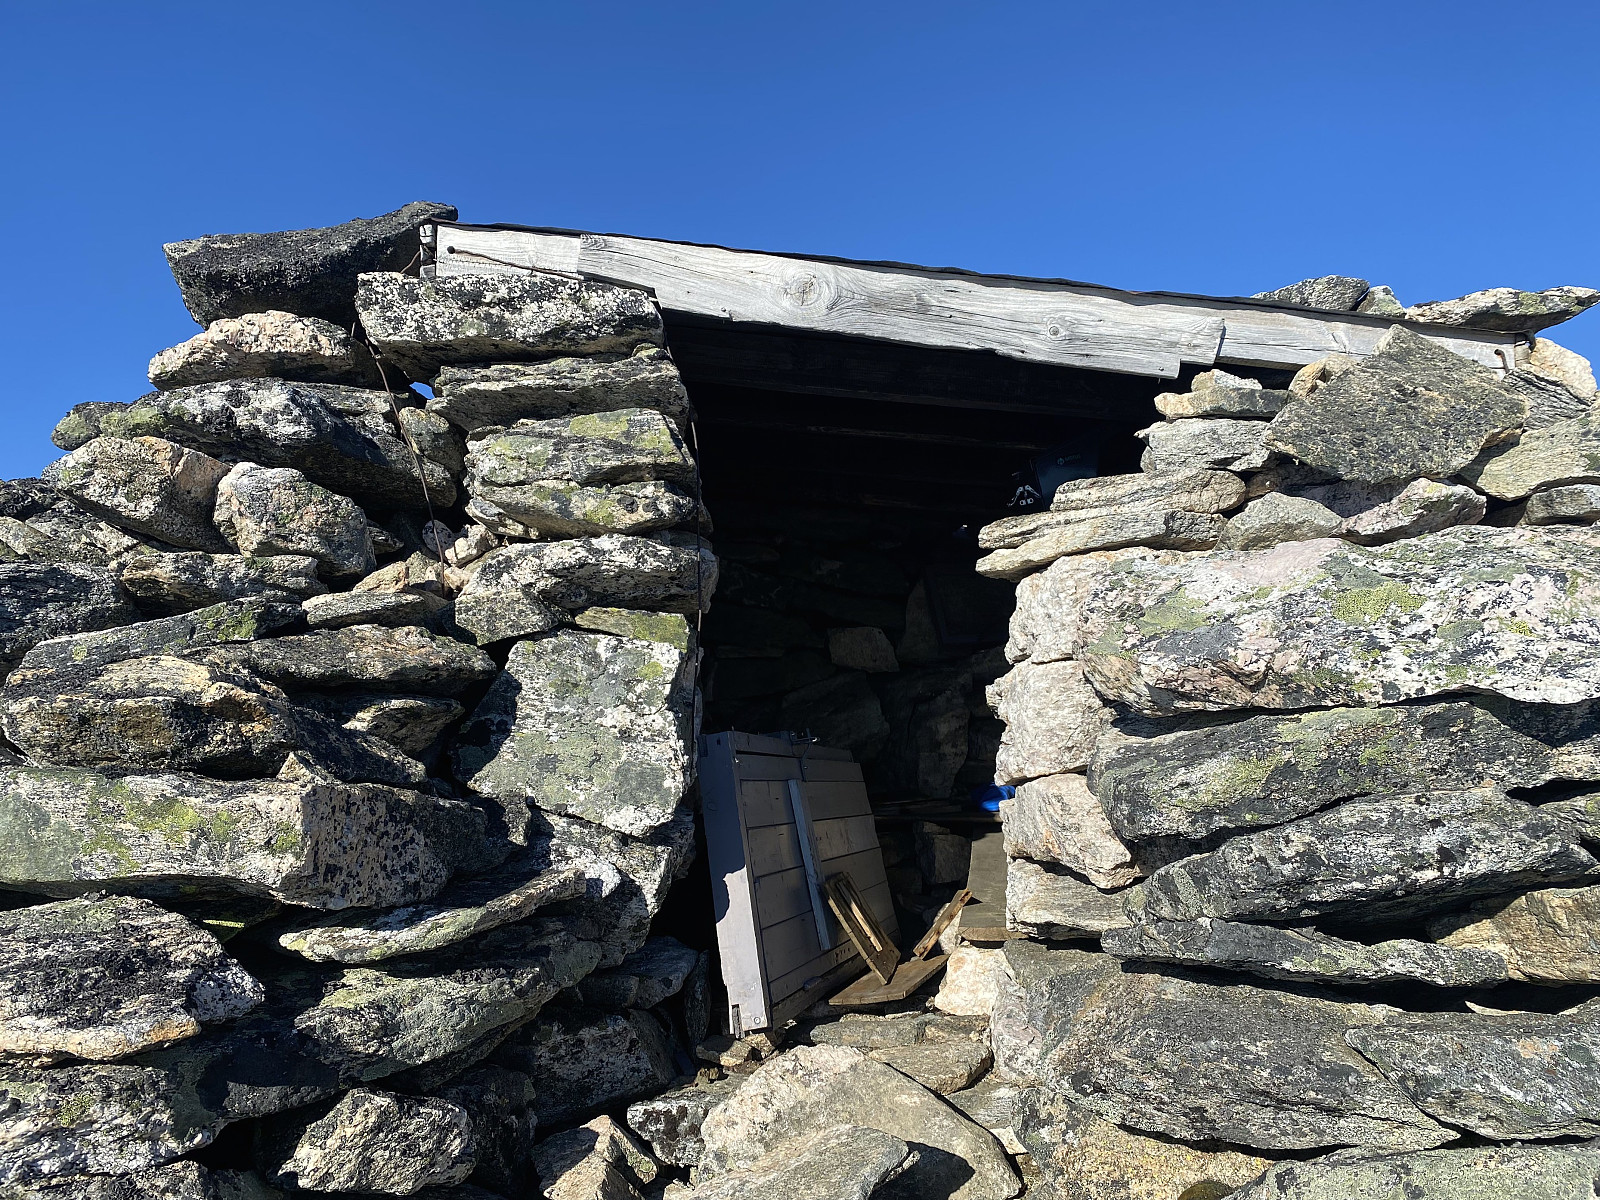
![Image #38: The upper part of the Packhorse Trail. This trail existed a long, long, time before Trollstigen Hairpin Road was constructed, and it is said that the farmers in Valldalen Valley even from the 16th century were leading cattle and horses along this trail over the mountain in order to sell them at the market in the valley of Romsdalen [i.e. the valley of the river ''Rauma''].](https://images2.peakbook.org/images/14939/Solan_20210720_60f7438a05a0c.jpg?p=xtralarge)
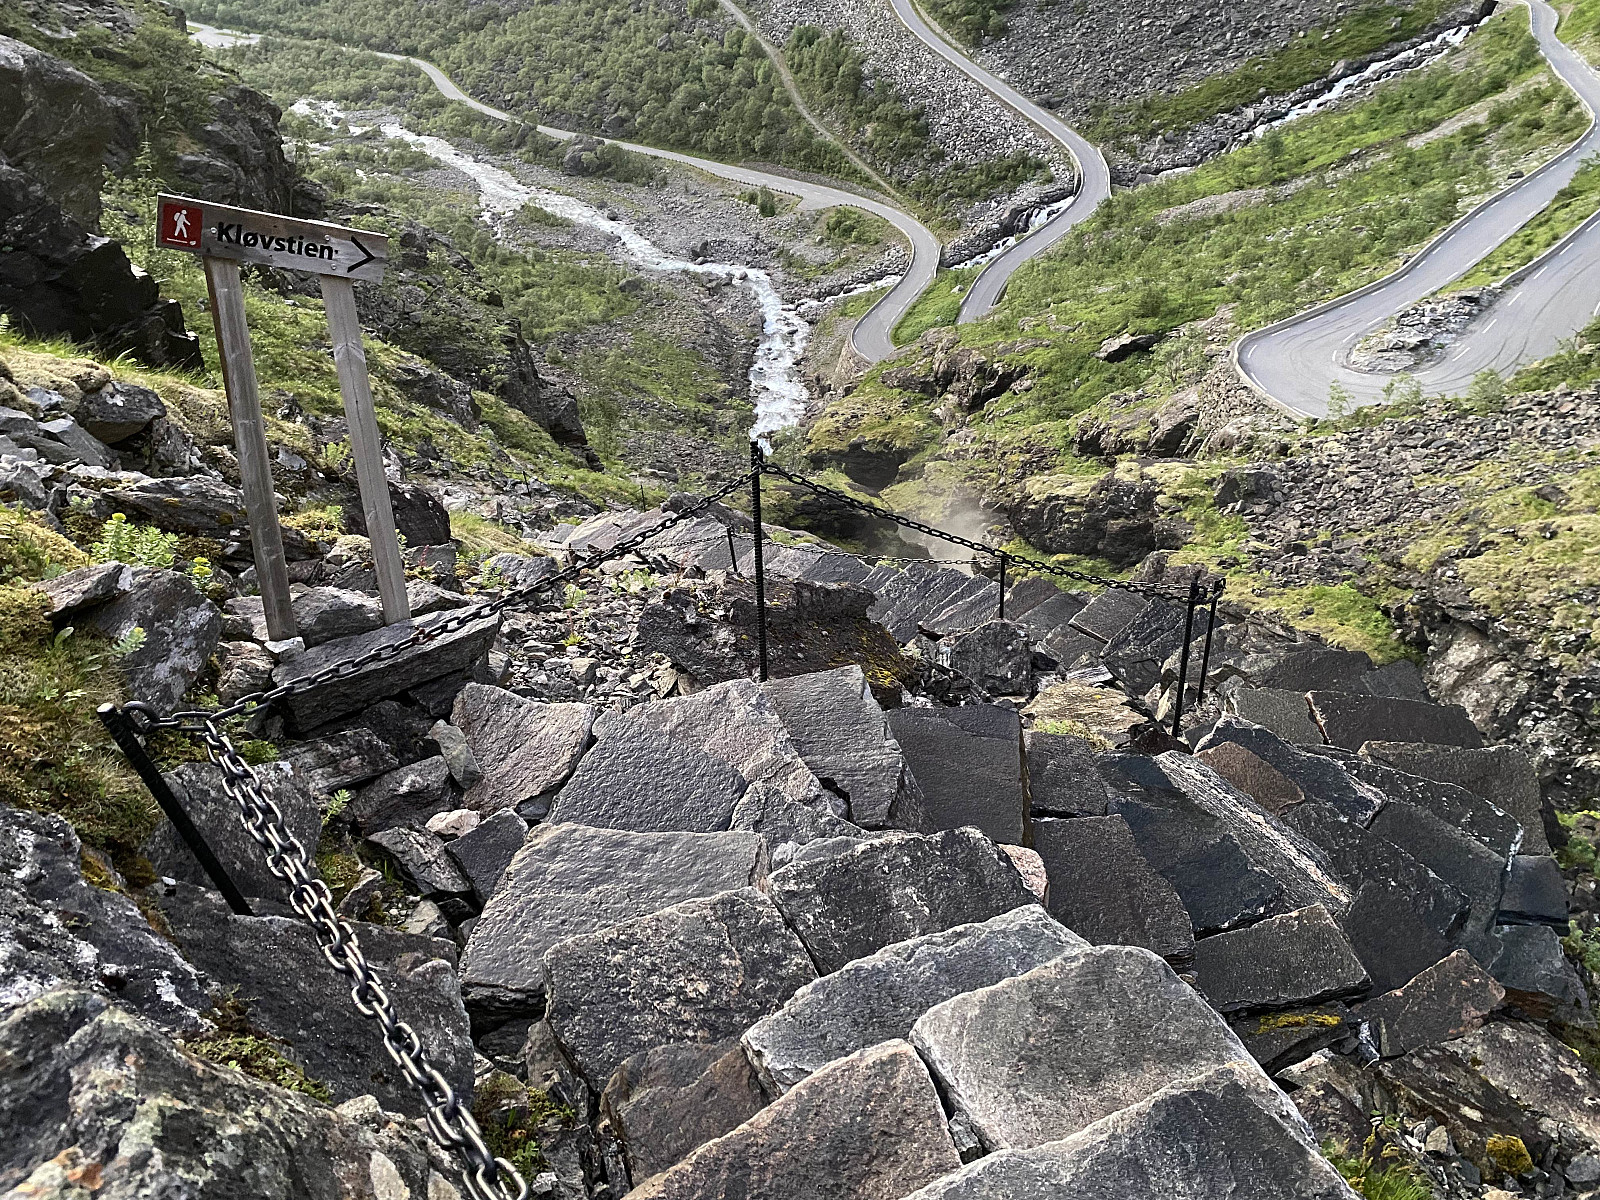
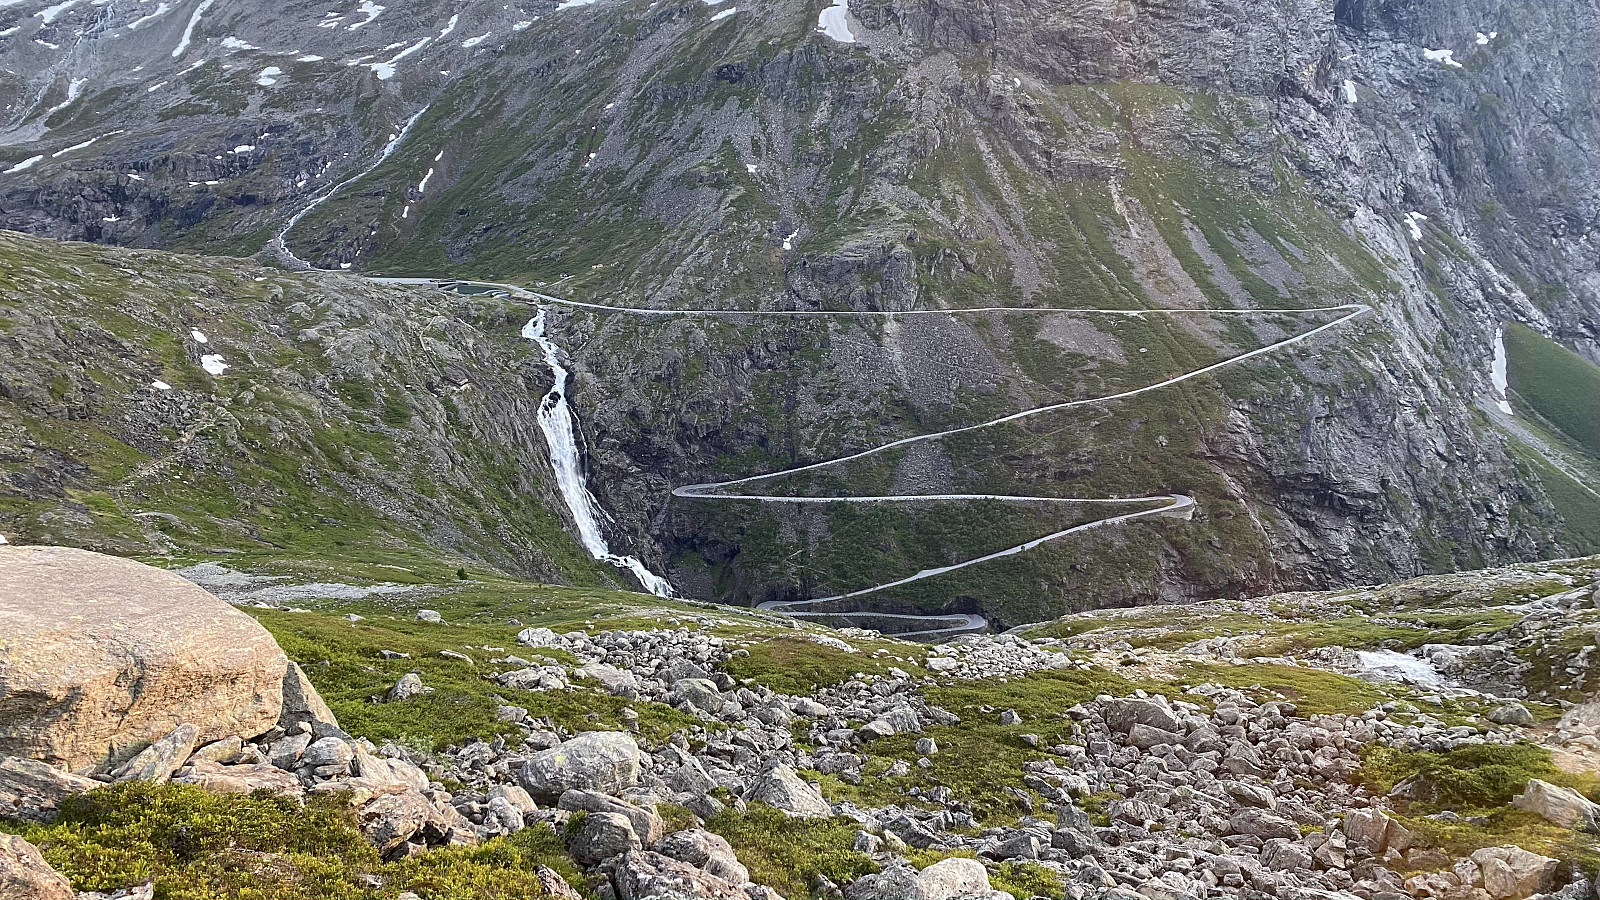
I finally reached Trollstigen Tourist Centre. When I climbed Mount Norafjellet around noon, I was thinking of taking a cab back down to Soggemoen (where I had my car) if I managed to get all the way to Trollstigen; but when I saw Trollstigen from Mount Trollklørn (Image #15), I all of a sudden got the idea that I could actually hike back to Soggemoen using an old trail known as Kløvstien [i.e. The Packhorse Trail, or The Pack Animal Trail, to translate it more literally]. This trail is an ancient hairpin trail, a bit similar to the current hairpin road; though much more narrow and rocky, and in no way as smooth as the 1920 construction (Image #39). I followed the packhorse trail into Isterdalen Valley for its entire length. After the hairpin part of the trail there was a part that is more like an ordinary forest trail; and there's even a part that has been broadened into a forest road, serving as access to a cabin located there. Finally the packhorse trail came to an end, and from there I just followed county road 63 down to my car. It took me some hours to hike all the way from Trollstigen tourist Centre down to Soggemoen, and the sun eventually went down at about 11:30 p.m.; but the summer night was beautiful, and it never really got dark (Image #40). I was back by the car at about half pas two in the morning, and quickly changed into a dry set of clothes that I had in the car, before I embarked upon my drive back home.
Video #2: The waterfall of Stigefossen, as well as that of Tverrelvfossen is amazing to be watching.
Video #3: There are huge forces in these waterfalls.


User comments