
Visiting Mount Nordre Trolltind with my Son (19.09.2020)

Written by Solan (Atle Solholm)

| Start point | Soggemoen (50m) |
|---|---|
| Endpoint | Soggemoen (50m) |
| Characteristic | Alpine trip |
| Duration | 7h 00min |
| Distance | 13.1km |
| Vertical meters | 1,646m |
| GPS |
|
| Ascents | Nordre Trolltinden (1,482m) | 19.09.2020 |
|---|---|---|
| Adelsfjellet (1,314m) | 19.09.2020 14:10 | |
| Middagsbarna (1,390m) | 19.09.2020 14:10 | |
| Norafjellet (959m) | 19.09.2020 14:10 | |
| Visits of other PBEs | Norafjellet - parkeringslomme (50m) | 19.09.2020 14:10 |
I had previously visited Mount Nordre Trolltinden [1452 m.a.m.s.l.] once, in order to familiarize myself with this peak, and with a few other peaks around it; including Mount Store Trolltind [1788 m.a.m.s.l.]. A dream of mine is to one day join a team of climbers in an ascent from Mount Nordre Trolltinden [i.e. "Northern Troll Peak] to Mount Store Trolltinden [i.e. "Greater Troll Peak"], as these two peaks are interconnected by a ridge that may be climbed if you’re using ropes, and have the appropriate security equipment. [For a tour description of my previous climb to Mount Nordre Trolltinden, see Reconnaissance Hike to Mount Nordre Trolltind]

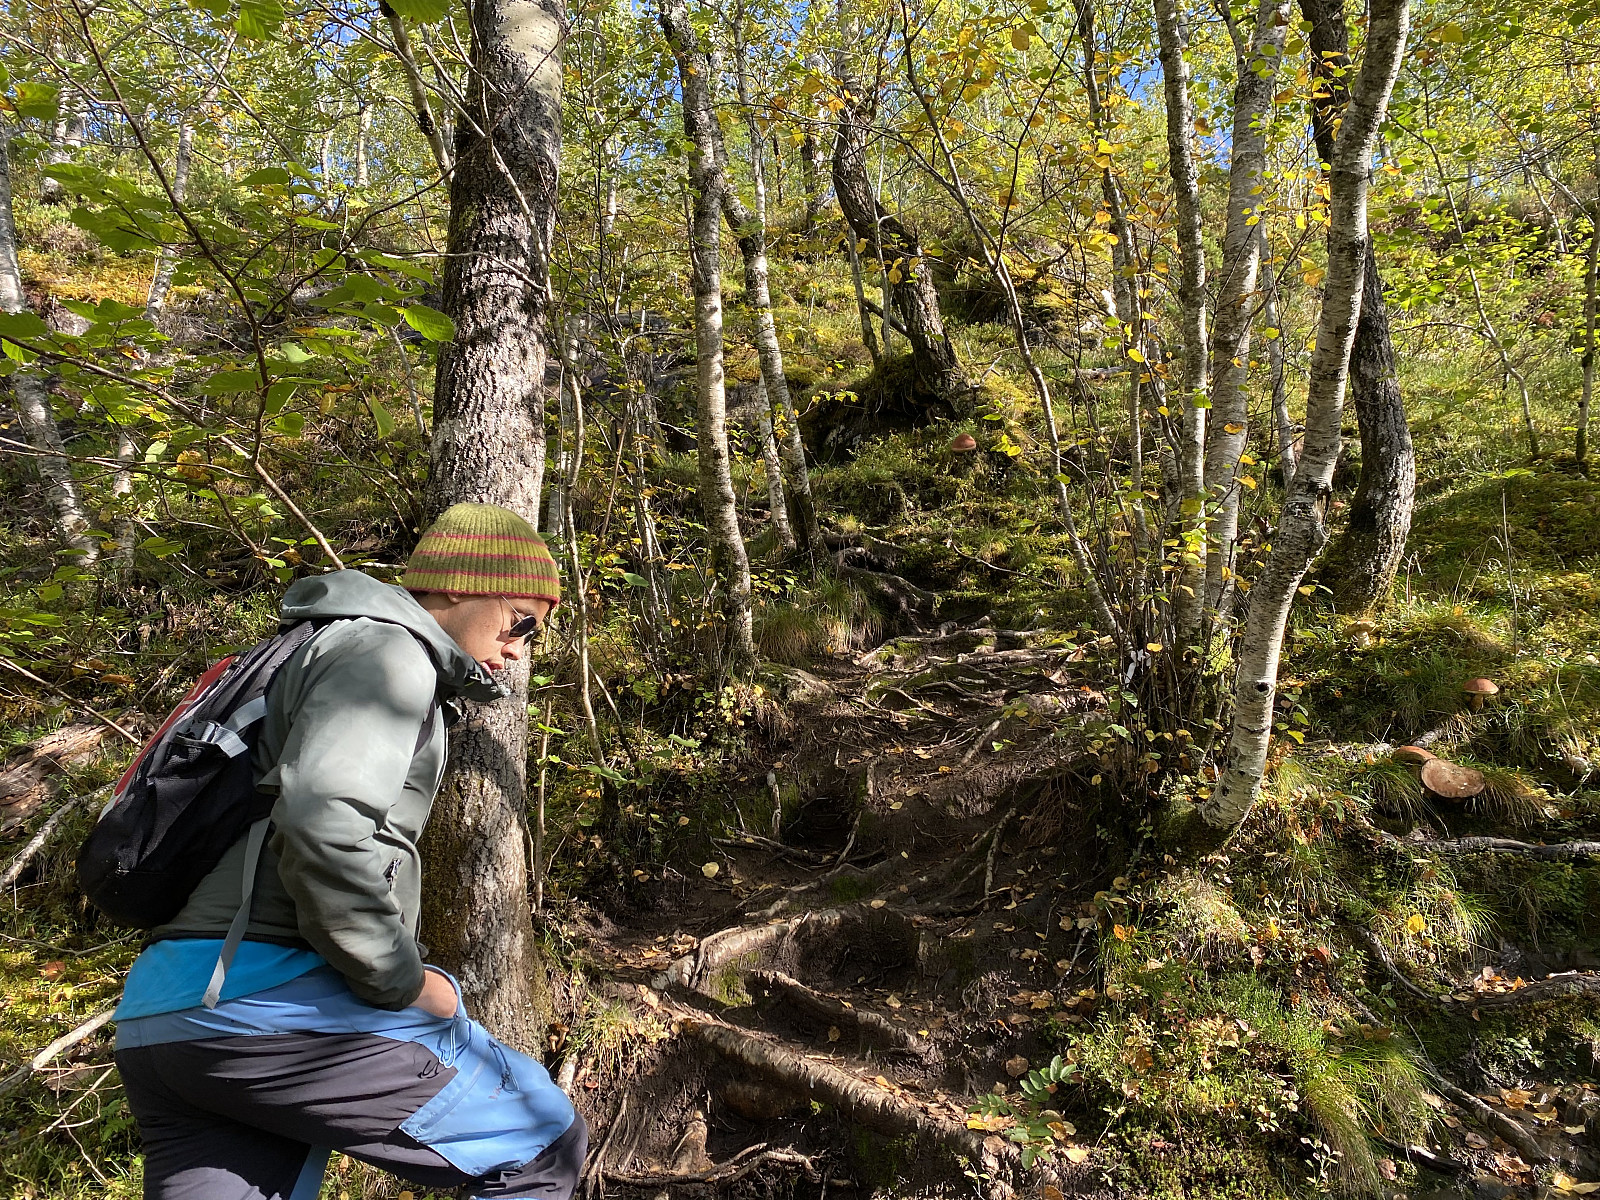
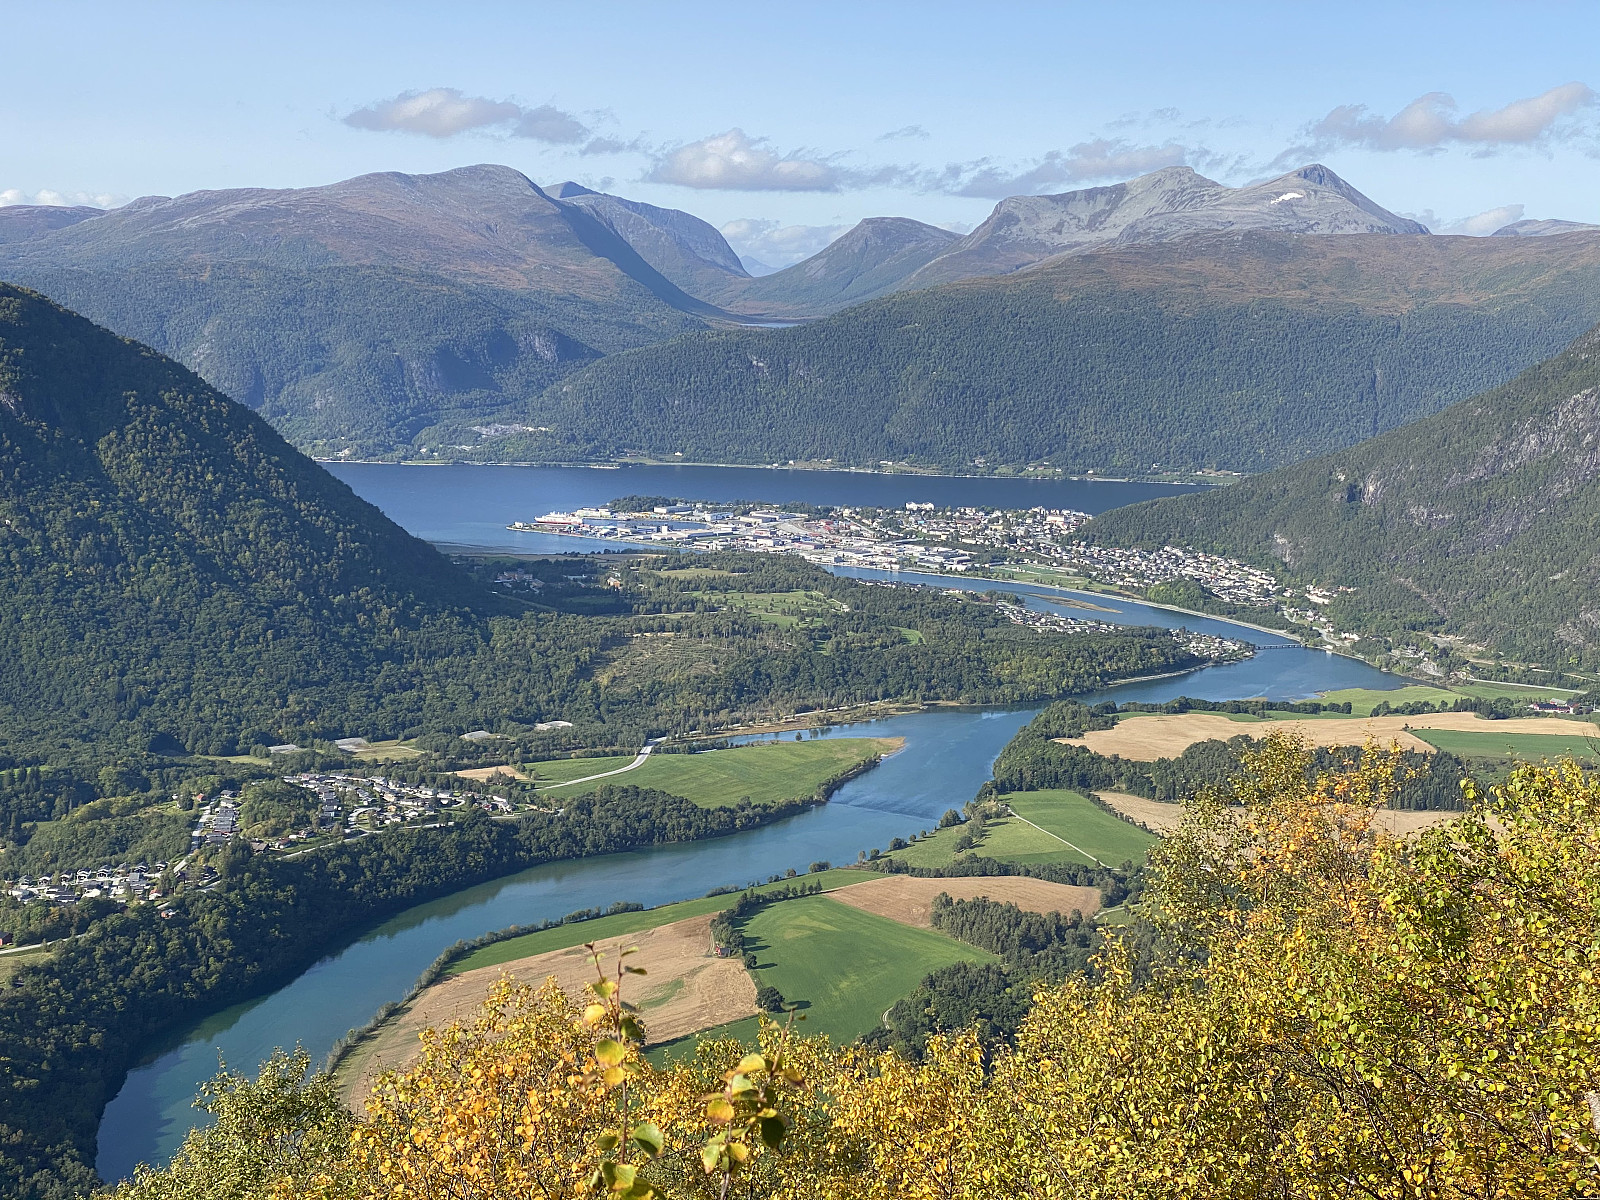
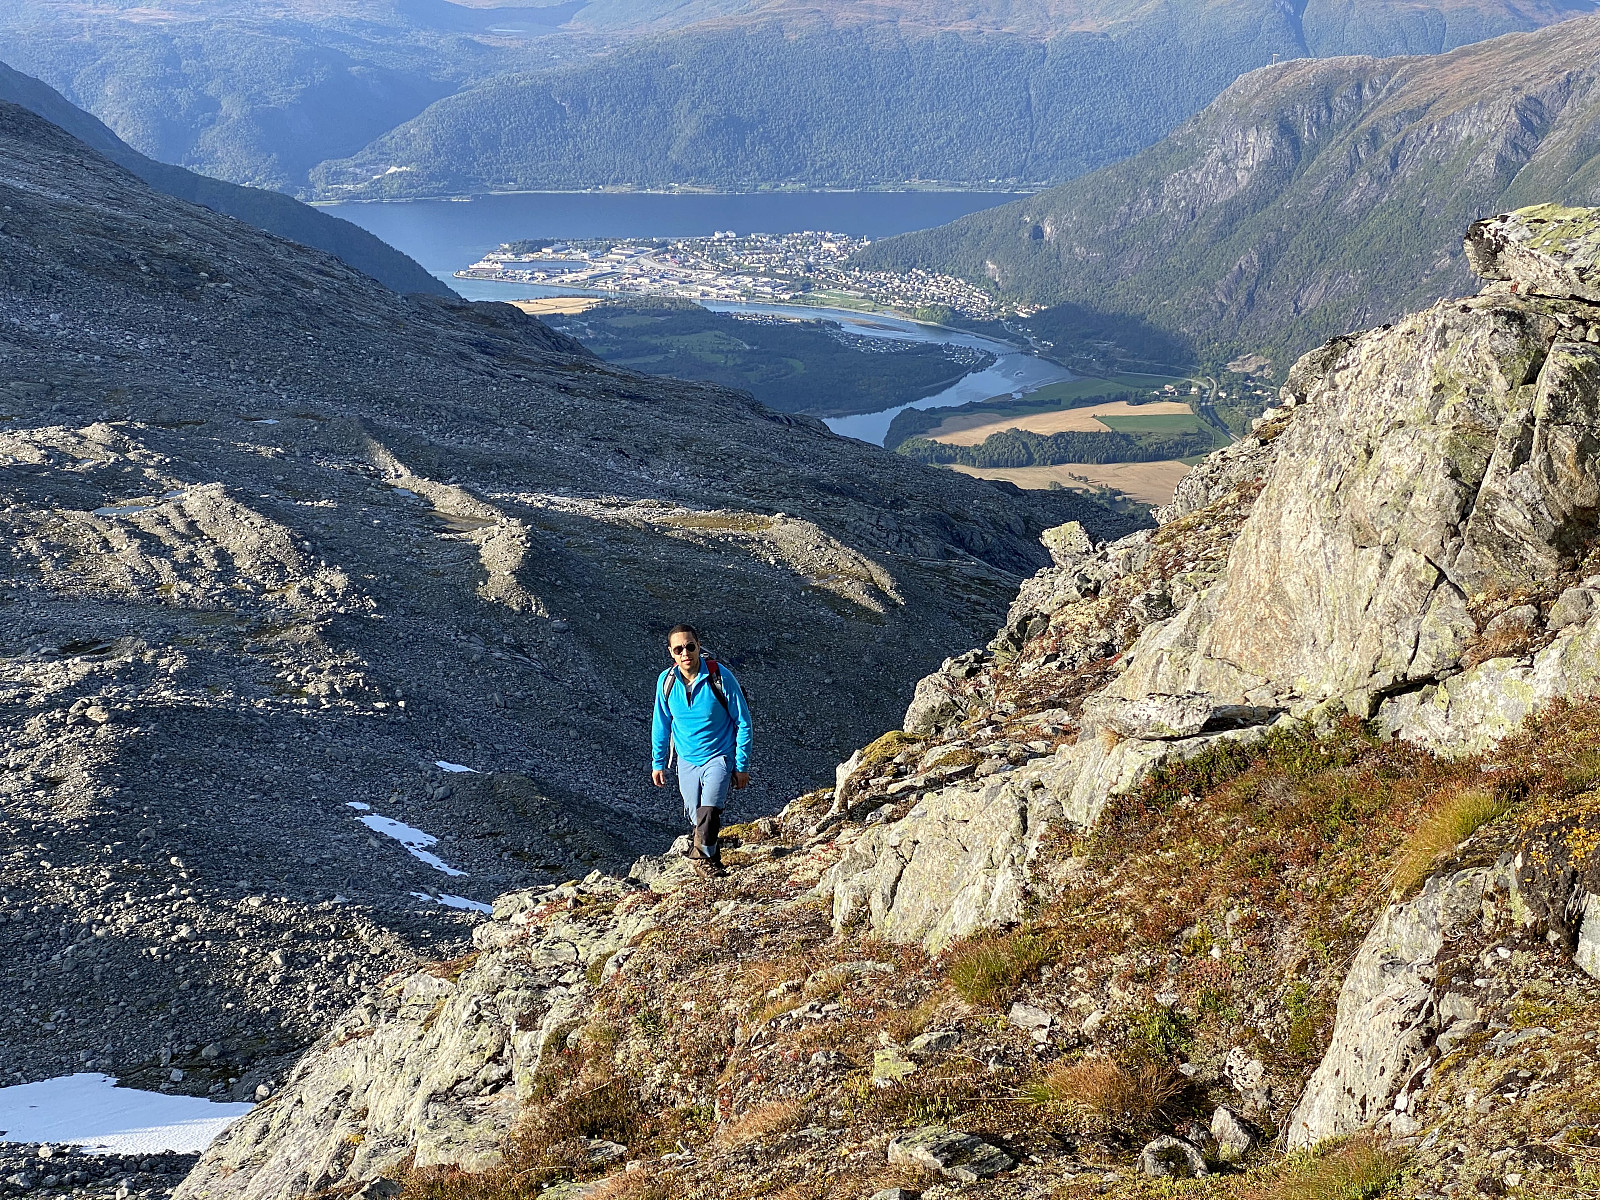
On this day, my son Dag asked me to join him for a climb to Mount Nordre Trolltinden, as he had never been there. The weather forecast for the day was excellent, and so I decided to join him. As on my previous trip to this mountain, we started out from a little parking lot just opposite campsite called Soggemoen. The first part of the climb goes through rather dense forest; at first spruce forest, but a bit higher up, mainly birch forest (Image #1). The trail up to Mount Norafjellet [959 m.a.m.s.l.] is readily visible, and has also been very well marked by red dots on trees and on stones. Mount Norafjellet is actually just a knoll on the huge mountain massif, of which Mount Breitinden [1797 m.a.m.s.l.] is actually the highest peak; though Mount Store Trolltinden [1788 m.a.m.s.l.] is usually also considered a separate peak, with its vertical separation of 365 meters. Mount Nordre Trolltinden, however, which we were aiming for on this day; only has a vertical separation of 28 meters; and may therefore be regarded as just a knoll on the north ridge of Mount Store Trolltinden. Nevertheless, this knoll has a name of its own, and has traditionally been regarded as a proper mountain by the people living in the area.
We shot some images while at Mount Norafjellet, and then we continued our trek. The trail towards Mount Nordre Trolltinden [i.e. The Northern Troll Peak] is still readily visible for half a kilometer or so after you’ve passed Mount Norafjellet; but then the ground becomes rocky and stony, with almost no vegetation apart from lichen on the stones, and from that point on it's no longer possible to see any trail. The problem in this upper part of the trek to Mount Nordre Trolltind is that there aren't any trail markings either, so you just have to pick out the peak that you want to visit; and then start walking towards it. (In bad weather it is of course possible to use a GPS track to find your way, but I wouldn’t recommend anyone to climb these mountains if visibility is zero, as the vertical cliff flanking many of the peaks up here are extremely high and treacherous).
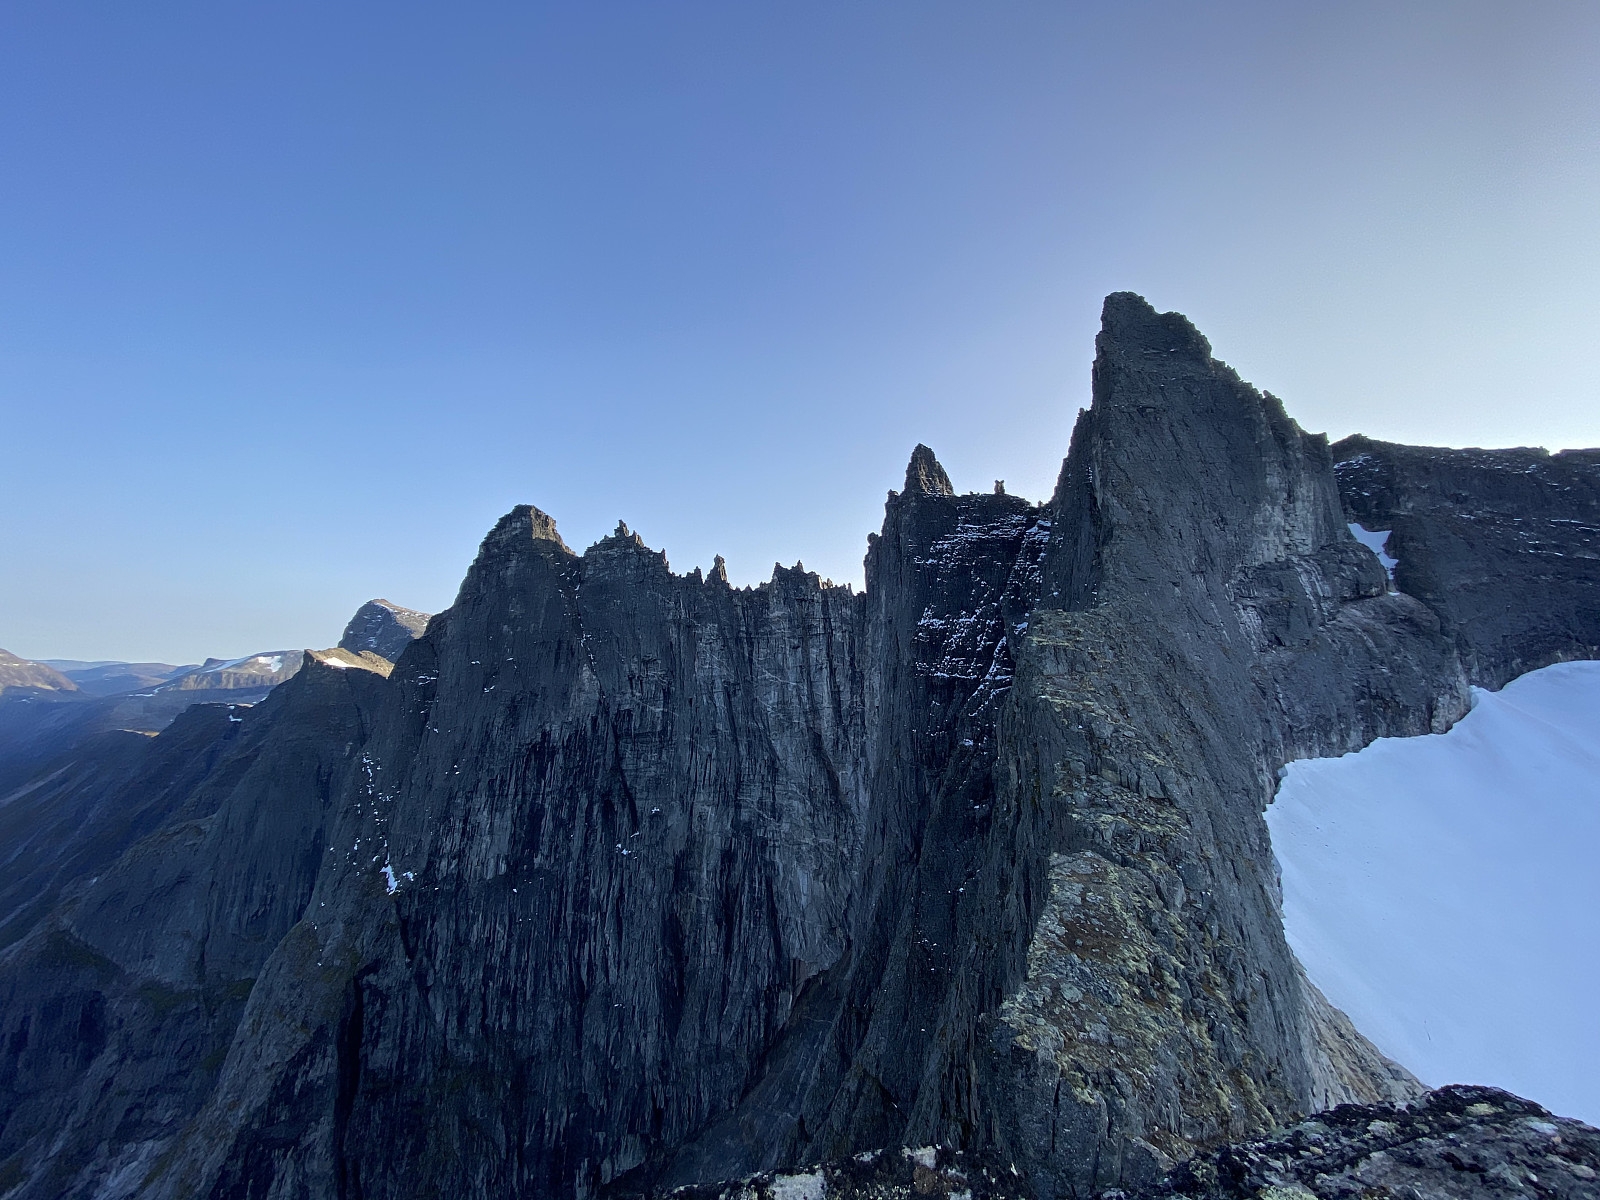
![Image #7: On top of Mount Adelsfjellet [i.e. "The Nobility Mountain"]. The nearby peak is Mount Middagsbarna, and the one behind it is Mount Nordre Trolltinden. In the far background are seen the peaks flanking the top of the famous "Troll Wall" [Norwegian: "Trollveggen"].](https://images1.peakbook.org/images/14939/Solan_20210119_600752bfbd626.jpg?p=xtralarge)
![Image #8: View of Mount Romsdalshornet, Mount Lillehornet, and Mount Hornaksla from Mount Adelsfjellet. The mountain hidden behind Mount Hornaksla is Mount Kalskråtinden [1801 m.a.m.s.l.]. In the left part of the picture part of Mount Store Venjetinden [1852 m.a.m.s.l.] is seen.](https://images1.peakbook.org/images/14939/Solan_20210119_600753fe5e10d.jpg?p=xtralarge)
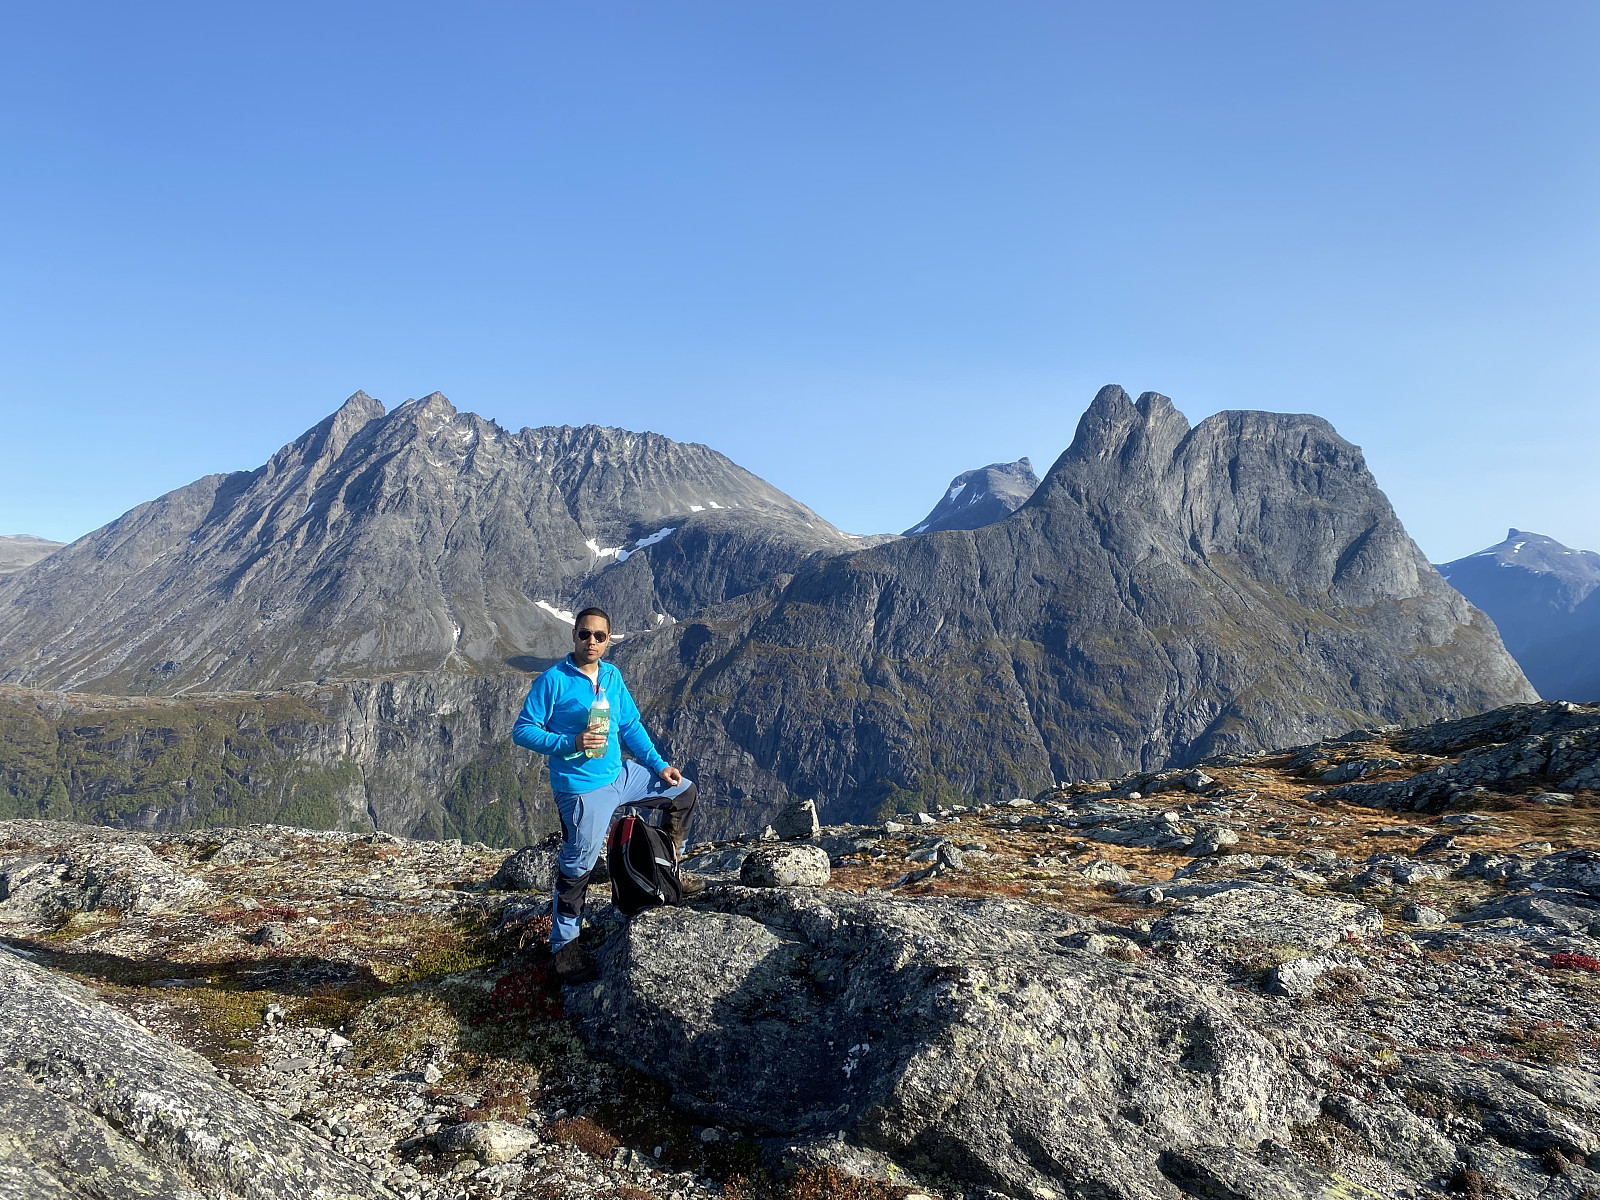
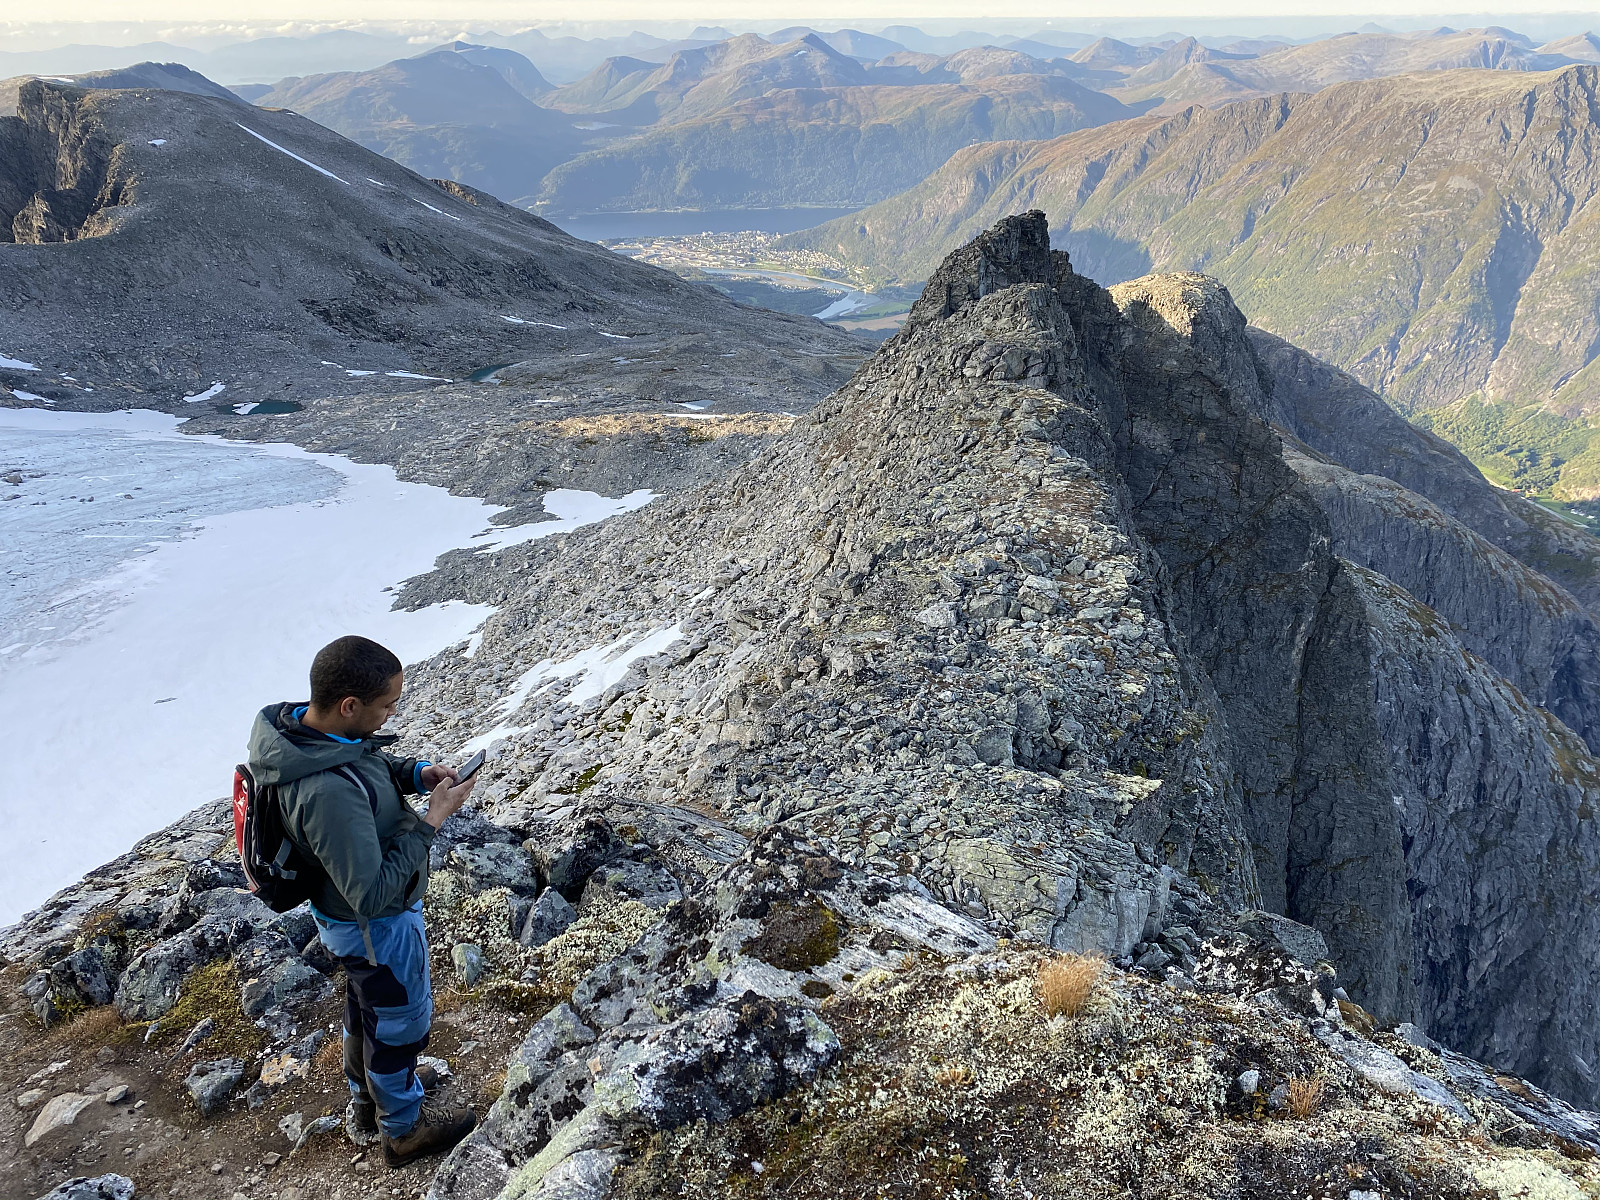
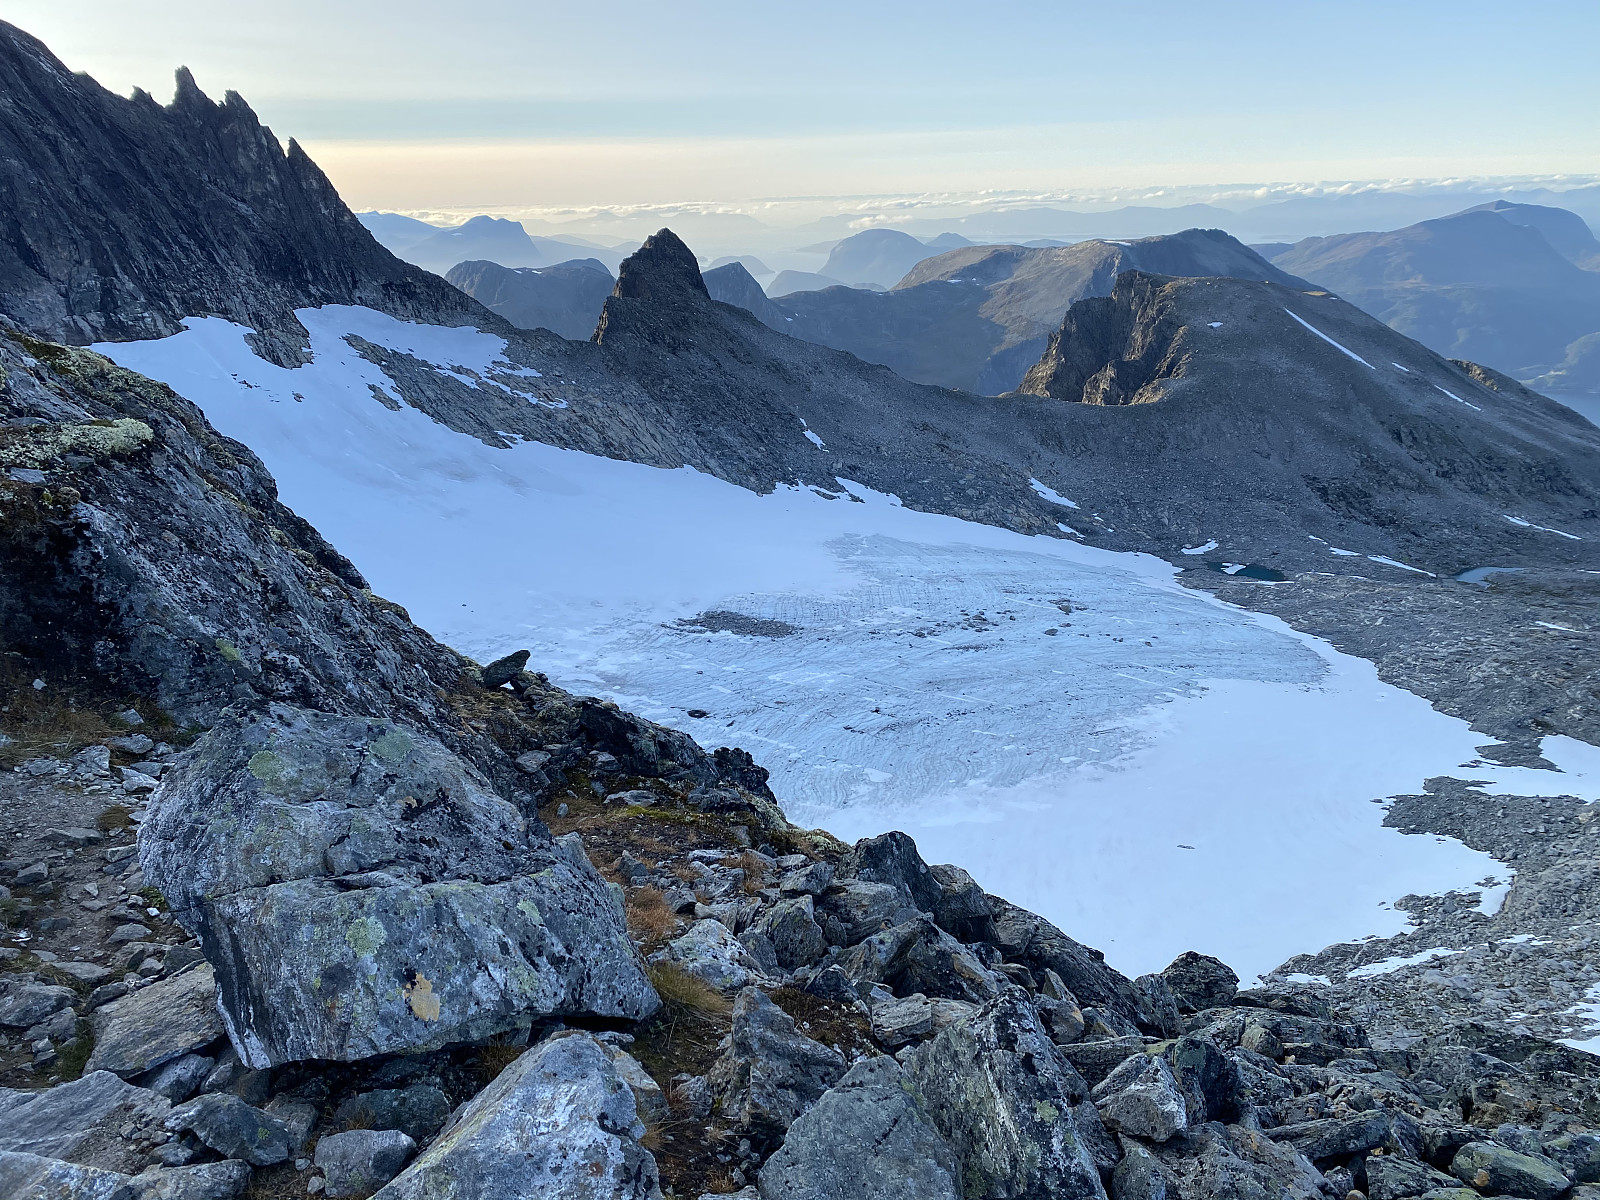
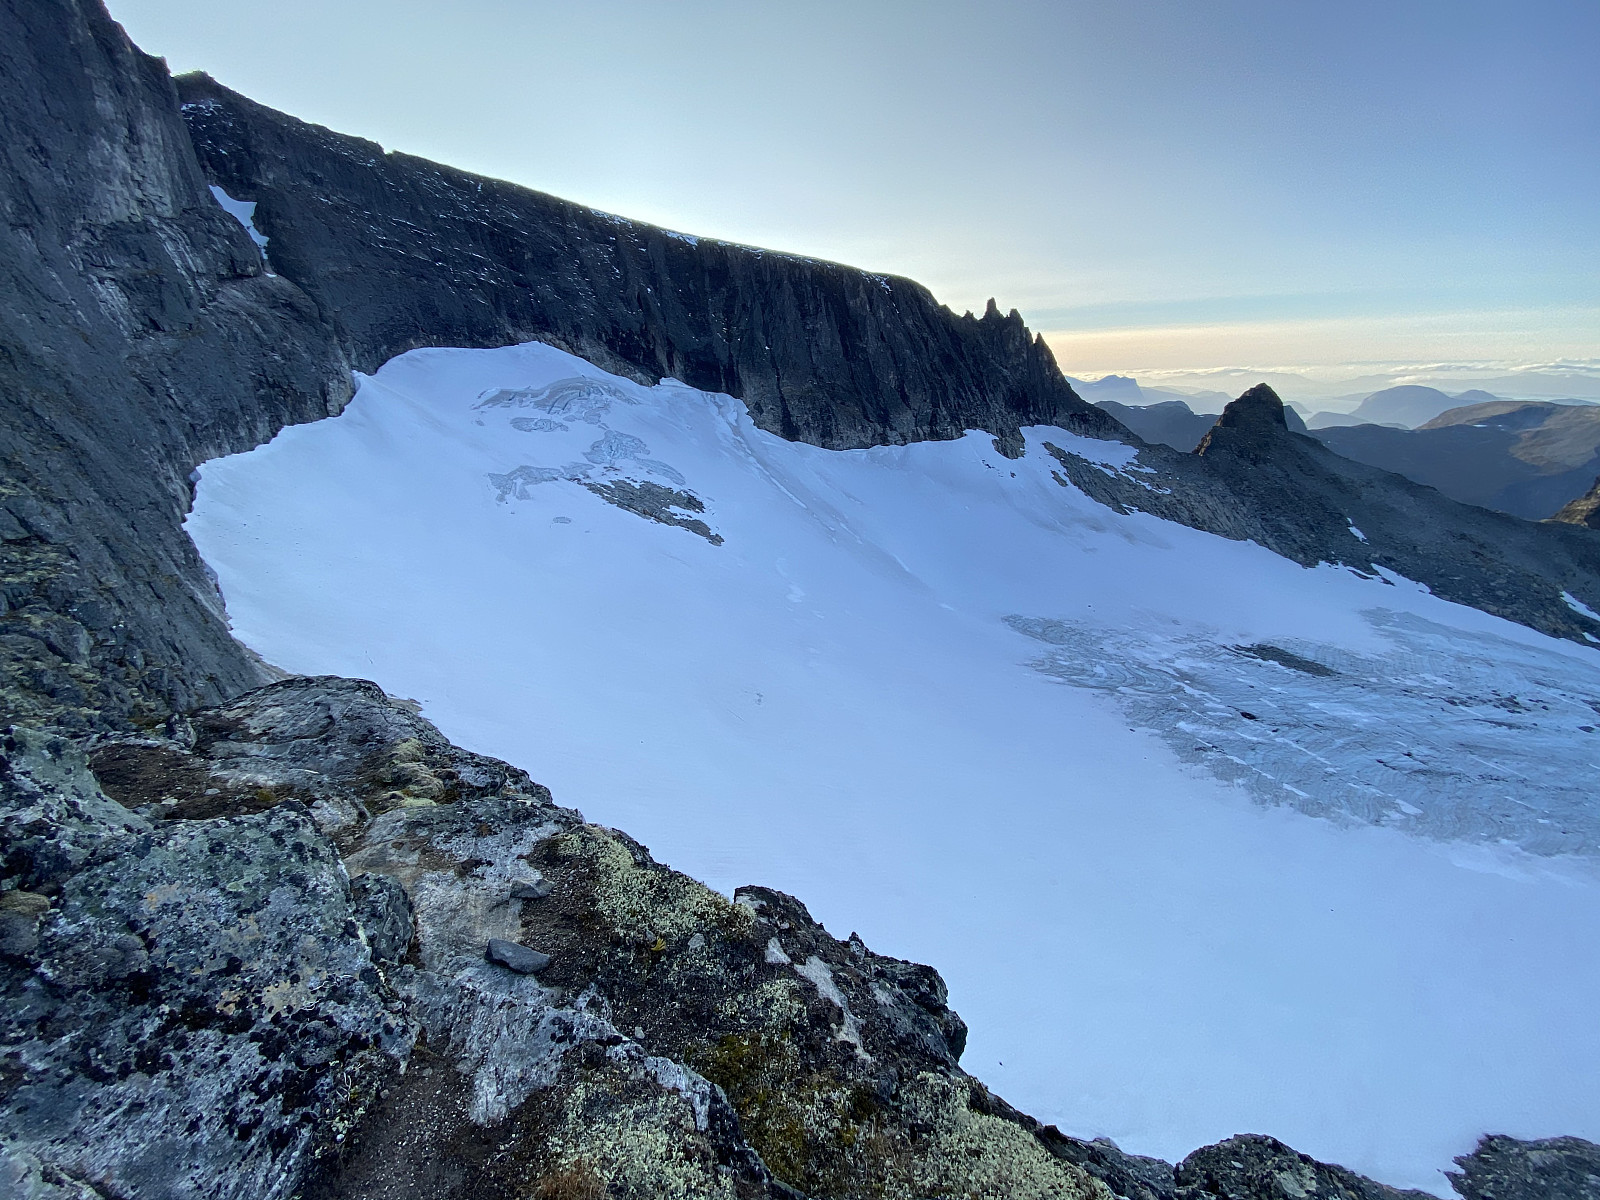
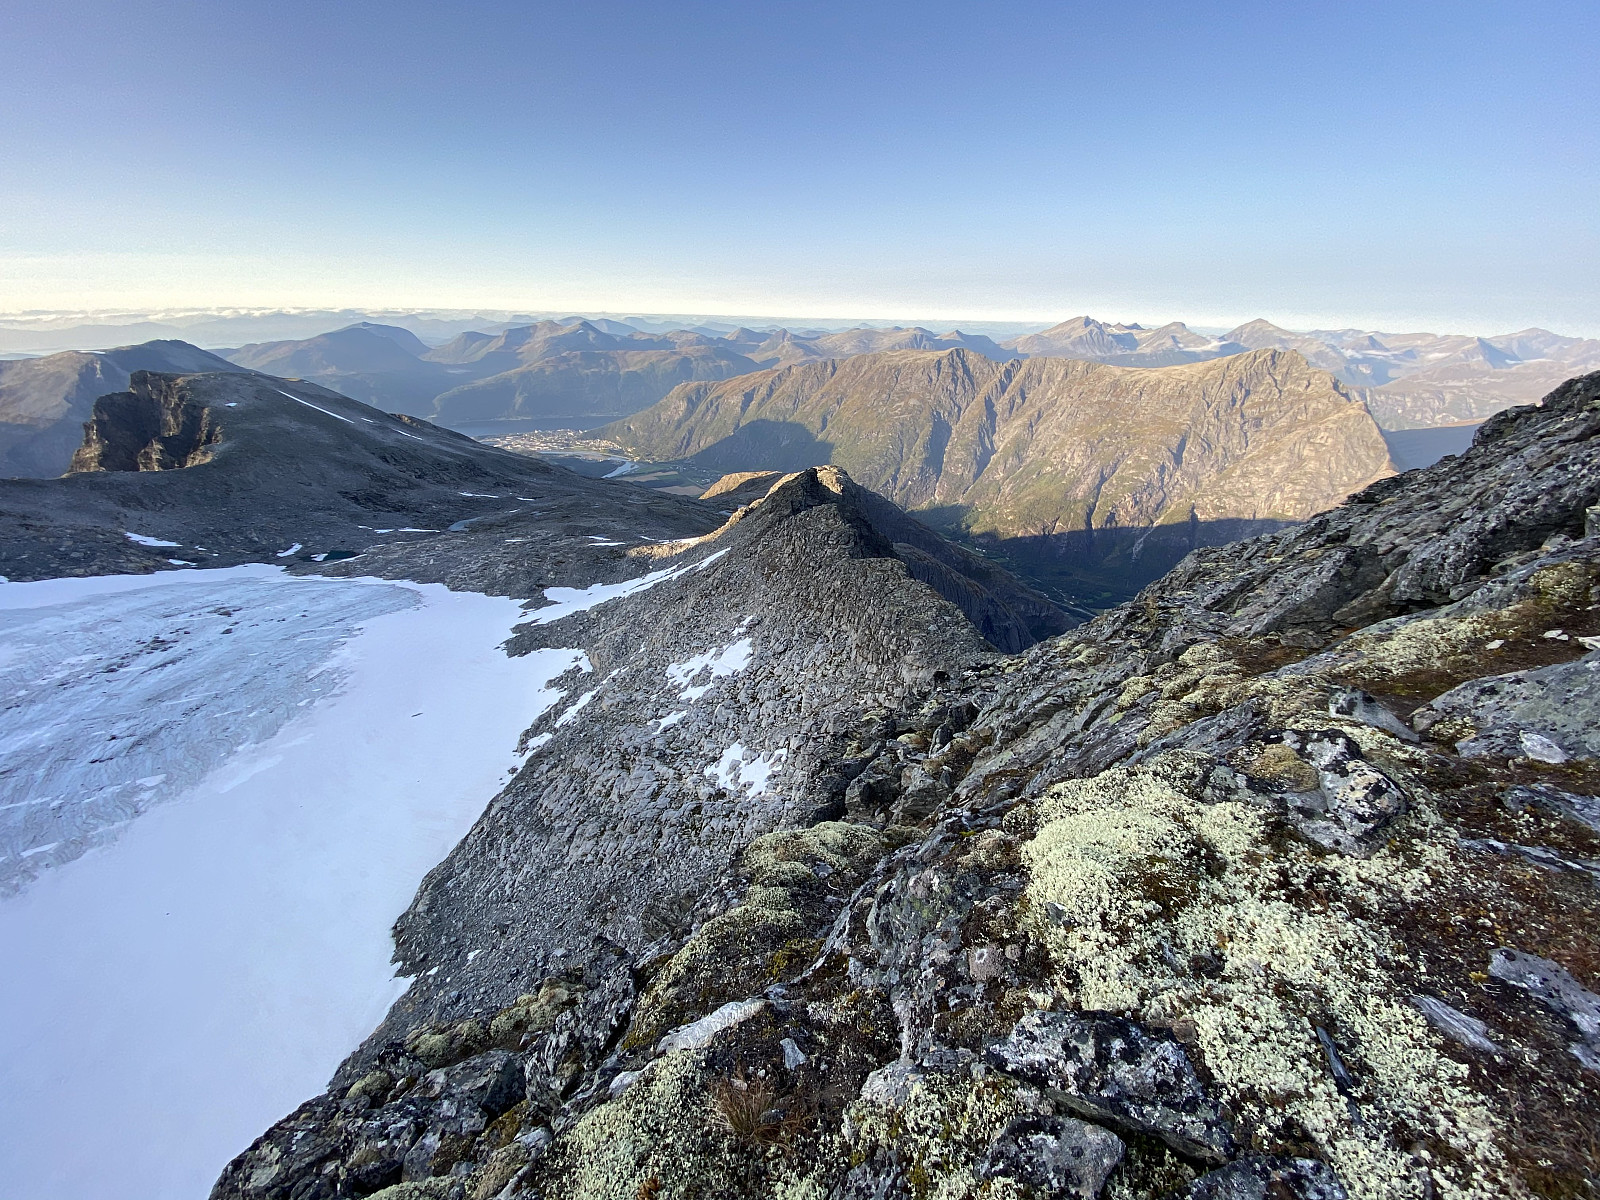
When you're looking southwards from Mount Norafjellet, you're actually looking into a stony hanging valley that's in its entirety above 950 m.a.m.s.l. Each side of this valley is flanked by 3 peaks or summits, and then in the upper part of the valley is a glacier called Adelsbreen [i.e. "The Nobility Glacier"]. The three peaks on the east side of the valley are (from north to south) Mount Adelsfjellet [1314 m.a.m.s.l.], Mount Middagsbarna [1390 m.a.m.s.l.], and Mount Nordre Trolltinden [1482 m.a.m.s.l.]; and the three peaks on the west side of the valley are Mount Nonshaugen [1194 m.a.m.s.l.], Mount Soggefjellet [1357 m.a.m.s.l.], and Mount Setergjelstinden [1436 m.a.m.s.l.]. We made our way up the valley by jumping from stone to stone, and after a while we turned a bit left, and started climbing towards the summit of Mount Adelsfjellet. I had, as mentioned above, previously once visited Mount Nordre Trolltinden, but I had never been on Mount Adelsfjellet, and as I had a desire to visit even that peak; I insisted upon climbing that one first.
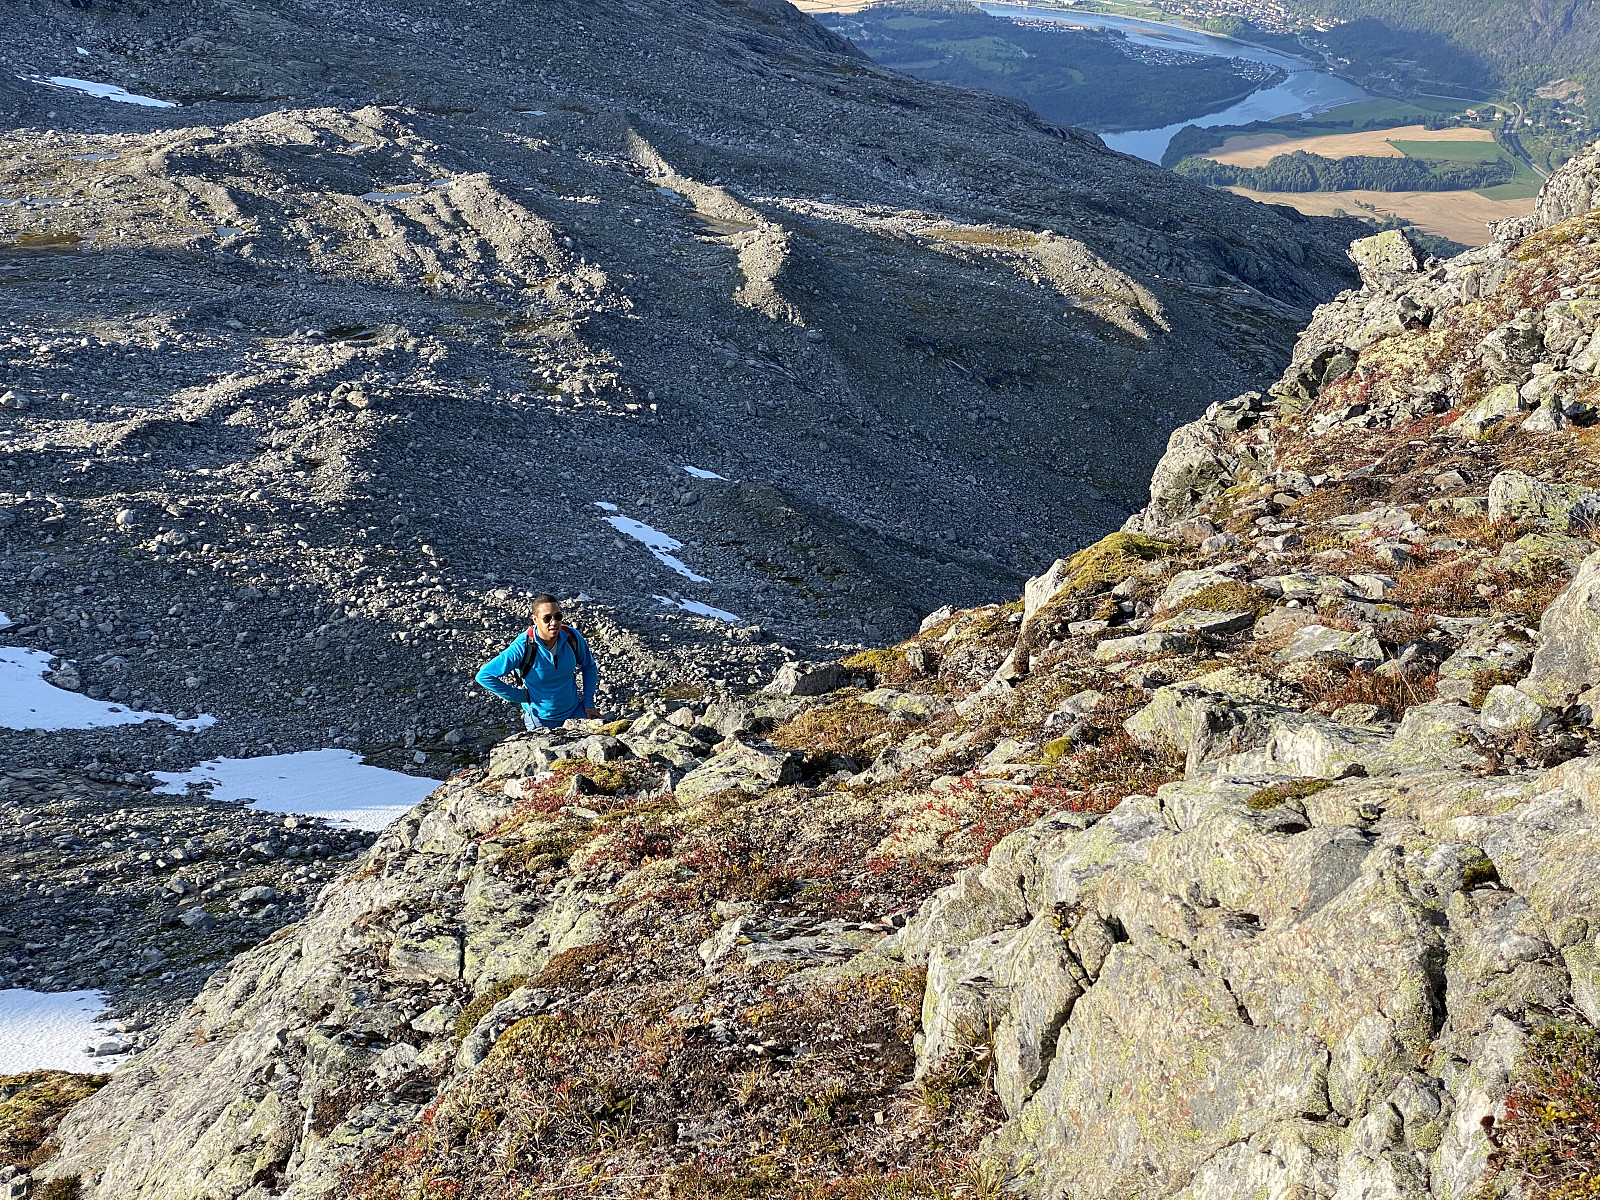
The view from Mount Adelsfjellet is astonishing. Not just do you see into the valley below, but you actually feel that you're coming really close to Mount Romsdalshornet (Image #8), a mountain renown for it's inaccessibility. And the proximity is not just a visual deception; The peaks of Mount Adelsfjellet and Mount Romsdalshornet are only about 2.8 kilometers apart, as they are only separated by the rather narrow valley of the river Rauma [The valley is interchangeably called either Raumadalen or Romsdalen]. From Mount Adelsfjellet we continued onto Mount Middagsbarna, which offers much of the same view, though the slightly different location and altitude gives a slightly different perspective. The climb down from Mount Middagsbarna (when moving towards Mount Nordre Trolltinden) is a little bit steep and tricky, though not to such an extent as to require any special climbing equipment.
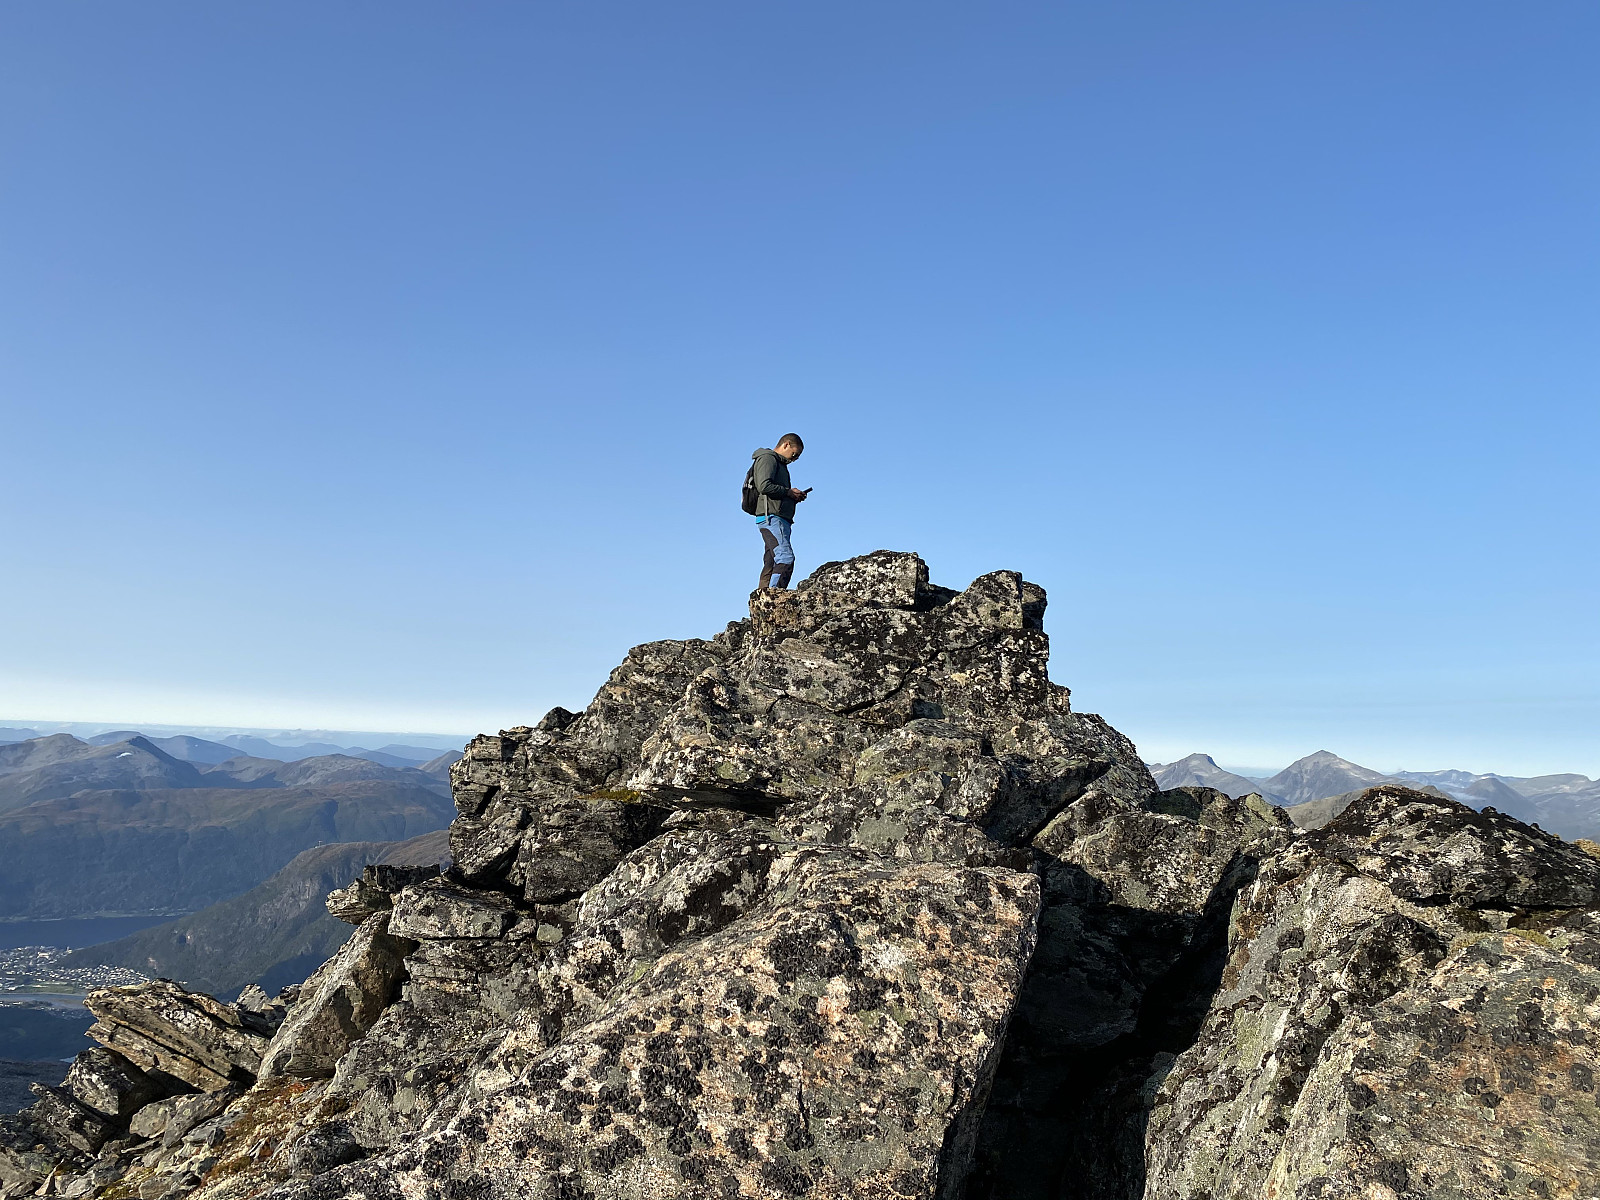
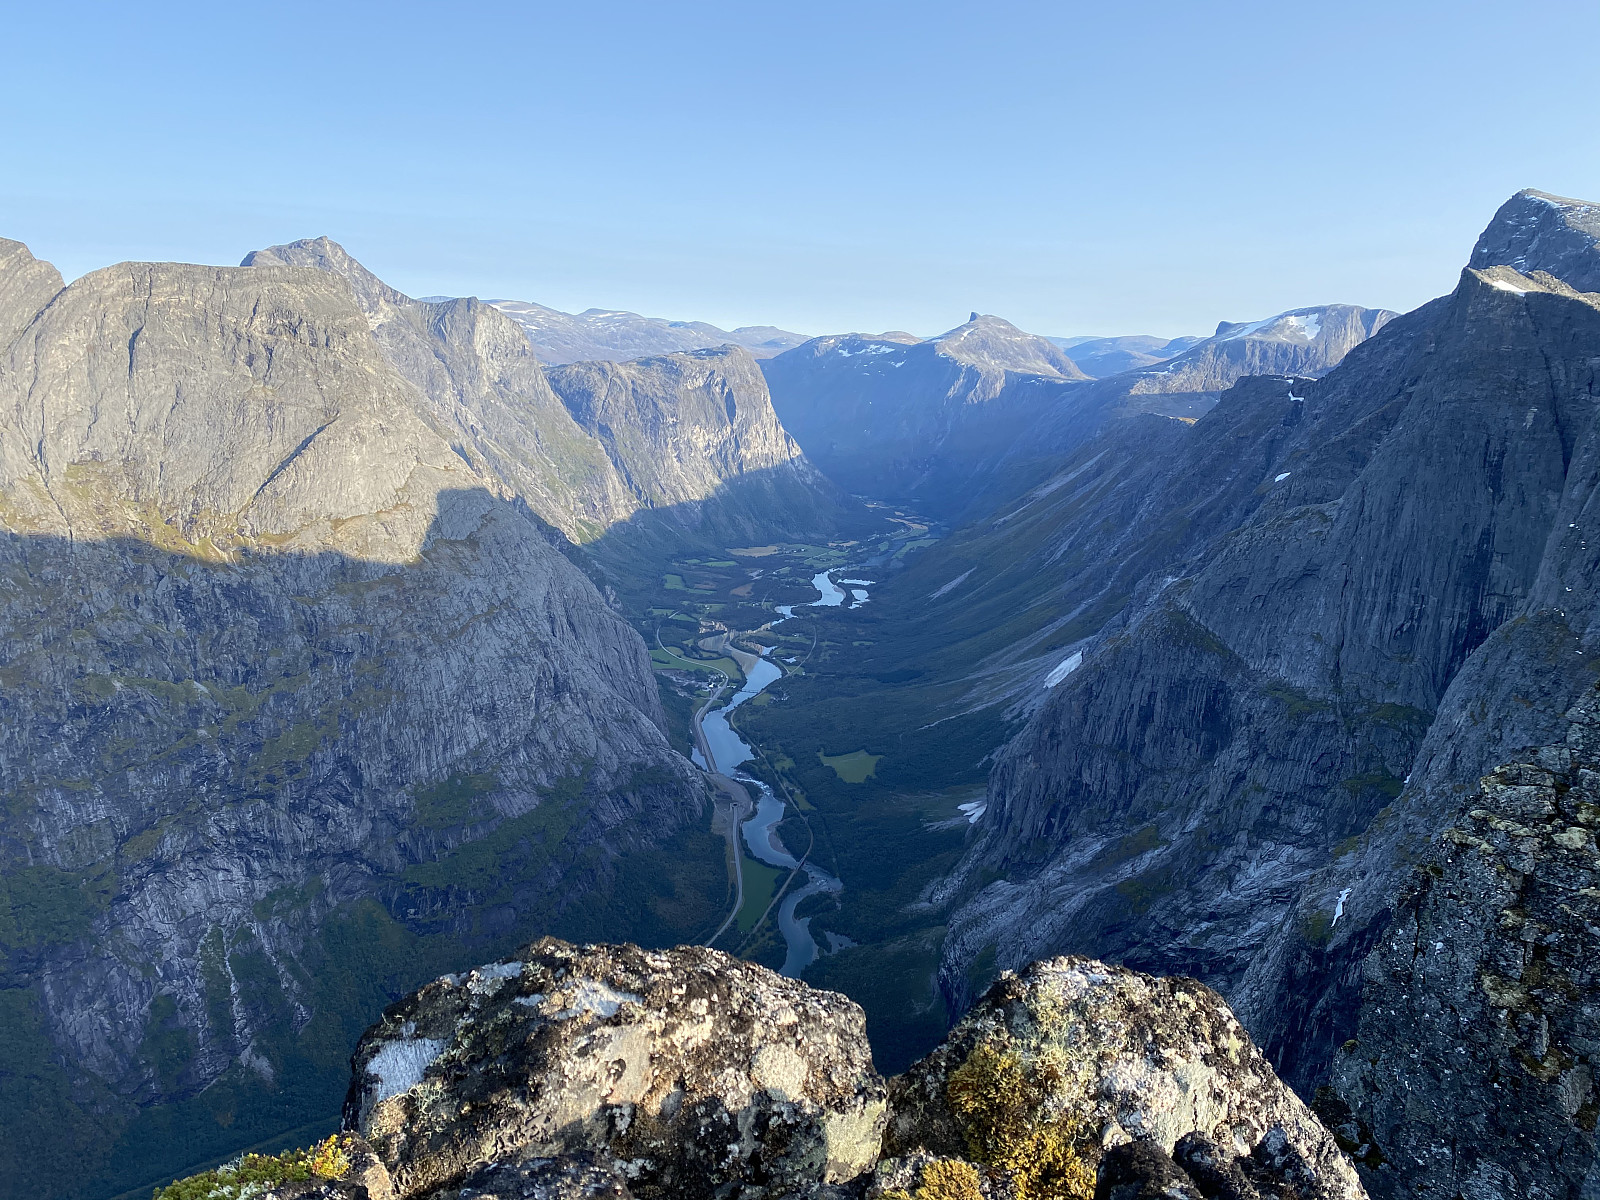
The climb up to the summit of Mount Nordre Trolltinden i also a bit steep, but even here you'll do fine without any special climbing gear; at least on a dry day. Just be careful, and take the time that you need, and you'll do fine; provided you're a bit used to climbing and trekking in such mountains. On the summit we shot a lot of images, and then we had something to eat and drink, before embarking on our descent. As on my previous visit to this mountain, I took time even on this occasion to study the ridge up to Mount Store Trolltinden through a pair of binoculars that I had with me; as I still do have the intent of one day climbing up that ridge, as mentioned above. Mount Nordre Trolltinden does offer the best view that you can imagine of the renown cliff called Trollveggen [i.e. "The Troll Wall"]; it's located so that it's just like having a balcony seat in a theatre. The vertical cliff of The Troll Wall is about 1000 meters high, some places with an overhang of 50 meters or so; and then below those 1000 vertical meters, the mountain side curves towards the bottom of the valley beneath, so that the peaks flanking the top of The Troll Wall are about 1700 meters above the river Rauma in the bottom of the valley.
![Image #13: The Troll Wall [Norwegian: Trollveggen] as seen from Mount Nordre Trolltinden. The highest peaks here are about 1700 meters above the floor of the valley beneath, and the vertical cliff is about 1000 meters high, some places with an overhang of about 50 meters. The Troll Wall has been a popular site for base jumpers. Due to the many fatalities, base jumping from the Troll Wall has, however, been prohibited since 1986.](https://images1.peakbook.org/images/14939/Solan_20210120_6008acc34cc0d.jpg?p=xtralarge)
From Mount Nordre Trolltinden we climbed down to Adelsbreen Glacier. This glacier is rather thin, and does not have any deep fissures that you may fall into, so its quite safe to cross it. Like all ice, however, it is quite slippery where it's not covered by snow; so you should bring with you some crampons if you want to walk on the "blue parts" of the glacier (see images ## 12, 15 and 16). From the glacier we got a very nice view towards Mount Store Trolltinden and a combined cleft and chute just west of it (Image #17). I've actually read a tour description here on peakbook by a guy who reached Mount Store Trolltinden by climbing up that steep chute with crampons and an ice axe. Obviously, you couldn't do that at this time of the year, as the snow was gone in the lower part of the chute; but in springtime, when there's more snow, that's definitely an option if you're into snow and ice climbing.
Walking on ice and snow is much quicker than jumping from stone to stone, so we chose to walk on the glacier until we came to the end of it; and from thereafter jumping from stone to stone was the best option, until we were approaching Mount Norafjellet, and the nice trail that we had been following earlier on this day. We pushed on a bit, as darkness was approaching. Had we had time, we would have visited even the peaks on the other side of the valley of Adelsbreen Glacier, but we didn't want to spend much of the night in the mountain. For the last part of our descent we still had to turn on our headlights, however; the days in September aren't as long as in June and July. We soon got down to our car, changed into dry clothes, and started driving towards home.
![Image #17: On Adelsbreen Glacier. The peak to the left is Mount Nordre Trolltinden, and the one to the right is Mount Store Trolltinden. The peak separated from Store Trolltinden by a cleft is called Vestre Trolltinden [i.e. The Western Troll Peak].](https://images1.peakbook.org/images/14939/Solan_20210120_6008b36f61c08.jpg?p=xtralarge)


User comments