
To the "Troll Church" with my sister and my daughter. (27.06.2020)

Skrevet av Solan (Atle Solholm)

| Turlengde | 8t 19min |
|---|---|
| Distanse | 14,6km |
| Høydemeter | 2354m |
| GPS |
|
| Bestigninger | Stordalstinden (895moh) | 27.06.2020 |
|---|---|---|
| Trolltindan øst (847moh) | 27.06.2020 | |
| Trolltinden (887moh) | 27.06.2020 | |
| Andre besøkte PBE'er | Trollkyrkja (484moh) | 27.06.2020 |
| Trollkyrkja parkeringsplass (84moh) | 27.06.2020 |
The Hike up to the Caves Called the Troll Church
The Troll Church [Norwegian: Trollkyrkja] is a fascinating series of three caves that a little river have carved out of a marble stratum in the the mountain. The mountain is, apart from that layer, formed by granite, and granite is what you mostly see on the surface of the ground up there; but as you enter the caves, you'll notice that the walls, the ceiling, and the floor of the caves are all marble, adding to the beauty of these caves. I have previously twice visited the Troll Church. First, I visited it alone on October 19th 2019; and since I found it quite fascinating, one week later, I even took my wife there for a visit [i.e. on October 26th]. On both of these occasions I wrote the tour description in Norwegian, but for the photos, and for the GPS tracking of these trips, you may follow these links: Til Trollkyrkja, Trolltindan, Stordalstinden og Blåfjellet and Til Trollkyrkja i Fræna med min kone., respectively. After my two visits to these caves last autumn, I told my sister about the place, and she immediately responded that she wanted me to take her there some day. And so, as the summer holidays of 2020 arrived, and my sister came to the west coast of Norway to visit our mom; she reiterated her request to take her to the Troll Church, and so we settled a date, and then I also asked my older daughter to come along with us, as she was also at home on vacation. The mountain in which you find the Troll Church, is located about 1 1/2 hours drive from where we live, plus 35 minutes with a ferry, as you have to cross the fjord between Vestnes and Molde in order to get there [i.e. you drive about one hour to go from Ålesund to Vestnes, then you're 35 minutes aboard the ferry; and finally you drive another half an hour to get from Molde to Sylteeidet by Elnesvågen]. I know that may sound like a lot of confusing details, but have a look at the Peakbook map where even our GPS track is recorded, and you'll figure it all out.
![Image #2: After you've crossed the river Moaelva, a broad trail will take you through the coniferous forest in the lower parts of Trolldalen valley [i.e. The Troll's Valley].](https://images1.peakbook.org/images/14939/Solan_20200813_5f35a2f5af0fd.jpg?p=xtralarge)

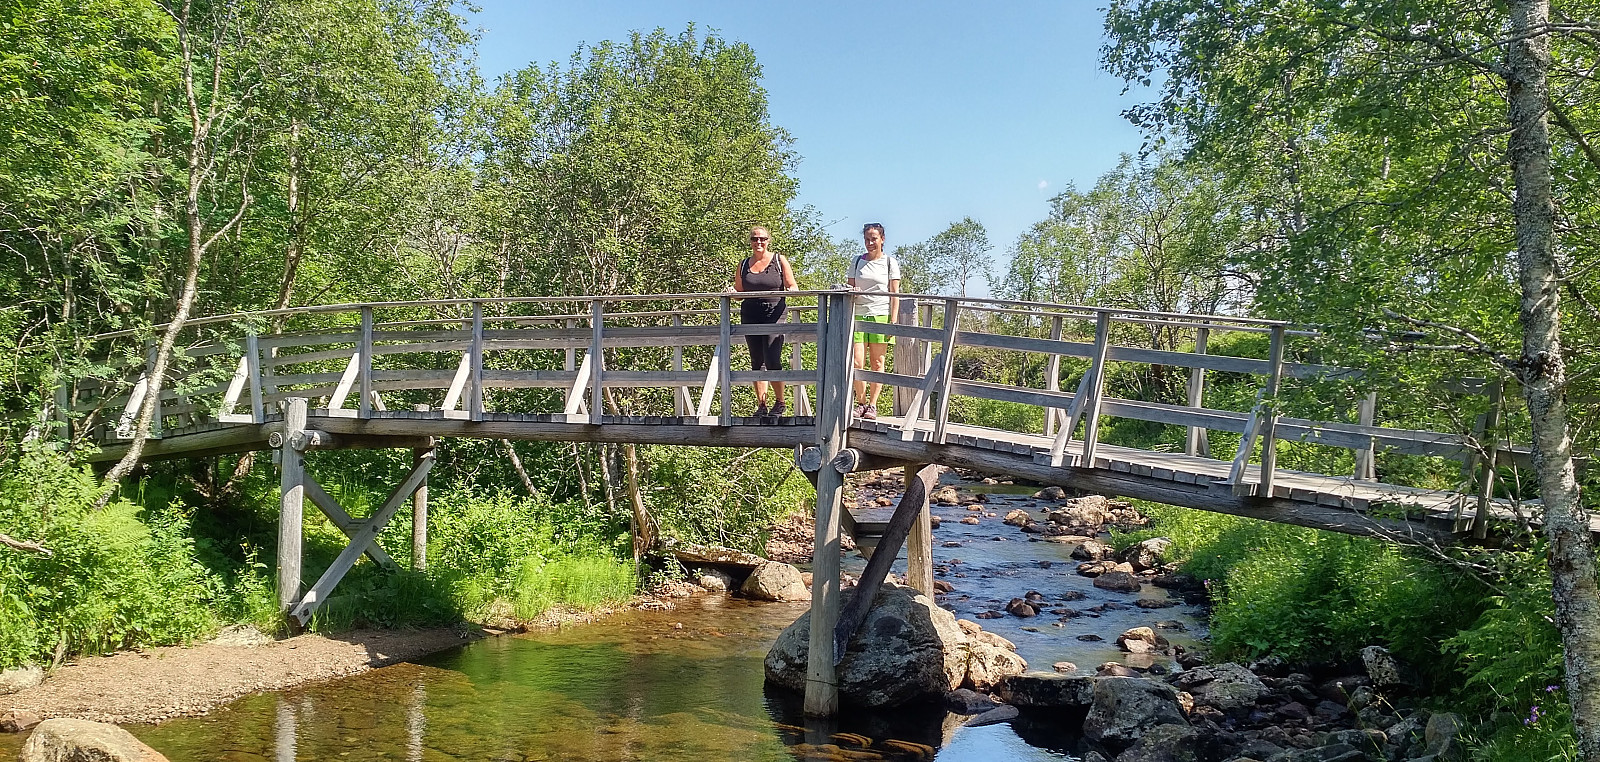
We parked our car at the parking lot at Sylteeidet, which is designated for people visiting the Troll Church caves; i.e. the parking lot is even named Trollkyrkja parkeringsplass [i.e. "The Troll Church Parking Lot] here on Peakbook. The first 400 meters of the hike goes along a gravel road that crosses the farmland in the valley. You next come to a river called Moaelva, which you may cross using a convenient bridge that have been built across it (Image #1); unless of course you prefer either to wade across the river, or to jump from stone to stone in order to get across it. After the river with the bridge, the trail goes through a rather dense coniferous forest in the lower part of the mountain side (Image #2), before it takes you into a more open forest with broadleaved trees, mostly birch trees (Image #3); and after that forest you get into a rather open mountain landscape. The trail mainly follows a little river called Trolldalselva [i.e. The Troll Valley River], which is the very same river that have carved the caves of the Troll Church out of the marble layer of the mountain. The river is indeed rather small where it comes out of the caves, but it does grow larger as it tumbles down the valley and receives a number of contributories under its way.
![Image #4: The trail up to the Troll's Valley is running parallel to the Troll Valley River [Norwegian: Trolldalselva]. Here I am with my daughter by one of the many waterfalls along the extent of this river. The river is the very same river that is running through the caves of the Troll Church, though it gains size down the valley as it receives water from a vast number of contributing creeks and small rivers.](https://images1.peakbook.org/images/14939/Solan_20200813_5f35a90dcd959.jpg?p=xtralarge)
Visiting the Marble Caves That Have Been Named the "Troll Church"
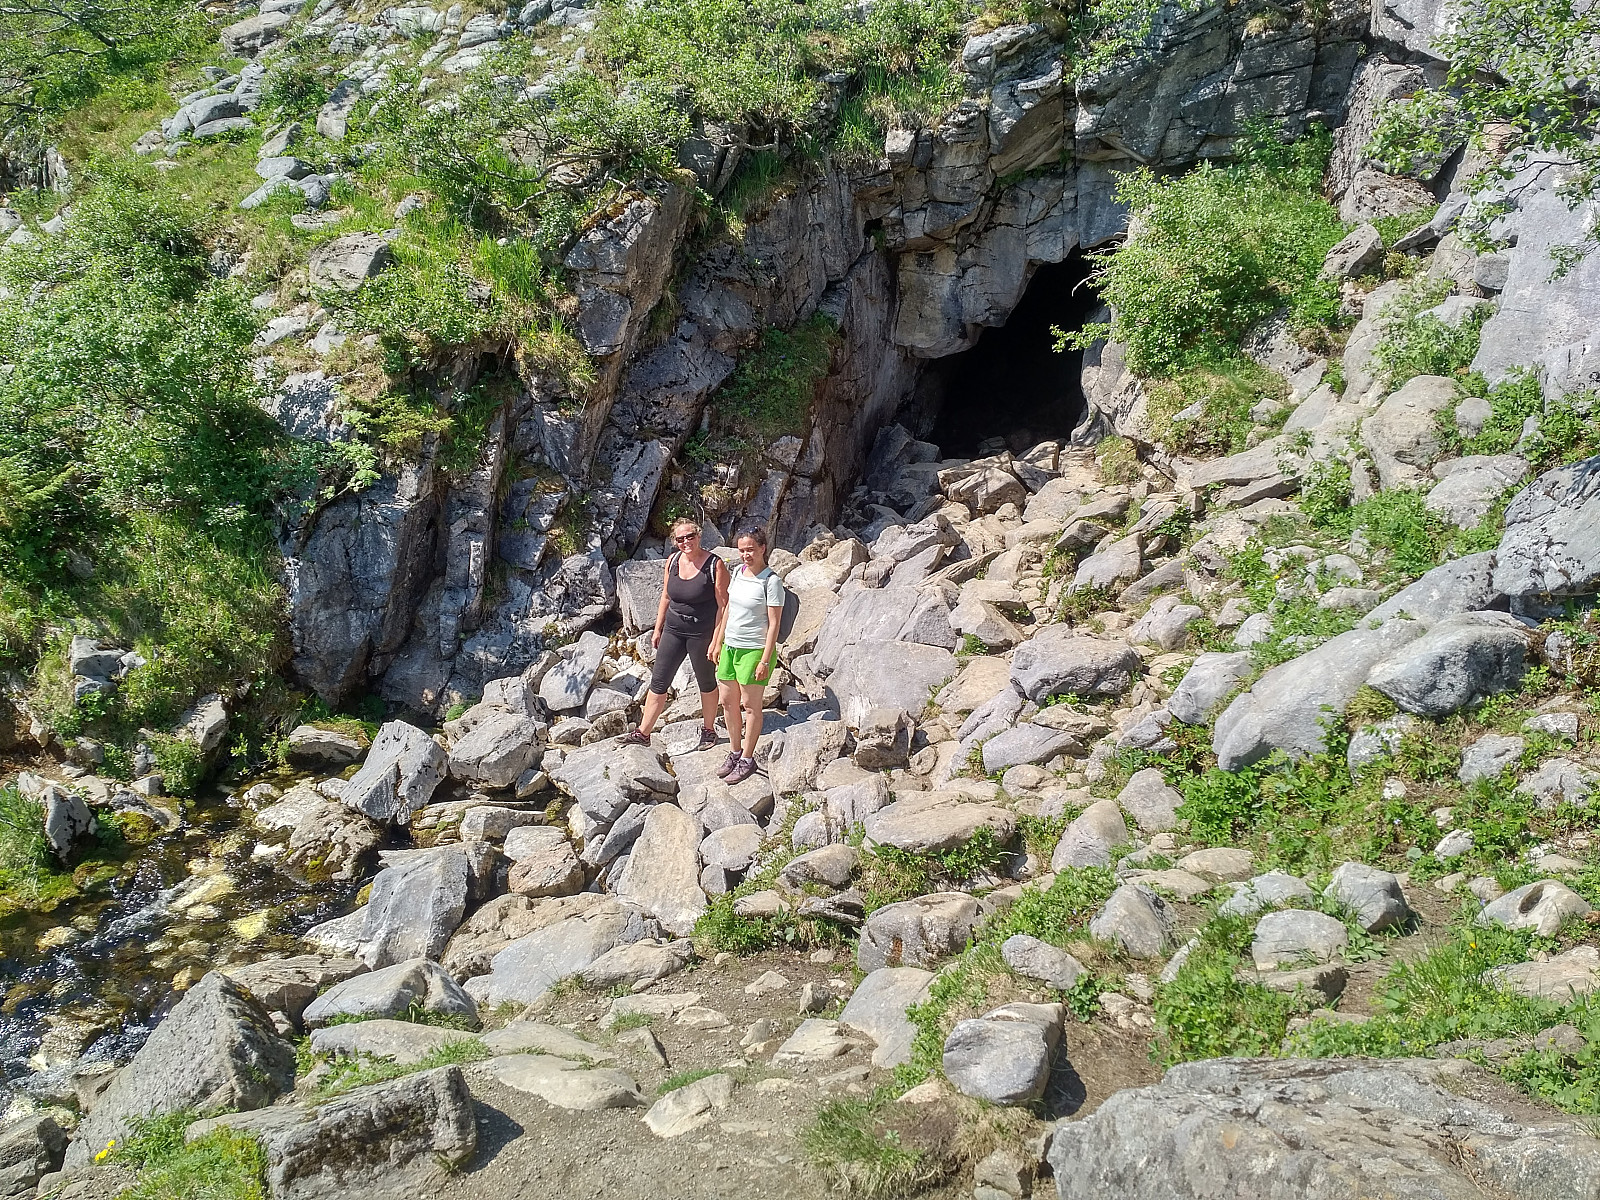
You reach the "Troll Church" at 484 m.a.m.s.l. The hike to get up there takes between one and two hours, depending on how fit you are for hiking, and who you're hiking along with etc. When I went there with my sister and my daughter on this occasion, we used 1 hour and 15 minutes from the parking lot up to the caves. It was a rather warm day, with the sun shining; and on such days it actually feels good to enter into the caves, where it's substantially cooler. On colder days, you should make sure to have a good jacket with you, as it may otherwise feel a bit too cold inside the caves.
We entered the first cave, and started walking inwards. Once you're about 5 meters past the entrance of the cave, you have to climb over a pile of stones; but after you've past this stony slope, the walk further in is pretty much straight forward, though you have to take care and avoid stepping into the river of the caves, if you want your feet to remain dry. A quite fascinating thing that you'll notice if you have a closer look at the stones on the floor of the cave, is that they are all of marble; as is the floor of the cave itself, as well as the walls and the roof.
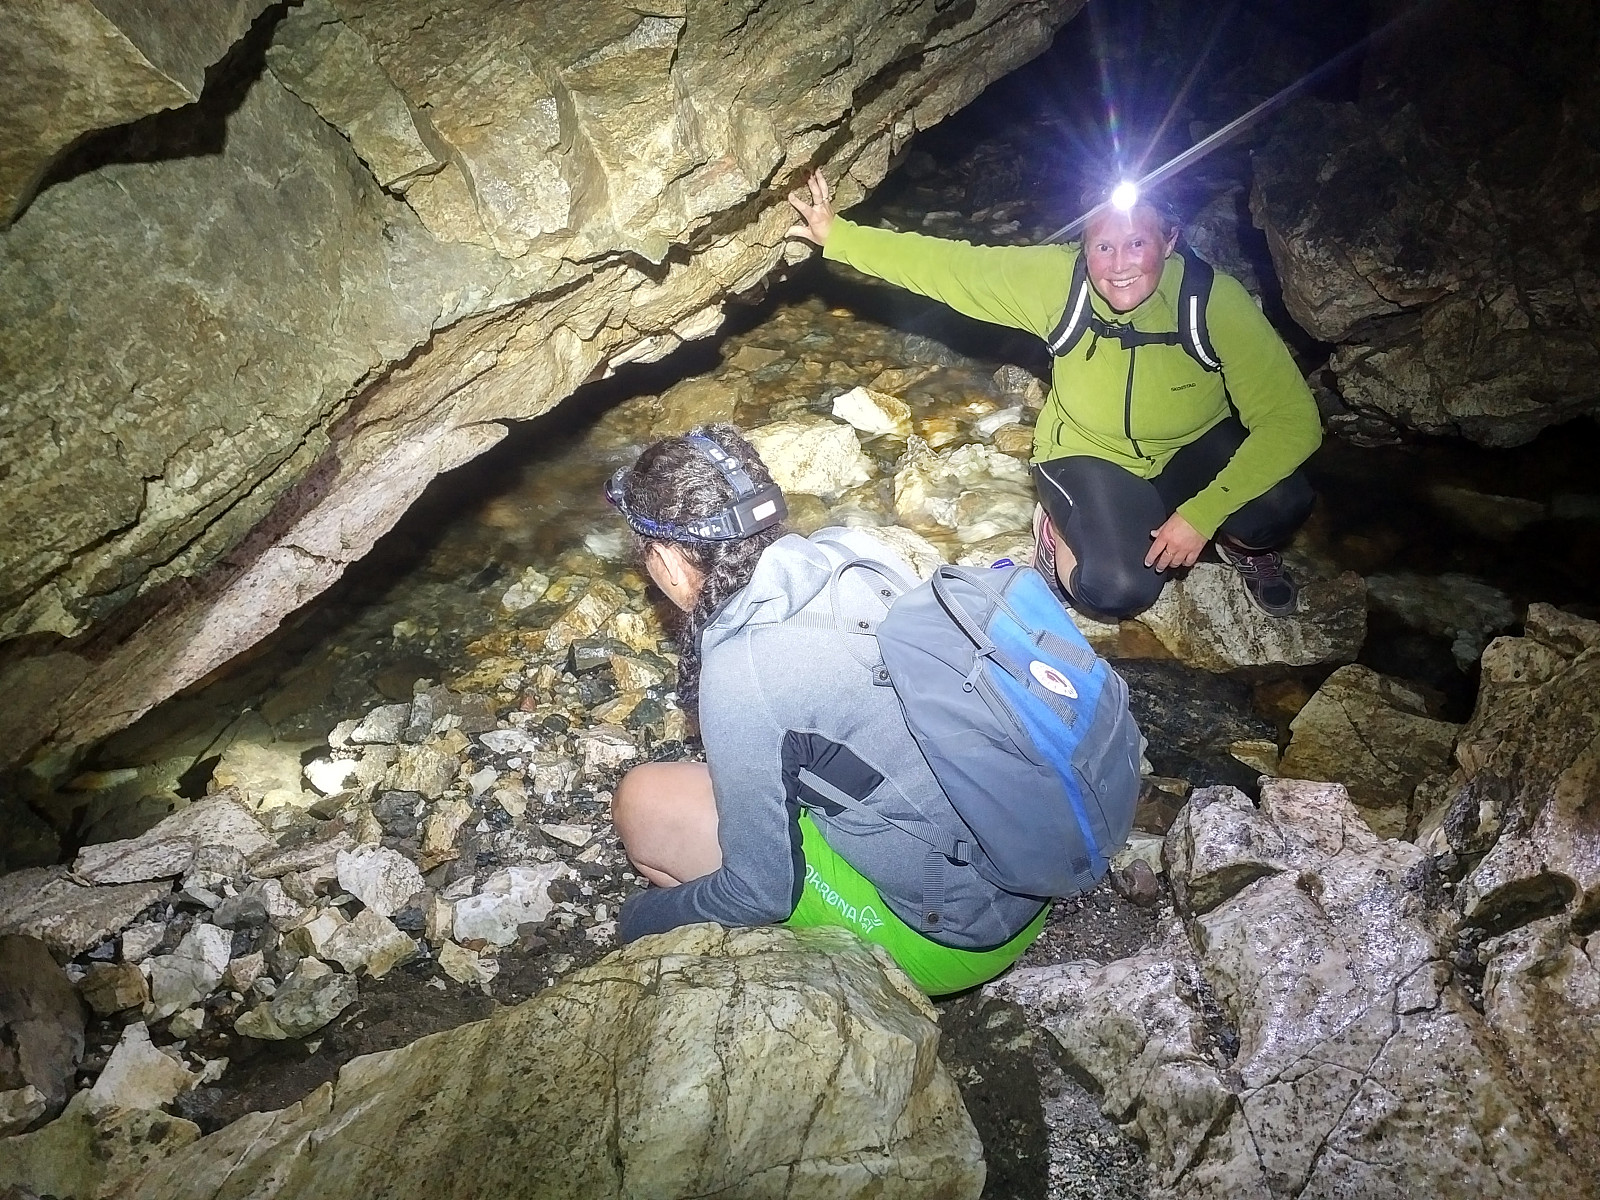
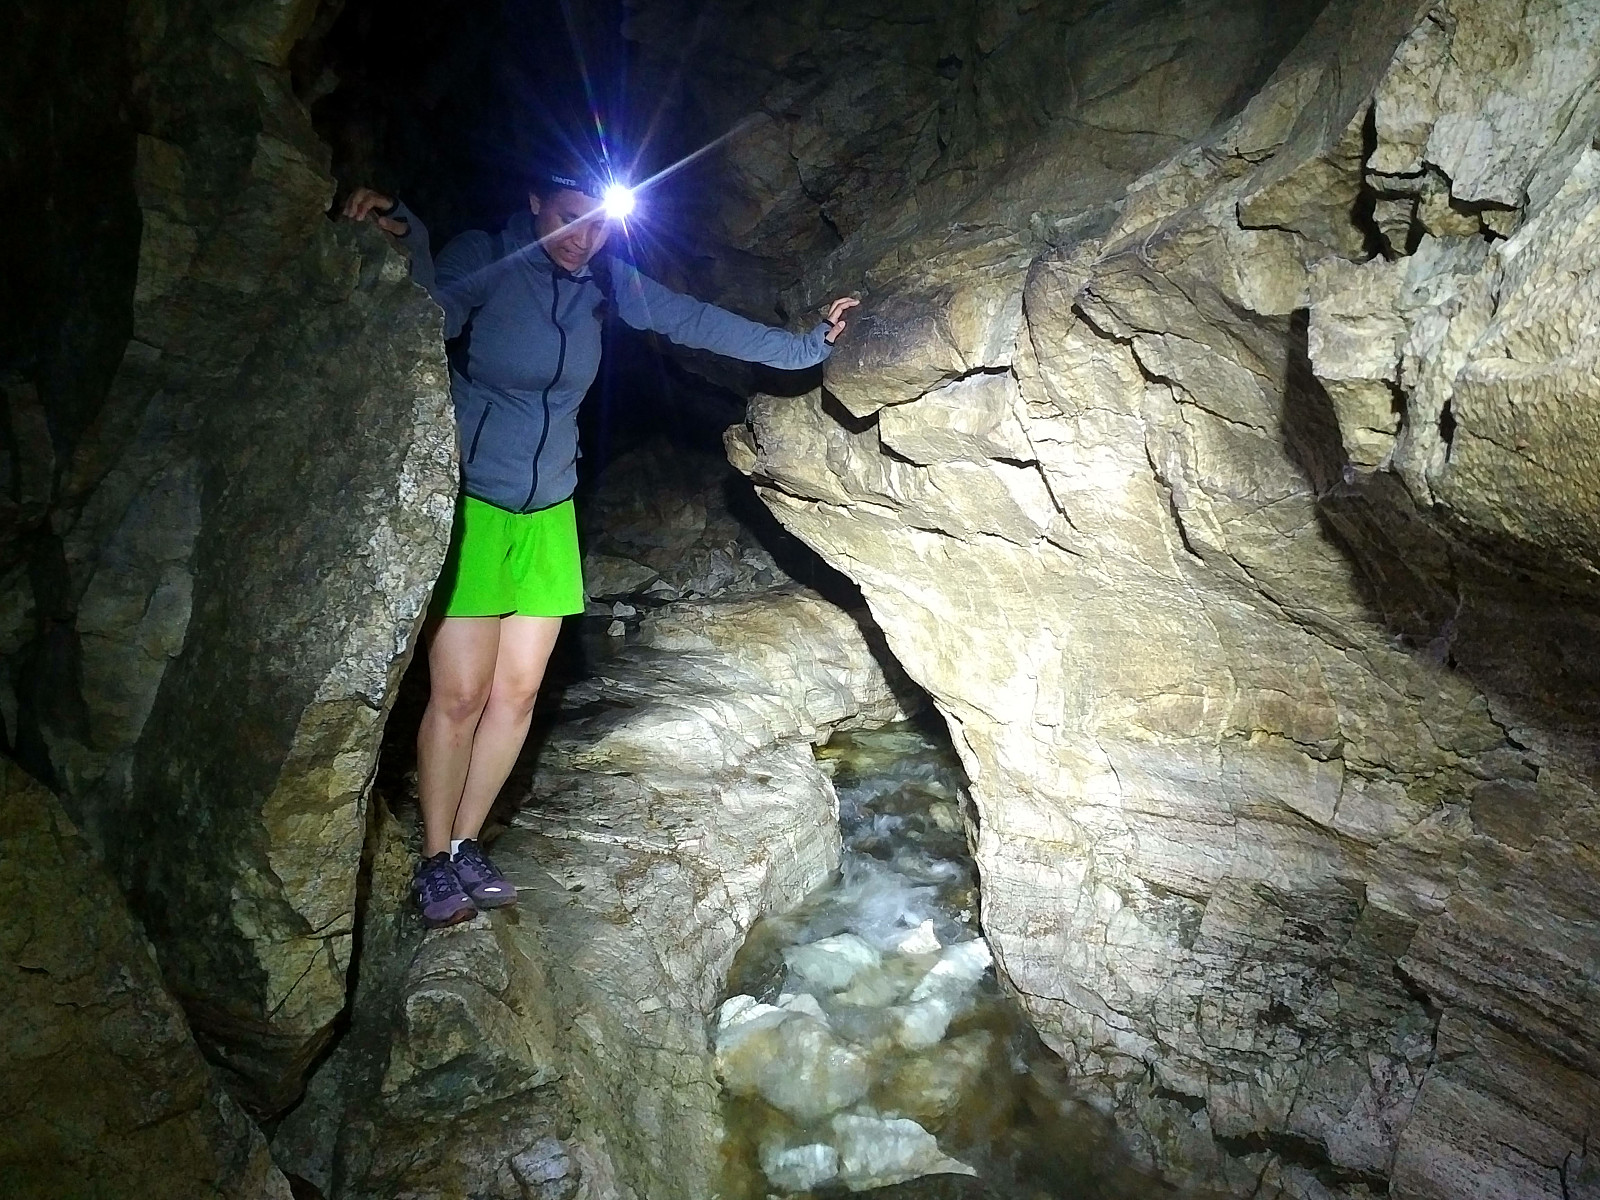
In order to fully enjoy this cave visit, you should bring with you a good headlamp. A hand-held battery torch may also do the work, but a headlamp is better, as the cave floor may be slippery at places, and a torch is easily dropped into the water if you slip and are about to fall. With a lamp on the front of your head, you'll have both hands free, which will even help you to avoid slipping and falling as you visit the caves.
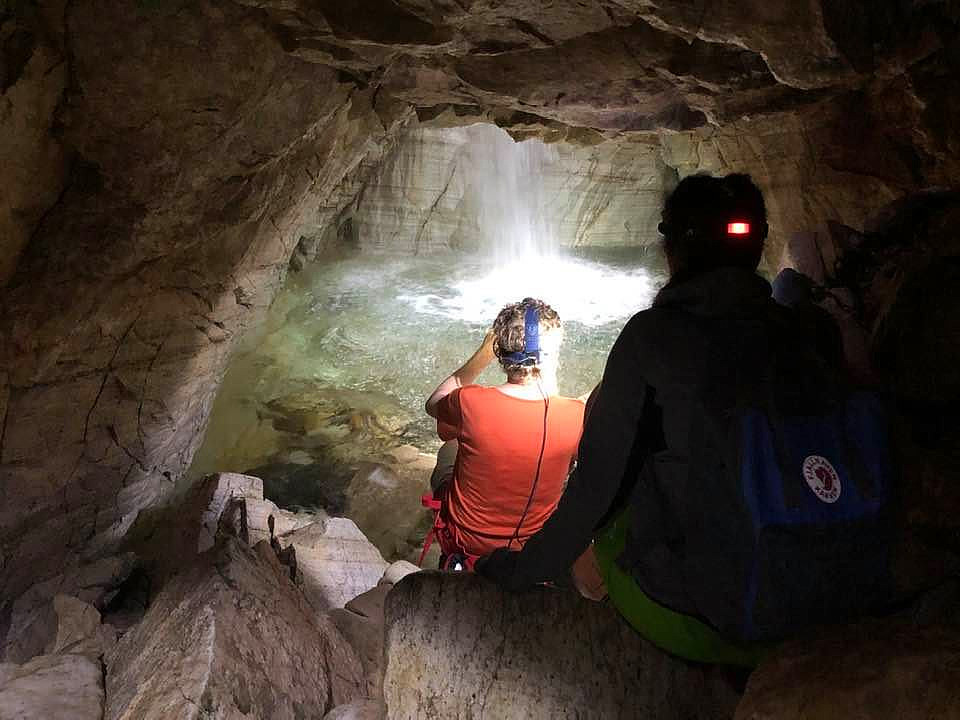
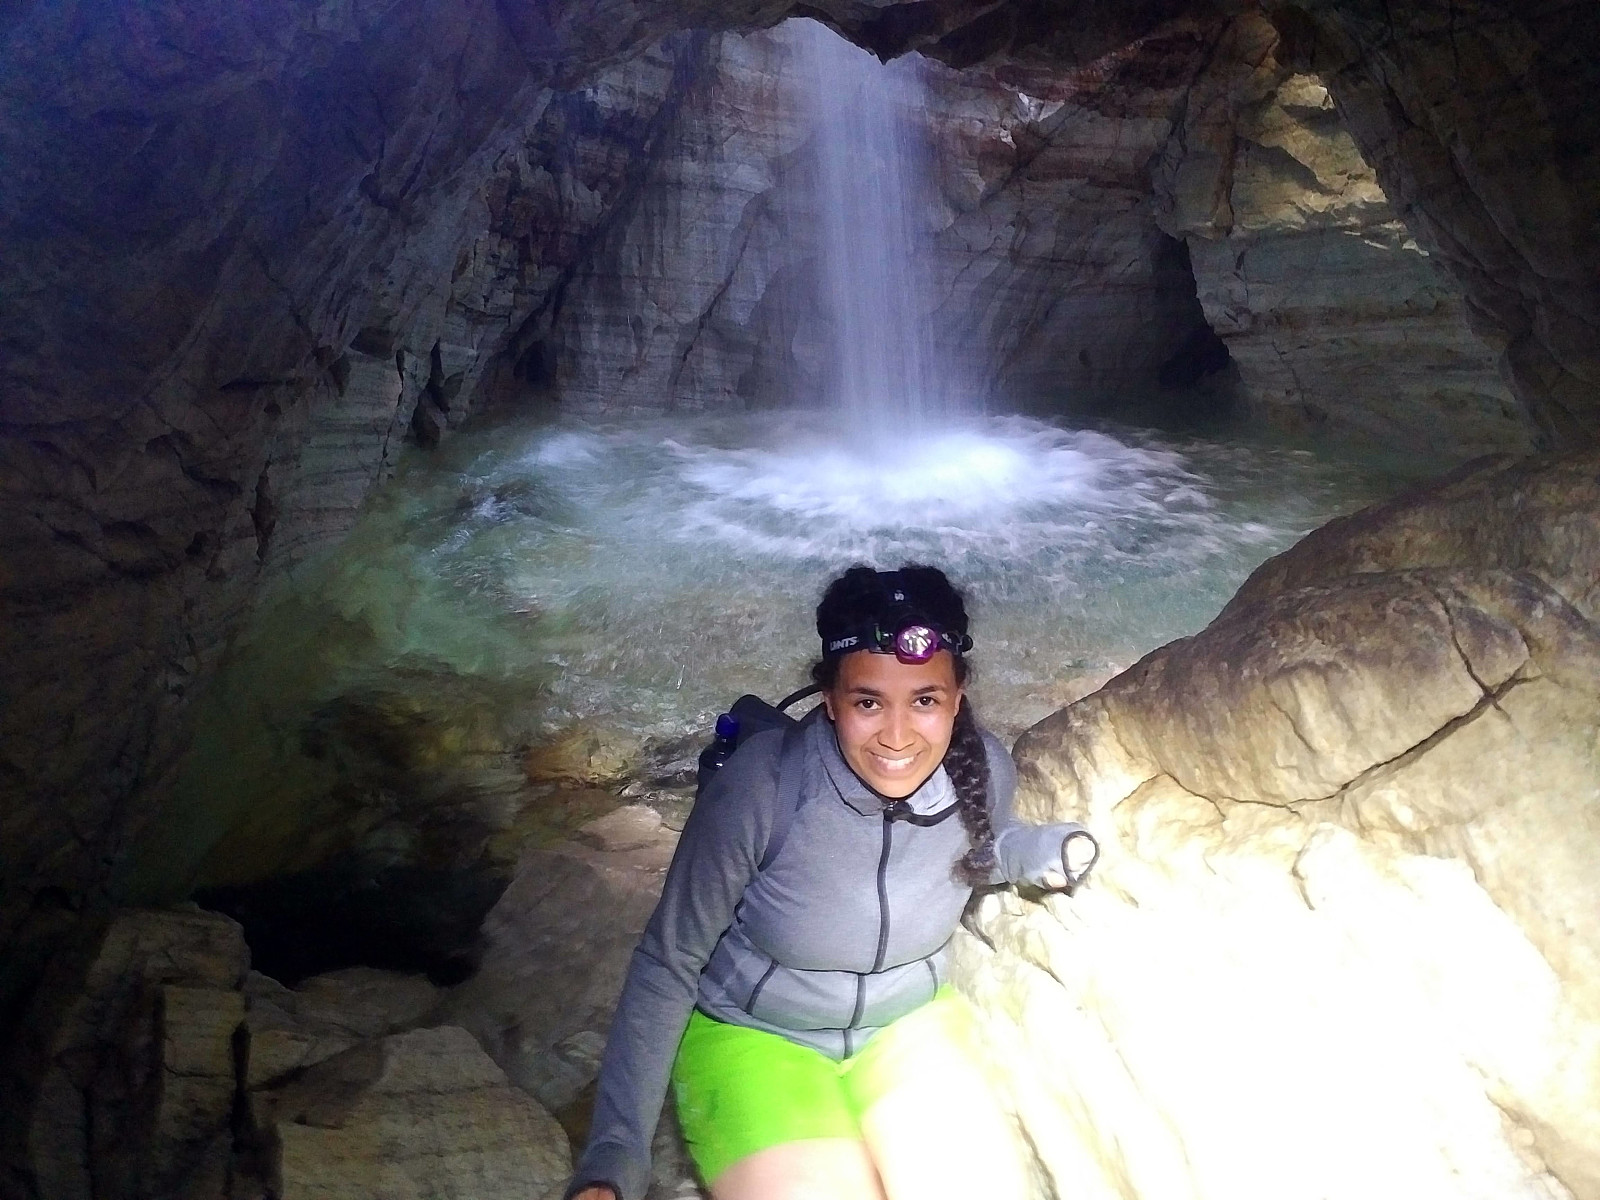
About 10 or 15 meters into the first cave, it takes an about 90 degrees turn to the right; and then you walk eastwards for about 30 meters, before it makes a 180 degrees bend to the left, that brings you in a westward direction. At places you have to walk on a little shelf, or jump from stone to stone in order to avoid stepping into the creek or little river of the caves (Image #8); whereas at other places the water have been carving its way underneath the walls of the caves, so that the floor is now dry in the middle of the cave (Image #7). The cave finally makes a second 180 degrees bend, this one in the right direction, and then finally you reach a large inner chamber, called the lagoon; as it is not just a chamber, but also a hollowlike basin in which the floor always is covered by water (Video #1 and Images ## 9, 10 and 11). The chamber also have a waterfall about 14 meters high; and daylight is entering the chamber high up in the ceiling, through the very same opening through which even the water is coming in.
Video #1: The waterfall in the Lagoon, the innermost chamber of the first cave.
After visiting the lagoon, and shooting some nice pictures in there; we continued up to the second cave. Fortunately, the first cave have an alternative exit (Image # 12), that takes you out of the cave quite close to the entrance of the second cave; hence you don't have to go all the way back through the first cave in order to get out again. When you turn around at the lagoon, so that your back is facing the waterfall, you get a little side cave on your left hand, through which you climb in order to get out. It is a bit steep, this side cave, and a bit tricky to climb through; but if those used to climbing help those not so used to it by pushing them up, or by kneeling down at the steepest point and letting them climb over your back and shoulders, then your entire company is likely to be able to get out of the cave through that exit.
Now, once you're out of the first cave, the second one is close by; you just have to climb a few meters in order to get up to the entrance. Climbing into this cave would've been a little bit tricky; but a ladder by witch you may climb down to the floor of the entrance have been put there by the local tour association (Image #13), in order to facilitate the climb into the cave. Once you've climbed down the ladder, it's just a few meters into the heart of the cave, which is actually a chamber a bit similar to the "Lagoon" of the first cave; in as much as it also has a waterfall of about 14 meters, as well as a hole high up through which daylight enters inn. In contrast to the first cave, however, this cave have two separate openings through which water and daylight enters inn.
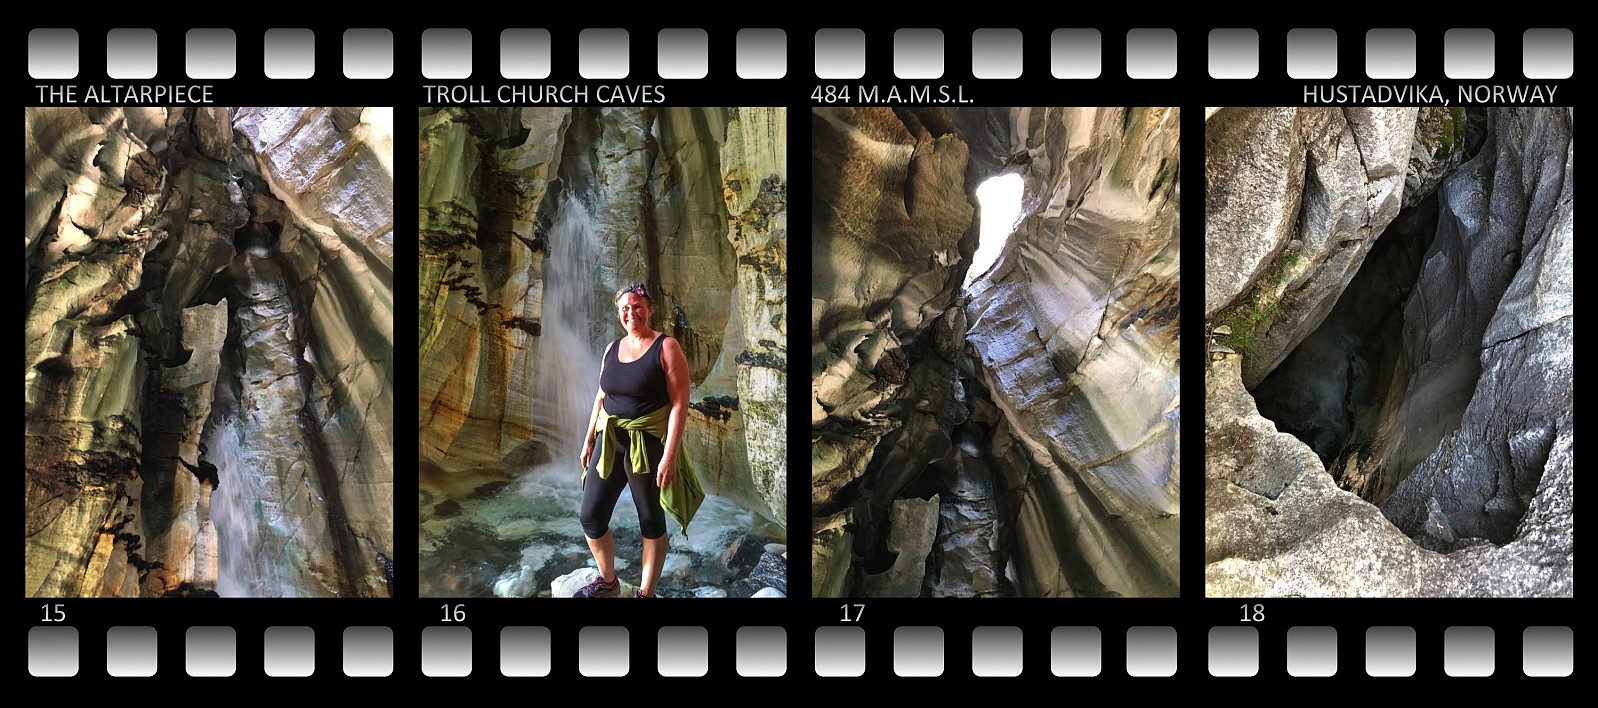
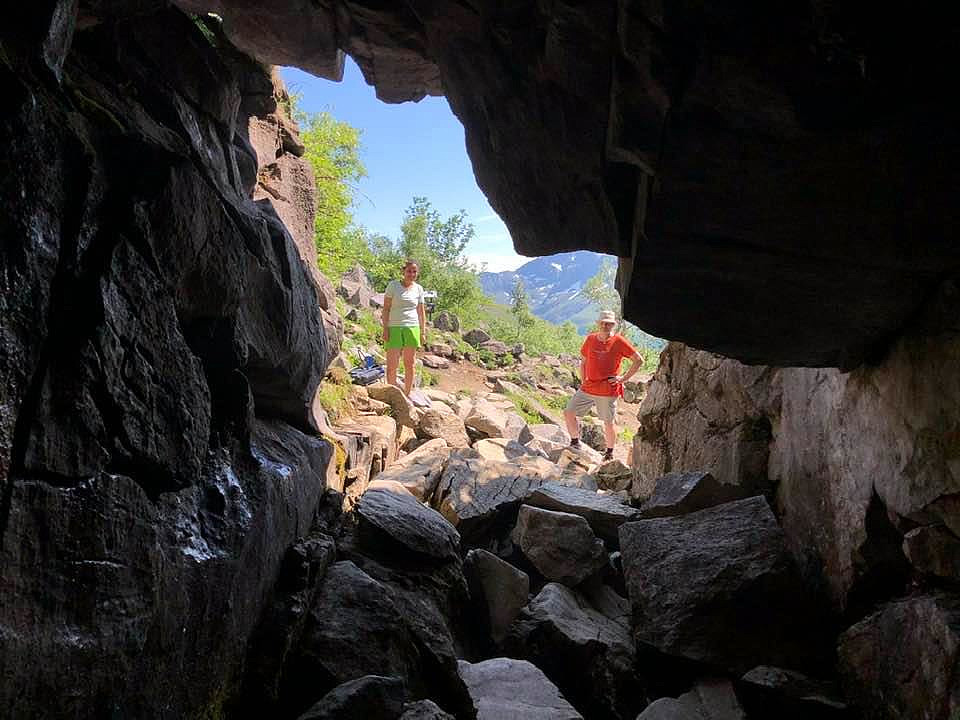
The second cave is amazing. At daytime, and especially in bright weather, daylight enters the cave high up in the ceiling; giving rise to a fascinating color play as the sun rays reaches the white and reddish marble, as well as the green algae growing on the walls of the cave (Images ## 14-16 and Video #2). This color play in the sunshine have prompted people to name the wall of the cave "The Altarpiece", adding another element to the "Troll Church" allegory. There's no daylight entering into the cave along with the water of the river. I believe there is an underground connection between this cave and the one above; i.e. the third or uppermost cave, because I haven't seen any creek or river between these two caves when walking on the roof above them; you only see the hole through which the daylight comes in (Image #18).
Video #2: The waterfall at the Altarpiece, the colorful wall of the second cave.
After visiting the second cave, we continued up to the plateau above and behind the caves (Image #19). We were intending to visit even the third cave, which I myself have visited on two previous occasions, and the entrance to that cave is simply a hole that you'll find in the ground upon the plateau. On this day the entrance to the third cave was still blocked by snow, however, and unfortunately we hadn't taken a shovel with us; which was a pity, as neither my sister, nor my daughter had ever seen that cave.
Hiking the Mountains Behind the "Troll Church"
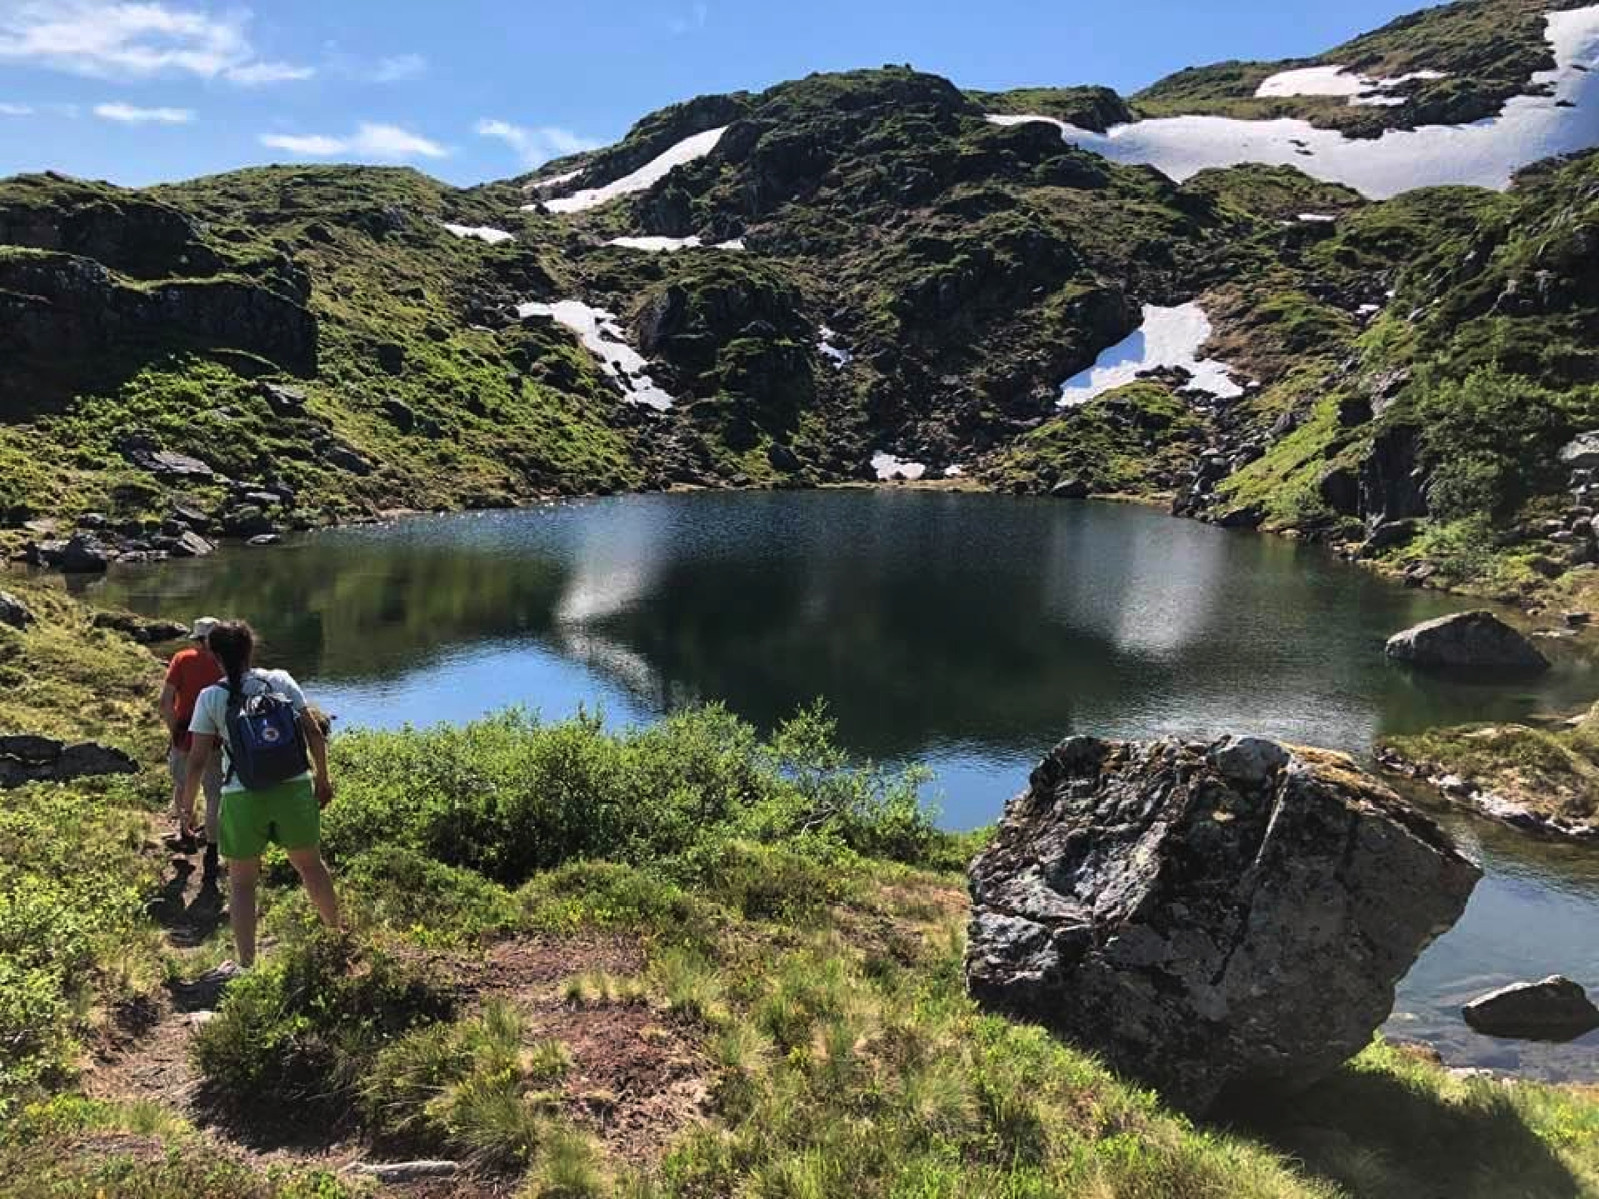
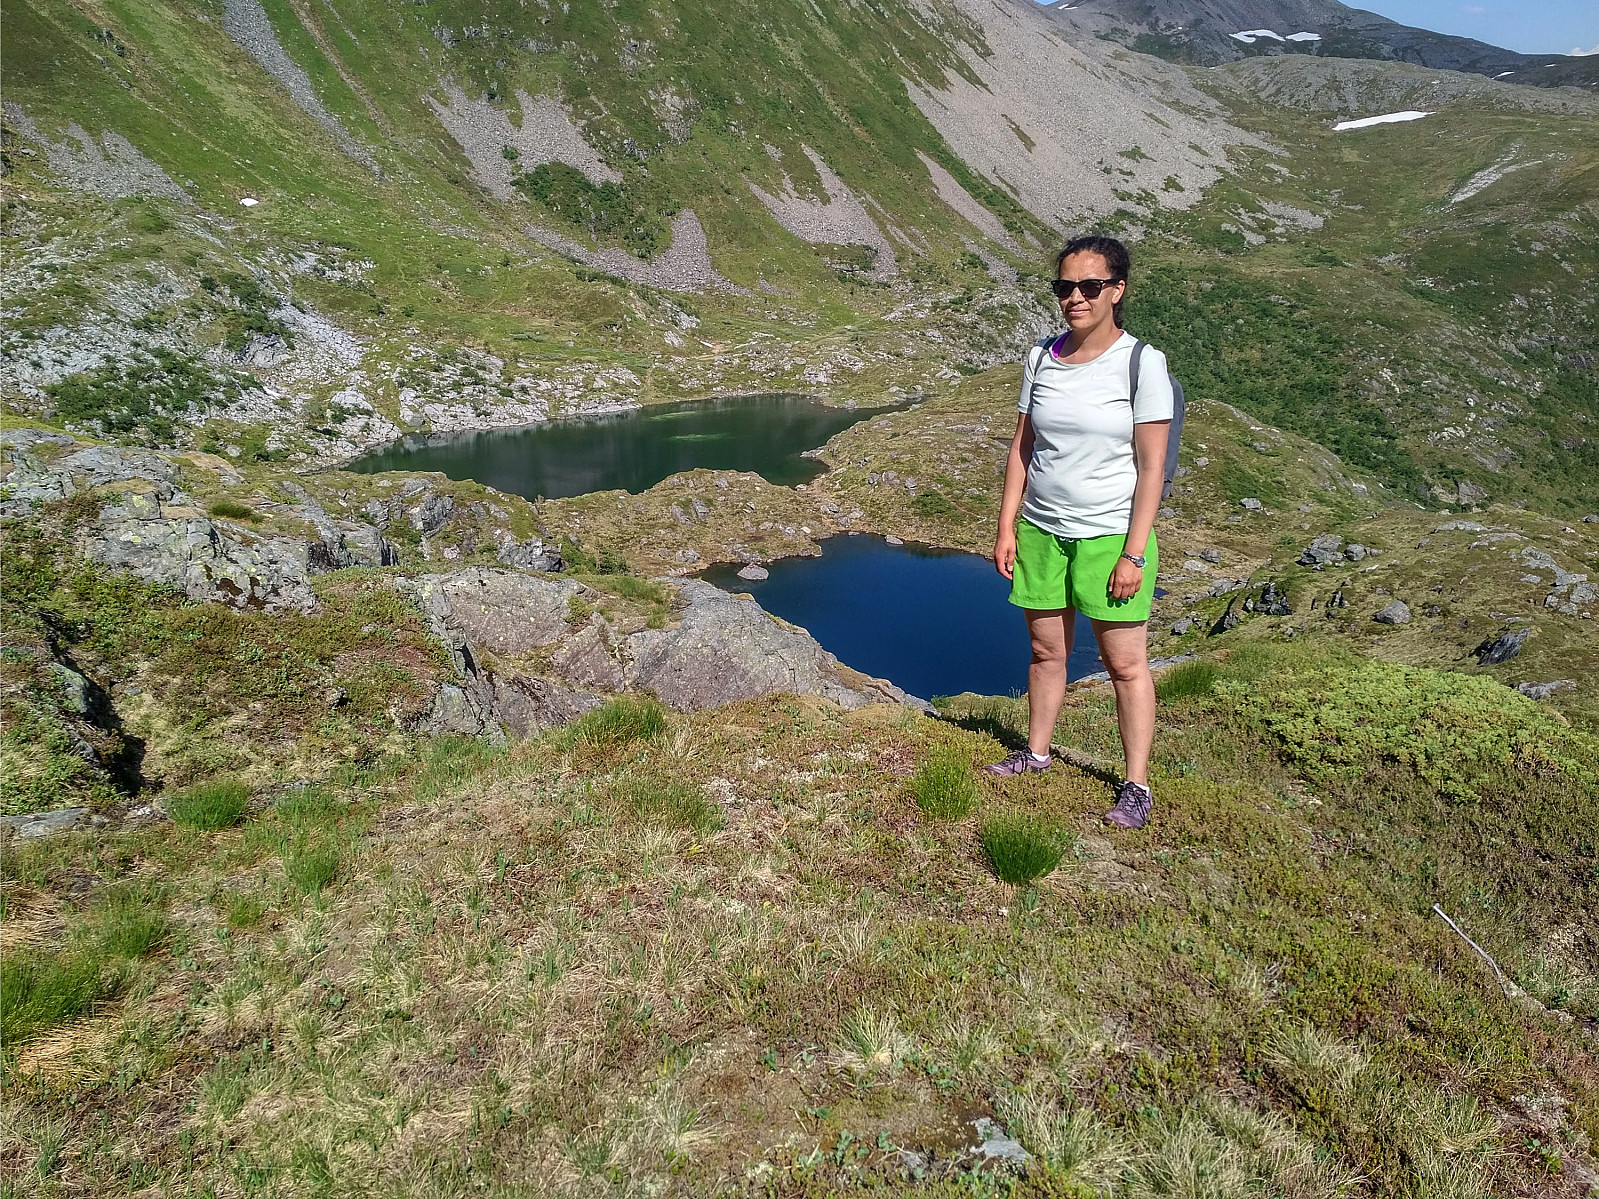
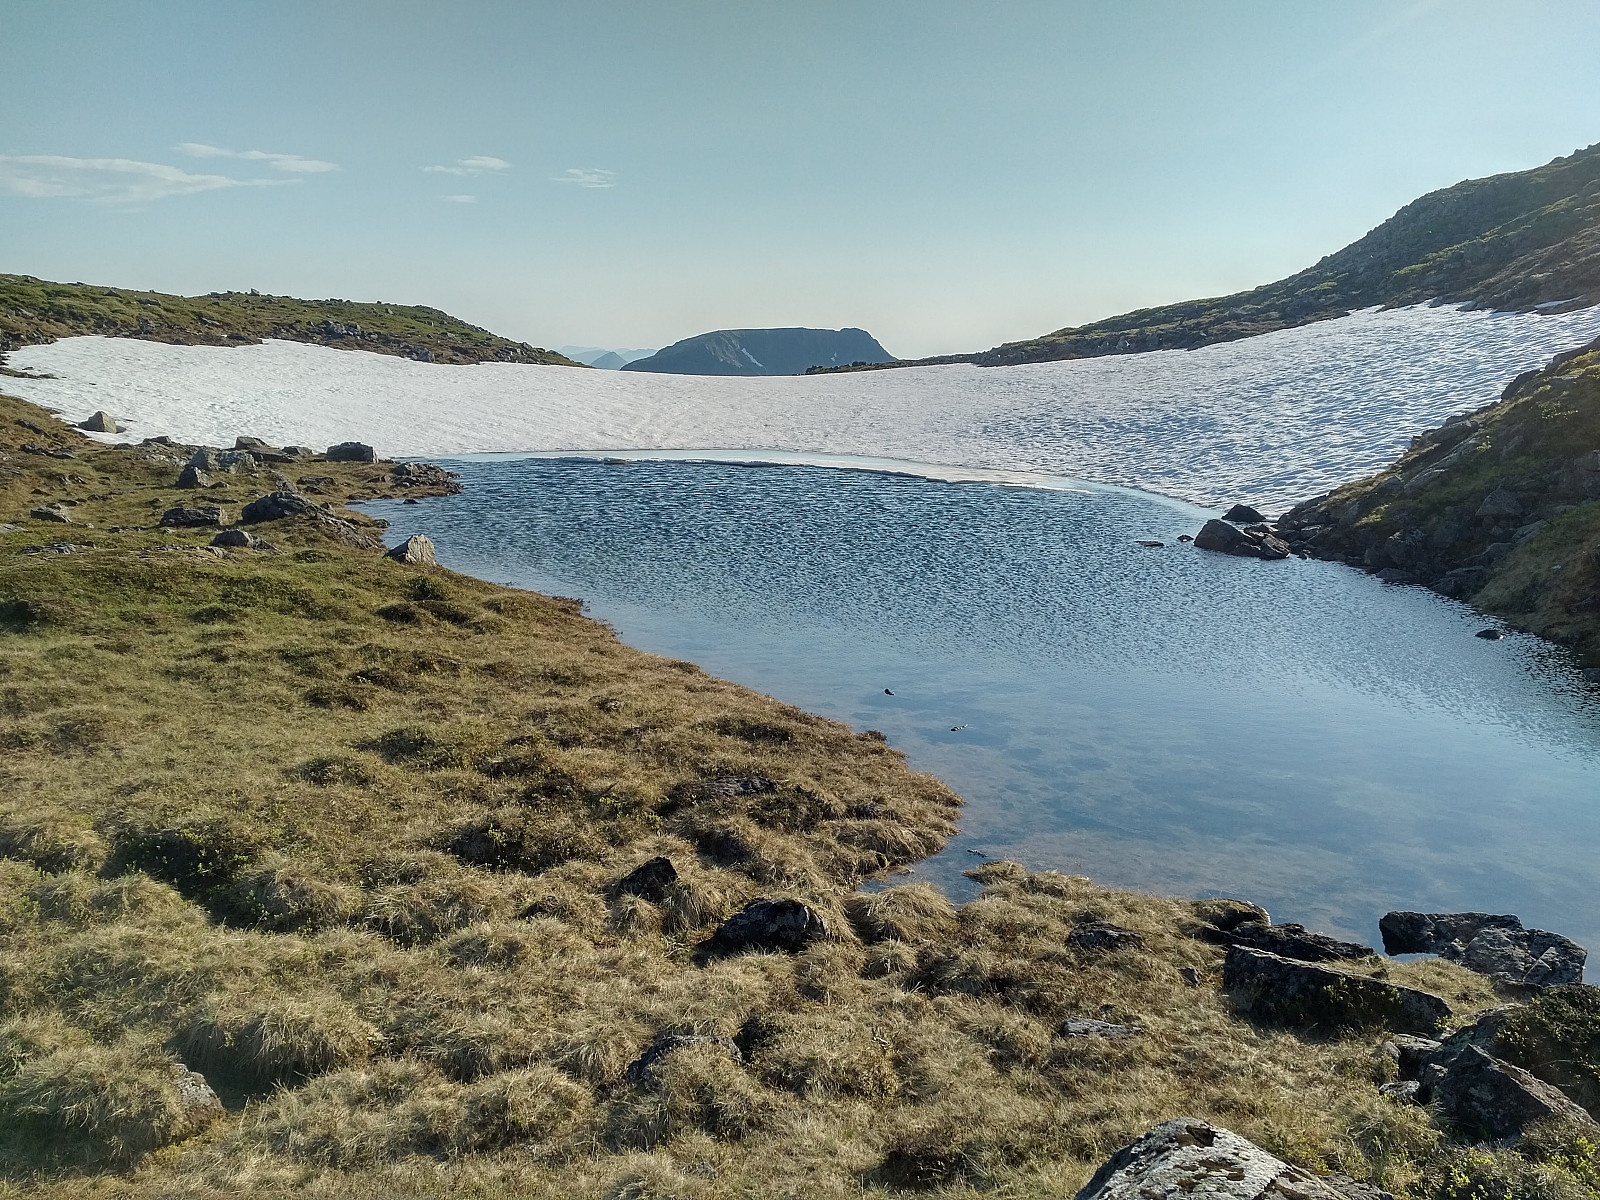
On the plateau above the cave, there is, in addition to the hole leading down to the third cave, also two small lakes, one of them a little bit larger than the other one (image #23). A fascinating feature about these lakes is that the larger one doesn't have a visible overground outlet; the water from it is finding it's way through fissures in the rock beneath, and then eventually forms the river that is running through the caves. At places along the bottom of the lake, you may actually even see the white stones of the marble stratum; whereas the rock and the stones lining the shores of the lake are mainly granite.
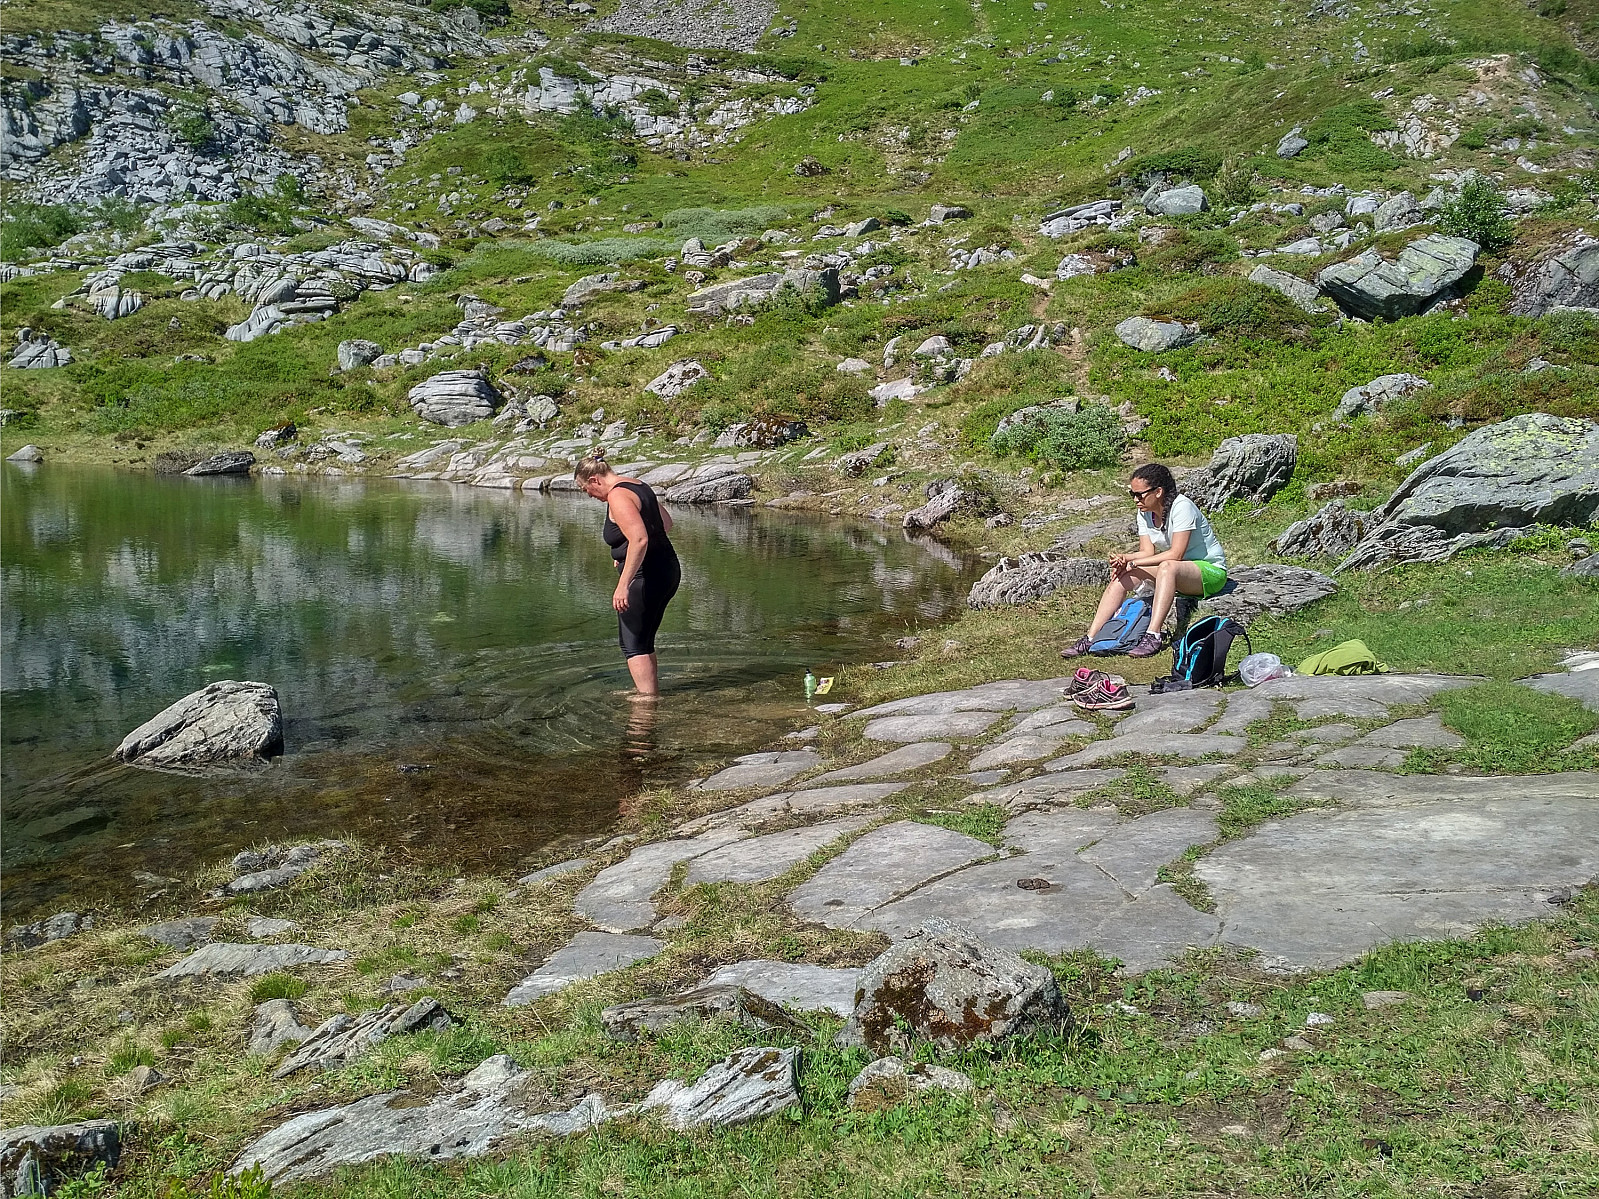
These lakes are beautiful even on a cold day, but on a warm and sunny day as this one, this is the perfect spot to sit down, enjoy the moment, and have your lunch. Moreover, if you thought of bringing a swim suit, you could even have a swim in one of the lakes; as that would be a perfect way to cool down after a mountain hike. Anyway, we sat down and had some food, and then we embarked upon hiking the mountains behind these lakes.
![Image #21: Panorama of the larger of the two lakes on the plateau above the caves. This lake has no visible outlet upon the ground; the water emerging from it is running in fissures in the mountain, and is contributing to the formation of the river that is running through the caves of the "Troll's Church". In the background are seen Trolltindan [i.e. The "Troll Peaks"] and Mount Stordalstinden [i.e. The "Great Valley Peak"]. If weather is nice when you go hiking in these mountains, this is a fabulous spot for your lunch break.](https://images1.peakbook.org/images/14939/Solan_20200816_5f38f7f396fd3.jpg?p=xtralarge)
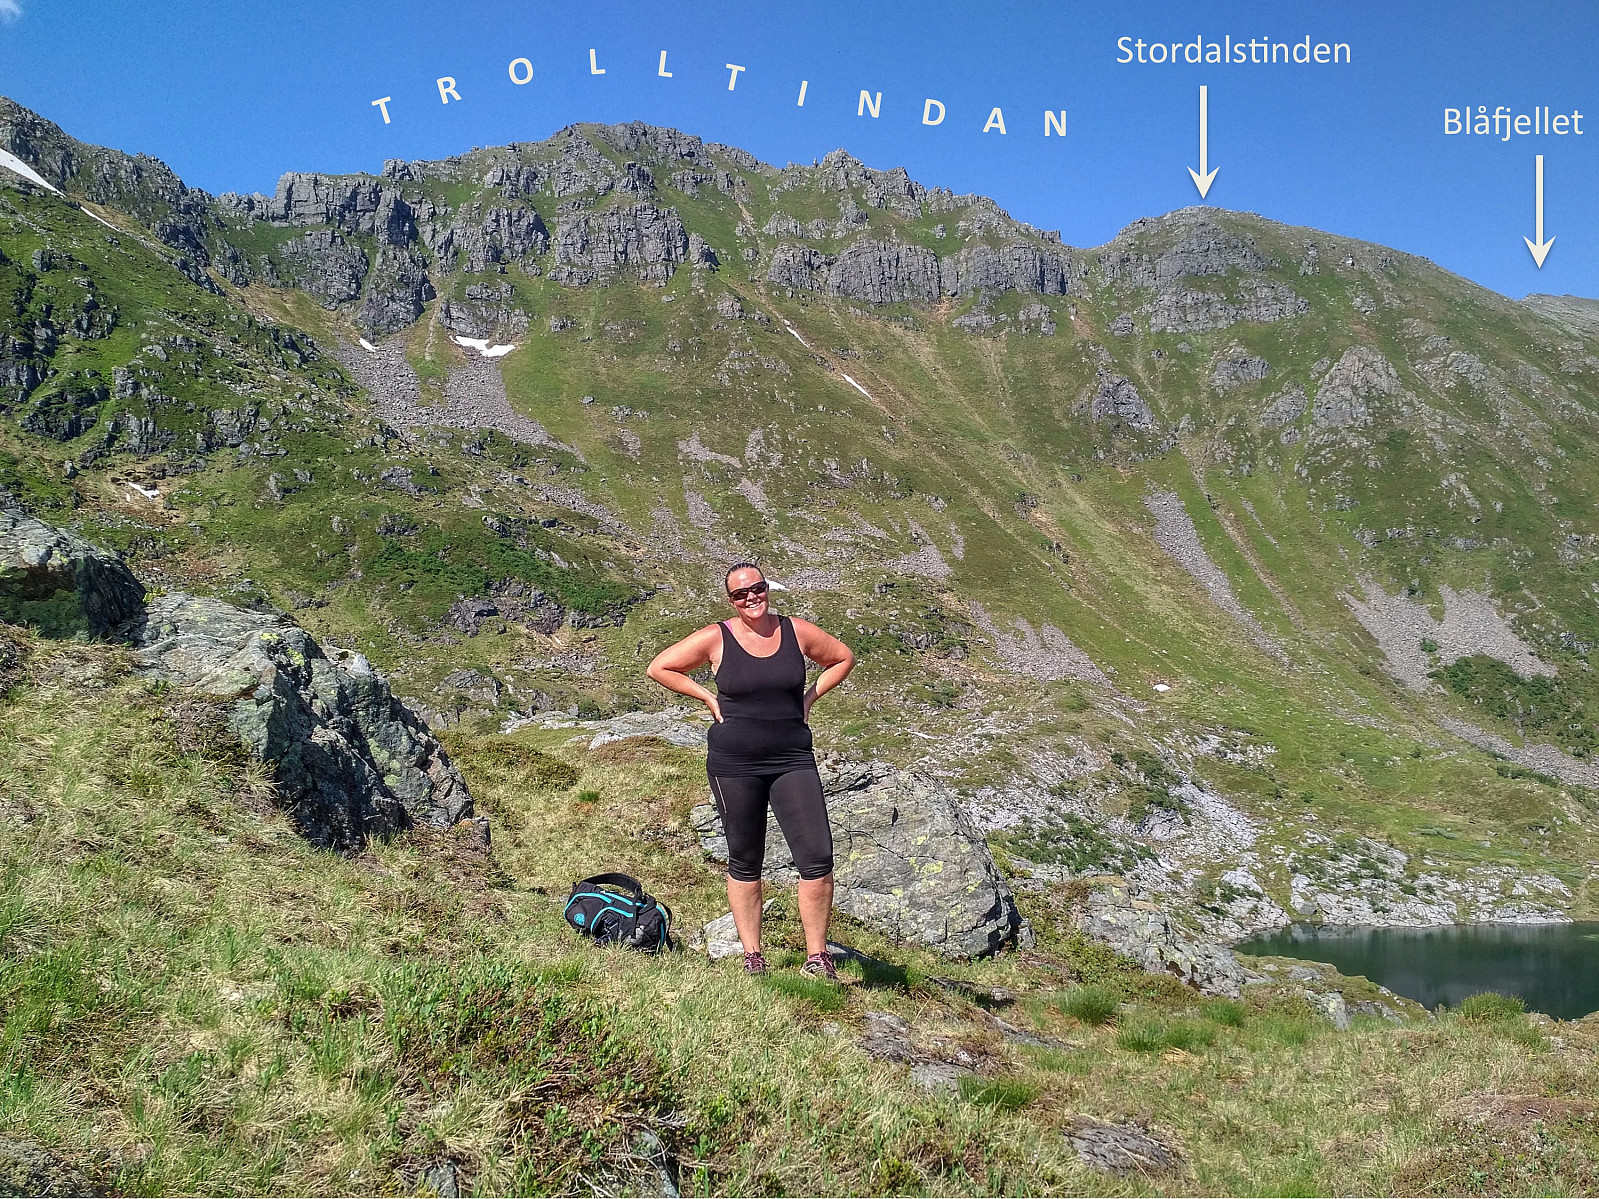
The mountains above and behind the caves and the two small lakes, are usually referred to as Sandnestindan on maps and in tour descriptions, but the westernmost of these peaks are usually called Trolltindan [i.e. The Troll Peaks] by the locals; and the eastern one is called Stordalstinden [i.e. The Great Valley Peak] (Image #24). We were planning to climb The Troll Peaks first, and then continue on to The Great Valley Peak afterwards; and if you so do there's two ways to get started from where the two lakes are: You either start following a tiny trail to the left of the lesser of the two lakes, or you start out along a trail in between the two lakes, and then you just follow the ridge as it curves up towards The Troll Peaks. The trail improves and become more clearly visible as soon as the two initial trails merge, but it does disappear wherever it crosses rocky and stony places without vegetation. The trail is marked with small red dots on the stones every here and there, but it is, unfortunately, not very well marked. The ridge and the trail at first goes in a westward direction, but it then gradually curves north until it reaches the jagged range that is known as The Troll Peaks.
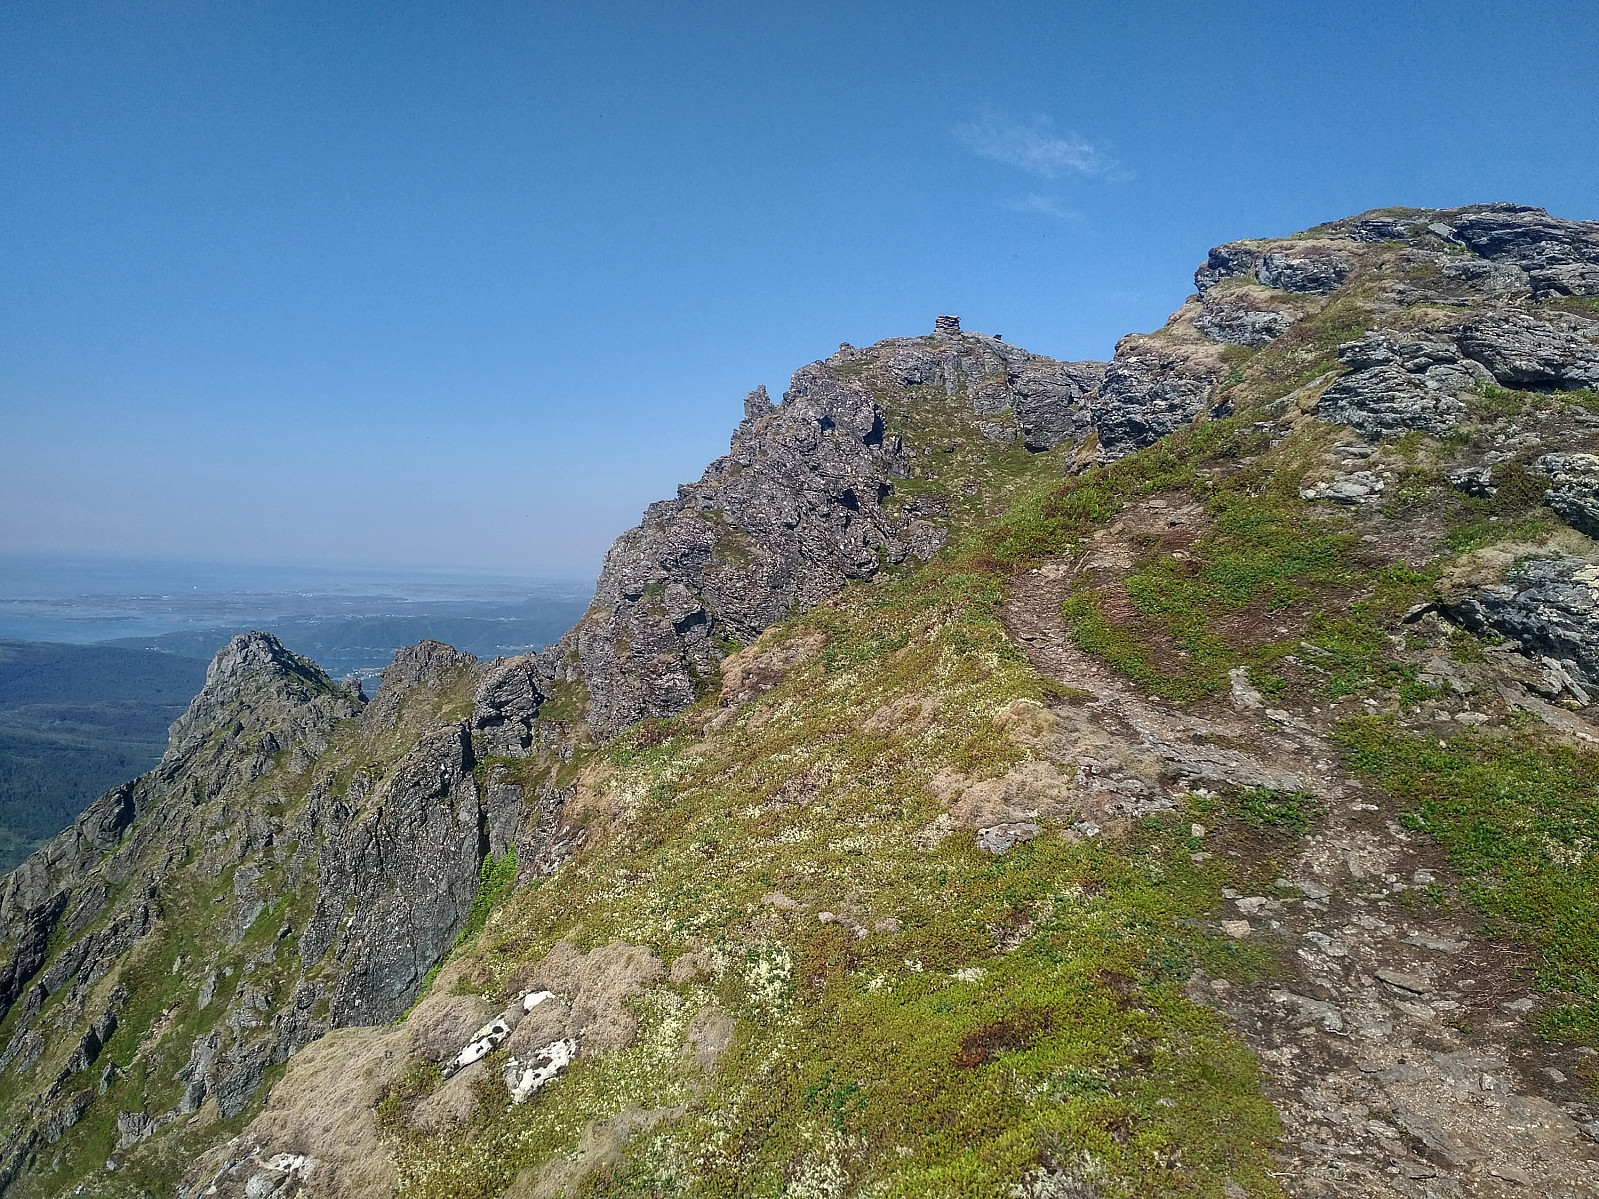
As soon as you reach the Troll Peaks (Image #26), the trail is no longer marked by red dots, but at this point it becomes more clearly visible (Image #29), and it is actually very easy to follow it along the Troll Peaks [Trolltindan] and over to the Great Valley Peak [Stordalstinden]. The part of the mountain that has been named Trolltindan is actually quite jagged; hence there are many Troll Peaks, though only three of them have a separate green map pin here on PeakBook. They have been termed Trolltindan Vest [i.e. The Troll Peaks West], Trolltindan [i.e. The Troll Peaks], and Trolltindan Øst [i.e. The Troll Peaks East]; but these peaks could just as well have been termed Troll Peak 1, 2 and 3 etc., and then there are at least five of them.
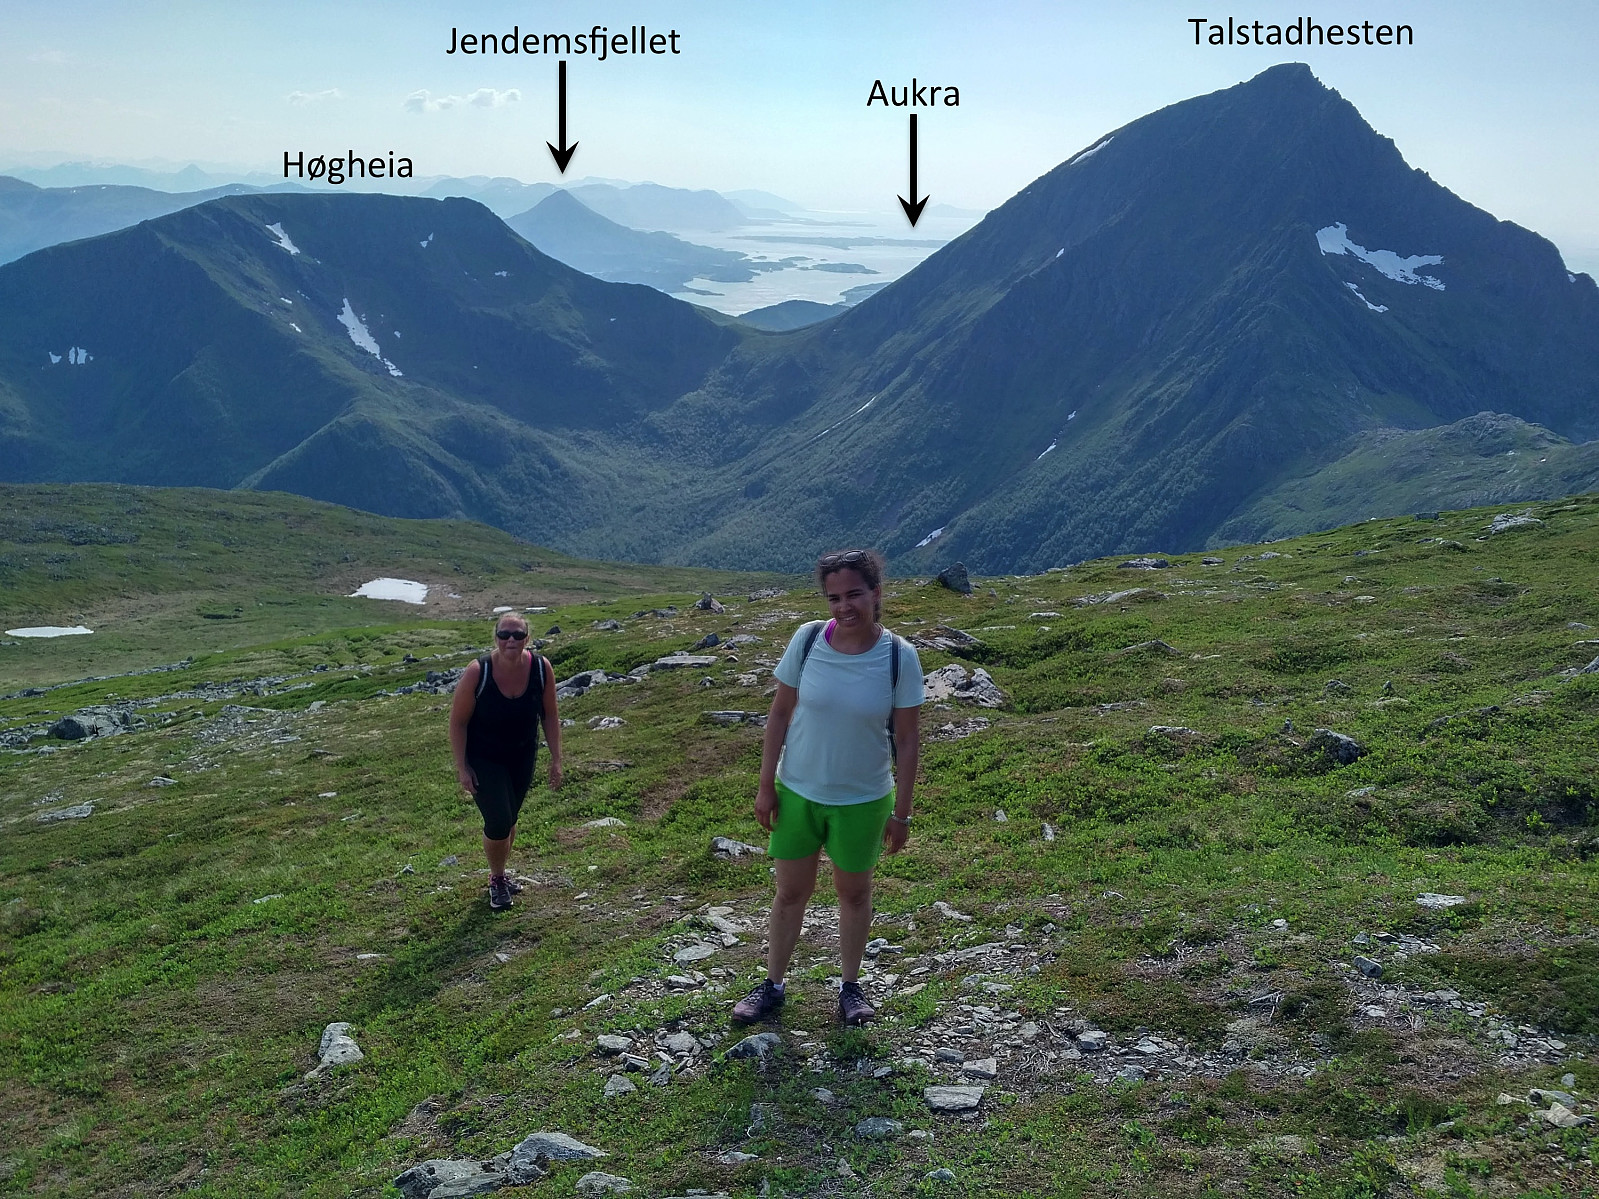
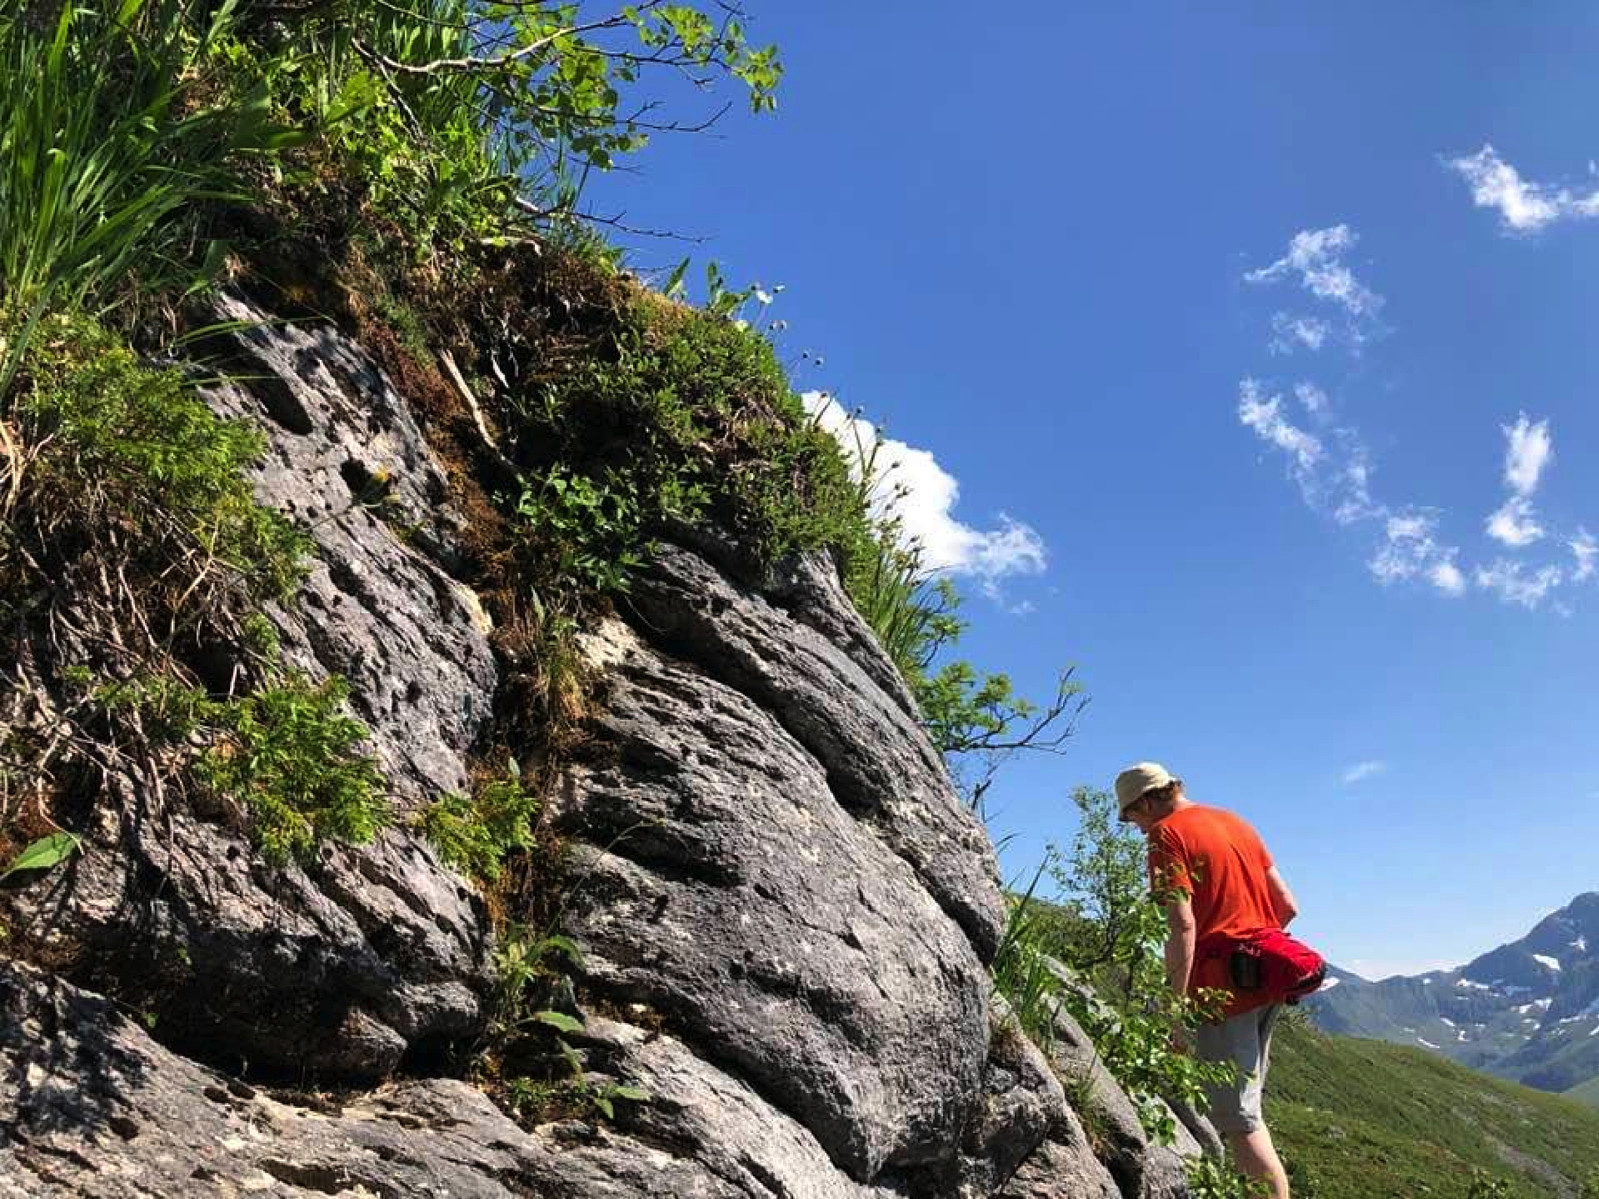
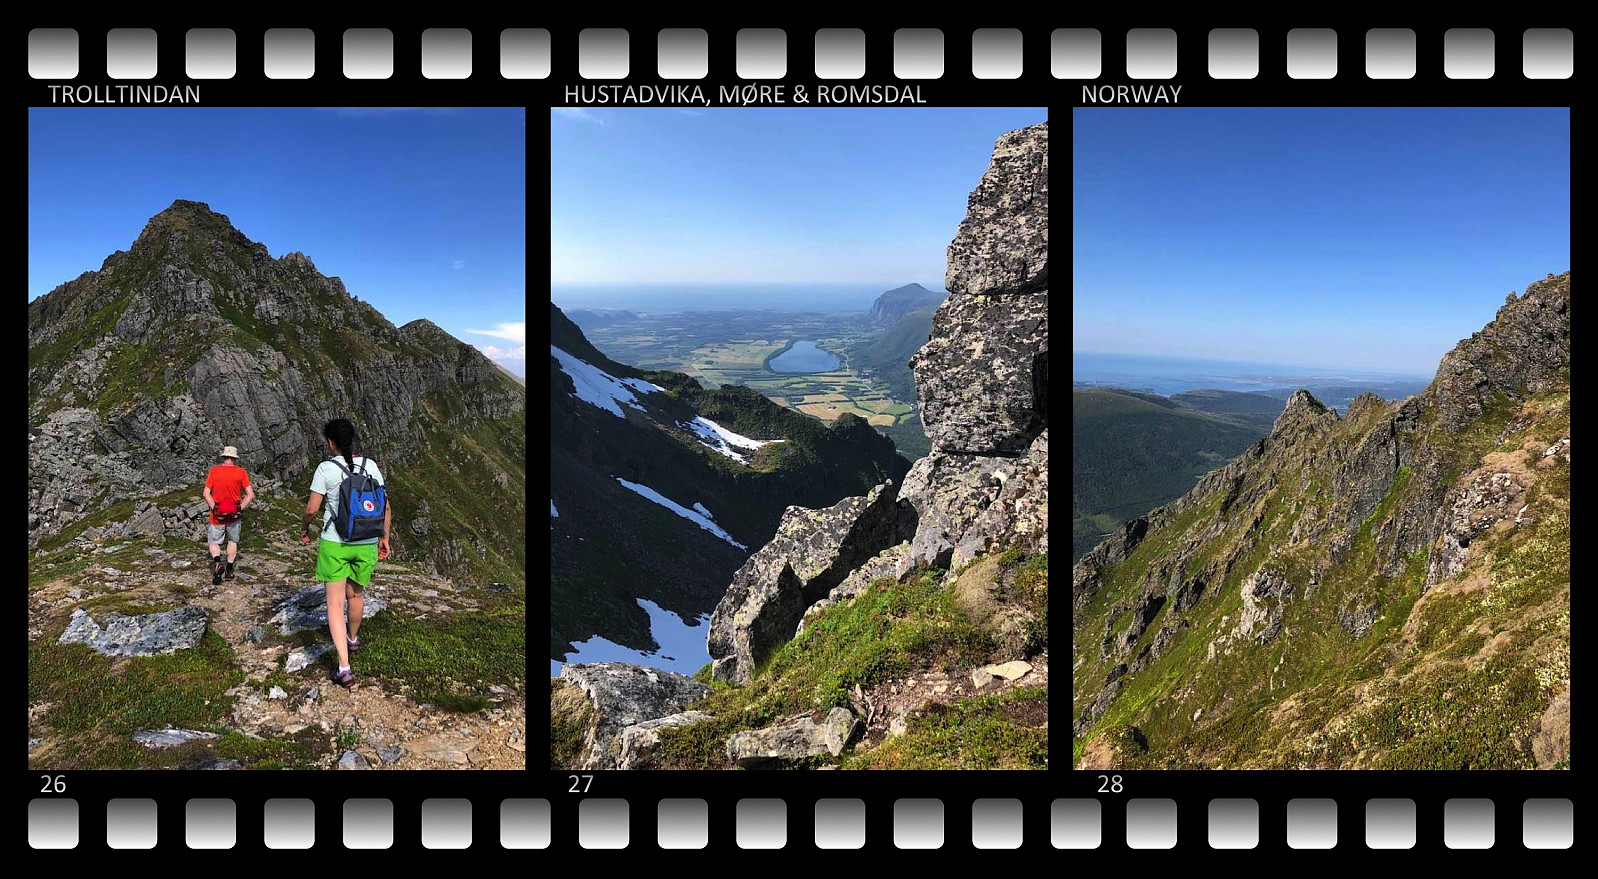
We skipped the westernmost of The Troll Peaks, as that one's located a bit outside of the round trip that had planned; and so we embarked directly on the climb up to the highest or middle one. This climb along this mountain range might be steep at places (Image #31), but wherever you encounter such places, the trail always divides into two; one steep trail and the other one more reasonable, or you could say one for climbers and the other one for trekkers. In nice weather you get a fabulous view in all directions, and especially towards the coast with the coastline of Hustadvika, which is renown for its many reefs and shallow waters, and the danger it poses for ships passing by (Image #27).
As we were climbing up the mountain, we had to stop every now and then; sometimes because it was a hot day and we needed to drink some water, and sometimes simply because my sister is a teacher in biology, and wanted to stop and capture a picture whenever she came across some rare or exotic flower. And there are actually a lot of small flowers and herbs that are more abundant on this mountain than most other places in Norway, due to the high content of calcium in the ground at this location.
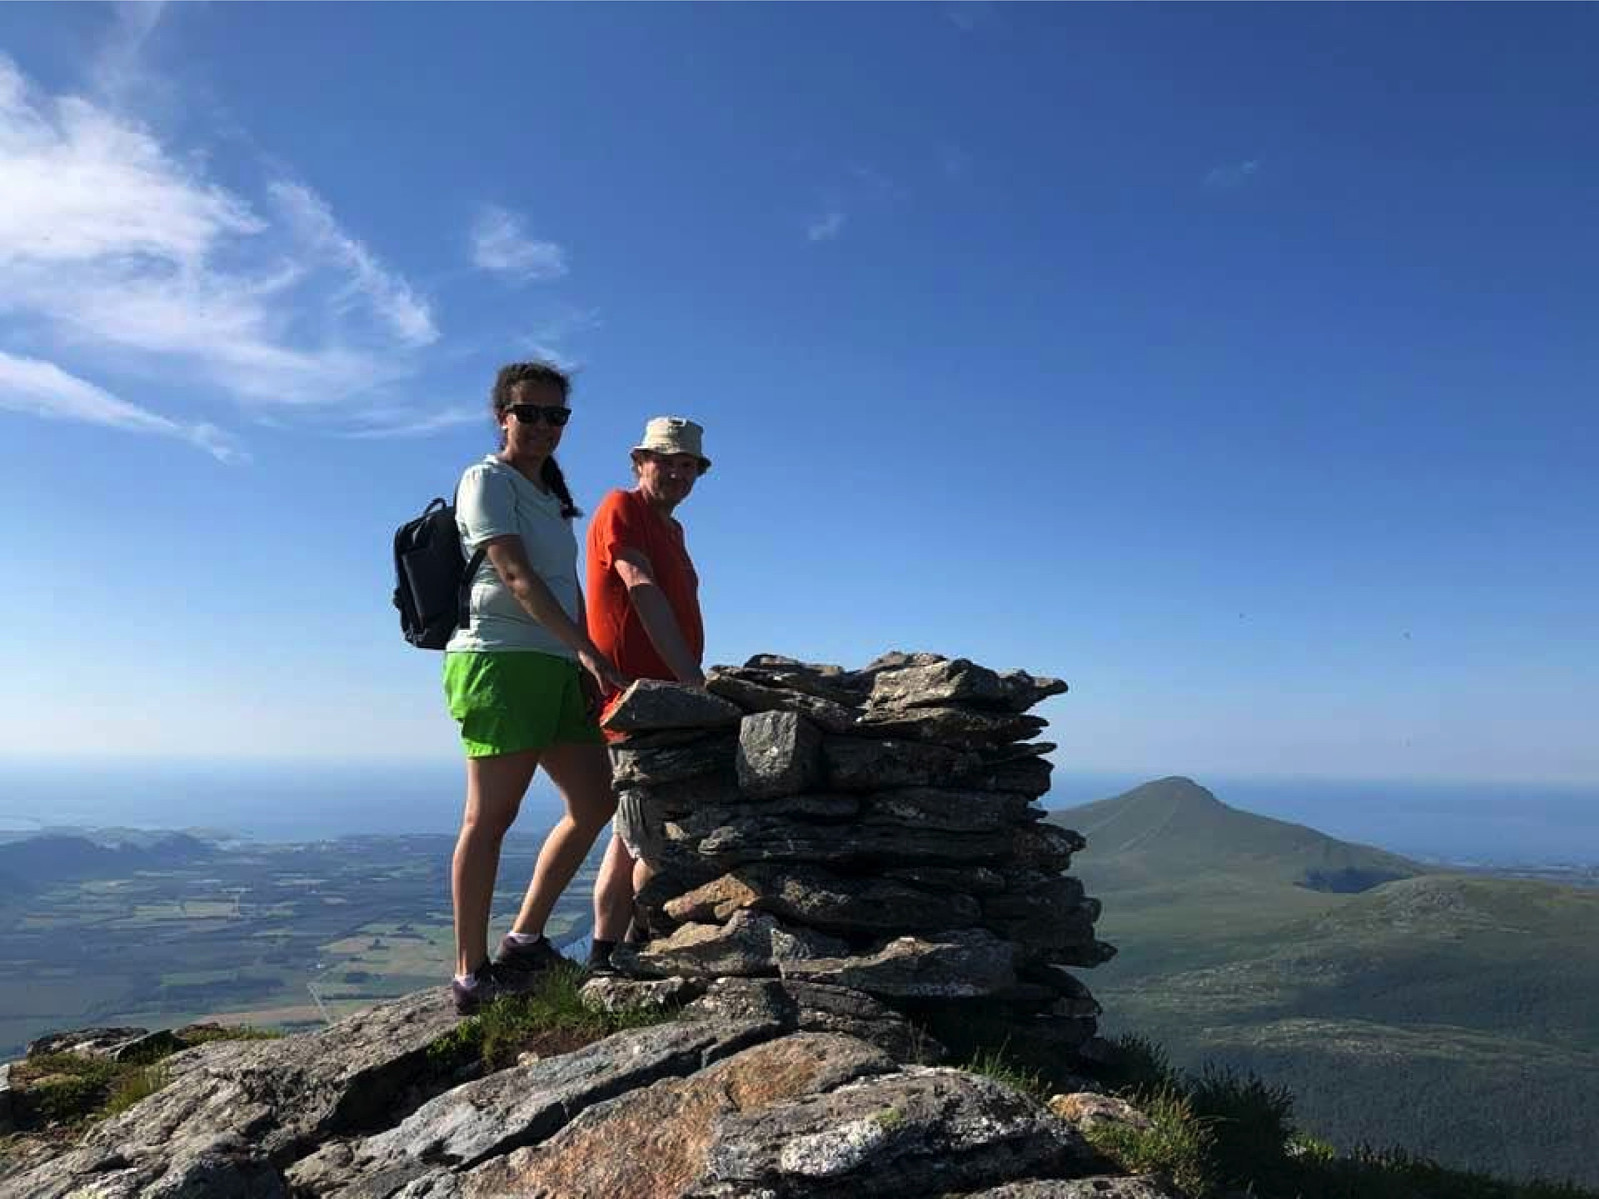
We reached the summit of Trolltindan at 887 m.a.m.s.l., and had a short break there; in order to shoot some photos (Image #30), and also in order to admire the beautiful view. For this was indeed a nice day, with nice weather. In October last year, when I first trekked this mountain range, it was quite opposite; on that day these peaks all reached into the clouds, so I didn't see very much, until I continued onto the next peak, namely Mount Stordalstinden.

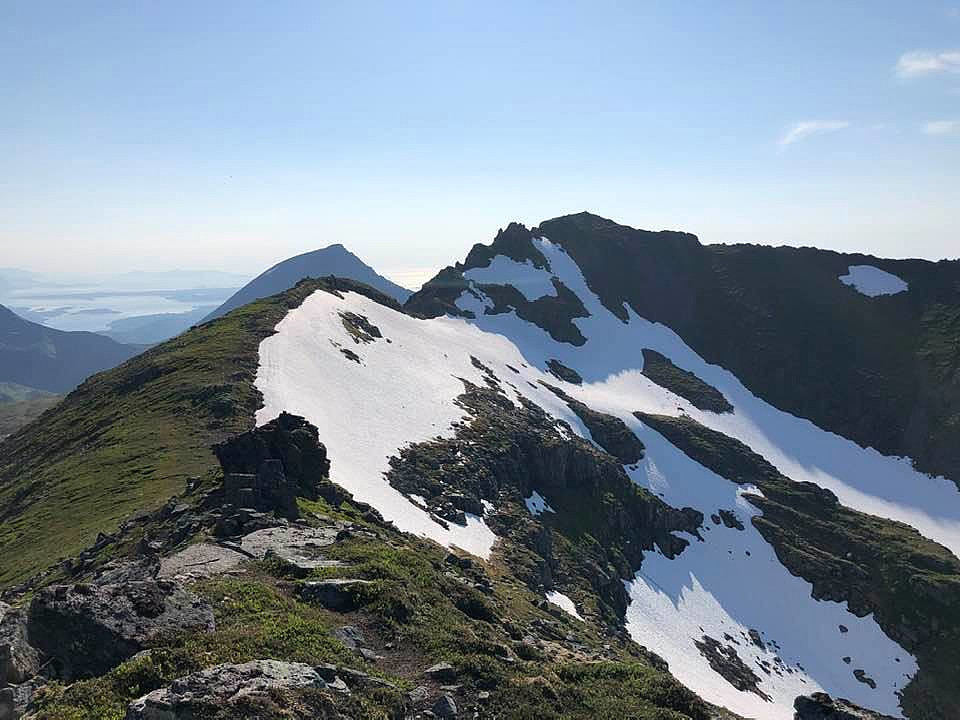
We continued eastwards along the mountain range, and soon passed a second peak, and then we arrived at a third one, i.e., the one that has been termed The Troll Peaks East here on Peakbook. From there we continued towards Mount Stordalstinden. In order to get there you have to first descend to about 815 m.a.m.s.l., and along this descent you run into a few short vertical cliffs. These are quite easy to encompass, however, as the trail goes around them, but in foggy weather they might be dangerous if you're not aware of them.
![Image #34: On the summit of the easternmost Troll Peak. Behind us Mount Stordalstinden [The Great Valley Peak] is seen, and close to the right edge of the photography, the mountain called Blåfjellet [i.e. "The Blue Mountain"] may be seen.](https://images1.peakbook.org/images/14939/Solan_20200817_5f3adb3411bba.jpg?p=xtralarge)
On top of Mount Stordalstinden [i.e. The Great Valley Peak], the view towards the coast was maybe not as good as from the middle Troll Peak, but the view towards the fjords is also nice (Image #36). From mount Stordalstinden we went down into the notch between Stordalstinden and Mount Blåfjellet [i.e. The Blue Mountain] (Image #24), and then we headed back towards The Troll Church caves. Down into the notch the trail is unmarked, but still nice; but once you turn west again, towards the Troll Church, the trail is much more difficult to find. There is some sort of a trail, for sure, but it disappears every here and there, and then it is quite difficult to find again.
![Image #36: On top of Mount Stordalstinden [i.e. The "Great Valley Peak"], with Mount Blåfjellet [i.e. The "Blue Mountain"] just behind me. To the left lake Nåsavatnet is seen, and the fjord in the background is called Kværnesfjorden.](https://images1.peakbook.org/images/14939/Solan_20200817_5f3ade2f99997.jpg?p=xtralarge)
We came to a little pond that still had some ice and snow in its waters (Image #37), and after we had passed that pond, the trail improved a little bit again. Then it turned south for a short distance, before it once again turned west towards the site of the caves. As we descended the final leg towards the cave, we encountered a fourth cave with a large opening in the ground, but we didn't have time to explore that one on this day, as it was already late afternoon, and we still had more than an hour's trekking to do to get down from the Troll Church to where we had parked our car.
![Image #38: Looking back towards Mount Blåfjellet [i.e. "The Blue Mountain"], as we were heading back down towards The Troll Church.](https://images1.peakbook.org/images/14939/Solan_20200817_5f3ae030baba5.jpg?p=xtralarge)


Kommentarer