
Round Trip over Tindfjell, Blåskjærdingen and Rekdalshesten (06.06.2020)

Written by Solan (Atle Solholm)

| Duration | 8h 47min |
|---|---|
| Distance | 20.6km |
| Vertical meters | 1,964m |
| GPS |
|
| Ascents | Blåskjerdingen (1,069m) | 06.06.2020 14:21 |
|---|---|---|
| Søre Blåskjerdingen (1,061m) | 06.06.2020 14:21 | |
| Byrkjevollhornet (708m) | 06.06.2020 14:21 | |
| Hestenebba (758m) | 06.06.2020 14:21 | |
| Hornbotnhornet (666m) | 06.06.2020 14:21 | |
| Rekdalshesten (782m) | 06.06.2020 14:21 | |
| Tindfjellaksla (842m) | 06.06.2020 14:21 | |
| Tindfjellet (960m) | 06.06.2020 14:21 | |
| Tindfjellpinakkelen (793m) | 06.06.2020 14:21 | |
| Urfjellet (757m) | 06.06.2020 14:21 |

I have ascended Mount Blåskjerdingen multiple times, sometimes on ski during winter, and sometimes on foot during summer. The mountain has a characteristic cleft, about 30 meters deep, close to the summit, and so it has a southern top of 1062 m.a.m.s.l. in addition to the main or northern peak of 1069 m.a.m.s.l. The mountain is usually climbed from the south, and when ascending it by skis during winter, you usually just visit the slightly lower southern peak, as you can't traverse the cleft with skis on. If you want to go all the way to the northern peak during winter, you should switch from skis and poles to crampons and an ice axe before you embark on climbing the cleft; and yet there would be the danger of climbing on a snow shelf that could break off, if you're not familiar with the wind predominant wind direction and where snow shelves build up. So, during winter I've so far only reached the south peak on ski, whereas on foot during summer, I've continued onto the northern peak on several occasions. Whenever I've ascended Mount Blåskjerdingen I've noticed a mountain ridge extending westward from the southern part of the mountain, and then curving in a northwest direction. This ridge actually has a "summit" of itself, which is called Mount Tindfjellet [i.e. The Peak Mountain], and then there's also two additional peaks called Tindfjellaksla [i.e. The Peak Mountain Shoulder] and Tindfjellpinakkelen [i.e. The Peak Mountain Pinnacle]. I've long been thinking of maybe visiting Tindfjellet on my next ascent of Mount Blåskjerdingen, but when I sat down to prepare for it by reading about this mountain, I realized that an ascent from the north was going to be more spectacular, and that it would even offer me the additional option of visiting the Shoulder and the Pinnacle of the mountain. On Peakbook there were tour descriptions from people that had started out from the village of Vestre by the fjord called by the same name. Looking at the map, however, I decided to start out a little bit further north, by the village of Eik, as that would allow me to include even a number of other peaks in this day's hike.

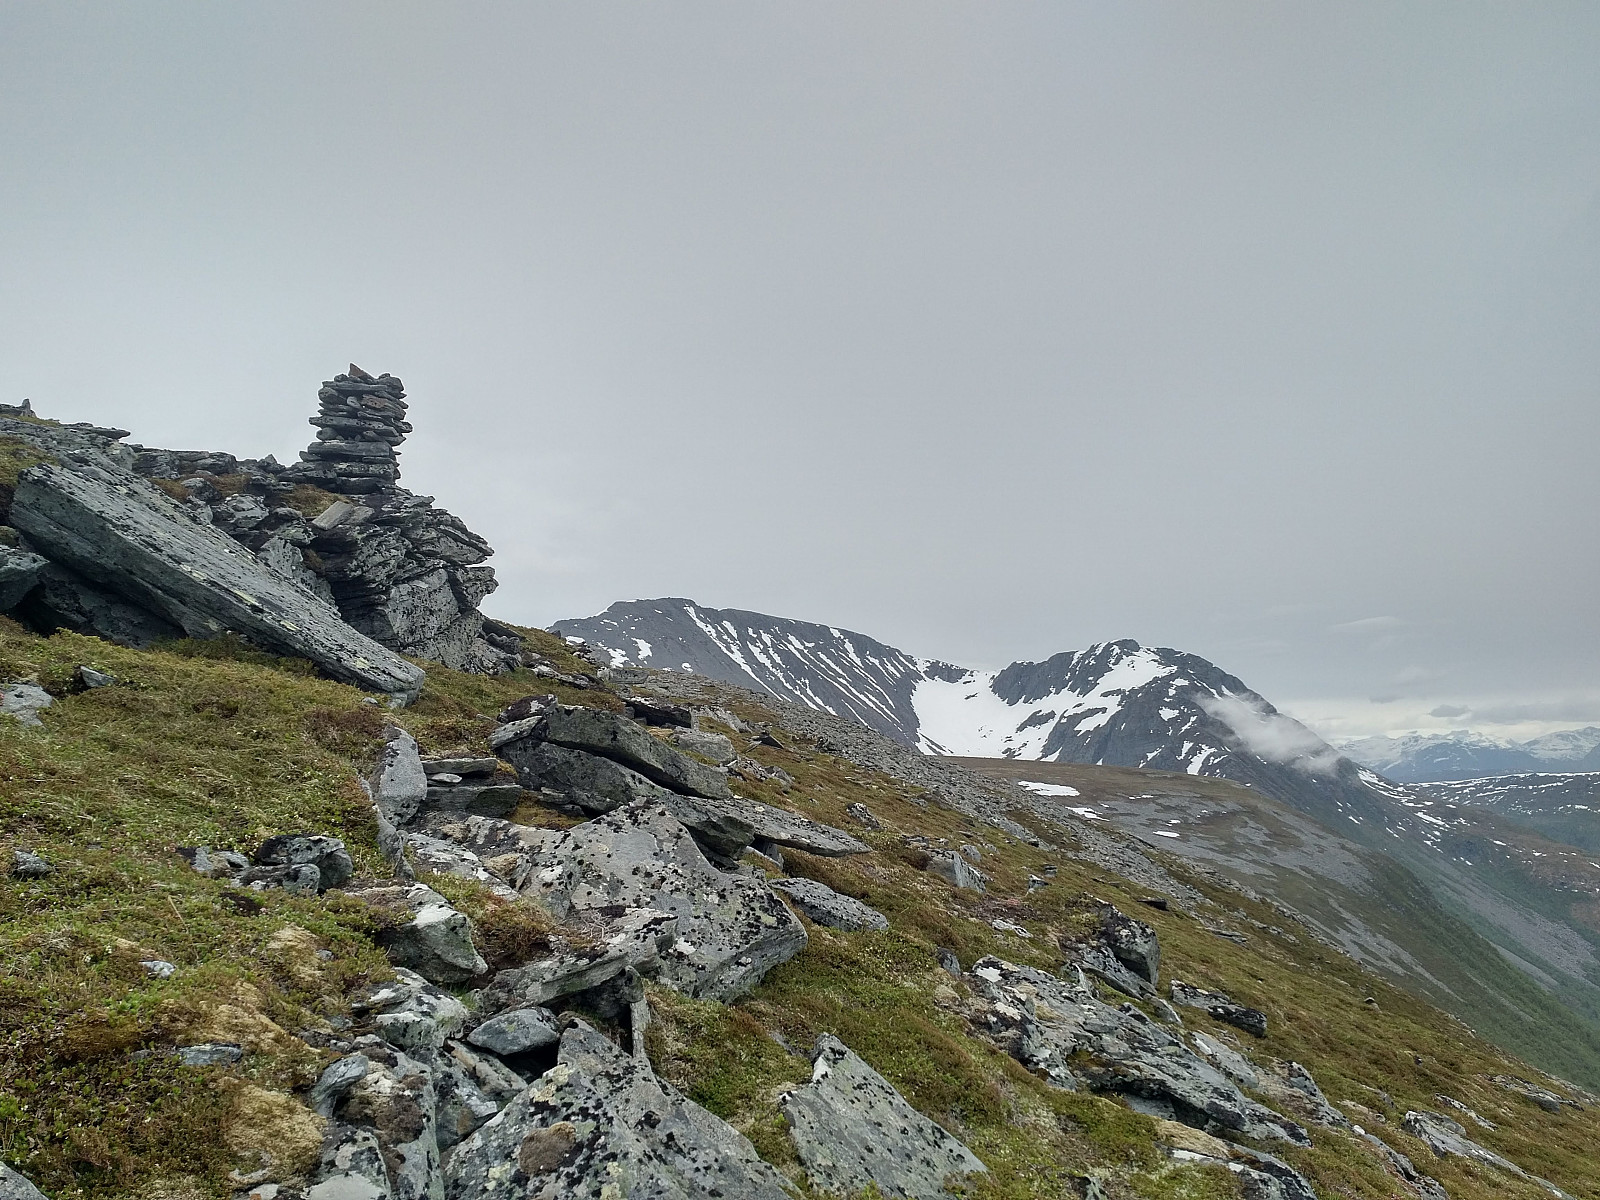
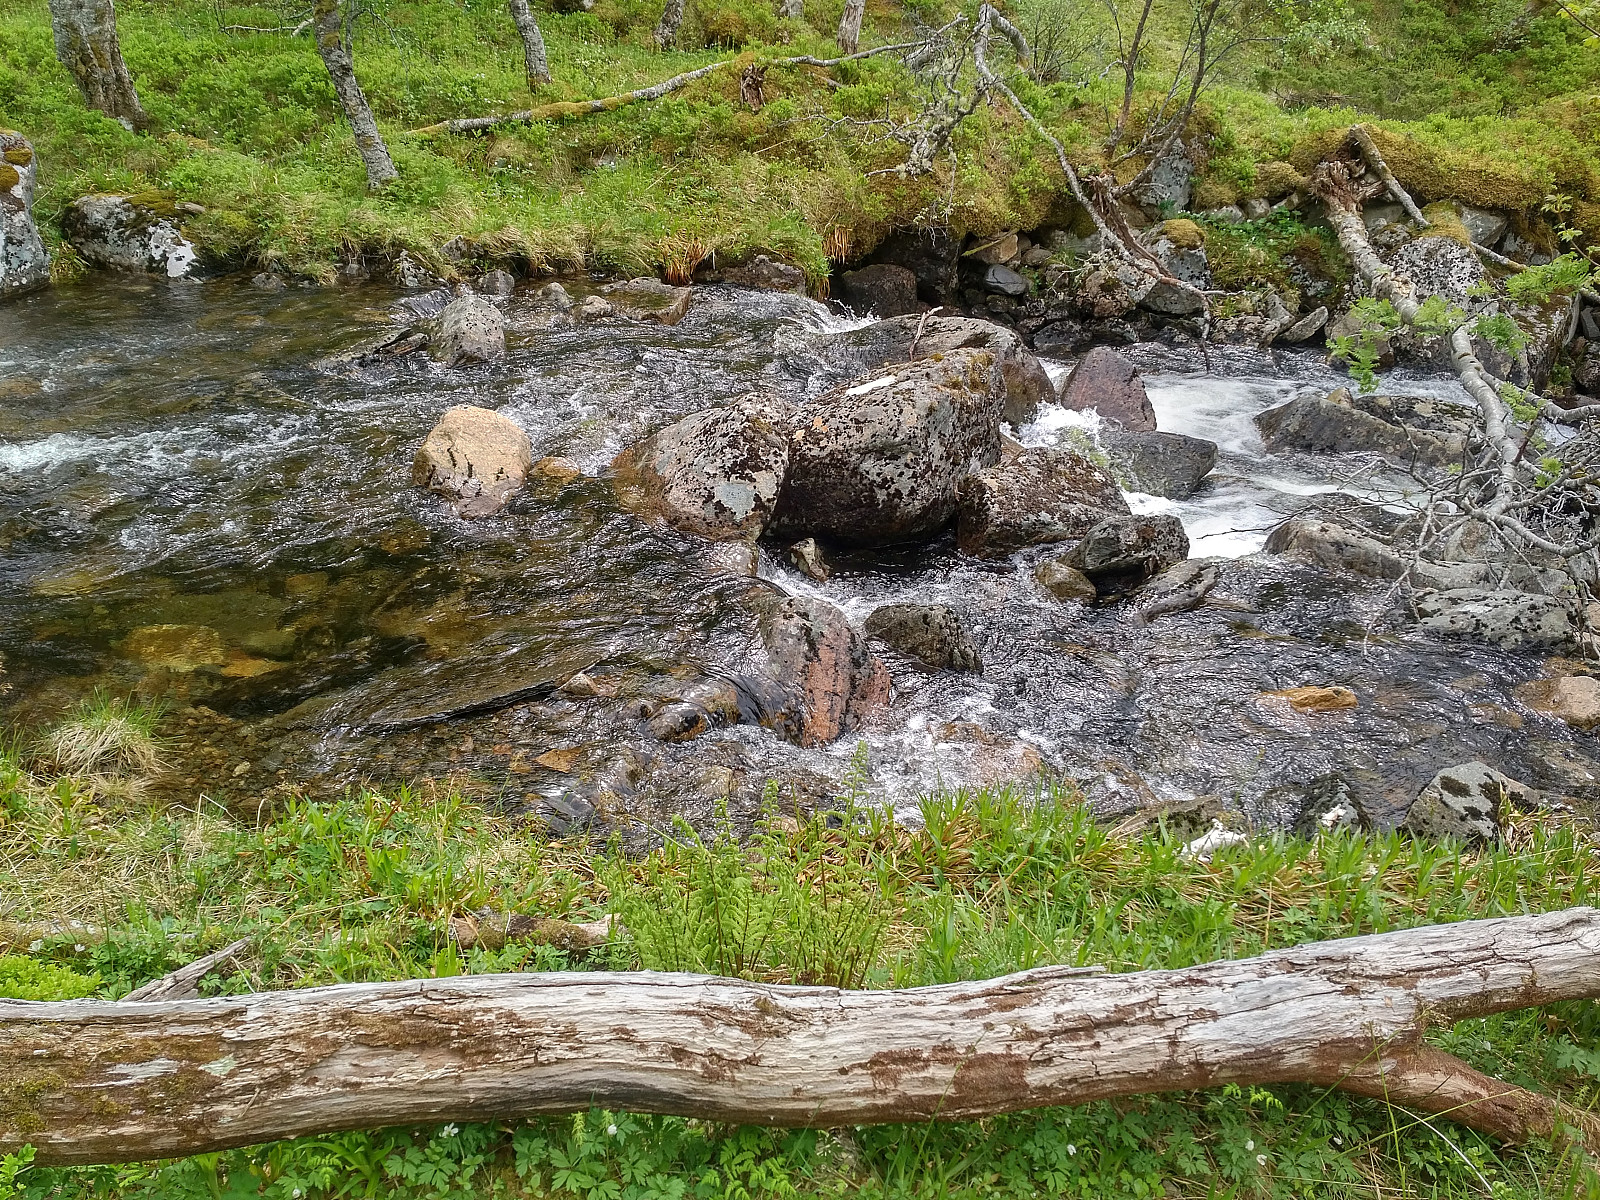
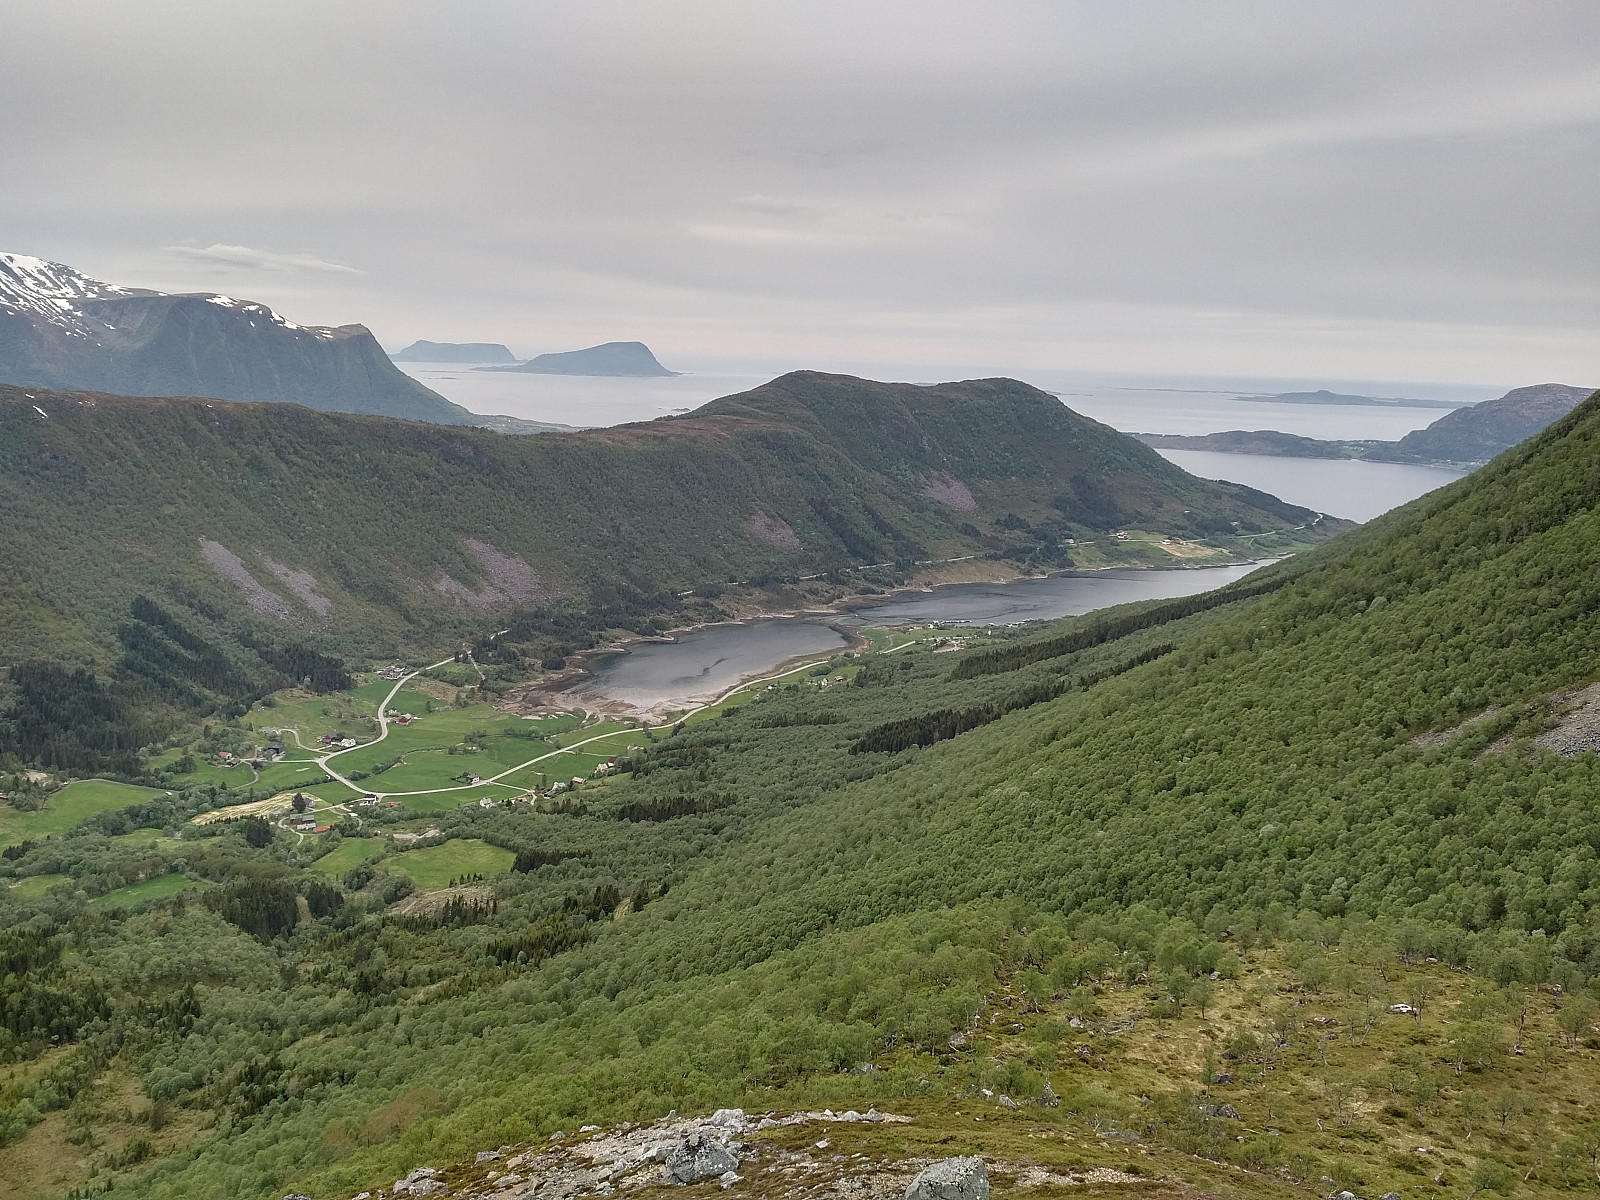
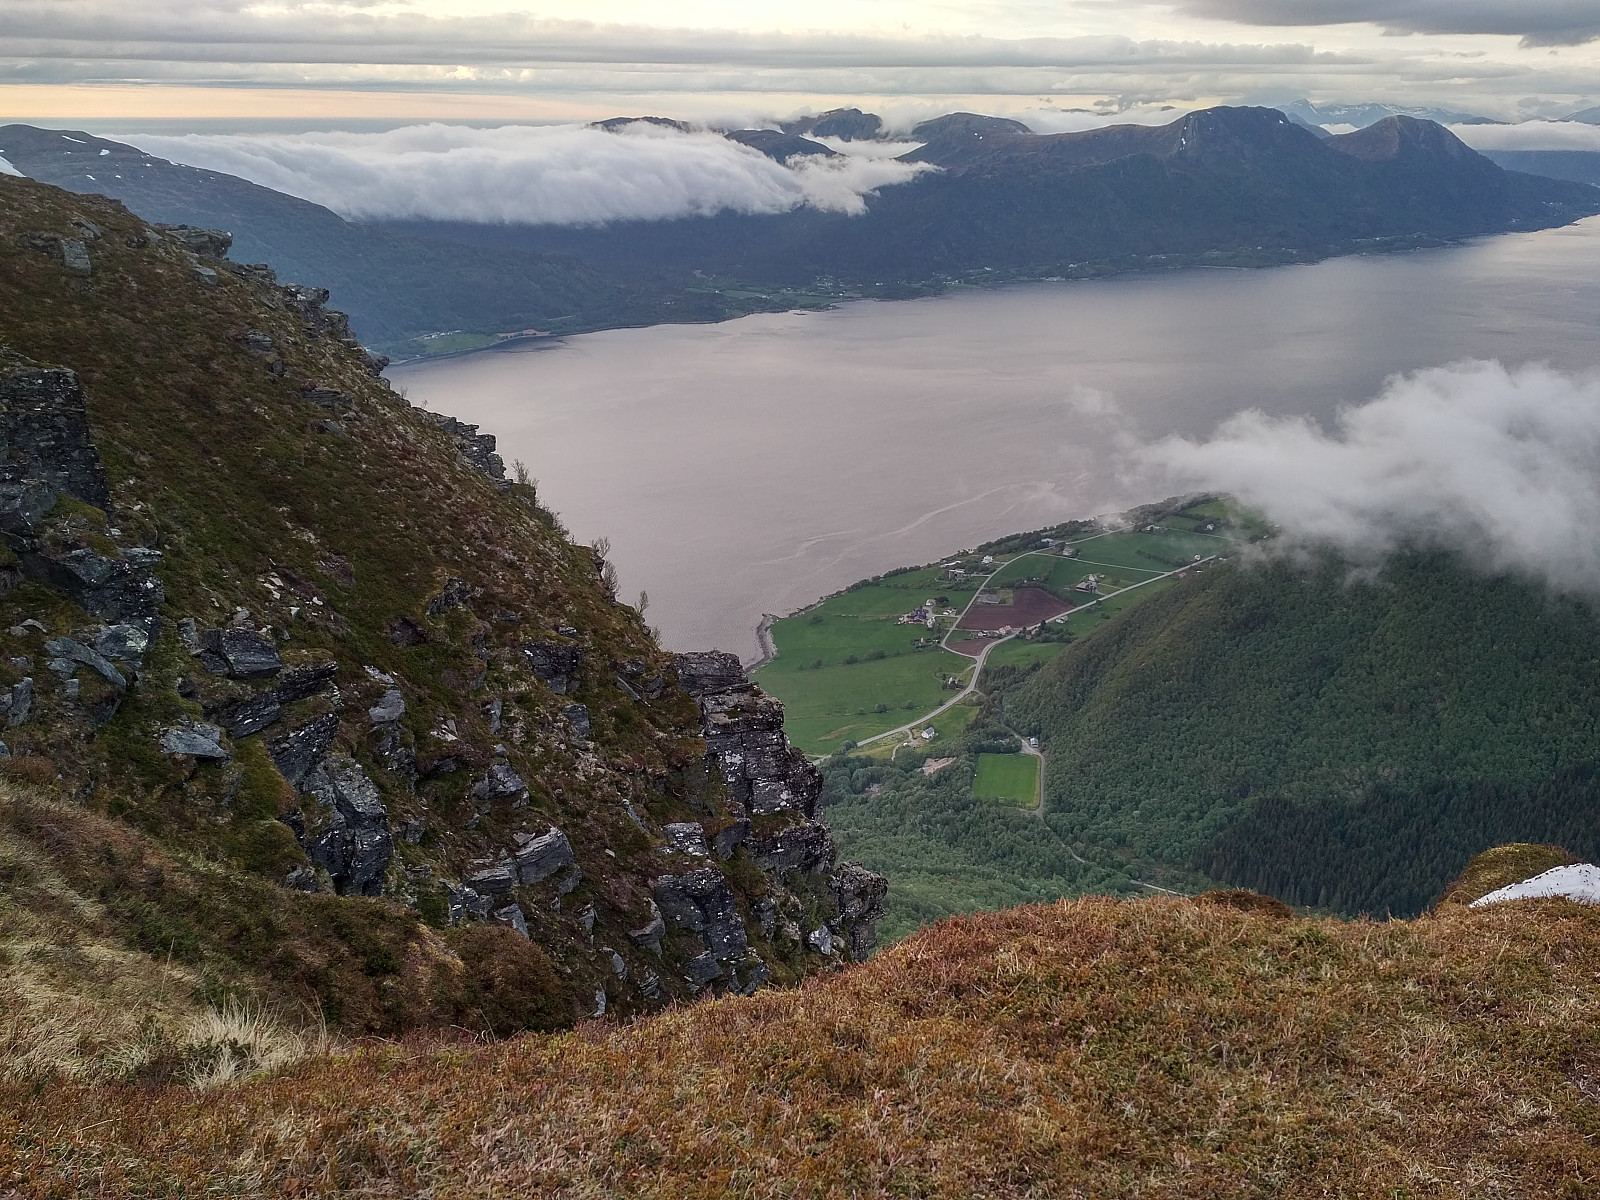
So, I drove to the little village of Eik on the east side of the fjord Vestrefjorden, parked my car there, and started trekking up a graveled mountain road (visible on image #1) that winded its way up to the hanging valley called Eikedalen. At about 250 m.a.m.s.l. I abandoned the road, crossed the river (Image #2), found my way through the birch forest to the foot of the mountain called Byrkjevollhornet , and started climbing. This north side of that mountain was pretty steep and a bit tricky to climb at places, but there was plenty of vegetations to hold on to; you just needed to make sure any tree you would grab was firmly attached to the ground, because every now and then you would come across a tree that would just be uprooted if you tried to hold on to it. At about 520 m.a.m.s.l. the vegetation changed from forest to open landscape (Image #3). There was still grass and heather growing up there, but no trees. At about the same altitude the inclination of the mountain also changed, not much, but just enough that you could start trekking instead of climbing. Shortly before the summit of Mount Byrkjevollhornet there suddenly was a hare in front of me. It got scared the very moment it saw me, and by four or five jumps it was gone behind some huge stones; long before I was able even to have my camera ready for a picture. I continued up the remaining slopes towards the summit. A minute or so after I had first encountered the hare, I saw its long ears popping up from behind a huge stone behind which it was hiding; but that was the last I saw of it.
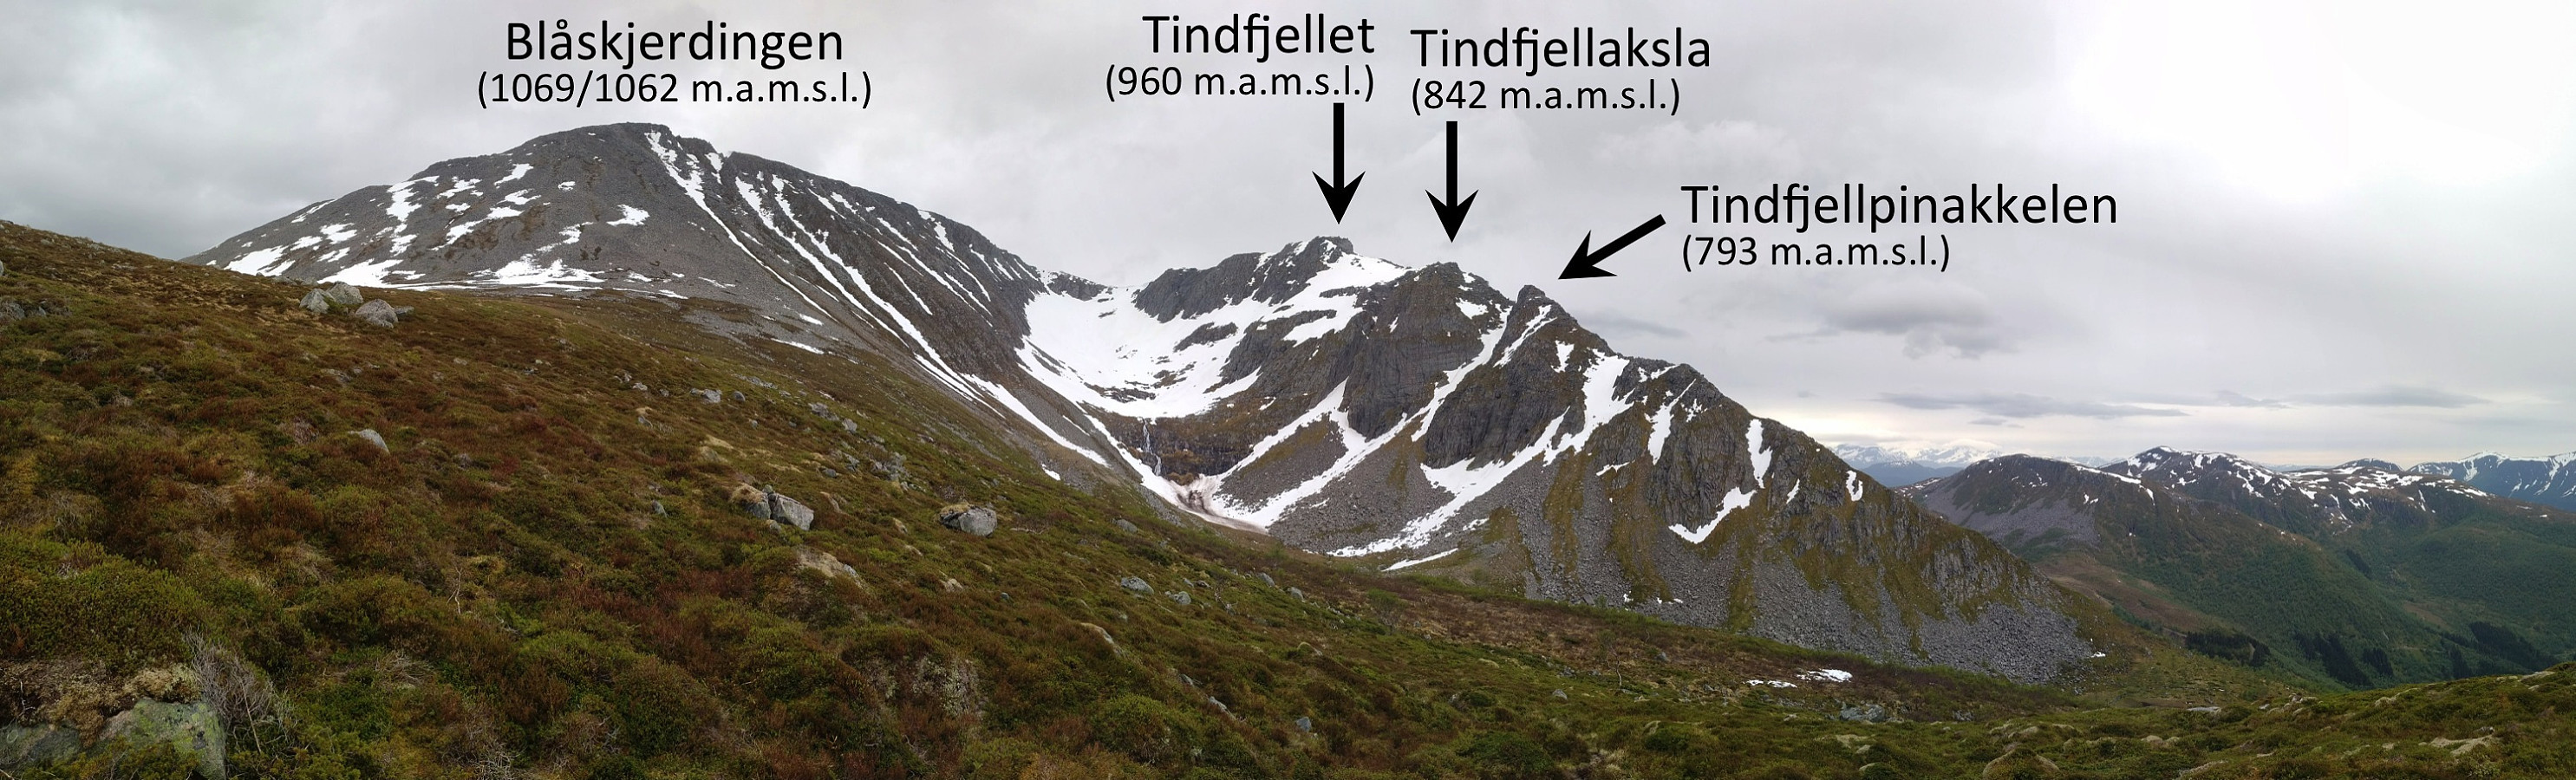
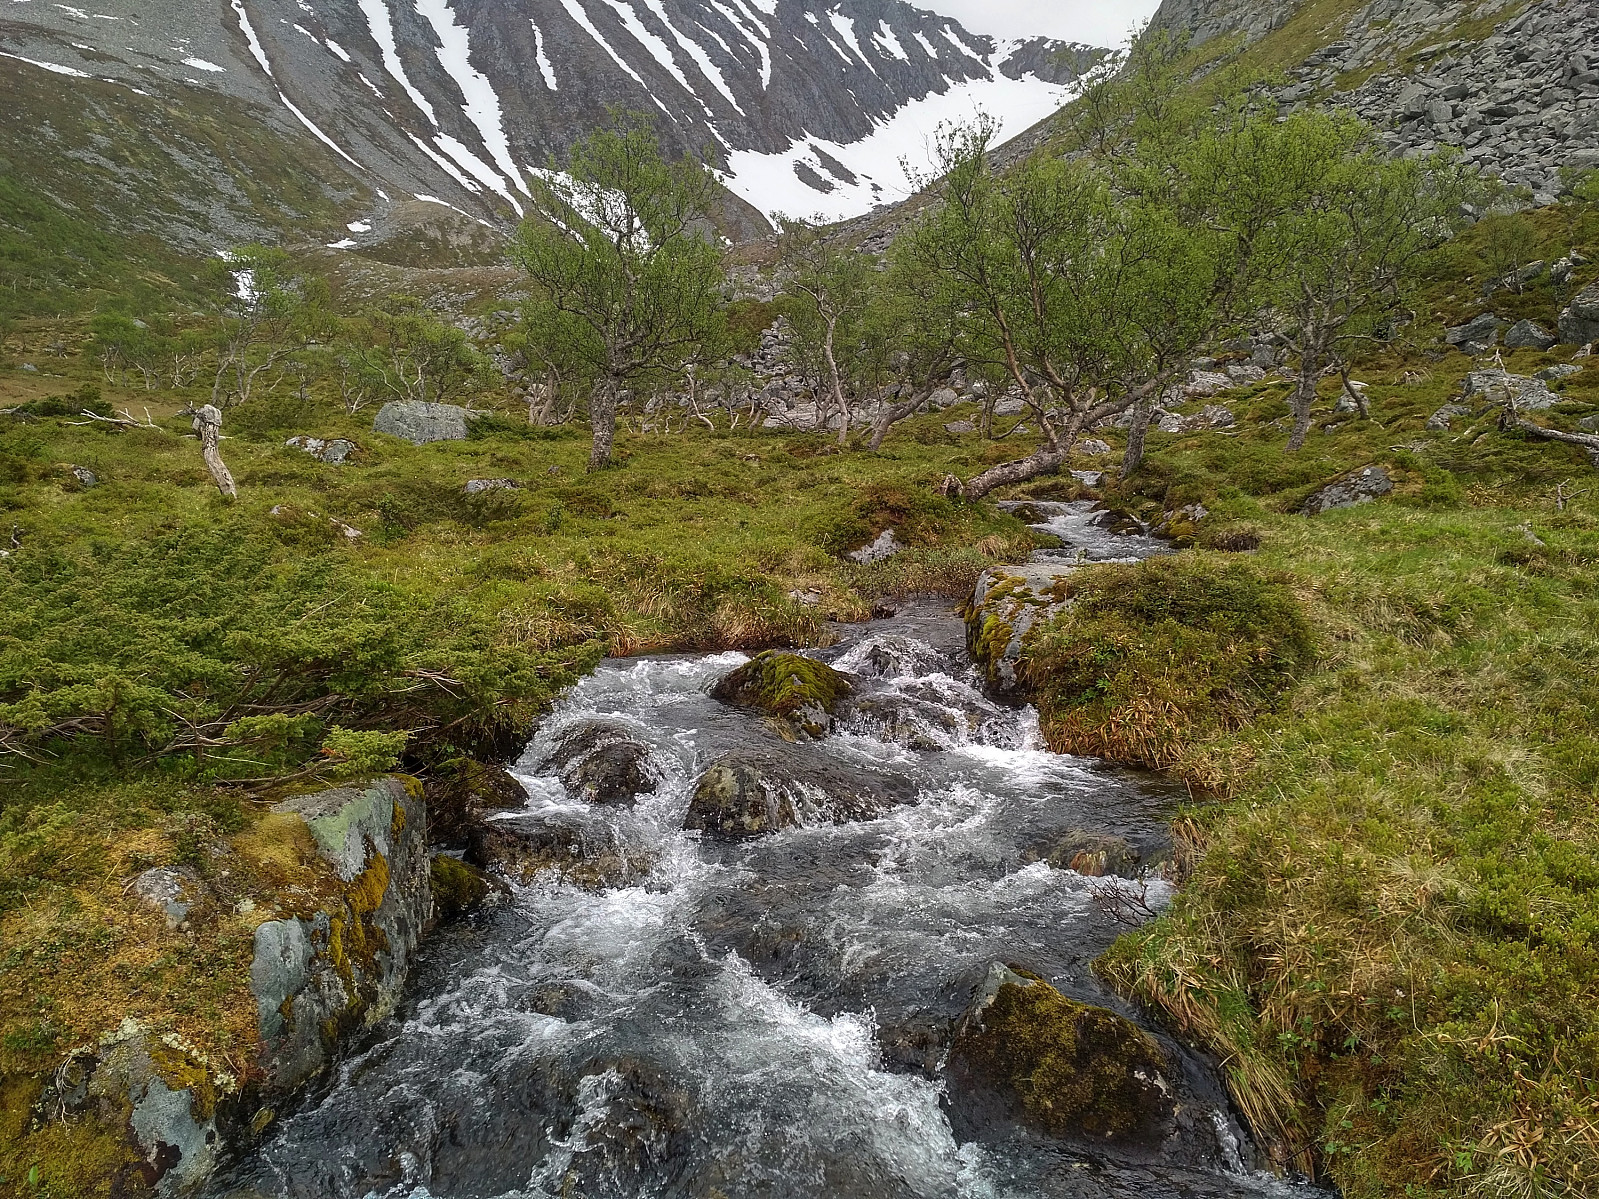
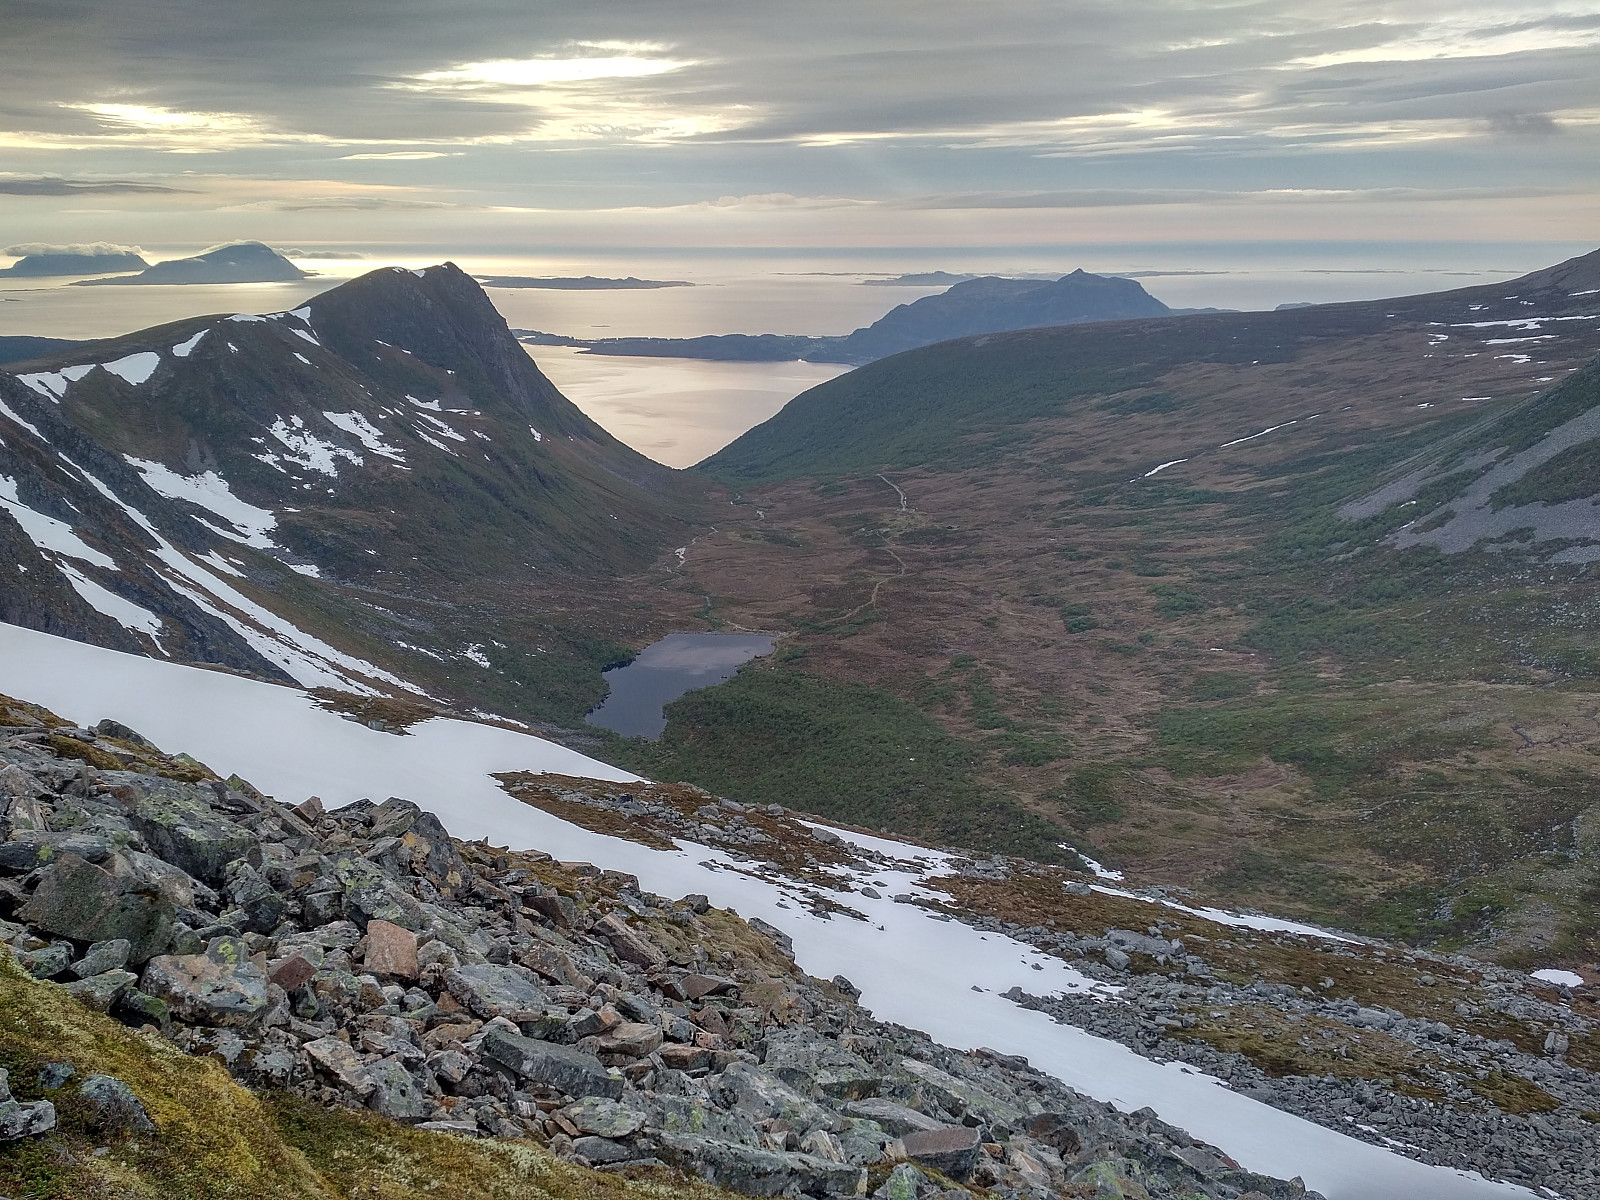
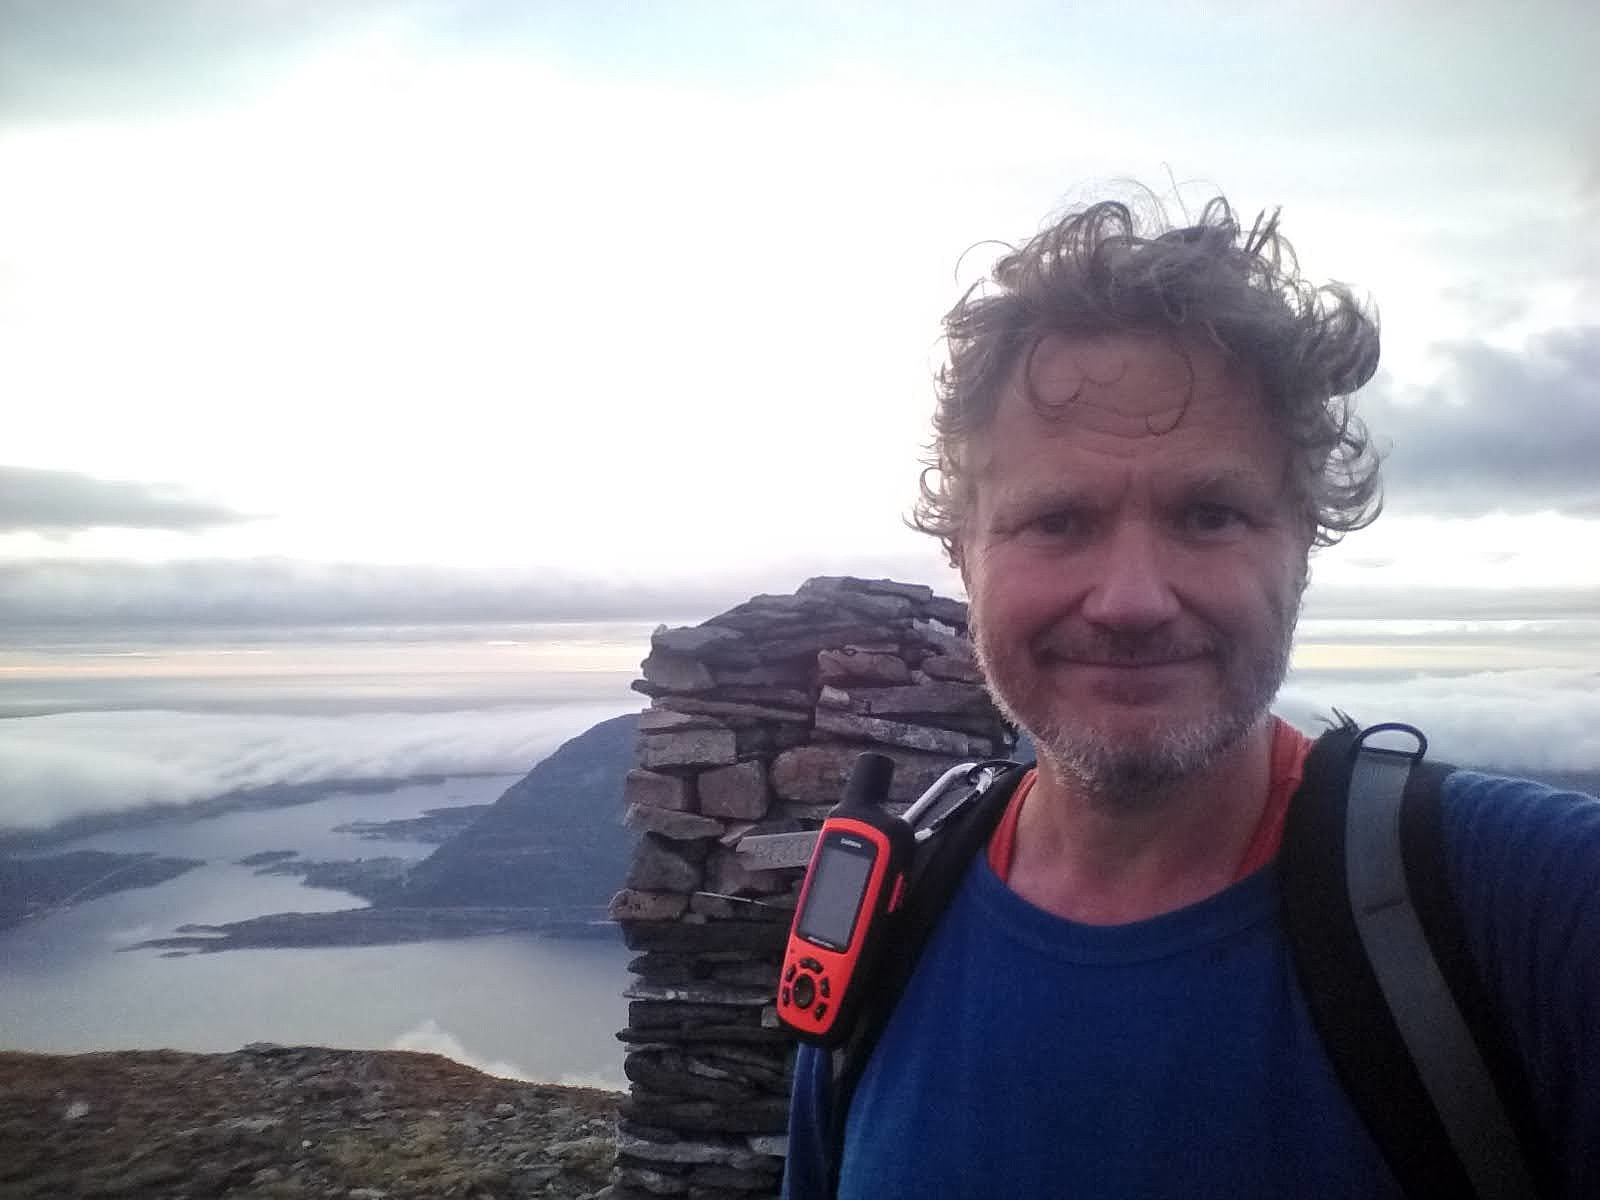
I reached the summit of Mount Byrkjevollhornet (708 m.a.m.s.l.), but I just shot a few pictures there, without taking time to have a real rest, as I knew I still had a long hike in front of me. From Byrkjevollhornet I continued onto Mount Hornbotnhornet (666 m.a.m.s.l.). Mount Hornbotnhornet actually isn't a distinct mountain by itself, it's part of the same mountain massif as Mount Byrkjevollhornet, hence you do not descend more than about 60 meters from Byrkjevollhornet before you climb about 20 meters to reach Mount Hornbotnhornet. If you insist on a vertical separation of 100 meters for a mountain to count as a separate mountain (i.e. the requirement for a peak to count as a red PBE [i.e. Peakbook Element] and not a green one), then both of these mountains, along with Mount Tindfjellet, Tindfjellaksla and Tindfjellpinakkelen, are just knolls on the huge mountain massif of Mount Blåskjerdingen. Now in order to get on to the mountain ridge of Tindfjellryggen (Image #5), I next had to cross a heathland slightly higher than Mount Hornbotnhornet (i.e. it was about 680 m.a.m.s.l.), and then I had to get down into a valley called Skjerdinghola, before I could embark on the aforementioned ridge. Over the heathland I have to say I didn't find any trail that I could follow; but as the weather was nice, and the only vegetation was heather, this landscape wasn't difficult to cross. As I came to the valley of Skjerdinghola, however, I found a nice trail that descended into the valley, and so I followed that trail down to the river, which I crossed at about 450 m.a.m.s.l. (Image #6).

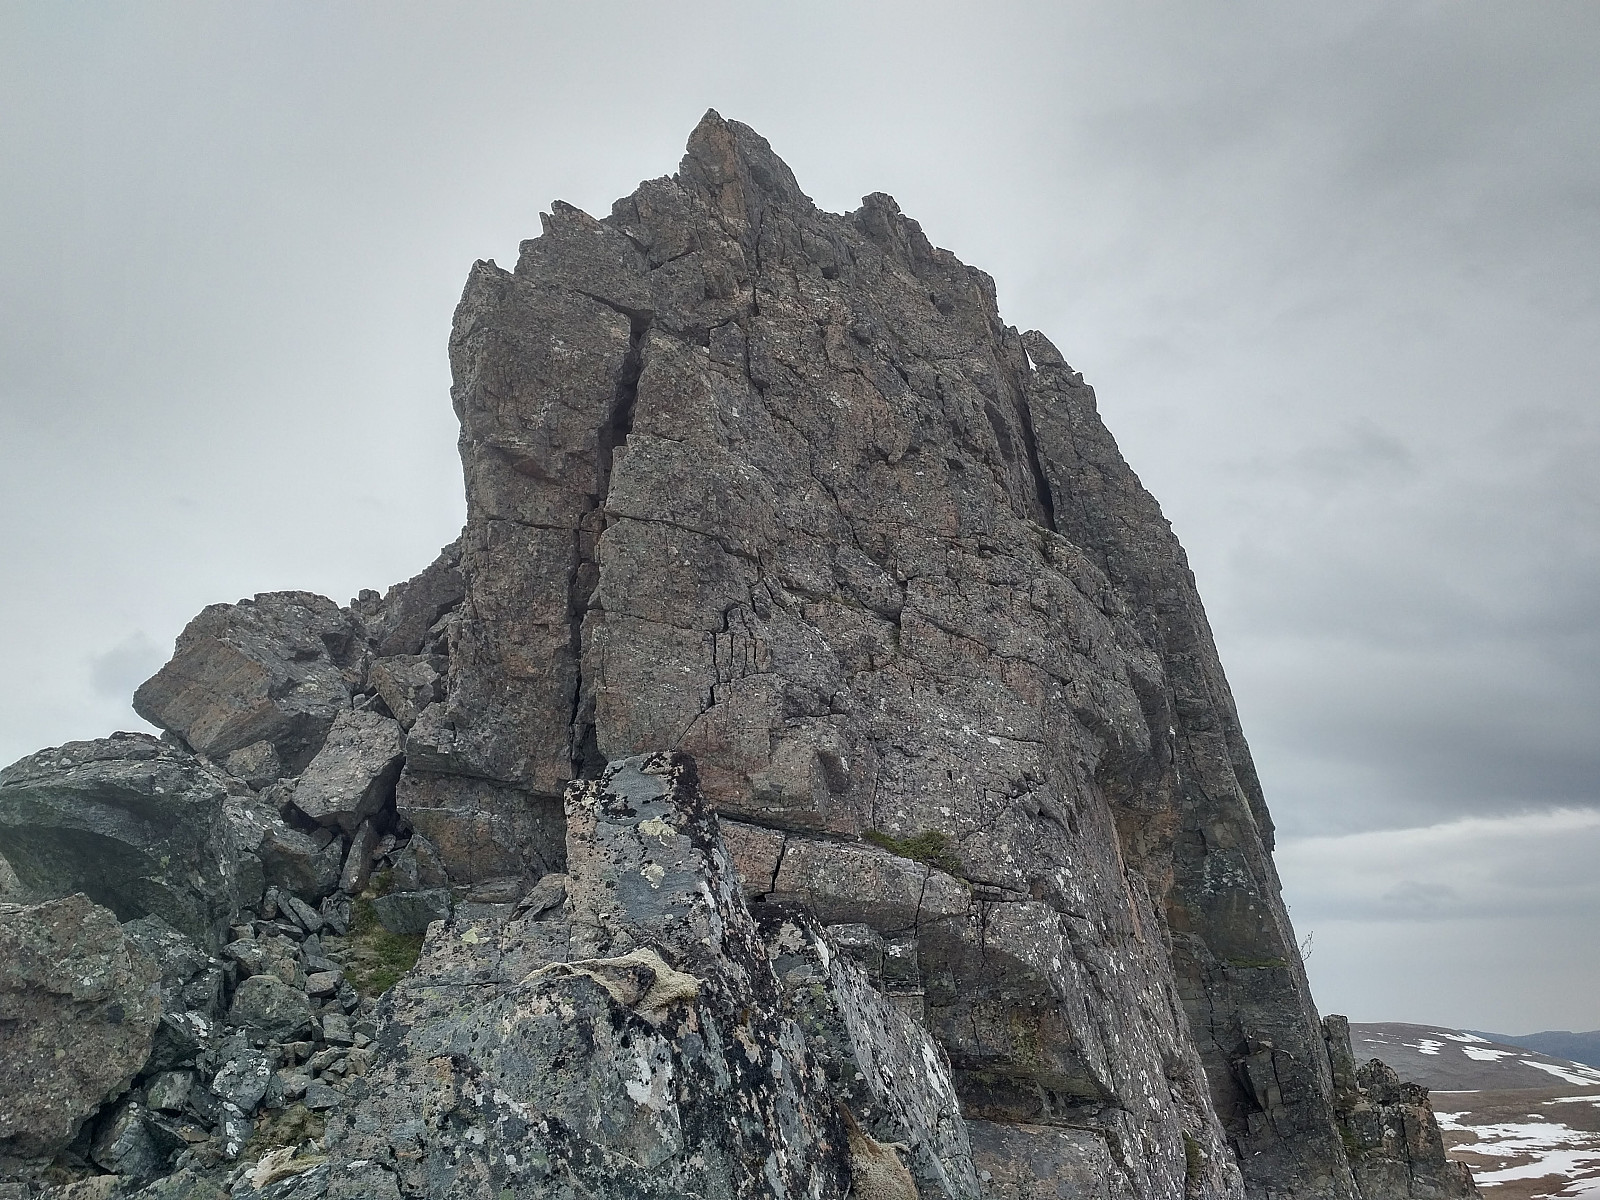
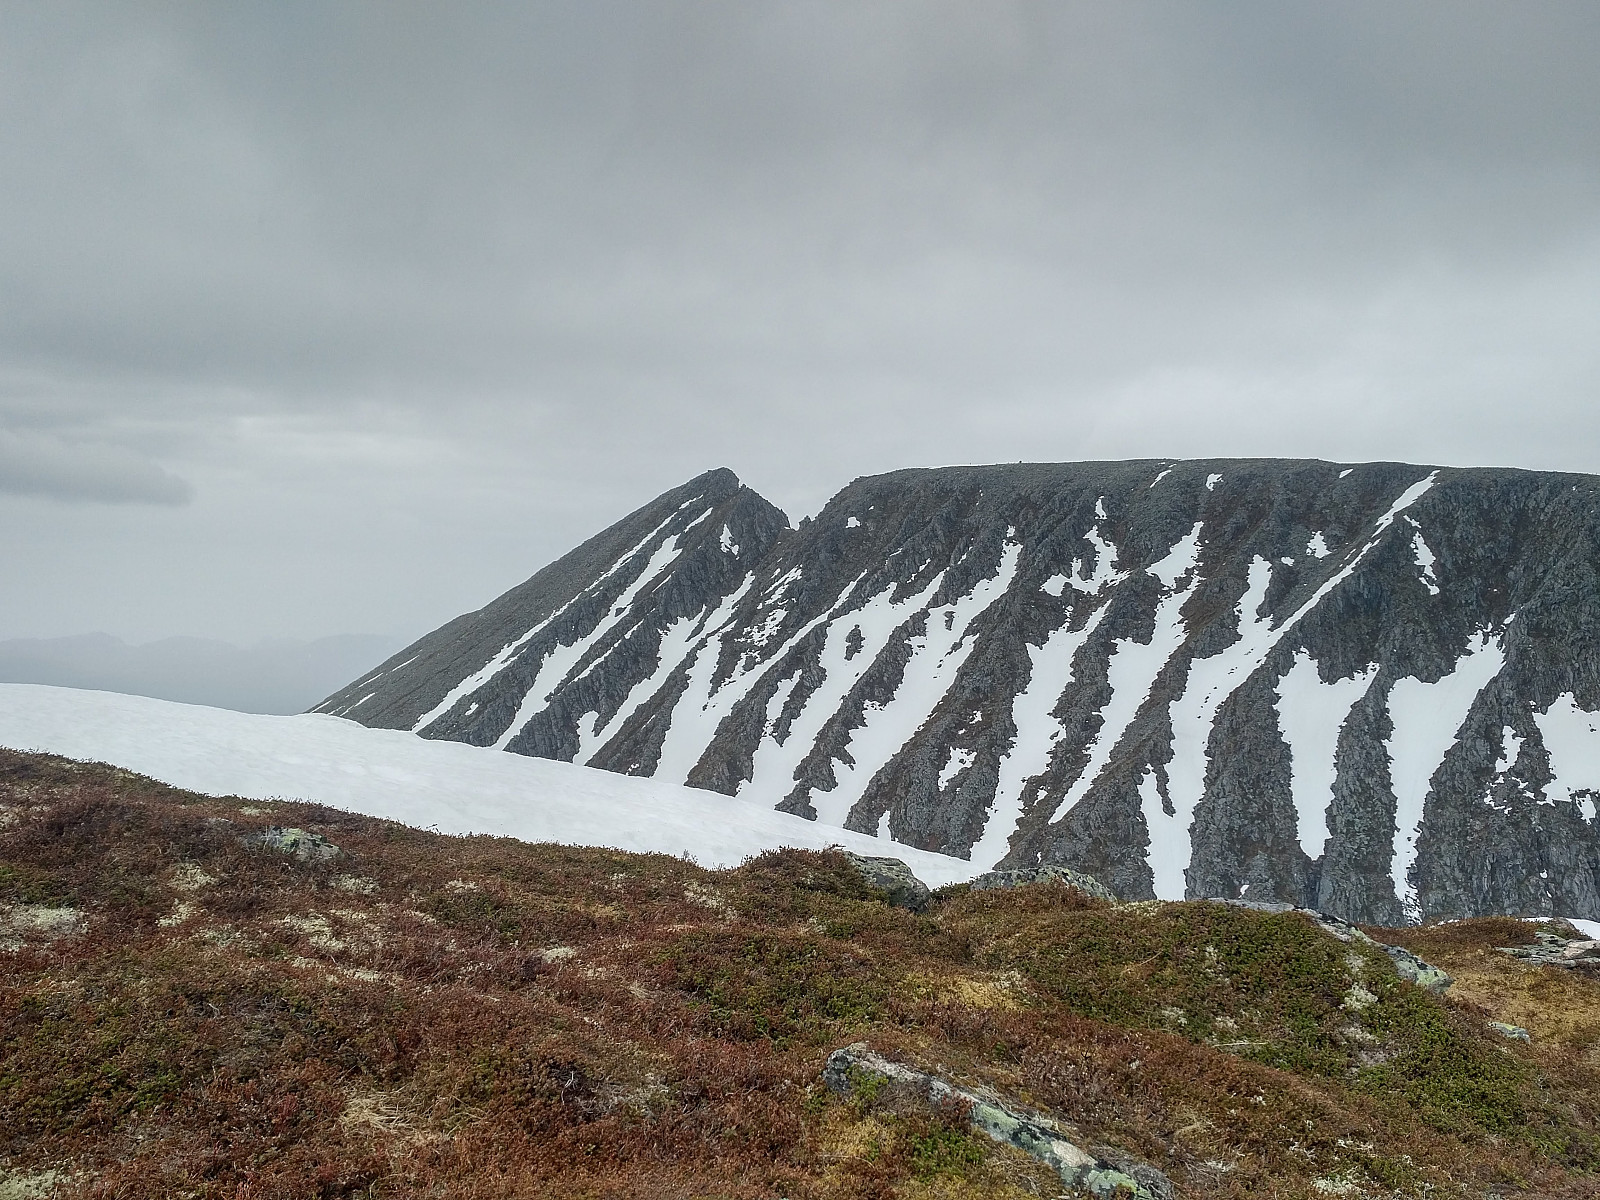
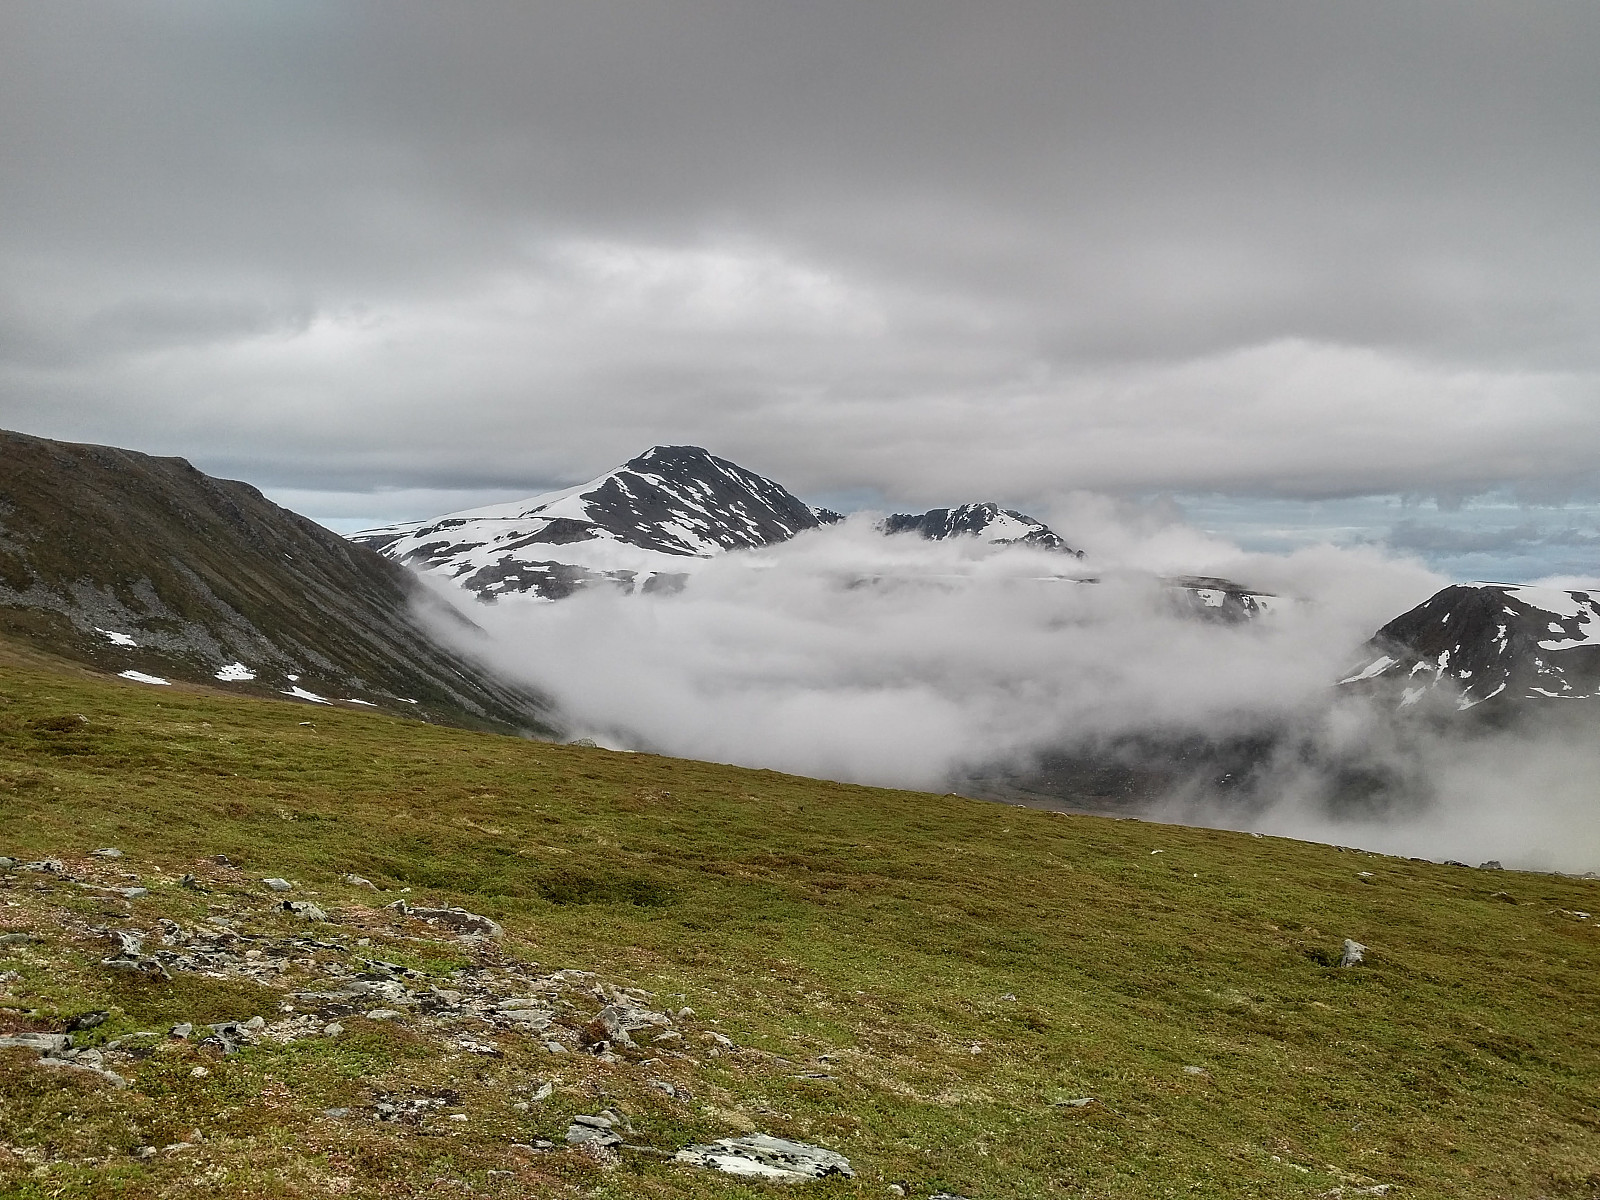
The climb up Tindfjellryggen [i.e. "The Peak Mountain Ridge"] was quite steep, though not as steep as the climb up Mount Byrkjevollhornet had been. This ridge had a trail that you could follow, and wherever the edge of the ridge was so steep that you had to climb instead of walk, there were alternative trails that circumvented the steep segment. This was the case where the main trail led up to Tindfjellpinakkelen (793 m.a.m.s.l.), for instance; you could circumvent the entire pinnacle by following an alternative trail, but then of course you couldn't claim afterwards that you had actually been upon it. At other locations along the route, the main difference between climbing along the edge, and taking an alternative trail, would be that the edge offered a magnificent view of Mount Blåskjerdingen and the valley Skjerdinghola between Mount Blåskjerdingen and Tindfjellryggen mountain ridge (Image #10); whereas the alternative short trails only offered a view of the valley west of the ridge (i.e. the valley seen on image #9).
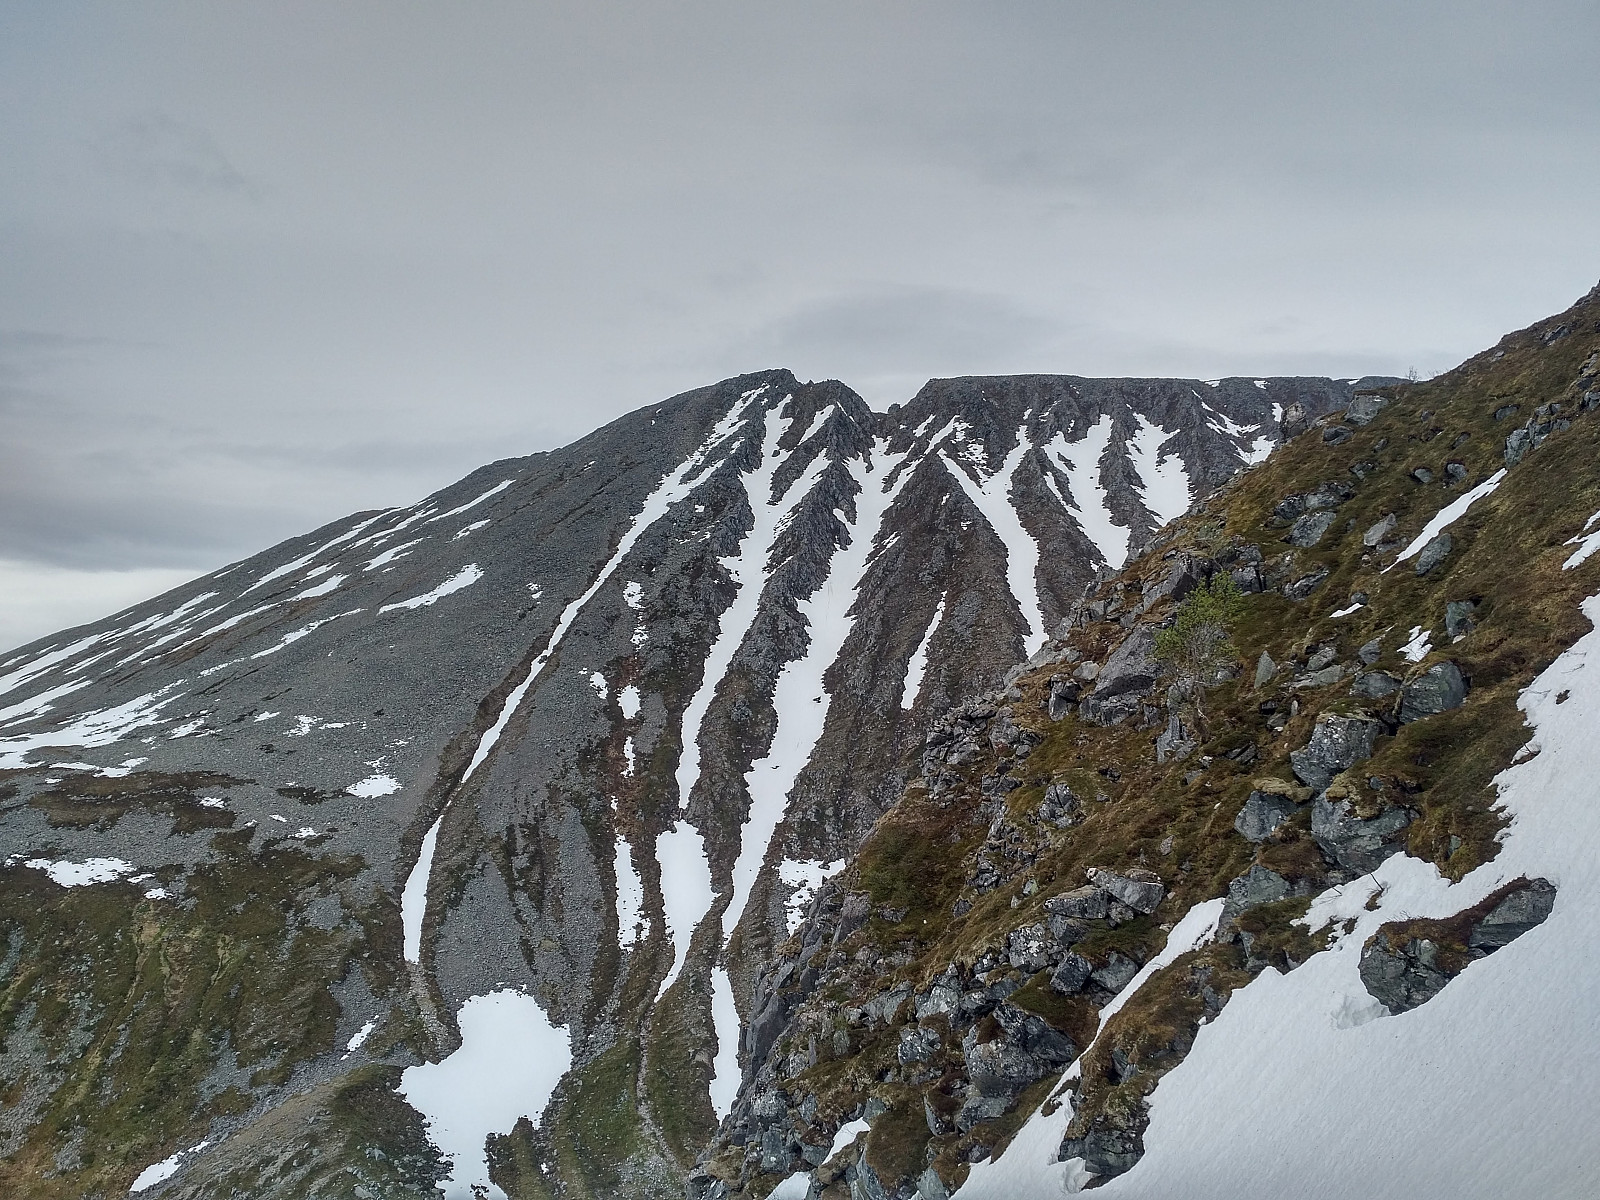
The climb up the pinnacle wasn't that bad, by the way; getting down again from it while continuing along the edge of the mountain ridge was more challenging (image #11). An obvious alternative if you're not into steep climbing, would of corse be to get back down the very way you came up, and then take the alternate route around the pinnacle as you continued the trek. I figured the climb down the steep route was good training for future mountain climbing, however, so I continued straight ahead.
![#12: The peak of Tindfjellpinakkelen as seen from a little bit higher up the ridge of Tindfjellryggen. In the background is seen the fjord Vestrefjorden and the islands of Dryna and Midøya; and even further back are seen [from the left] the islands of Haramsøya, Skuløya, Fjørtofta and Harøya. In the right part of the image you can see the peaks of Byrkjevollhornet and Hornbotnhornet.](https://images1.peakbook.org/images/14939/Solan_20200615_5ee7eb7bb7fa0.jpg?p=xtralarge)
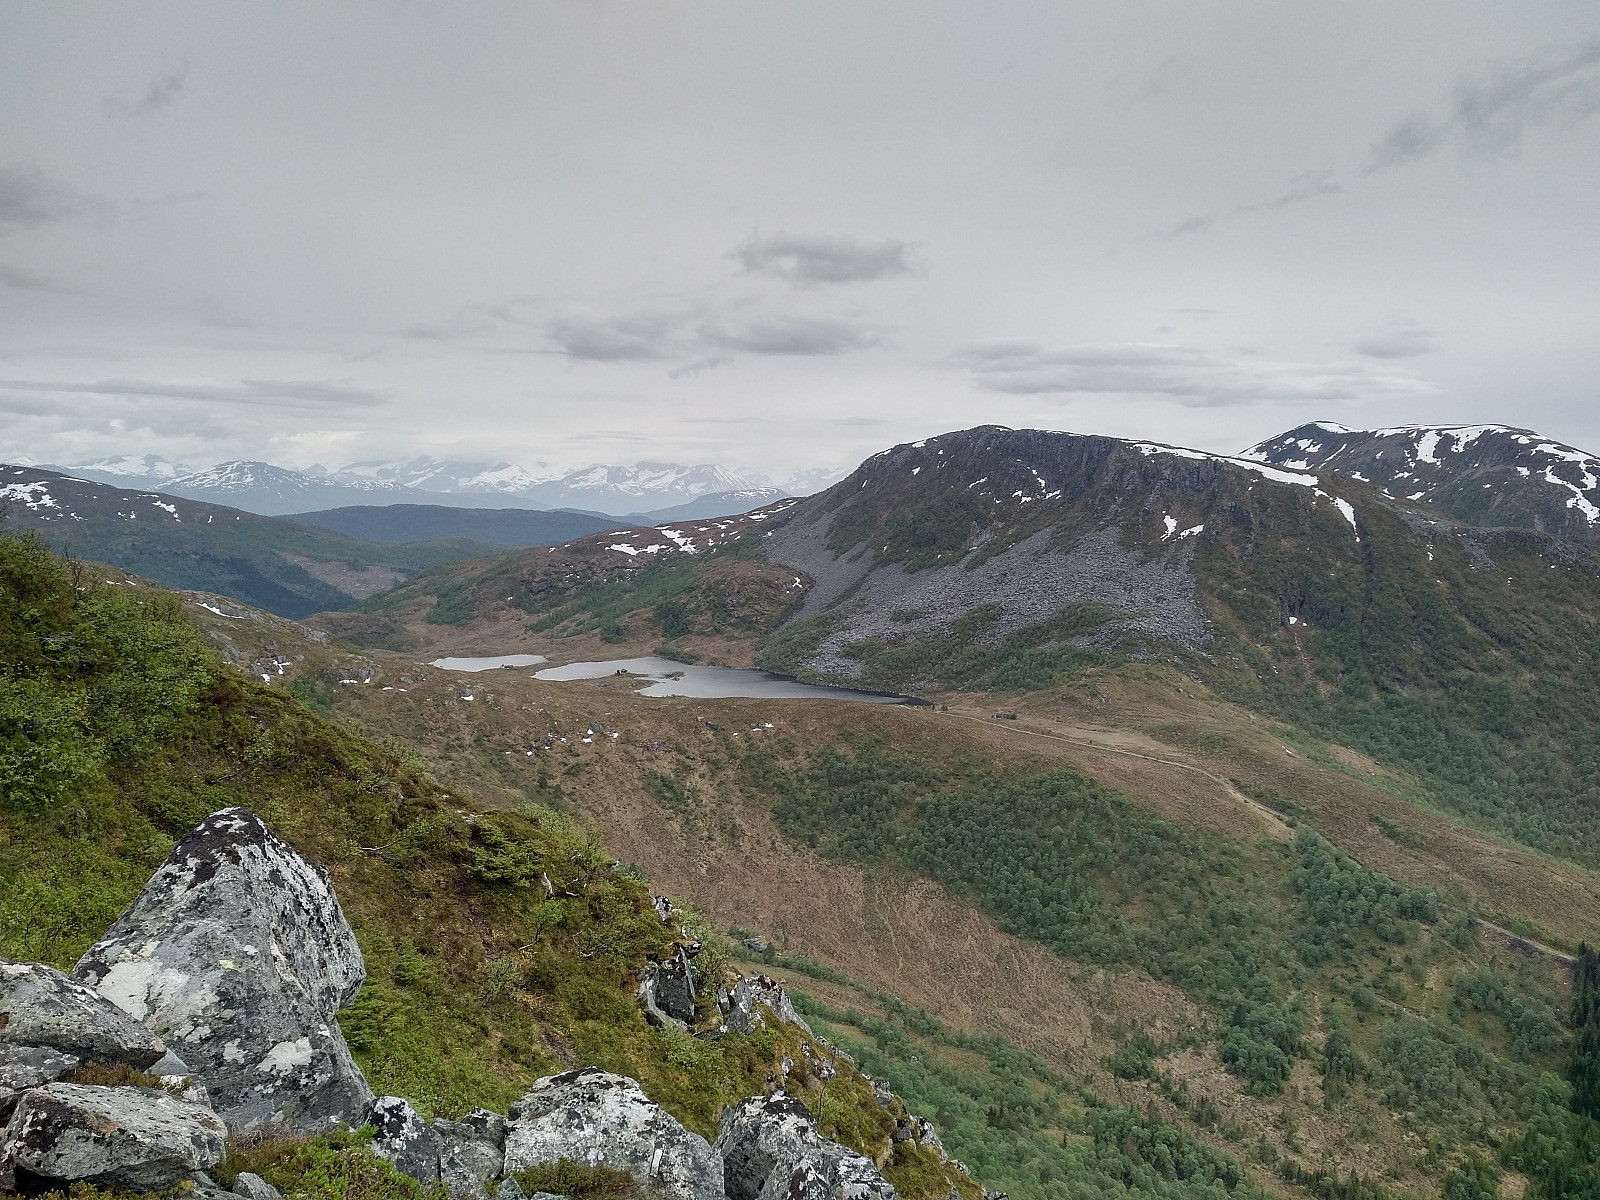
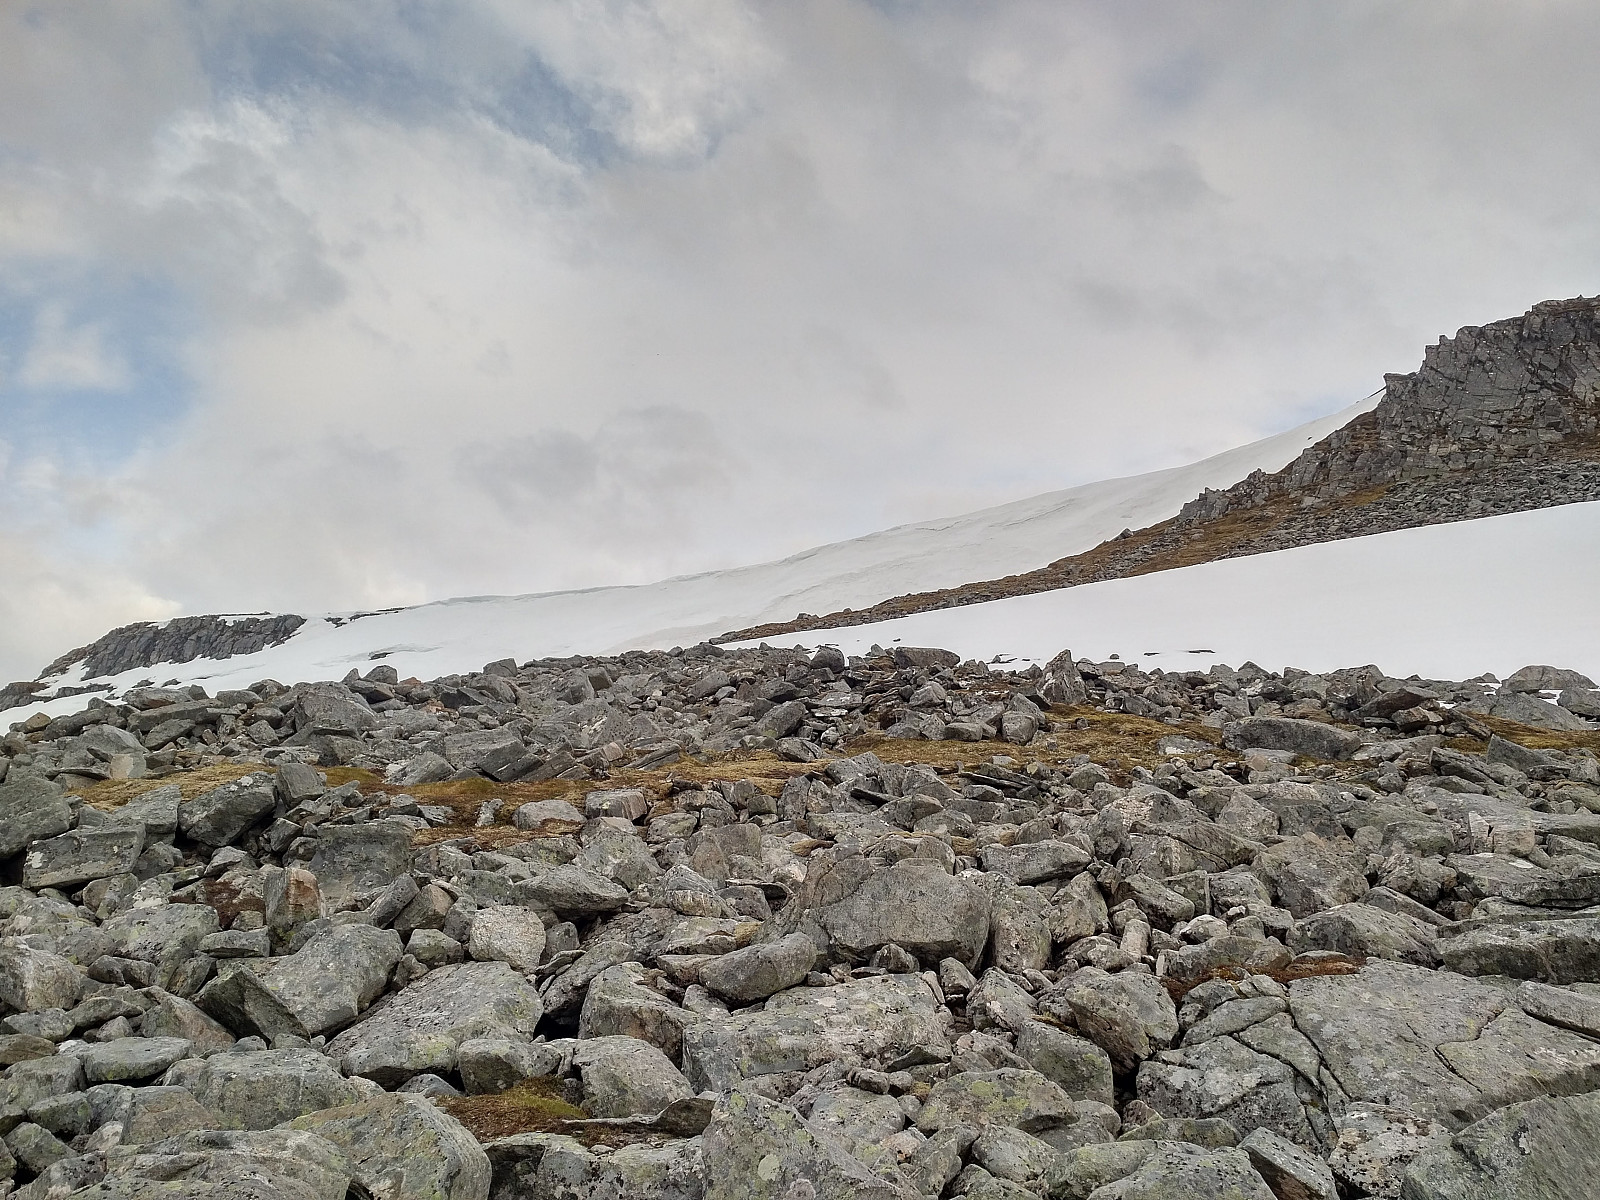
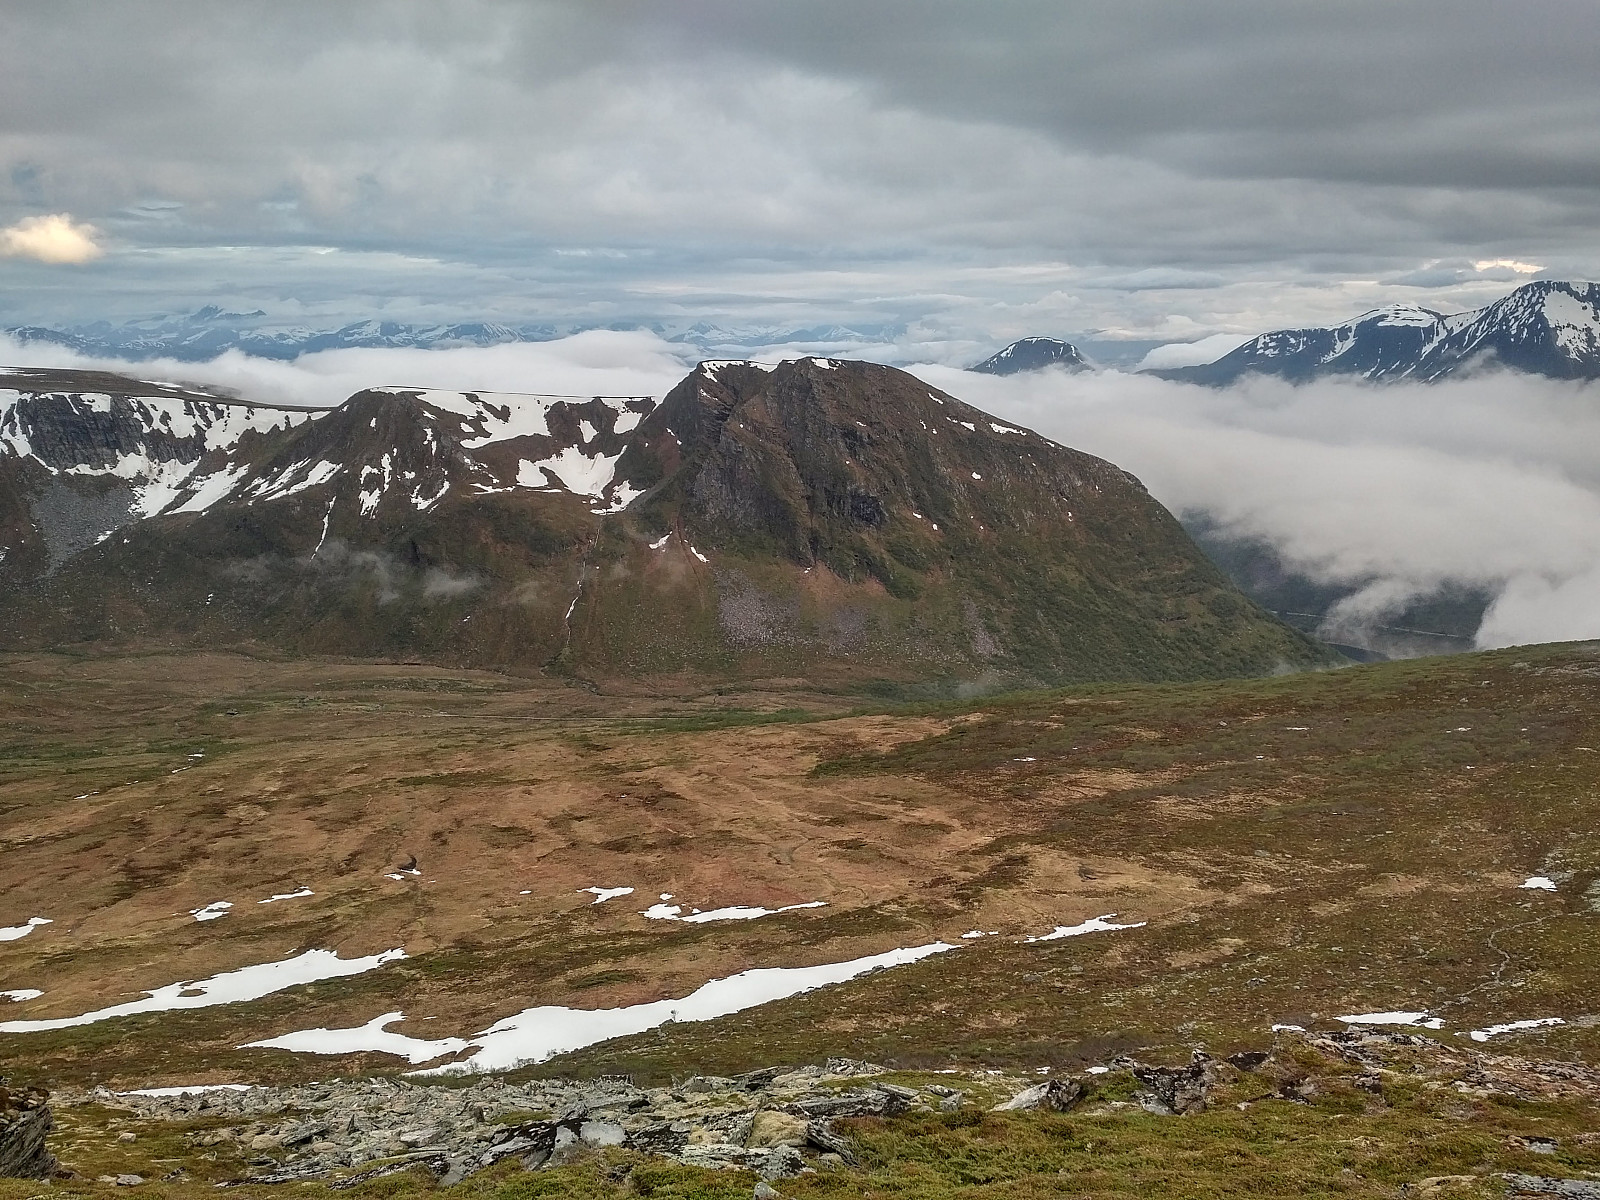
The next peak on the climb was Tindfjellaksla (842 m.a.m.s.l.). The most demanding part of this days hike was undoubtedly the climb up Tindfjellryggen Mountain Ridge, but climbing Tindfjellaksla in itself was rather straight forward. From there up to the main peak of Tindfjelltoppen [i.e. The Peak Mountain Summit] (969 m.a.m.s.l.) there were some patches of snow remaining from the winter, but none of them were difficult or dangerous to cross.
From Mount Tindfjellet [i.e. The "Peak Mountain"] you just follow the ridge over to Mount Blåskjerdingen. When you walk along the edge of this ridge, you get a very steep cliff of maybe 70° inclination down to the valley of Skjerdinghola on your left hand, whereas on the right hand you have a mountain side with an inclination of only about 40° or so. I started out from Tindfjellet by doing the mistake of going a bit to the right of the edge, i.e. 25 elevation meters or so below the edge; thinking that was going to be easier, as the ridge itself seemed to be a bit spiky or furrowed. That judgement proved wrong, however, as down there on the south side of the mountain, I encountered several chutes with snow tongues protruding up from a larger accumulation of snow further down in the mountain side. I could have crossed them, but then there was the risk of sliding downwards upon one of them since I didn't have any crampons with me; so I quickly figured it would be easier to just go back up to the edge, and then follow the edge over to Mount Blåskjerdingen. Up there on the ridge, I immediately found a broad nice trail that was easy to follow; and I felt kind of stupid that I hadn't chosen the ridge in the first place.
![#15: Having a look back at Mount Tindfjellet from Mount Skjerdingen. The lower prominence to the right is the one called Tindfjellaksla [i.e. the "shoulder" of Tindfjellet].](https://images1.peakbook.org/images/14939/Solan_20200616_5ee936918c8c0.jpg?p=xtralarge)

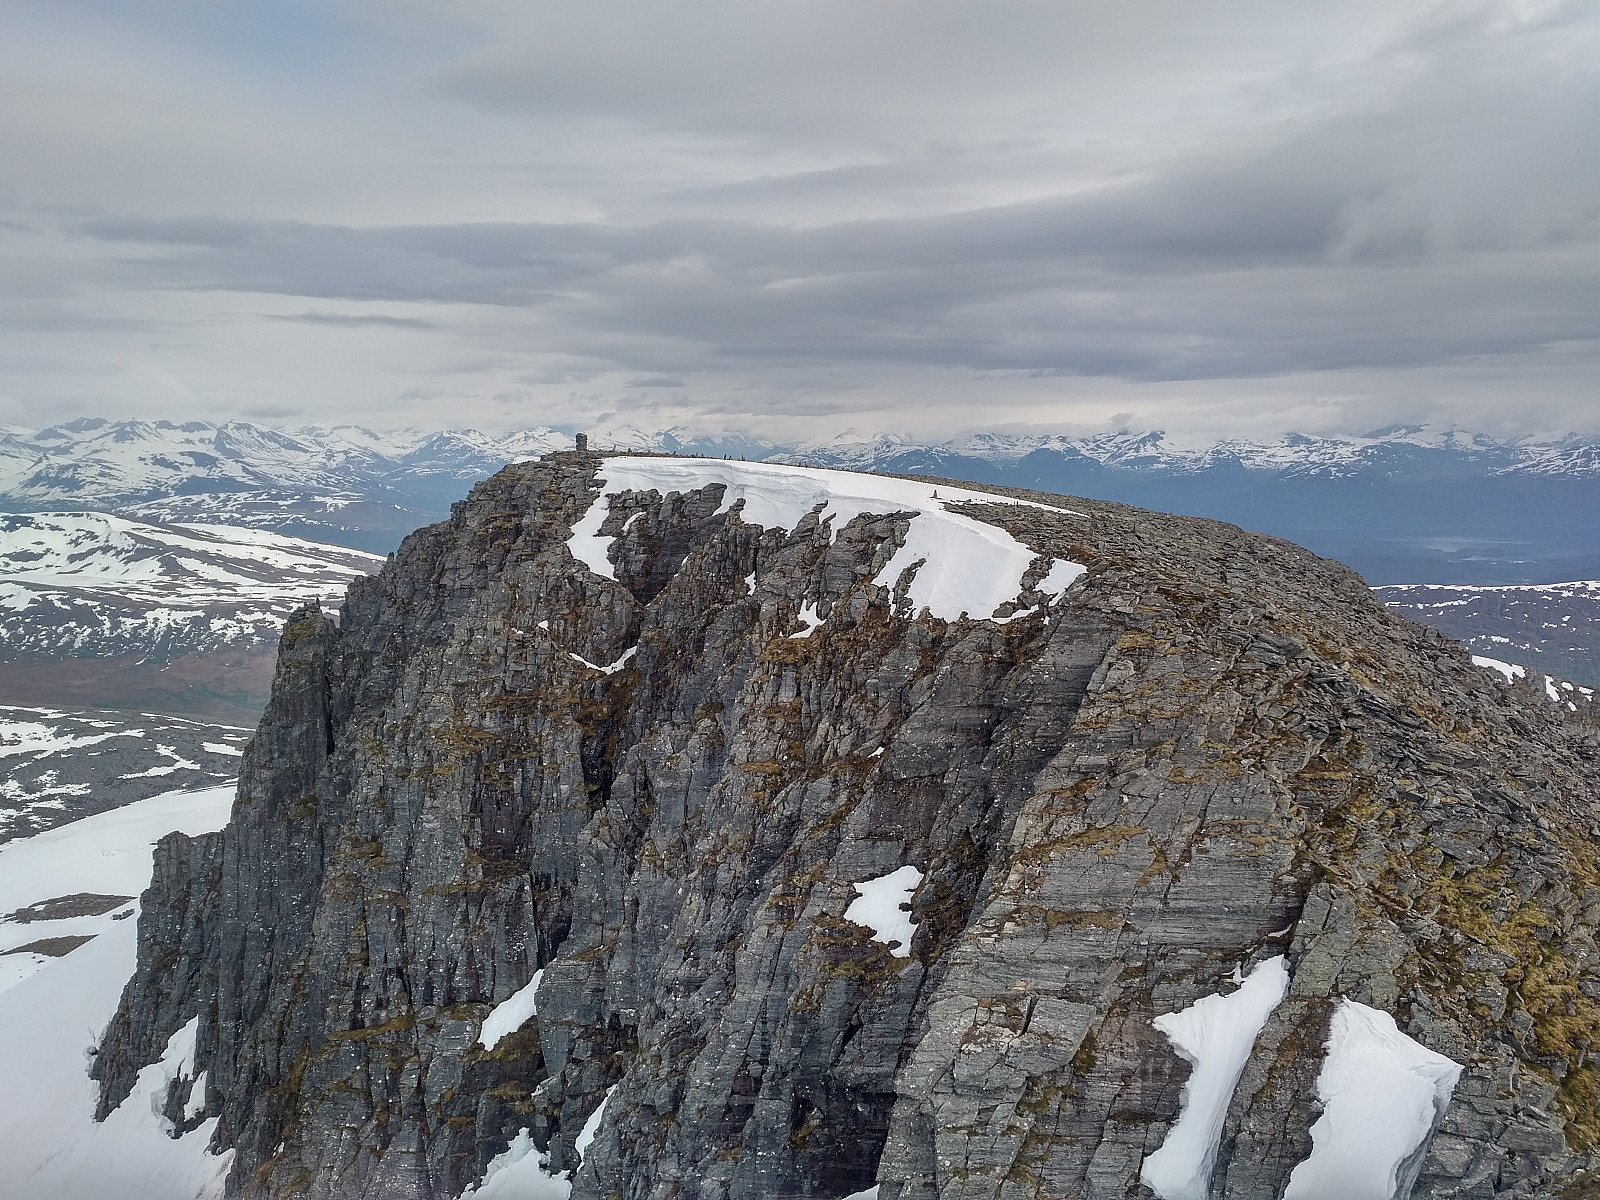
On the south peak or south "summit" (1062 m.a.m.s.l.) of Mount Blåskjerdingen there was still a huge snowdrift that had heaped up during winter (Image #17), though it no longer covered the entire summit plateau. It might be dangerous to cross this large snowdrift, if you walk too close to the northeastern edge of the plateau, as the snowdrift commonly have even a large snow shelf overhanging a almost vertical cliff of several hundred meters. In order to reach and cross the cleft separating the two peaks of Mount Blåskjerdingen, therefore, I avoided crossing the snowdrift, and circumvented it on the west side instead; where there was no longer any snow.


The ravine or cleft of the mountain was in itself more or less free of snow (Image #19); or at least there currently wasn't any snow preventing you from crossing the ravine. Towards the north peak of the mountain (1069 m.a.m.s.l.) there was another little snow patch (Image #18), but climbing past that one posed no challenge. The names used for this mountain are a bit confusing. Most people seems to be using the names Skjerdingen and Blåskjerdingen interchangeably, and refer to the two summits as the north peak and the south peak of either Skjerdingen or Blåskjerdingen. It is my impression, though, that some of the locals from the villages around the mountain are referring to the south peak as Mount Skjerdingen, and the north peak or summit as Mount Blåskjerdingen.

From Mount Blåskjerdingen and back down to the valley Eikedalen, the greatest challenge was huge, loose stones, that tended to tilt over as you stepped on them. There is a mountain ridge stretching from the summit, or north peak of Mount Blåskjerdingen in a northward direction. I have even descended along that ridge on a previous occasion, but that was later in summer, hence all the snow was gone; and before reaching Eikedalen we took east along another ridge on that occasion (see tour description from May 28th 2016 Hiking to Mount Skjerdingen and Two Beautiful Lakes). This time, however
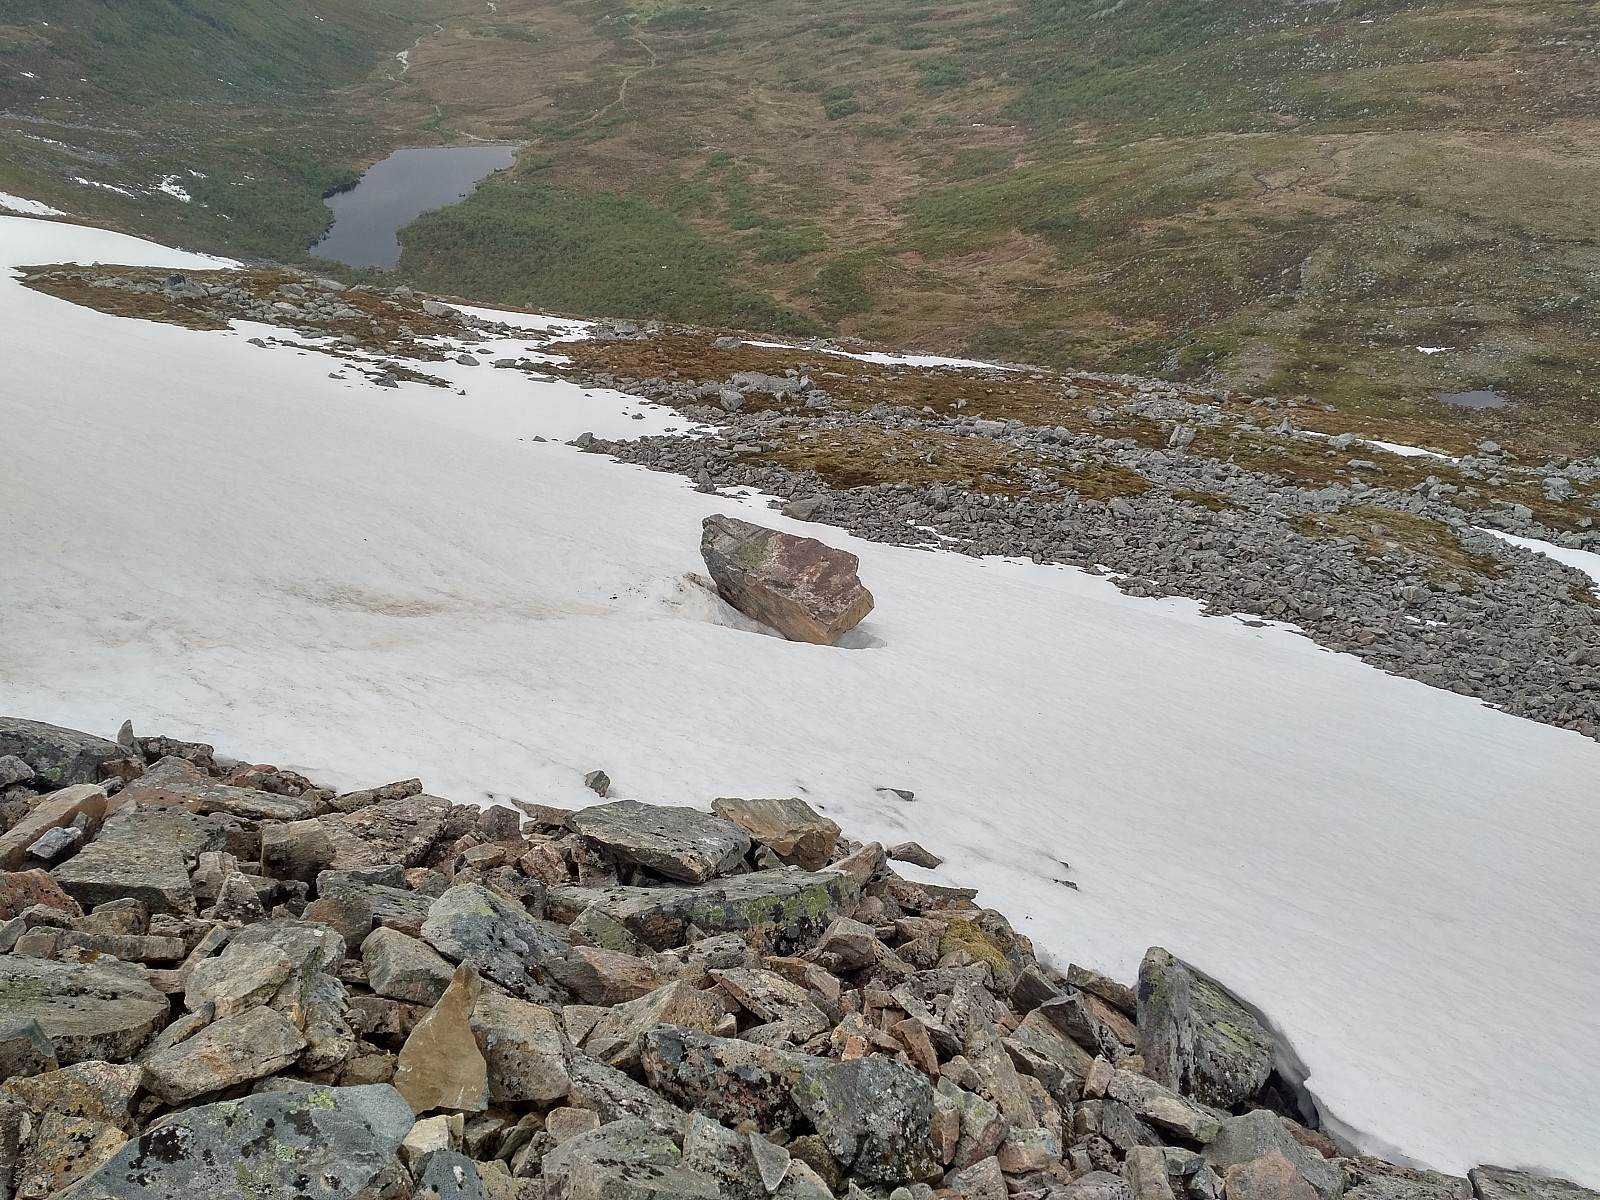
there were still large patches of snow along the north ridge of the mountain, which I had to cross if I wasn't up to circumvent them. It is quite often easier to walk on old snow than on tilting stones, but then some places while you're walking peacefully on the snow, one of your steps goes right through the snow, and deep into a hole in between the stones underneath the snow, so I ended up with walking on the snow some places, and walking around it at other places. Moreover, this time I wanted to cross the valley of Eikedalen, and then visit Mount Rekdalshesten north of the valley before heading back to my car, so I continued straight north, avoiding the ridge going east, and as I came closer to the valley of Eikedalen, I gradually realized the climb down into the valley was going to be a bit steeper than I had imagined. The north ridge of Mount Blåskjerdingen continued only down to the plateau where even the summits of Byrkjevollhornet and Hornbotnhornet are located, and then there was a steep cliff separating the plateau from the valley. I first went a little bit east, in order to find a suited place for my descent, but there I just found another huge snowdrift that still had snow shelves overhanging the valley beneath (Image #25); so then I turned around and went a little bit west, where I actually found a nice place to climb down into the valley (See my GPS tracking).
The place I descended was quite steep just under the plateau, but I found some stair-like stones that I could step on, and some others that I could hold onto; and once I was beneath the upper ten meters or so, the slopes were no longer that steep, so you could continue downwards on foot without having to climb down. Then suddenly I saw a huge rock maybe 4 x 4 x 0,5 meters in size lying on the ground just in front of me, and about 50 meters further down the slopes another, smaller, maybe 0,8 meters in diameter lying upon a snowdrift (Image #24). There had obviously been a rockfall at this location at some time during this last winter, as this huge rock was still lying on top of the snow. I continued down to the upper part of Eikedalen valley, though the place I crossed the valley was actually the watershed area between Eikedalen and a valley called Langedalen, just east of it (see map). This watershed area between the two valleys is also referred to as Skjerdingshalsen [i.e. The Skjerdingen Neck]. I crossed some small creeks that were running eastwards. I was a bit thirsty so I had some water to drink from one of the creeks, and I also filled up two of my bottles, that were empty by now. Norwegian mountain water is generally safe to drink, though you should be careful in areas with a lot of rodents, such as lemmings, and also in areas with grazing domestic animals. Generally speaking, the higher the altitude, the less animals there tends to be, and the safer the water is likely to be. The water of this creek was probably safe, because I drank a lot of it, and it didn't harm me; but it had a characteristic taste of mire, and I wouldn't have drunk of it had there been an alternative.
The final goals of my hike was Mount Urfjellet (757 m.a.m.s.l.) and Mount Rekdalshesten (782 m.a.m.s.l.). Rekdal is the name of a village located at the foot of this latter mountain, and hest is the Norwegian word for horse. I believe that the term horse originally was applied to the mountain due to the saddle shape of the valley between these two mountains; hence originally the name Rekdalshesten probably referred to the mountains of Rekdalshesten and Urfjellet together. Mount Rekdalshesten proper, or the head of the horse, can't be seen from the creek where I filled my water bottles, it's hidden behind Mount Urfjellet. I had seen both summits from afar, while still up there on Blåskjerdingen, however, so I had sort of a map inside my head as I embarked on ascending Mount Urfjellet. Mount Urfjellet would normally have been a rather easy mountain to ascend, but after many hours of climbing and walking, my pace wasn't any longer as it was when I started out in early afternoon.
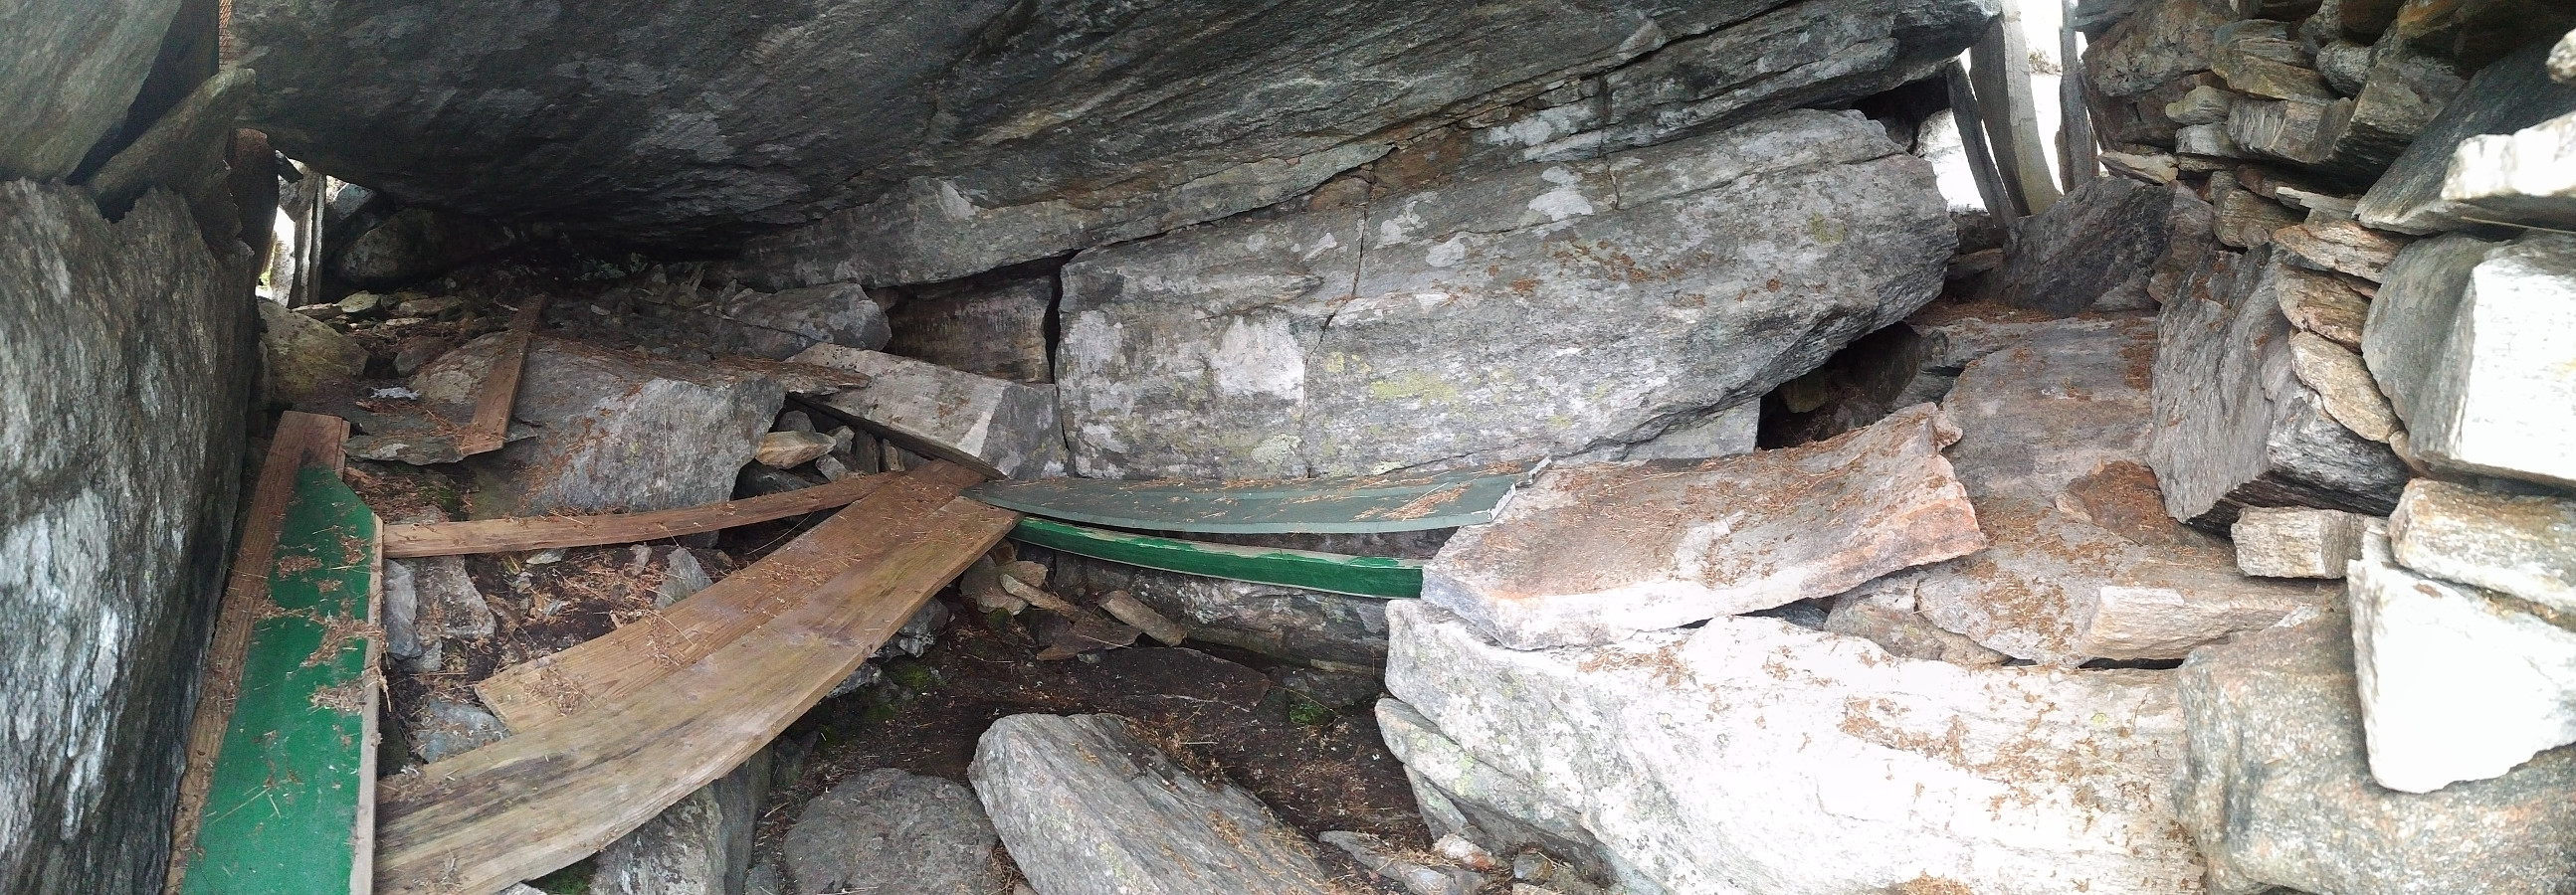
I reached the summit of Mount Urfjellet after some minutes, and then adjusted my direction towards the eastern part of Mount Rekdalshesten, just above the village of Rekdal. The mountain has a little knoll called Hestenebba (758 m.a.m.s.l.) at this location, and I wanted to visit this knoll before continuing to the summit of the mountain. Shortly before arriving at Hestenebba, I came across a funny construction that has been named Hesthellaren (Image #29). It seemed to have originally been a shelter formed by a huge stone protruding from the ground; later made into a cabin-like structure by the addition of some stone walls. Inside the shelter (Image #30) was some simple benches to sit on.
![#29: A shelter called the "Horse Shelter" [Norw.: Hesthellaren], not because anyone's keeping horses up there, but because it's a shelter on the mountain called "the Horse of Rekdalen Valley [i.e.: "Horse" is "hest" in the norwegian language]. The shelter seemed to be a natural shelter, later improved by human hands.](https://images1.peakbook.org/images/14939/Solan_20200622_5ef095ae5c657.jpg?p=xtralarge)
The view from Hestenebba was amazing; down to the valley and the village of Rekdal (Image #31), and the view towards the huge fjord called Romsdalsfjorden, the islands in the fjord, and the town of Molde on the other side of the fjord (Image #32). I captured some photos from the knoll of Hestenebba, then continued onto the top of Mount Rekdalshesten; and from there I embarked on the climb back down to the spot where I had parked my car.

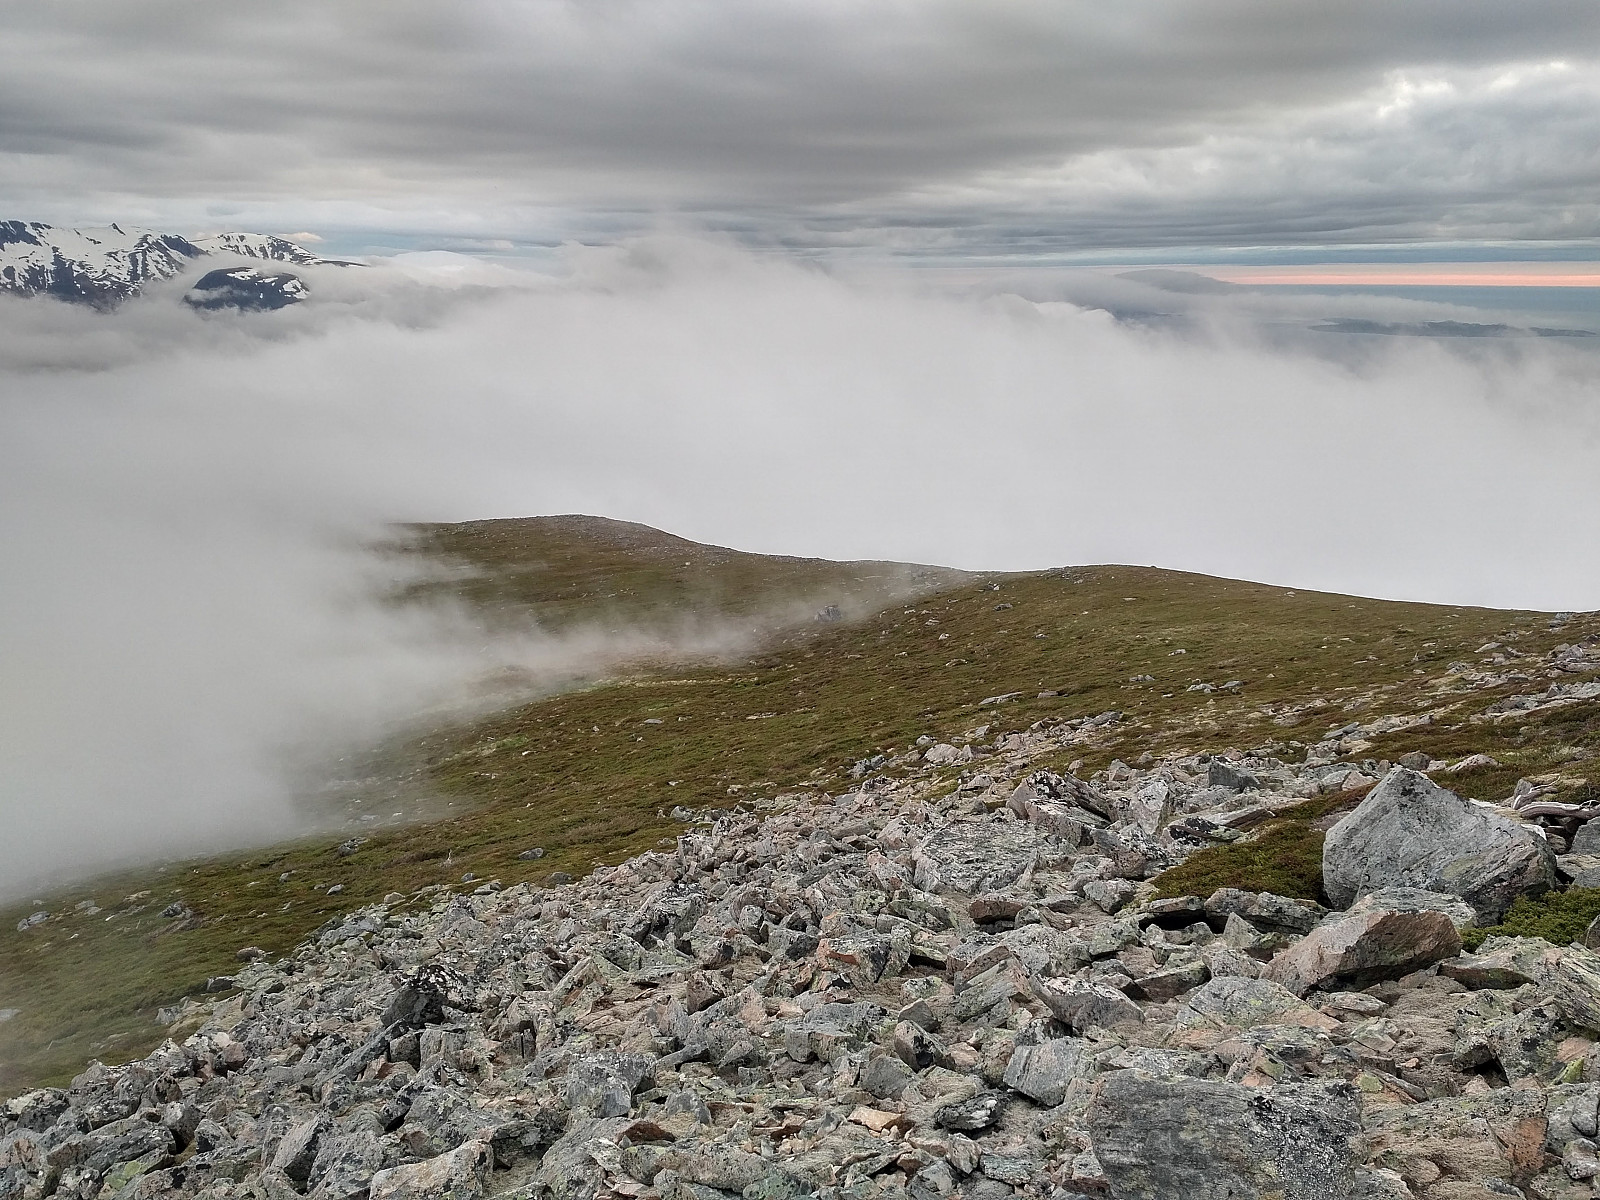
I followed a trail in a westward direction, along the west ridge of the mountain. The trail was easy to follow to begin with. I wasn't quite sure whether it was a real trail, or just an animal track, but the landscape was open, and I knew the direction in which I was heading, so I didn't really mind about the trail. But then I noticed a lot of dense clouds were coming in from the ocean, just in front of me and beneath me, and realized this was going to be fog once it hits the mountain, and there was a possibility that it was going to obscure my path. There is a rather steep cliff on the north side of Mount Rekdalshesten, so I decided to avoid walking too close to that cliff; and then I also speeded up my pace a bit, in spite of being tired, hoping to get under the level of the clouds before the fog became too dense.
The fog didn't last long, however; it drifted away due to the wind. I walked in the fog just for a few minutes, and then it disappeared. As I approached the elevation at which the birch forest starts again [i.e. about 460 m.a.m.s.l.], I noticed a broad and much nicer trail than the one I had been following. This one was running south, and I decided to follow it, as I figured it was probably leading down to the mountain road that I had used to get form the village of Eik up to the valley of Eikedalen. This trail lead me through the birch forest, very well, but every now and then it would split up in two, and thereafter become less clearly defined and more difficult to follow. I managed to follow it for a while, though, and when it finally disappeared completely, I checked the map on my GPS, and realized I was no longer than maybe 50 meters from the gravel road, so then I just made my way right through the dense forest down to the road. The descent along the mountain road down to the car was straight forward, and so after about 21 km and about 8 hours and 48 minutes, I was back at the car and could drive home again.


User comments