Ascending the Peak of Freedom (25.11.2022)

| Start point | New Rongai Gate (2,362m) |
|---|---|
| Endpoint | Marangu Gate (1,897m) |
| Characteristic | Hillwalk |
| Duration | 118h 40min |
| Distance | 70.3km |
| Vertical meters | 5,495m |
| GPS |
|
| Ascents | Uhuru Peak (5,895m) | 25.11.2022 |
|---|---|---|
| Gilman's point (5,685m) | 25.11.2022 03:50 | |
| Mount Kilimanjaro (5,843m) | 25.11.2022 03:50 | |
| Stella point (5,756m) | 25.11.2022 03:50 | |
| Visits of other PBEs | Crater camp (5,731m) | 25.11.2022 03:50 |
| Horombo hut (3,720m) | 25.11.2022 03:50 | |
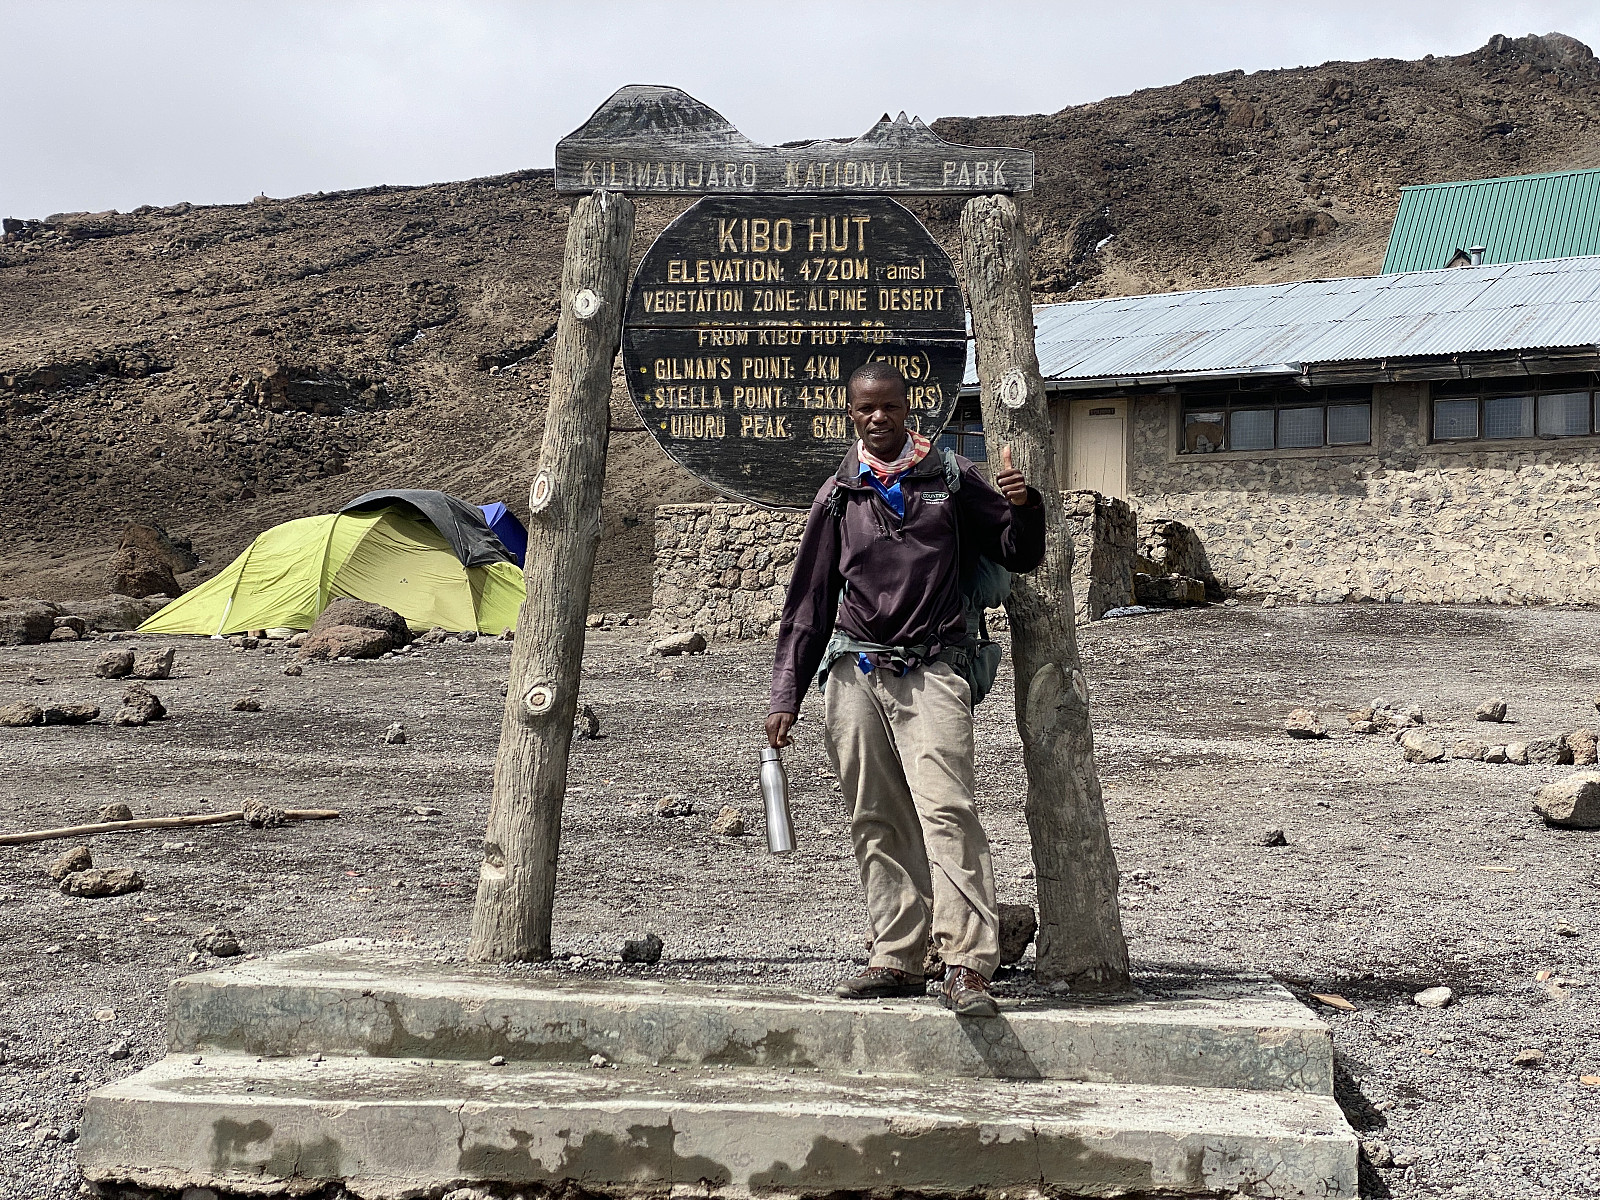
| Kibo Huts (4,700m) | 25.11.2022 03:50 | |
| Kikelewa caves campsite (3,665m) | 25.11.2022 03:50 | |
| Mandara huts (2,710m) | 25.11.2022 03:50 | |
| Marangu gate (1,880m) | 25.11.2022 03:50 | |
| Mawenzi Midpoint (5,710m) | 25.11.2022 03:50 | |
| Mawenzi tarn hut (4,308m) | 25.11.2022 03:50 | |
| New Rongai Gate (2,364m) | 25.11.2022 03:50 | |
| Second Cave Camp (3,490m) | 25.11.2022 03:50 | |
| Simba camp (2,670m) | 25.11.2022 03:50 |
Introduction
Ascending Mount Kilimanjaro has been a longstanding dream of mine. As a teenager living in Africa back in the 1980s I occasionally heard of people that had ascended Kilimanjaro (or attempted to do so), but travelling from the DRC to Tanzania was quite costly back then; and so I never had the opportunity. When my employer started sending me to Addis Ababa in Ethiopia for work every now and then, I saw this as an opportunity for trekking Kilimanjaro, however, as Addis is located about 2400 m.a.m.s.l., and 2 weeks there offers good altitude acclimatisation. And so, I got in touch with a guy named Frank Fred Lyimo, and booked a hike of Kilimanjaro with him; scheduling it to the days immediately after a two week stay in Addis.
According to what I've read, between 5 and 10 % of people who attempt to climb Kilimanjaro, fail to do so due to altitude sickness, and I believe most of them (but sure not all) would have managed to reach the summit if they had had a good plan for altitude acclimatisation. And so, in order to avoid the embarrassment of not reaching the summit, I made myself an acclimatisation plan, that included:
- Ascending as many >1500 meter summits as possible in Norway before leaving for Africa.
- Staying two weeks at 2400 m.a.m.s.l. in Addis Ababa with running/jogging almost every day.
- Ascending at least one >3000 meter summit while in Ethiopia [Link: To Mount Zuqualla in Oromia, Ethiopia].
- Ascending Mount Ol Doinyo Lengai [2962 m.a.m.s.l.] immediately after my arrival in Tanzania [Link: Climbing the Mountain of God].
- Ascending Mount Meru [4562 m.a.m.s.l.] merely a few days before the ascent of Kilimanjaro [Link: Ascending Mount Meru in Arusha].
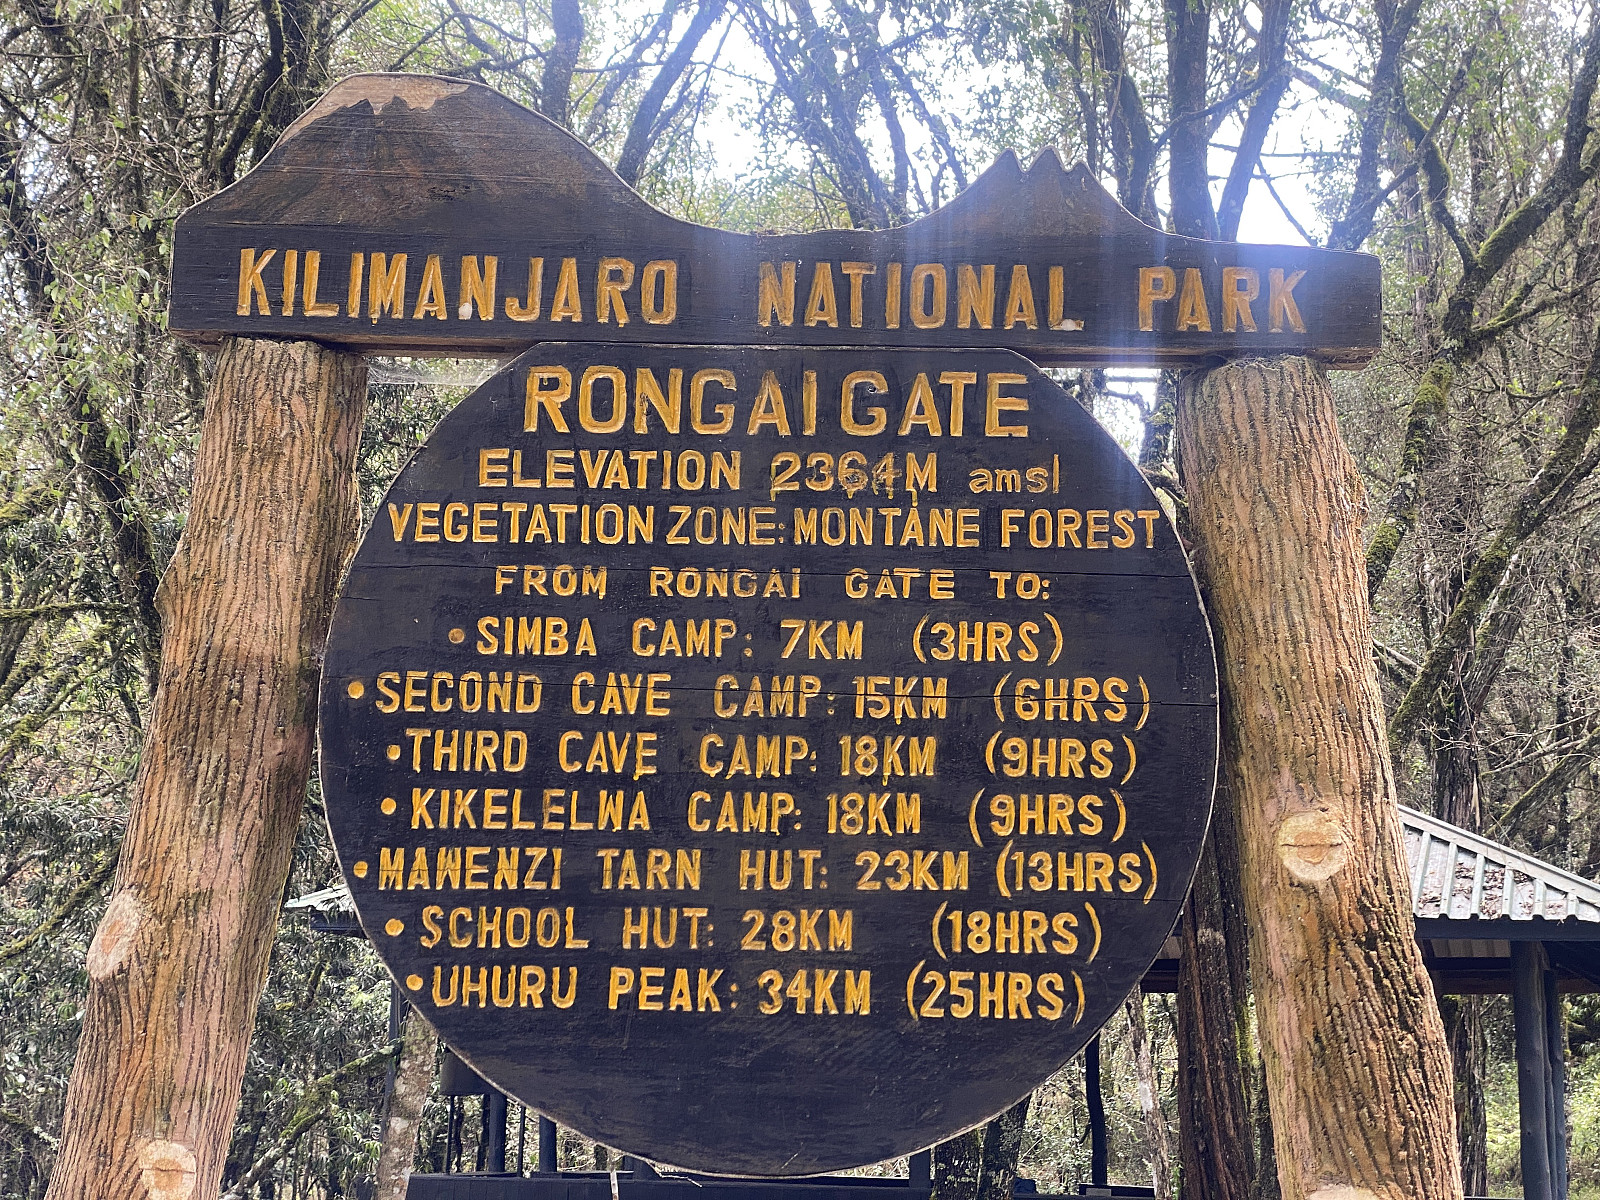
Day 1 - From the Rongai Gate to the Simba Camp
We started out from Marangu quite early in the morning, but the drive from Marangu to Rongai takes about 1 hour and a half (it's about 65 kms), and we were going to pick up some stuff (food etc.) on our way there. We eventually arrived at the Rongai Gate, however, but there we had to go through a thorough process of registration, and just as when we climbed Meru, everything had to be weighted, to make sure no porter was carrying more than 20 kgs. We finally started trekking at about 5 past 1 p.m. The New Rongai Gate is located at 2364 m.a.m.s.l., and according to our schedule we were only trekking up to Simba Camp [2670 m.a.m.s.l.] this first day; which took us about one hour, even though we had a 12 minute stop about halfway in order to eat lunch. When thinking through it retrospectively, we shouldn't have made the first day's leg this short, as I was already fully acclimatised to this altitude, and there was no reason to ascend this slowly. It would have been better to continue all the way up to the Second Cave Camp on the first day, and then to the Mawenzi Tarn Hut already on the next day; as I needed acclimatisation above 4000 m.a.m.s.l., and not below 3000 m.a.m.s.l.
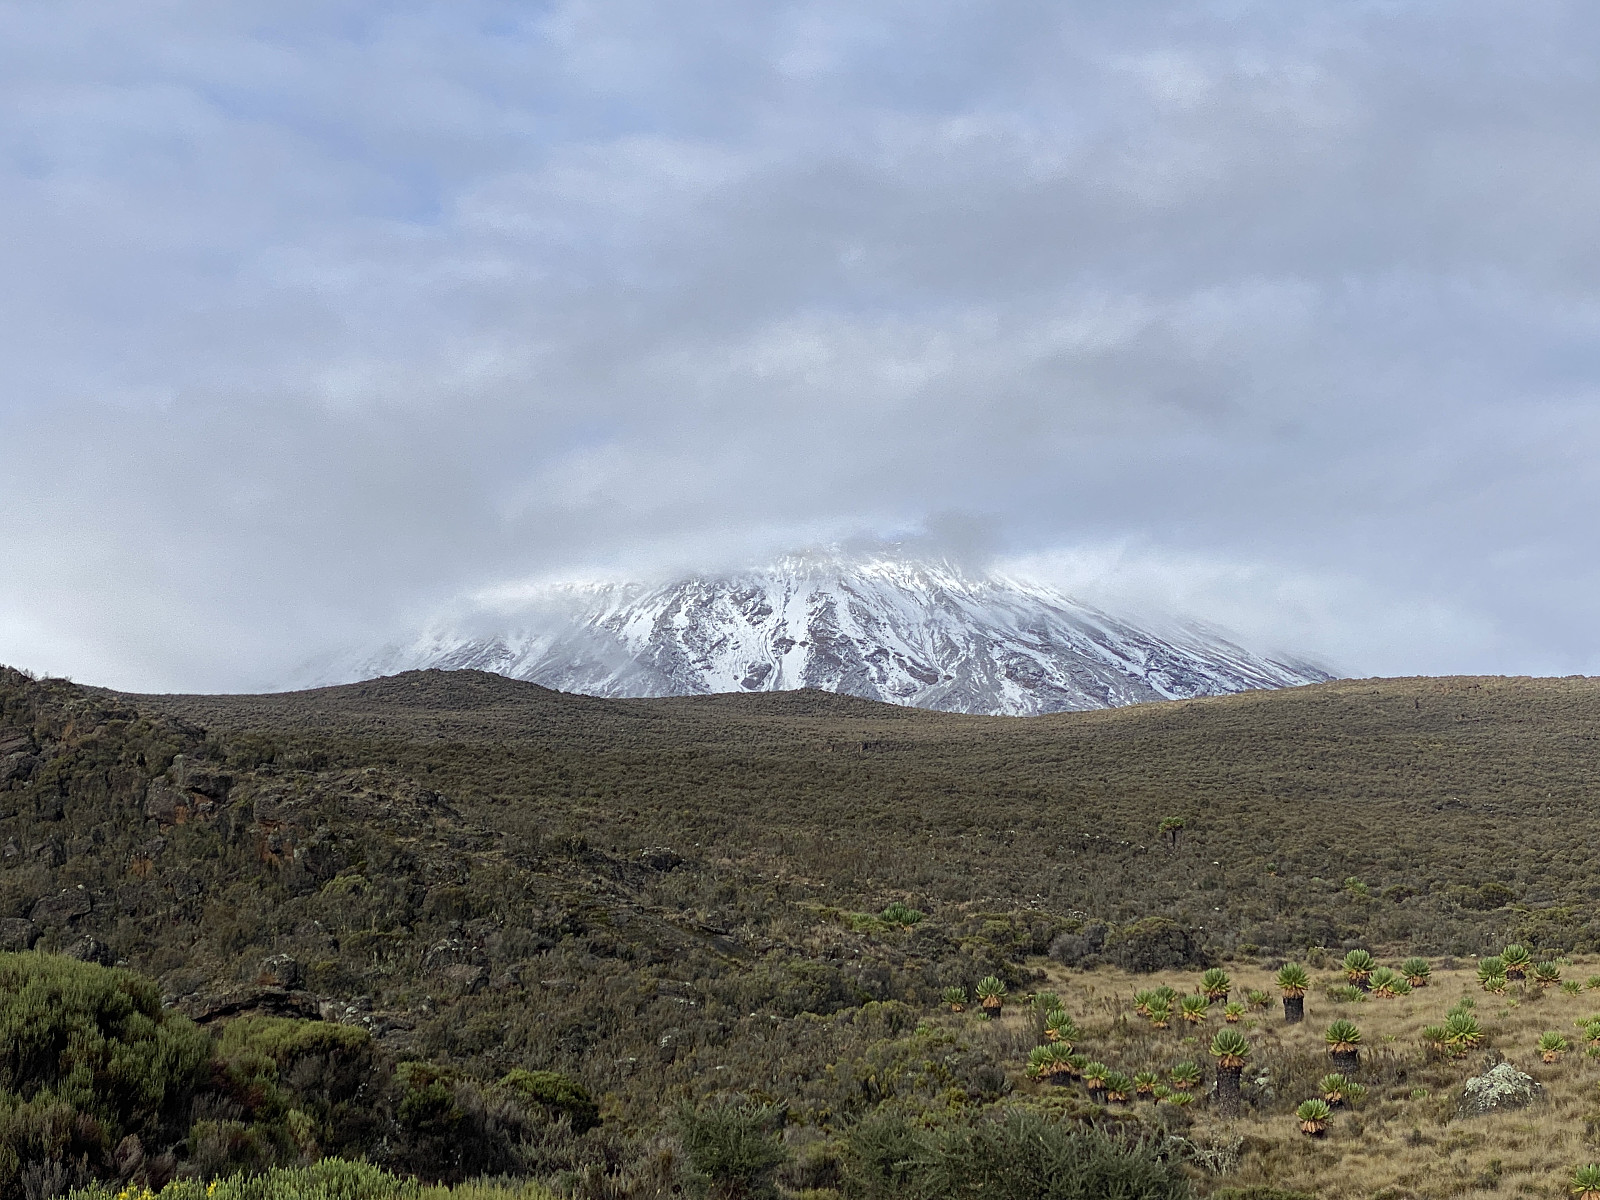
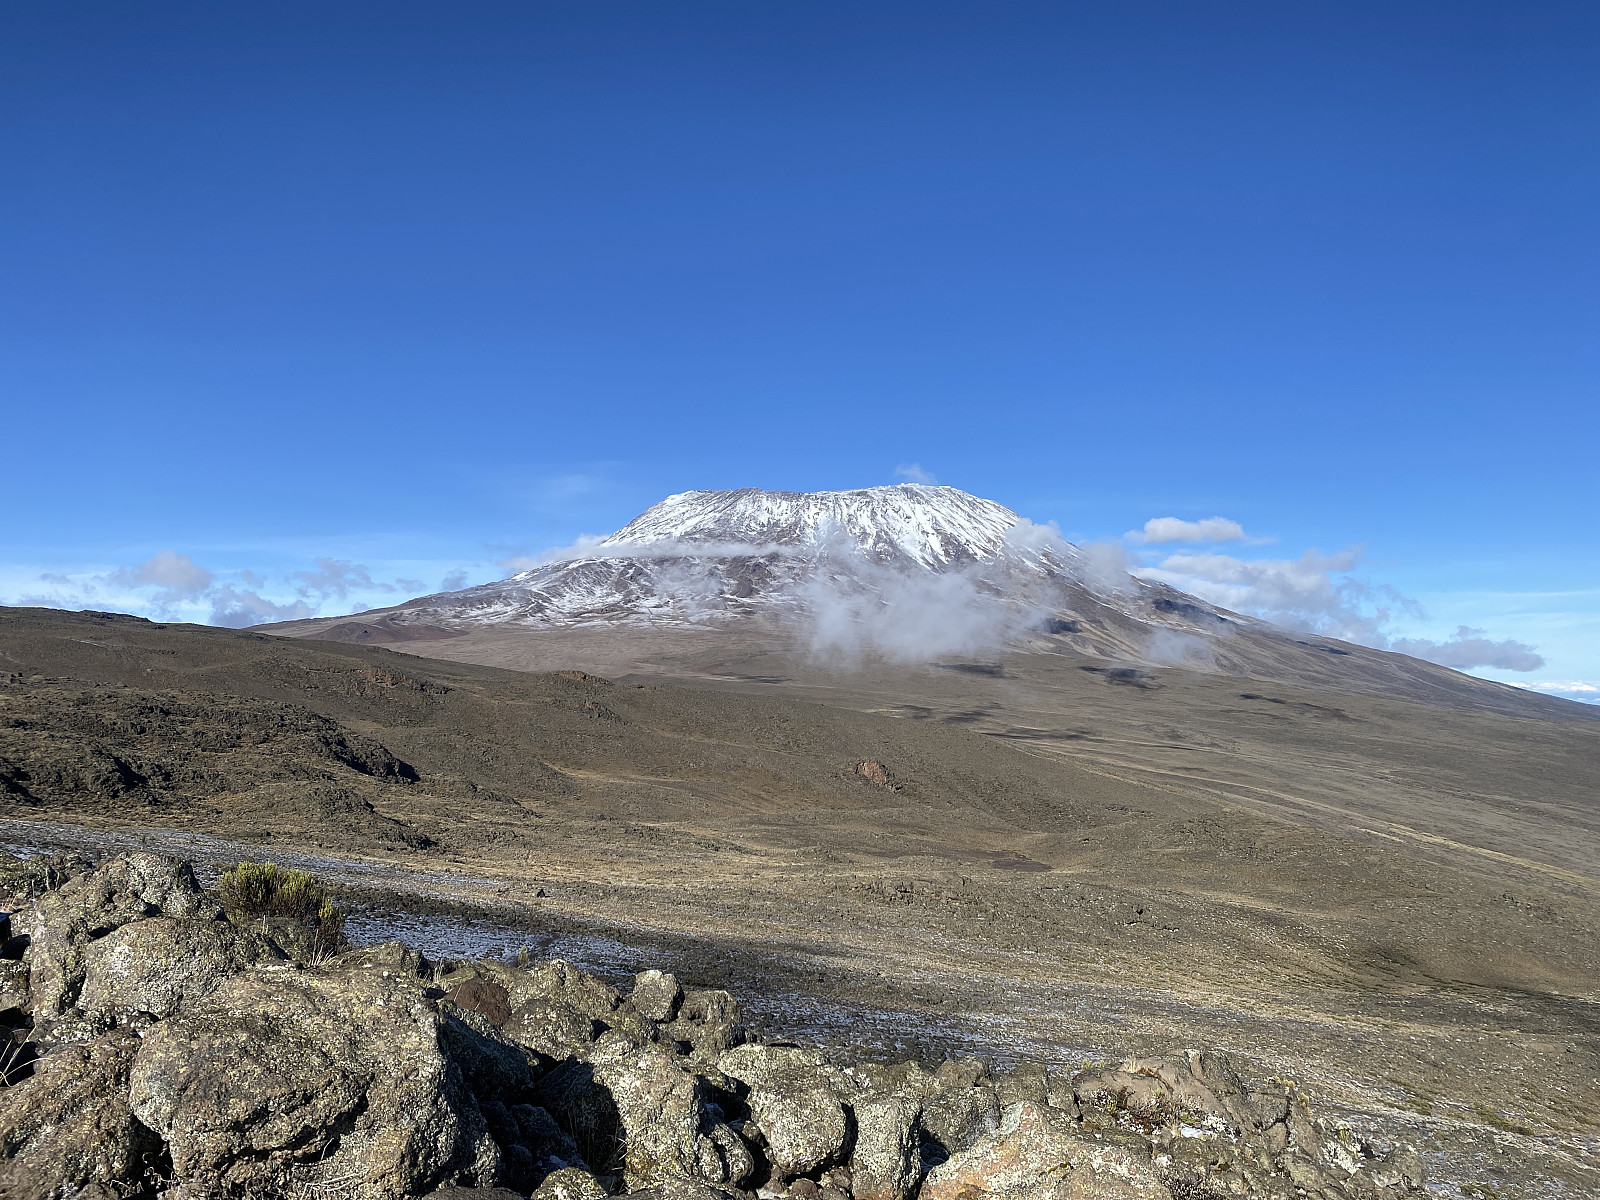
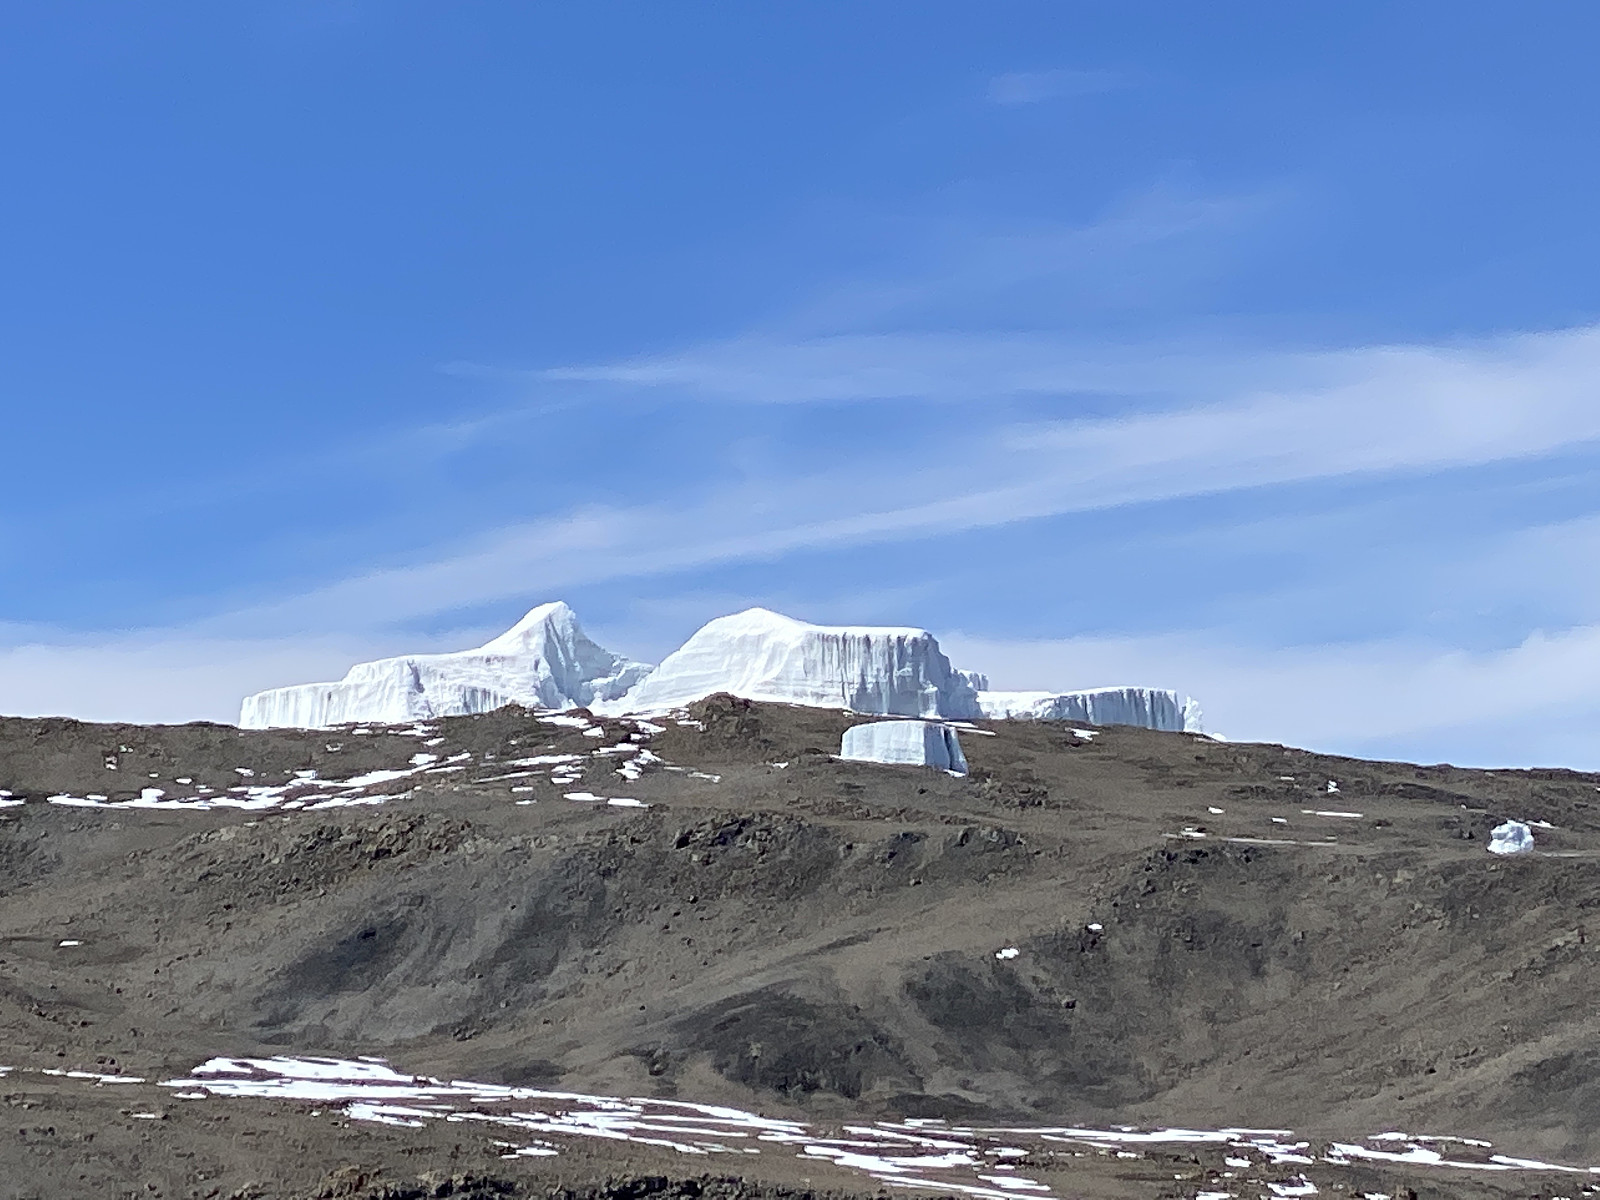
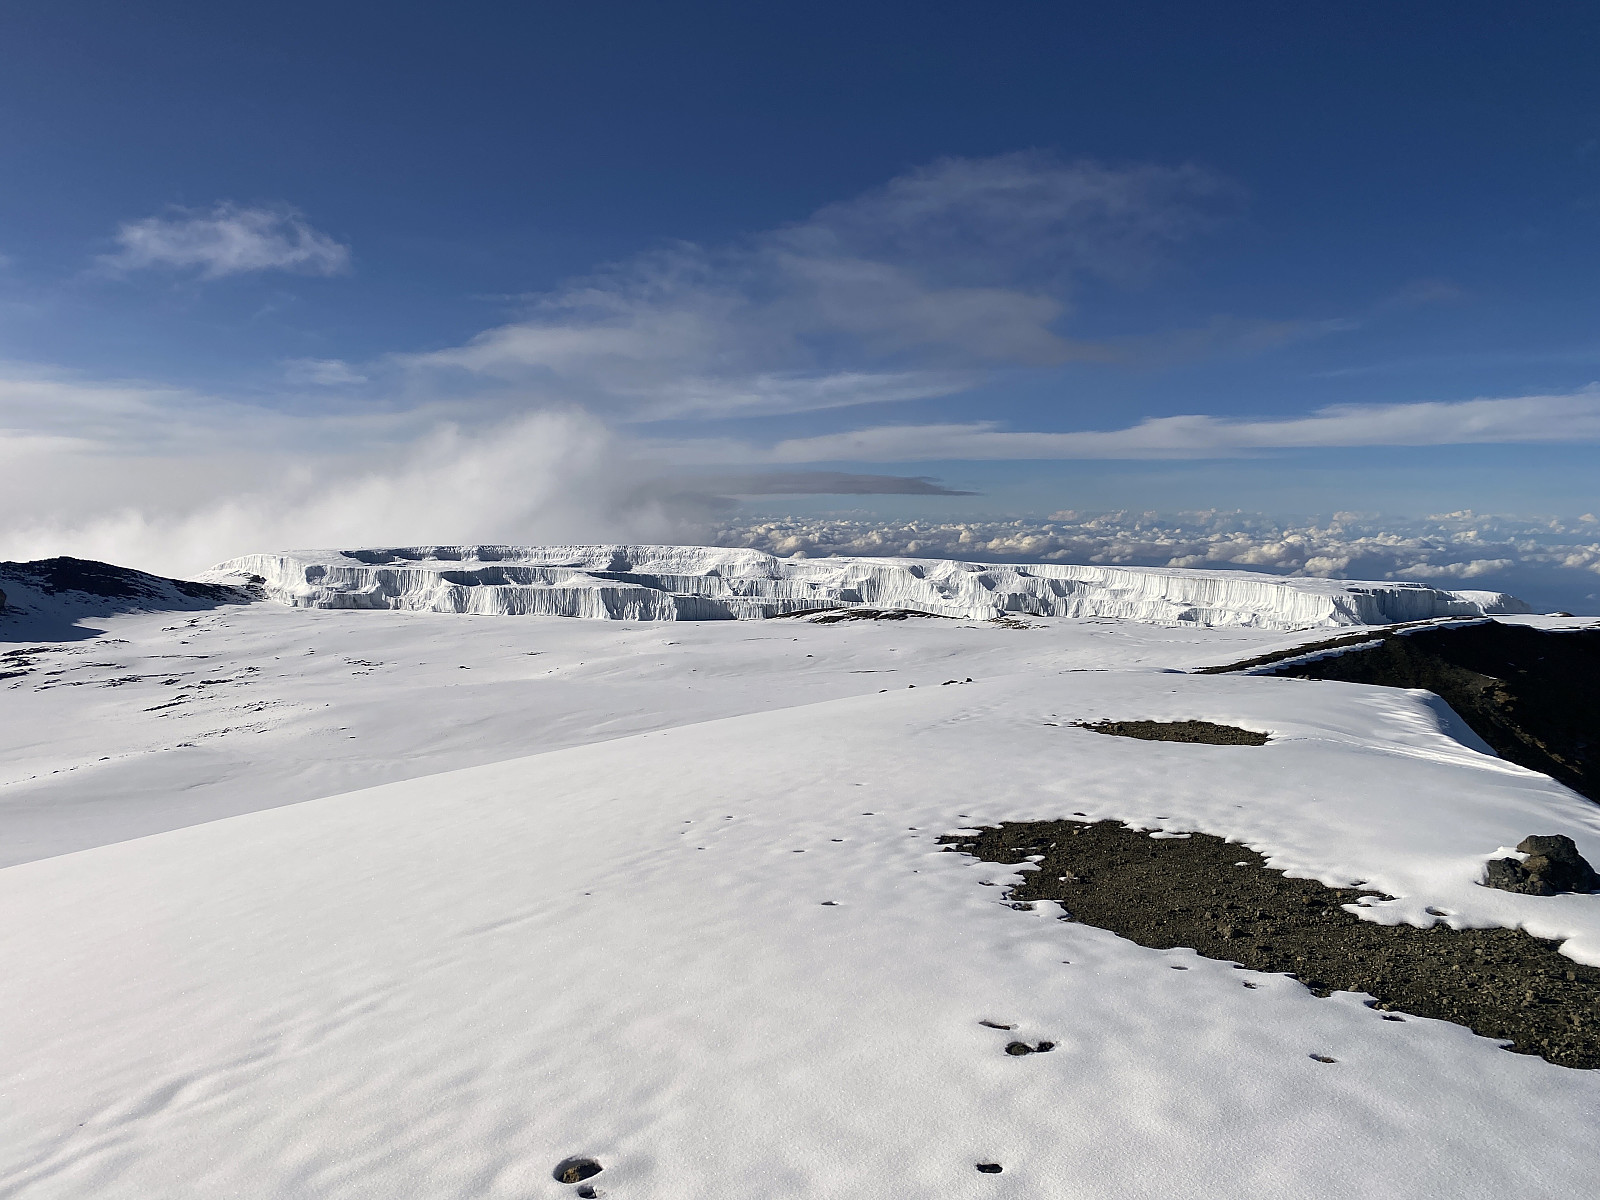
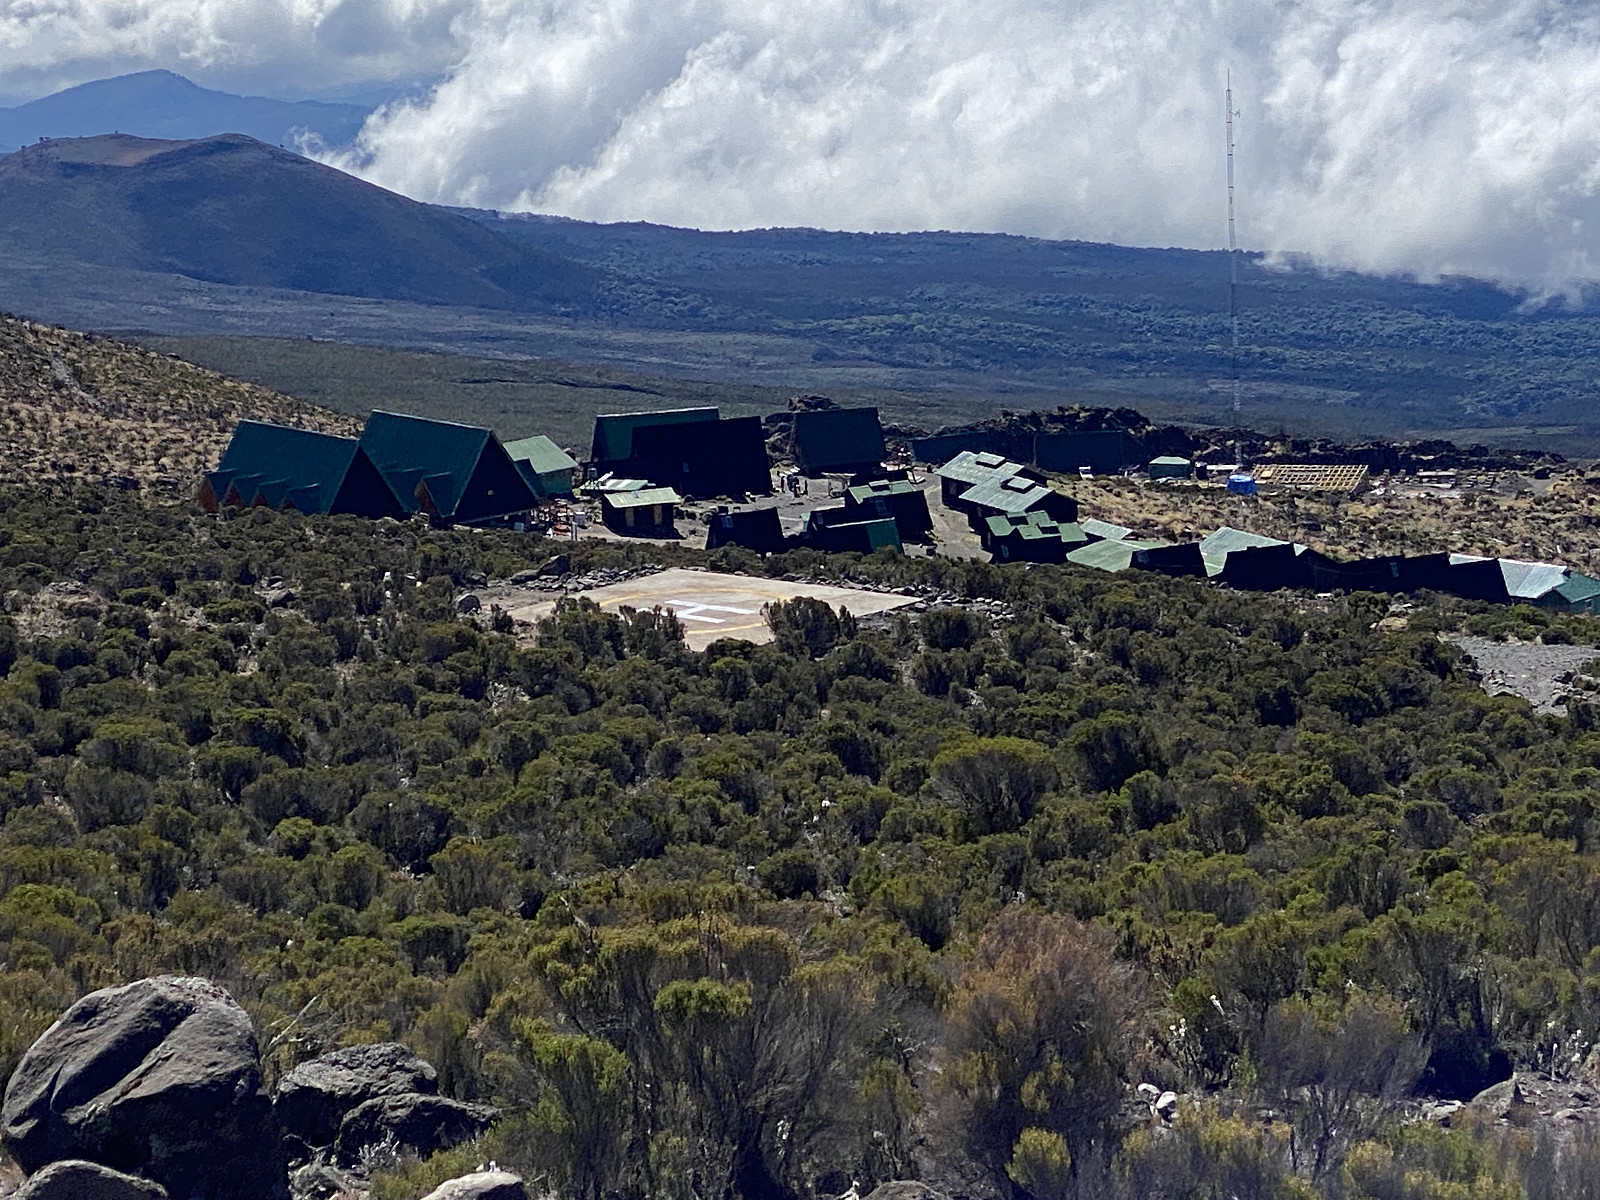
![Image #4: Kilimanjaro as seen from the Simba Camp [2670 m.a.m.s.l.]. Uhuru Peak is located on the southern aspect of the top area of the mountain, and can't be seen from this site.](https://images2.peakbook.org/images/14939/Solan_20230130_63d8124666a42.jpg?p=xtralarge)
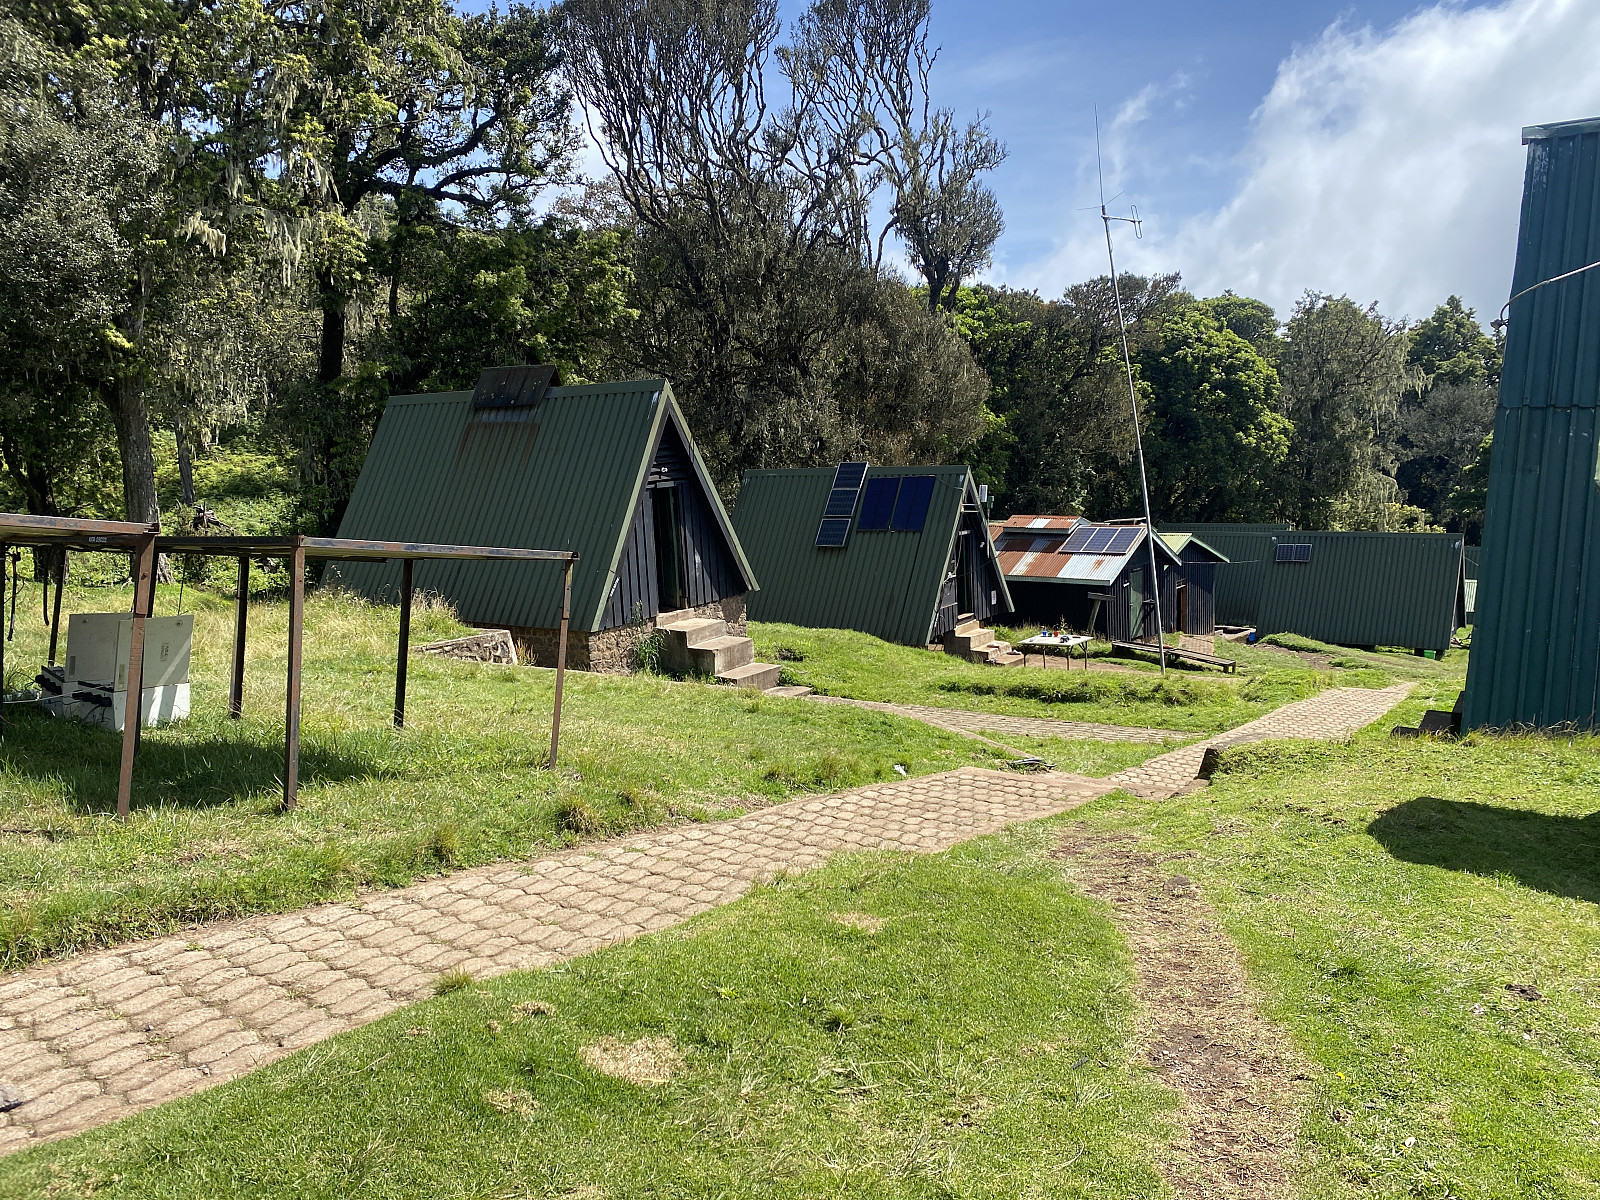
The Simba Camp site was nicely located in the forest, with enough open space that we could pitch our tents there. There was a cabin for park employees, with a huge antenna on top; and at the forest edge south west of the cabin, were some sort of toilet facilities. The toilets weren't the type with seats to sit on; each toilet chamber had just a hole in the floor, but they were otherwise clean and descent enough. The Rongai Route doesn't offer the luxury of the Marangu Route (i.e. "the VIP Route"). There are no cabins for the tourists or their support staff to stay in, and so we accommodated ourselves in two tents that Frank had rented in Moshi. The reason Frank had selected this route, however, was that I had said I wanted to trek as far up in the Mawenzi mountain side as you're allowed to (see below); and then the Rongai Route up to the Mawenzi Tarn Hut is the shortest route to what they call The Mawenzi Midpoint. We went to bed early this evening, as there's no electricity in this camp, but that helped us get early up the next morning for the following day's trek.
Video #1: A little creek that we crossed shortly after departure from the Rongai Gate. The stones have been very nicely carved out by the water of the creek. The trail up to the Simba Camp pretty much follows this little creek up the mountain side.
Day 2 - From the Simba Camp Site to the Kikelewa Camp Site
The next morning, I was brought hot water, and as soon as I had cleaned up a bit, breakfast was served. It was a four course breakfast, i.e.: sliced fruit, then porridge, then omelette, and finally bread and pancakes with jam or chocolate spread. The food is abundant, mainly because in the African way of thinking, you need to eat a lot in order to have strength to trek the mountains. I have to admit this isn't so weird after all, as in times past, this used to be the European way of thinking as well; but if you're going to trek Kilimanjaro or any other mountain in the region, you should be aware that you'll hardly be able to walk if you eat everything you're being offered. Moreover, if you eat too much porridge and omelette, you might not be able to have the pancakes afterwards...
We started out from Simba Camp at about 20 minutes to 8, Holson, myself and Frank. The walk upwards was pretty uneventful, as we just followed a nice trail upwards. The trek was not hard, nor was this part of the mountain very steep. I got the impression, however, that Holson, who was walking first, was slowing us down on purpose; as I knew we would all have been able to walk much faster. I did comply for a while, as I knew we were only going up to the Kikelewa Camp this day, and there was no point in rushing it. I was aware that Kilimanjaro guides generally advice their clients to walk slowly, so that they may have time to adapt to the altitude, but we had yet not even reached the elevation of the Saddle Camp on Mount Meru, where we had been just a few days earlier, so we were already acclimatised to the current altitude and beyond. After a while the porters and the chef started catching up with us one by one, and then Holson stopped and allowed them to walk past us.
Then it dawned upon me: A part of their concept is to walk a bit slowly, and then let the porters and the chef run past the tourists and the guides, often while they are eating lunch; in order that they may pitch the tents at the next camp, and make the dinner ready before the tourists arrive. This concept is likely to live on for a long time, as it works well with the British, for instance, who are used to expecting good service once they've paid for it. For me, however, it seemed awkward, as I would rather walk at a pace that suited me. I decided to walk very close up to the back of Holson, therefore, so as to force him to go a little faster, and the porters and the chef, therefore, never got very far ahead of us. At one time we cached up again with two of the porters, who had stopped, because the younger one had an issue with one of his shoes. Holson then actually stopped to help him, and instructed me and Frank to just continue along the trail, and said he would eventually catch up with us. And so he did.
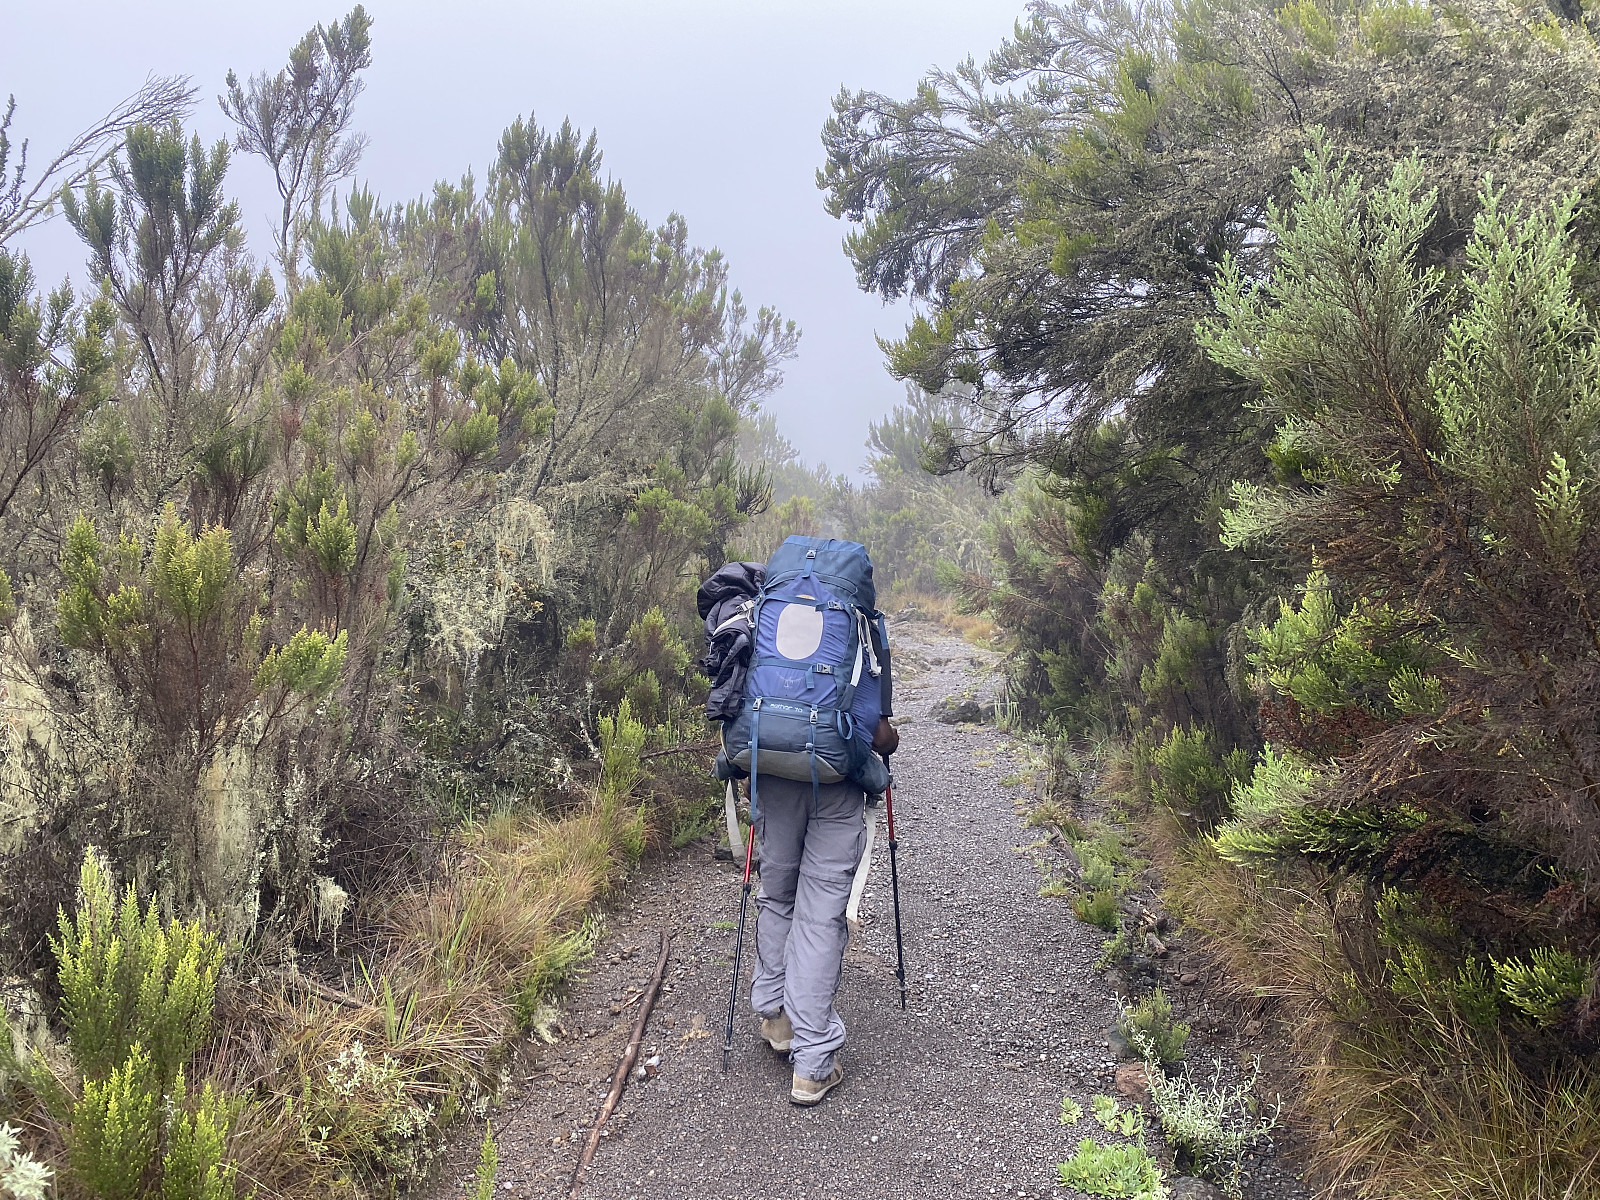
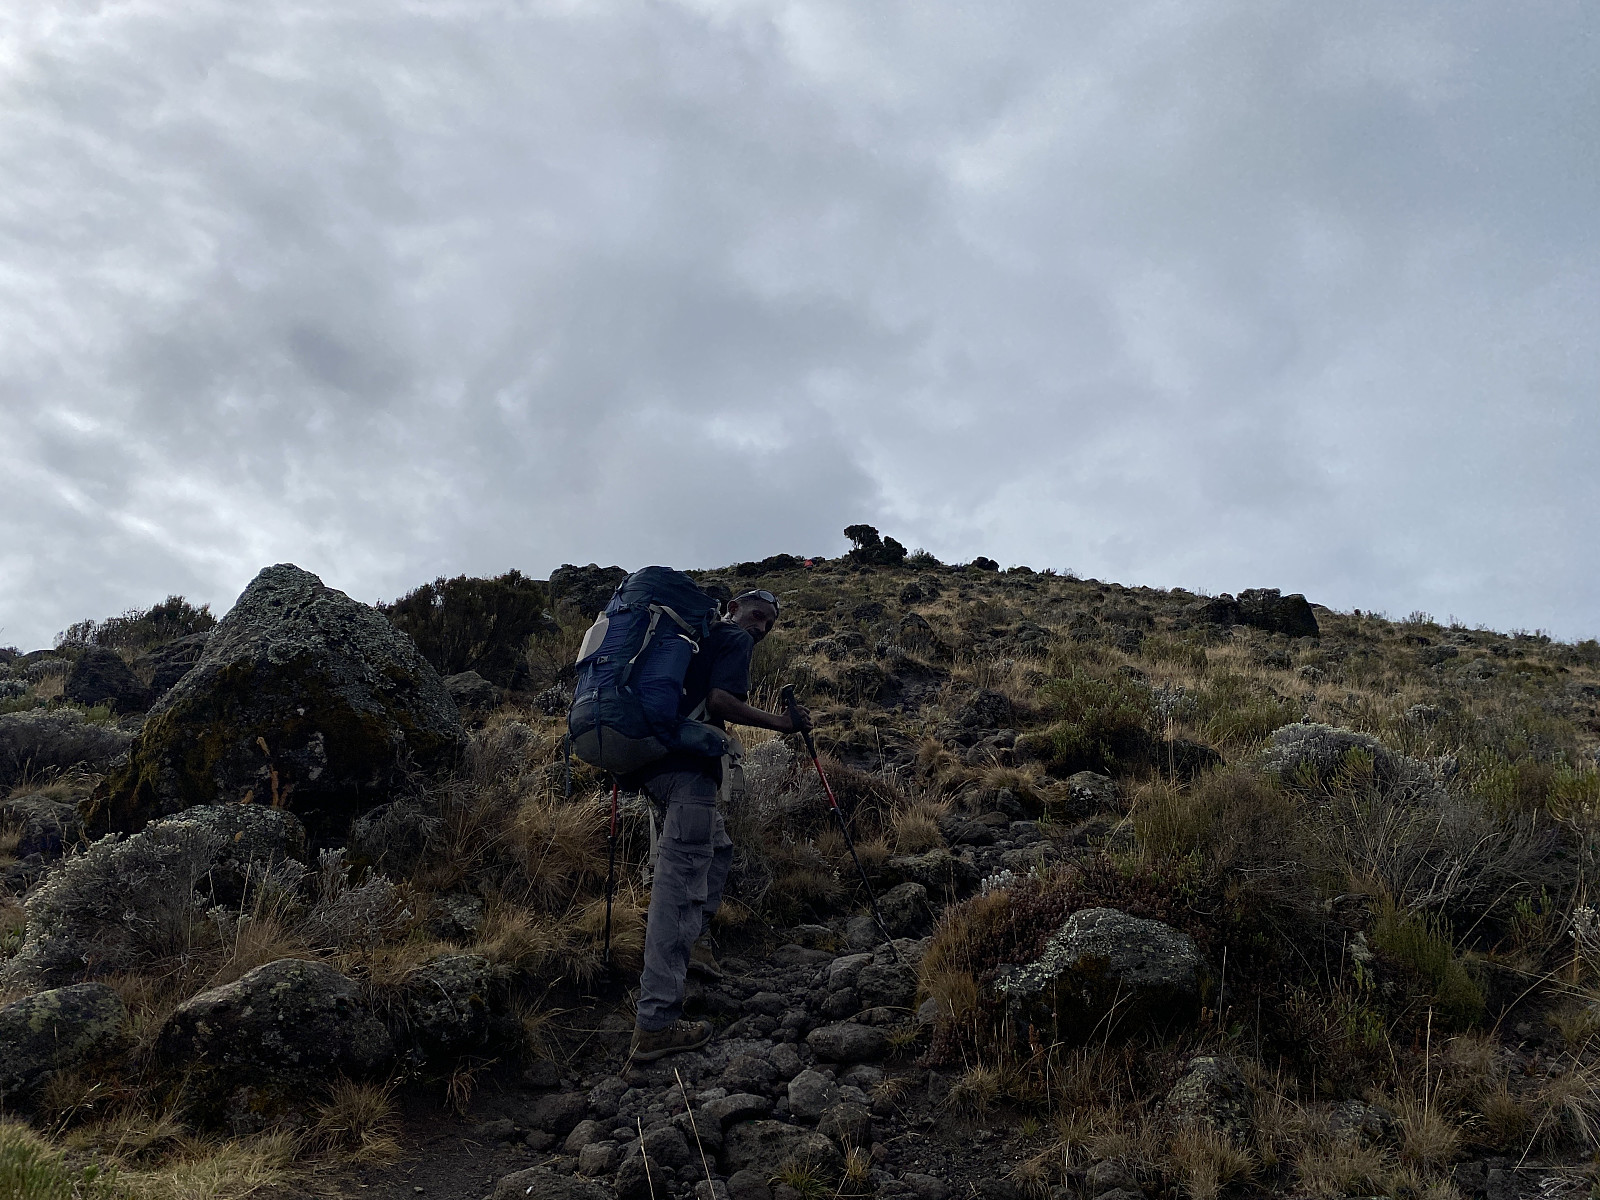
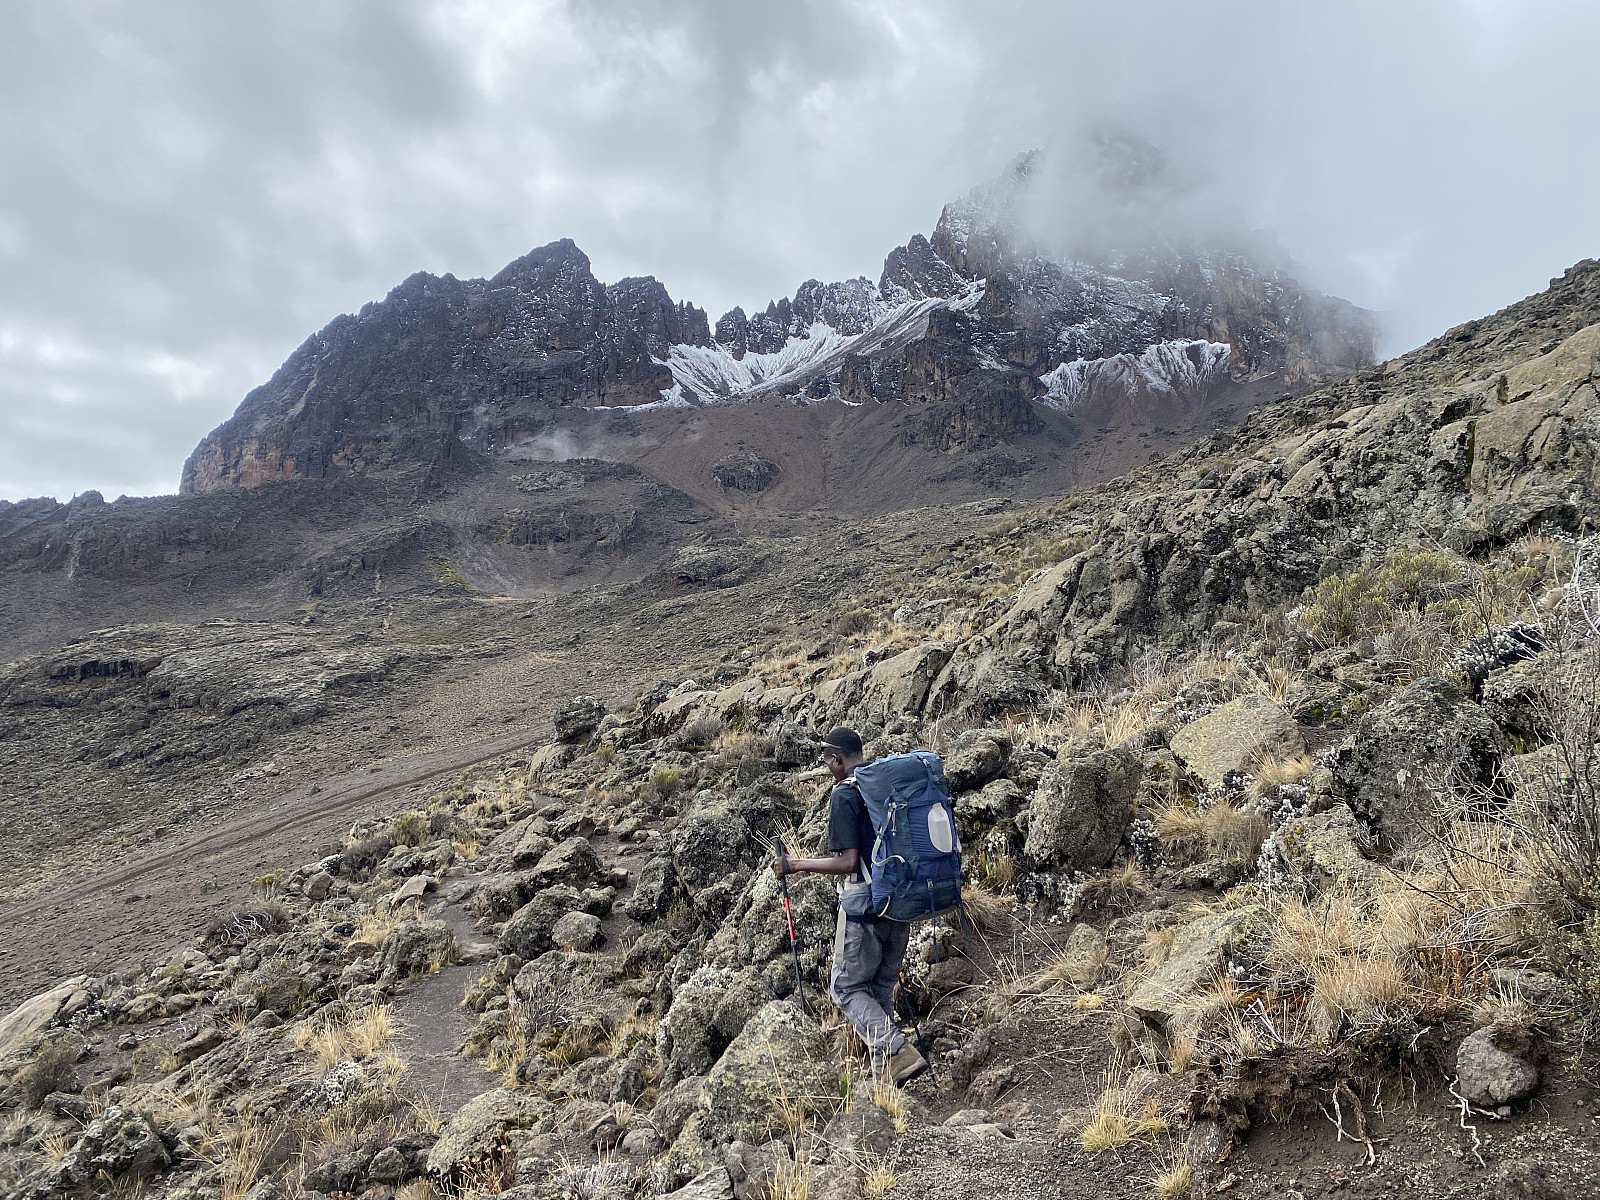
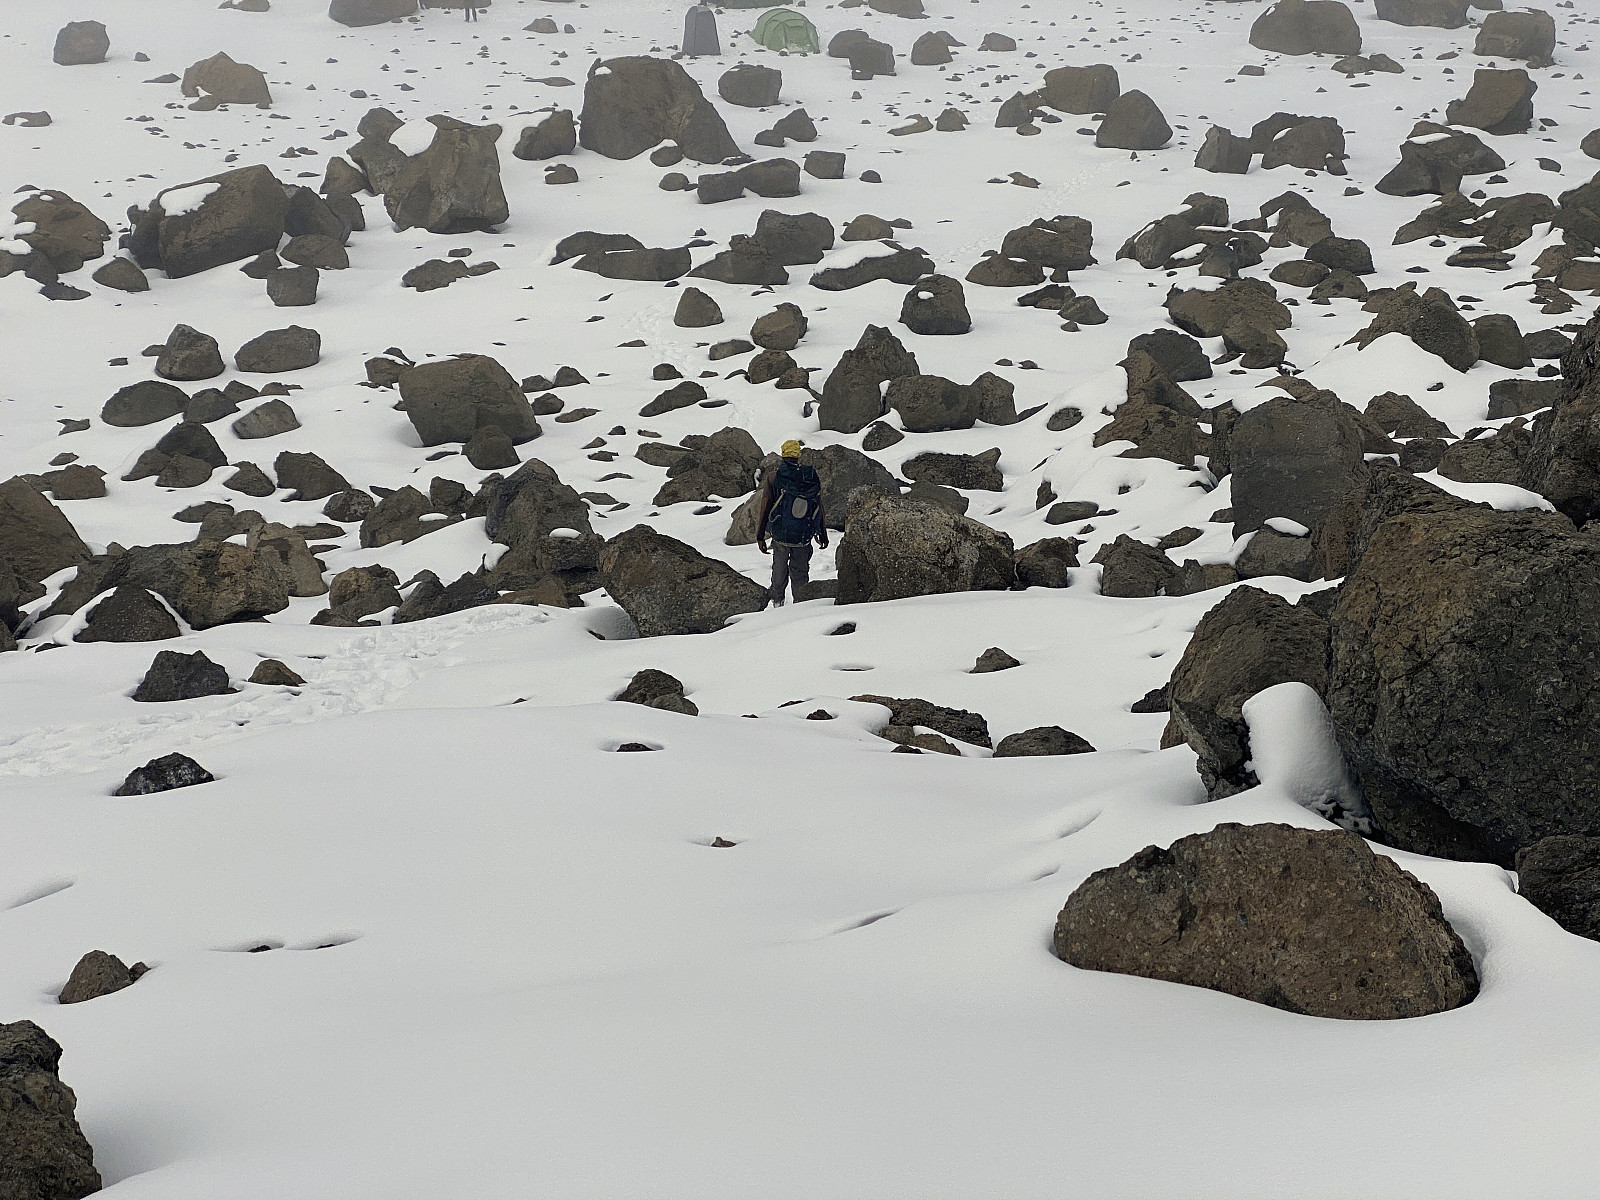
![Image #11: Continuing from The Second Cave Camp site [3450 m.a.m.s.l.] towards the Kikelewa Camp site [3600 m.a.m.s.l.].](https://images2.peakbook.org/images/14939/Solan_20230130_63d8497ac9dfb.jpg?p=xtralarge)
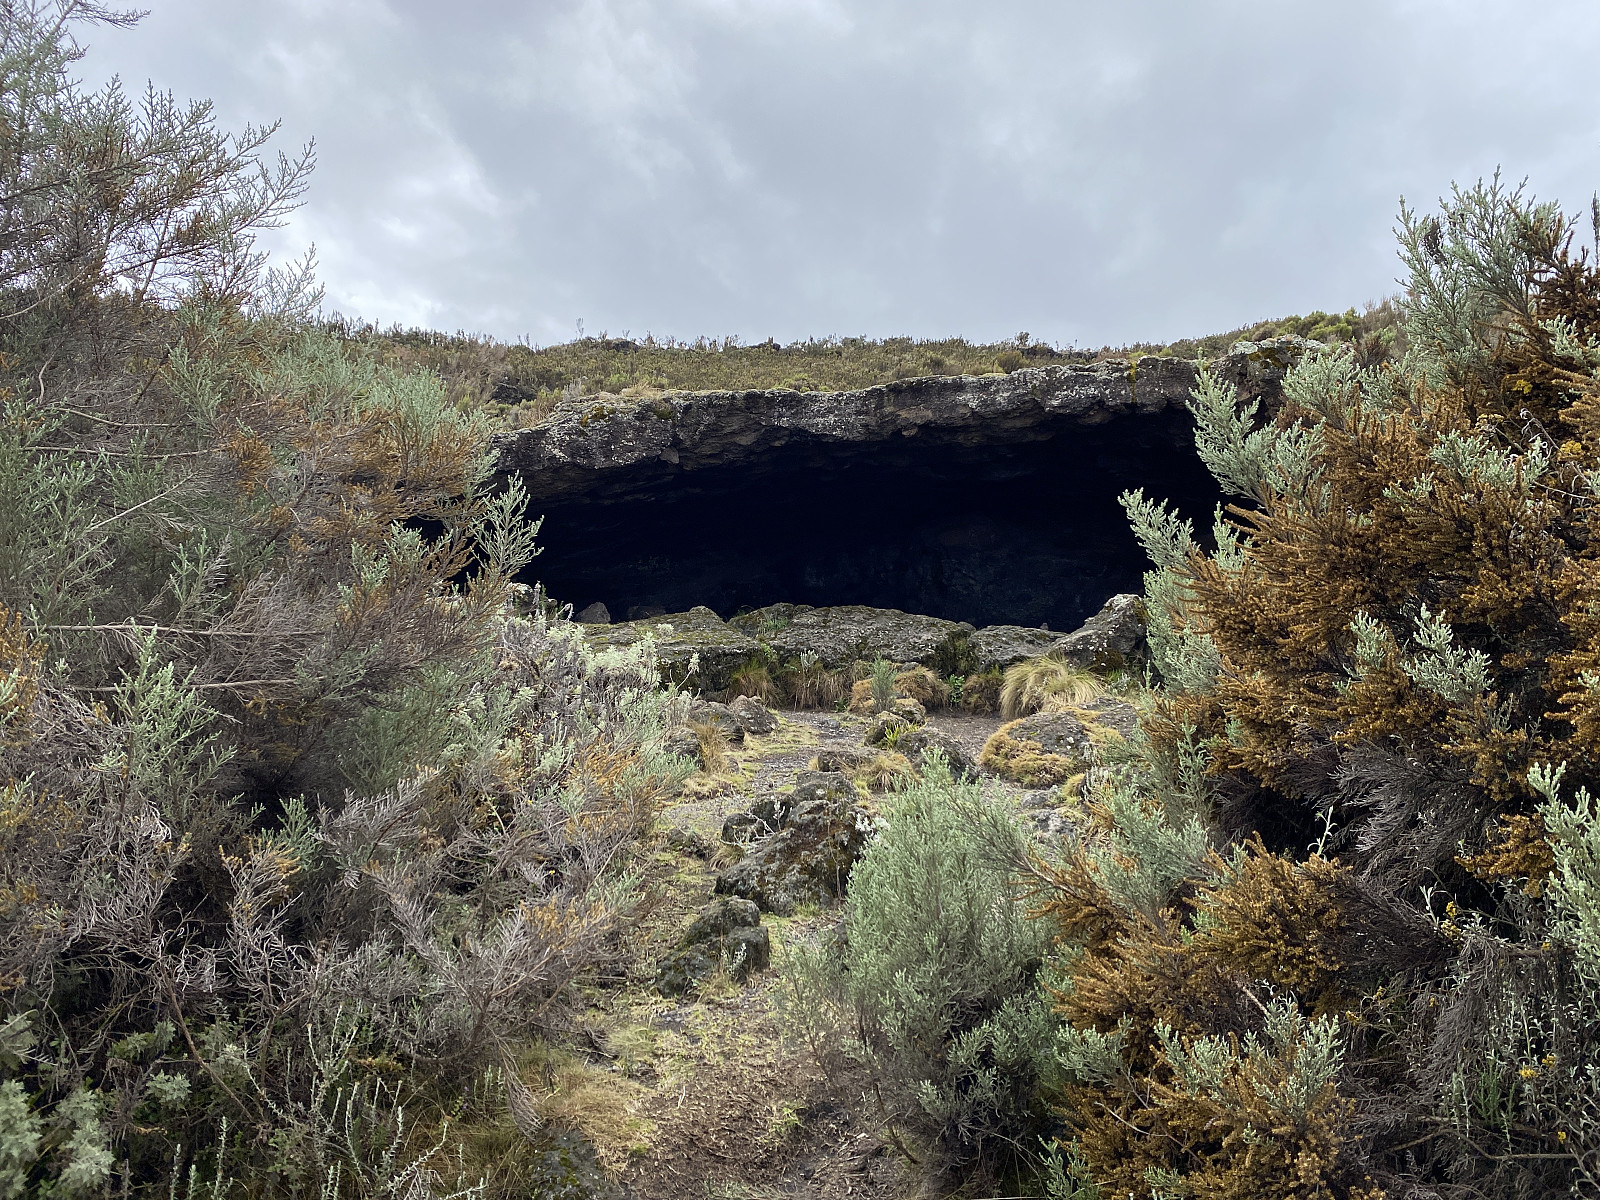
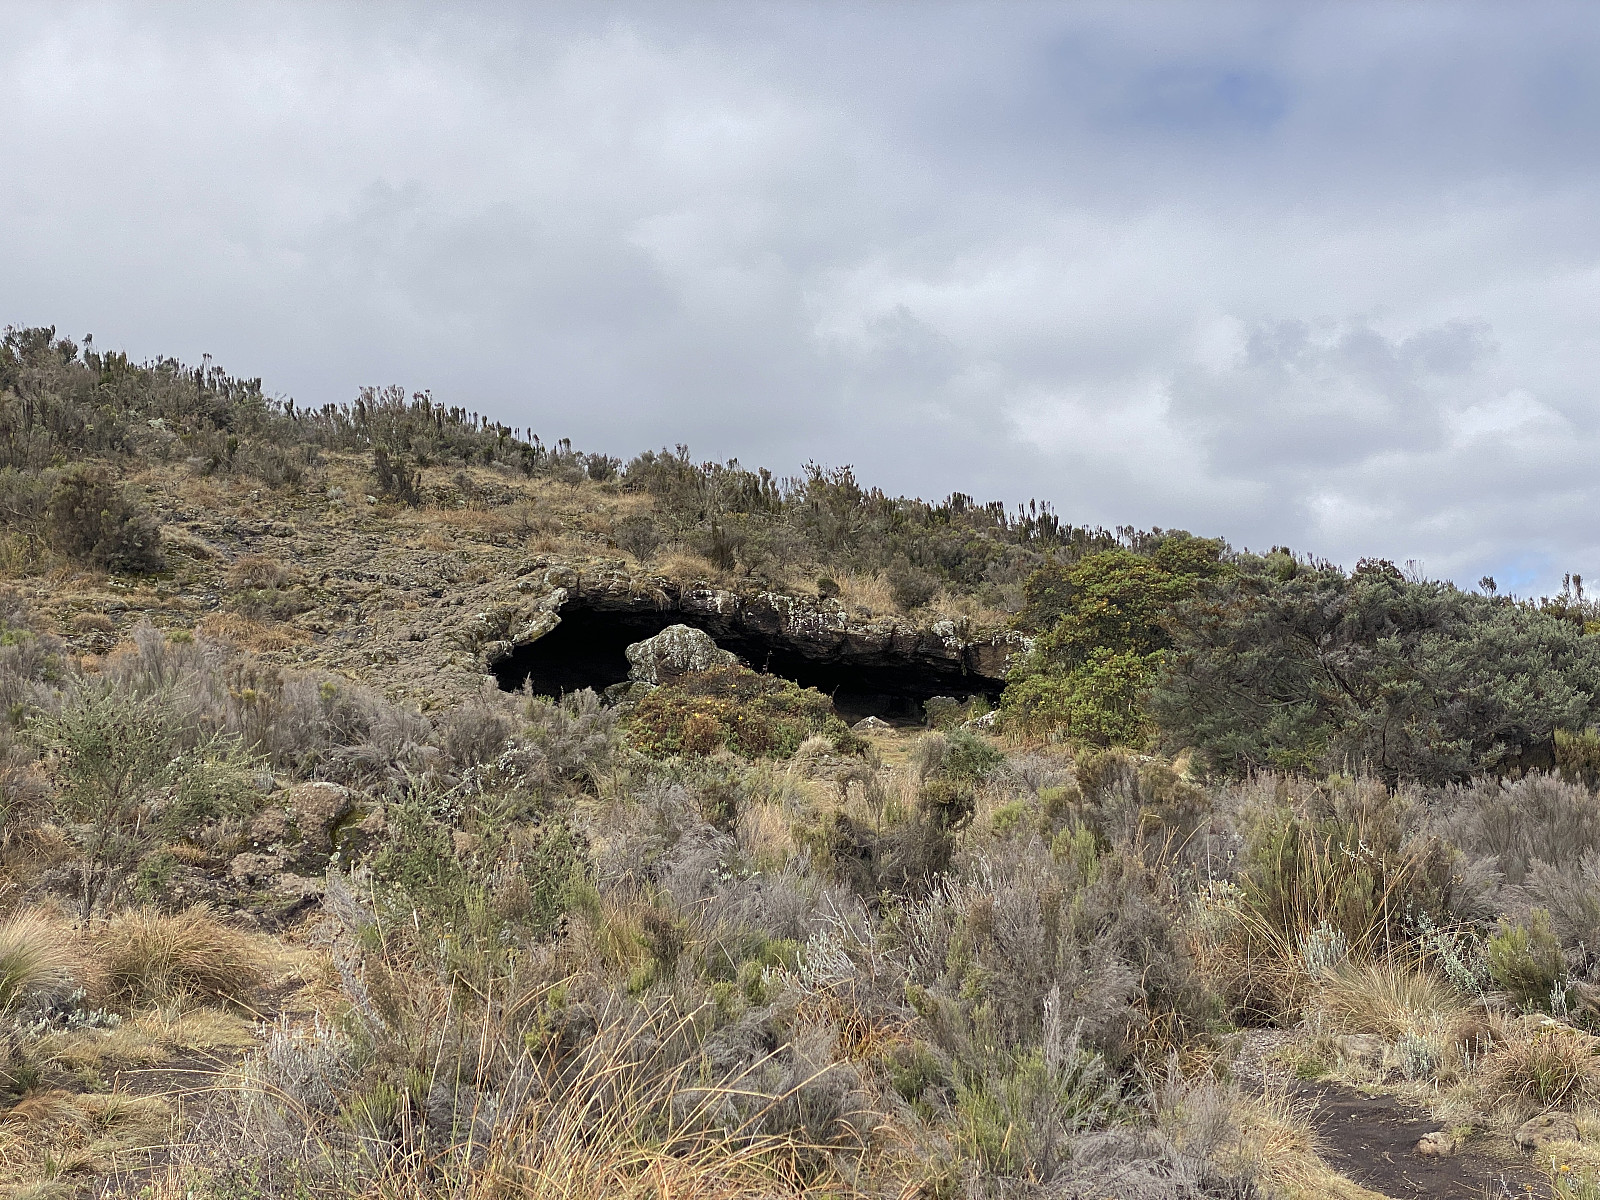
At about 10 minutes to 10, we arrived at a cave (image #6), and I stopped to shoot a couple of images of it. This was the cave that have been named the First Cave. Holson explained to me that back in the old days, before they had tents, they used to sleep in the caves when trekking Kilimanjaro. We continued for another 20 minutes or so, and then arrived at the Second Cave Camp, where we all sat down to have lunch (image #8). The lunch box is another concept that you'll become familiar with if you go for a trek on Kilimanjaro or Meru. Every day the chef prepares a lunch box with some fruit, an egg, a little carton of juice, and often a piece of meat. Generally speaking, the food is OK, but the amount in the box is way beyond what I'm able to consume in one meal.
The trail splits in two at the Second Cave Camp; i.e. one that continues up to the Third Cave Camp, and one that goes to the Kikelewa Camp, which is located a bit further east. We remained at our lunch site a little less than 25 minutes, and then headed towards the Kikelewa Camp, as this camp site is located on the trail towards the Mawenzi Tarn Hut, which was our destination for the next day. The walk from the Second Cave Camp up to Kikelewa Camp was uneventful. The Second Cave Camp is located just a little past midway between the Simba Camp and the Kikelewa Camp, but you've already reached an altitude of 3500 m.a.m.s.l. at the Second Cave Camp, and so you only need to gain another 170 elevation meters in order to reach the Kikelewa Camp site. The distance is, however about 6 kms or so, and so we arrived at the Kikelewa Camp at about 10 minutes to 2.
Video #2: In late afternoon at the Kikelewa Camp Site, I suddenly noticed som rodents just outside mye tent. It was at first one single four-striped grass mouse, that came and picked up some mais corns that had fallen to the ground just outside of my tent. You probably shouldn't feed them anything purposely, but that's rather difficult when they look at you with these big, dark eyes. Anyway, there were a lot of these little cuties at Kikelewa as well as at the Mawenzi Tarn Hut, and at Horombo.
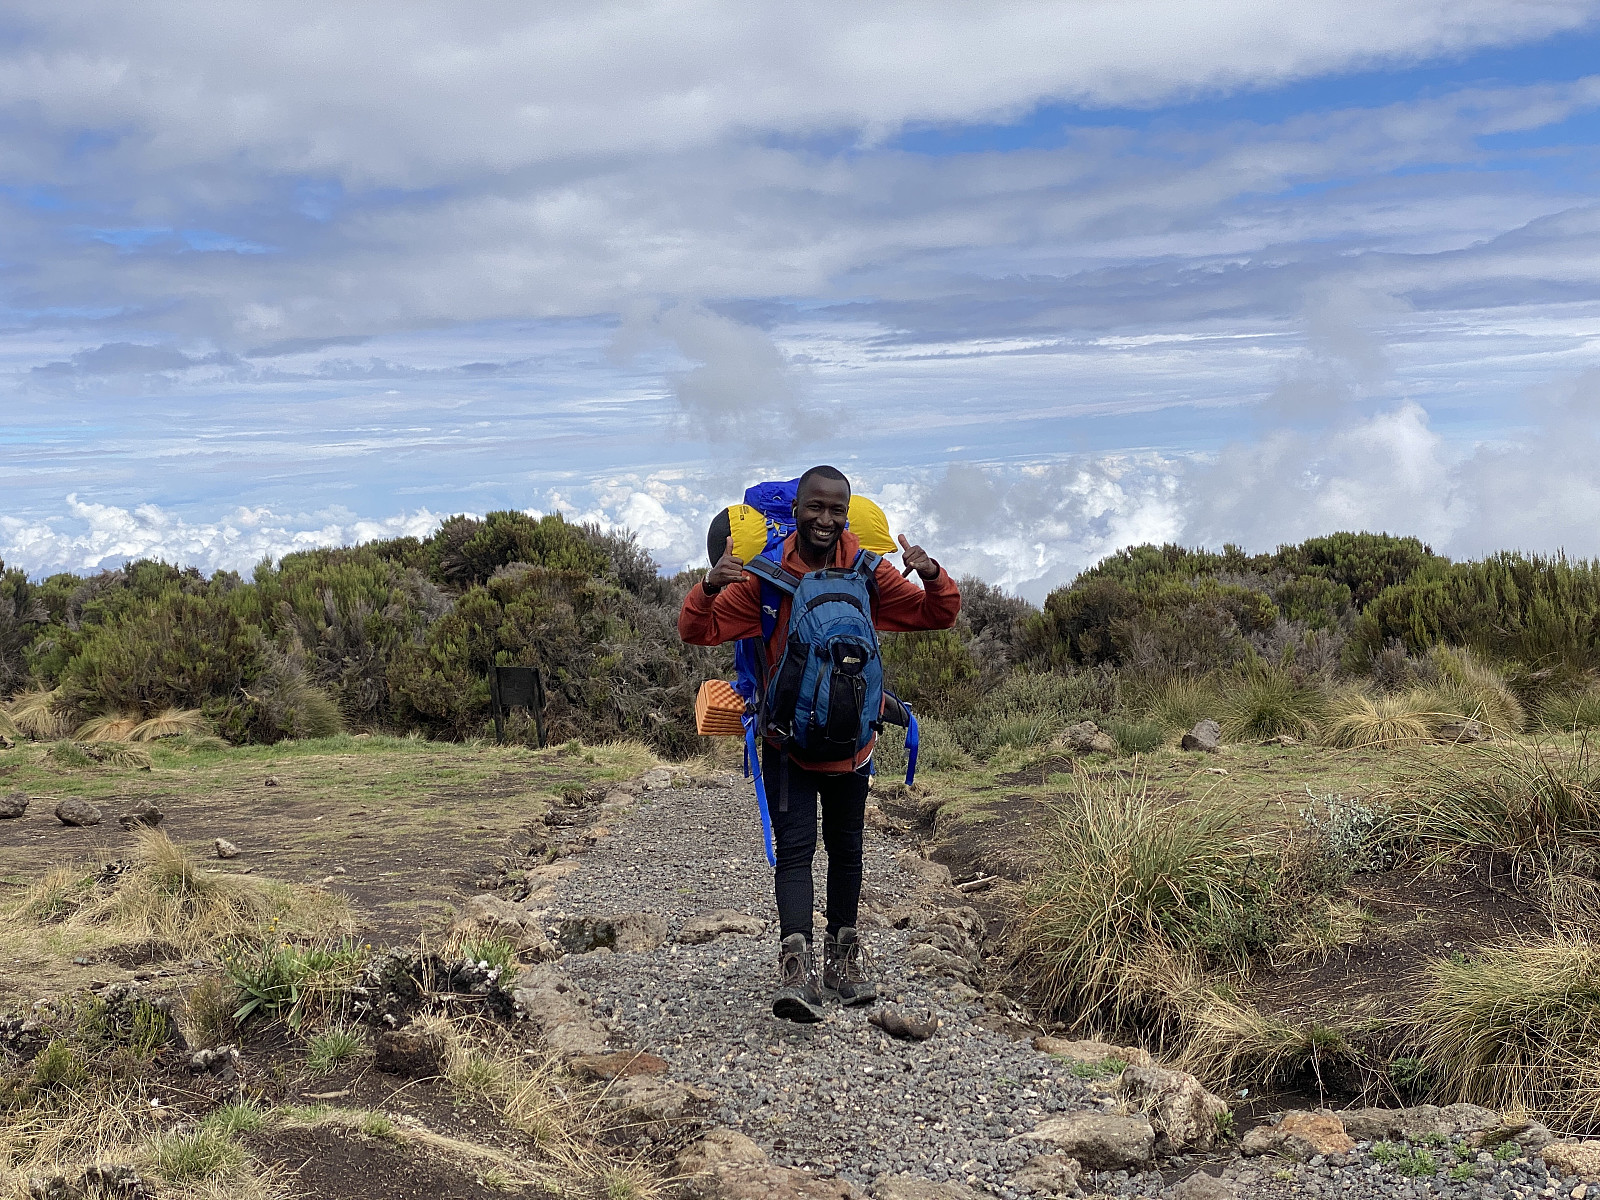
At Kikelewa, the porters pitched our tents (images ## 13, 14, 17 and 18), and the chef started preparing dinner. In the meantime I walked around, shooting some pictures, and familiarising myself with the site. A little later dinner was ready, and after dinner, I sat down in the kitchen tent with the chef, the two guides, and the three porters; chatting for a while. Having just 3 porters on such a long mountain journey, and in a group of 7 persons, might sound like a bit insufficient; but Frank had arranged for a fourth porter to bring supplies for the last two days directly to Horombo, as it gave no meaning to carry the supplies for our descent across the mountain, since we were going to descend along the Marangu Route. Moreover, Frank also saved the cost of an additional porter by carrying quite a load himself; as seen on images ## 7 & 8, where he carries a huge backpack on his back, and at the same time his own daypack on his belly. Frank did this the first two days or so, on this hike as well as the one we had just had on Mount Meru. After the initial two days, our food supplies had diminished sufficiently that one of the porters could be charged with carrying the large backpack, without exceeding the 20 kg limit that a porter is allowed to carry. I later learned from a conversation between Frank and Holson that the entrance fee for a tourist to spend 6 days in the Kilimanjaro National Park is 900 USD, hence when the tourist pays 1500 USD or so for the trek [2022 prices]; it means the tour operator only has 600 USD to rent the tent, buy the food supplies, and pay the chef and the porters. The tourist is of course expected to pay everyone a tip afterwards, but apart from the tip, there isn't much room for a profit; which explains Frank's creativeness in lowering the porter costs by carrying some of the goods himself. (I speak Swahili fluently, and so I picked up a lot of things that would escape most other foreigners attention). After Darkness, there was just as little to do in this camp as in the previous one; and so I went to bed early even this evening, which was of course good, as we were going to start out quite early the following day.
Day 3 - To the Mawenzi Tarn Hut and the Mawenzi Midpoint
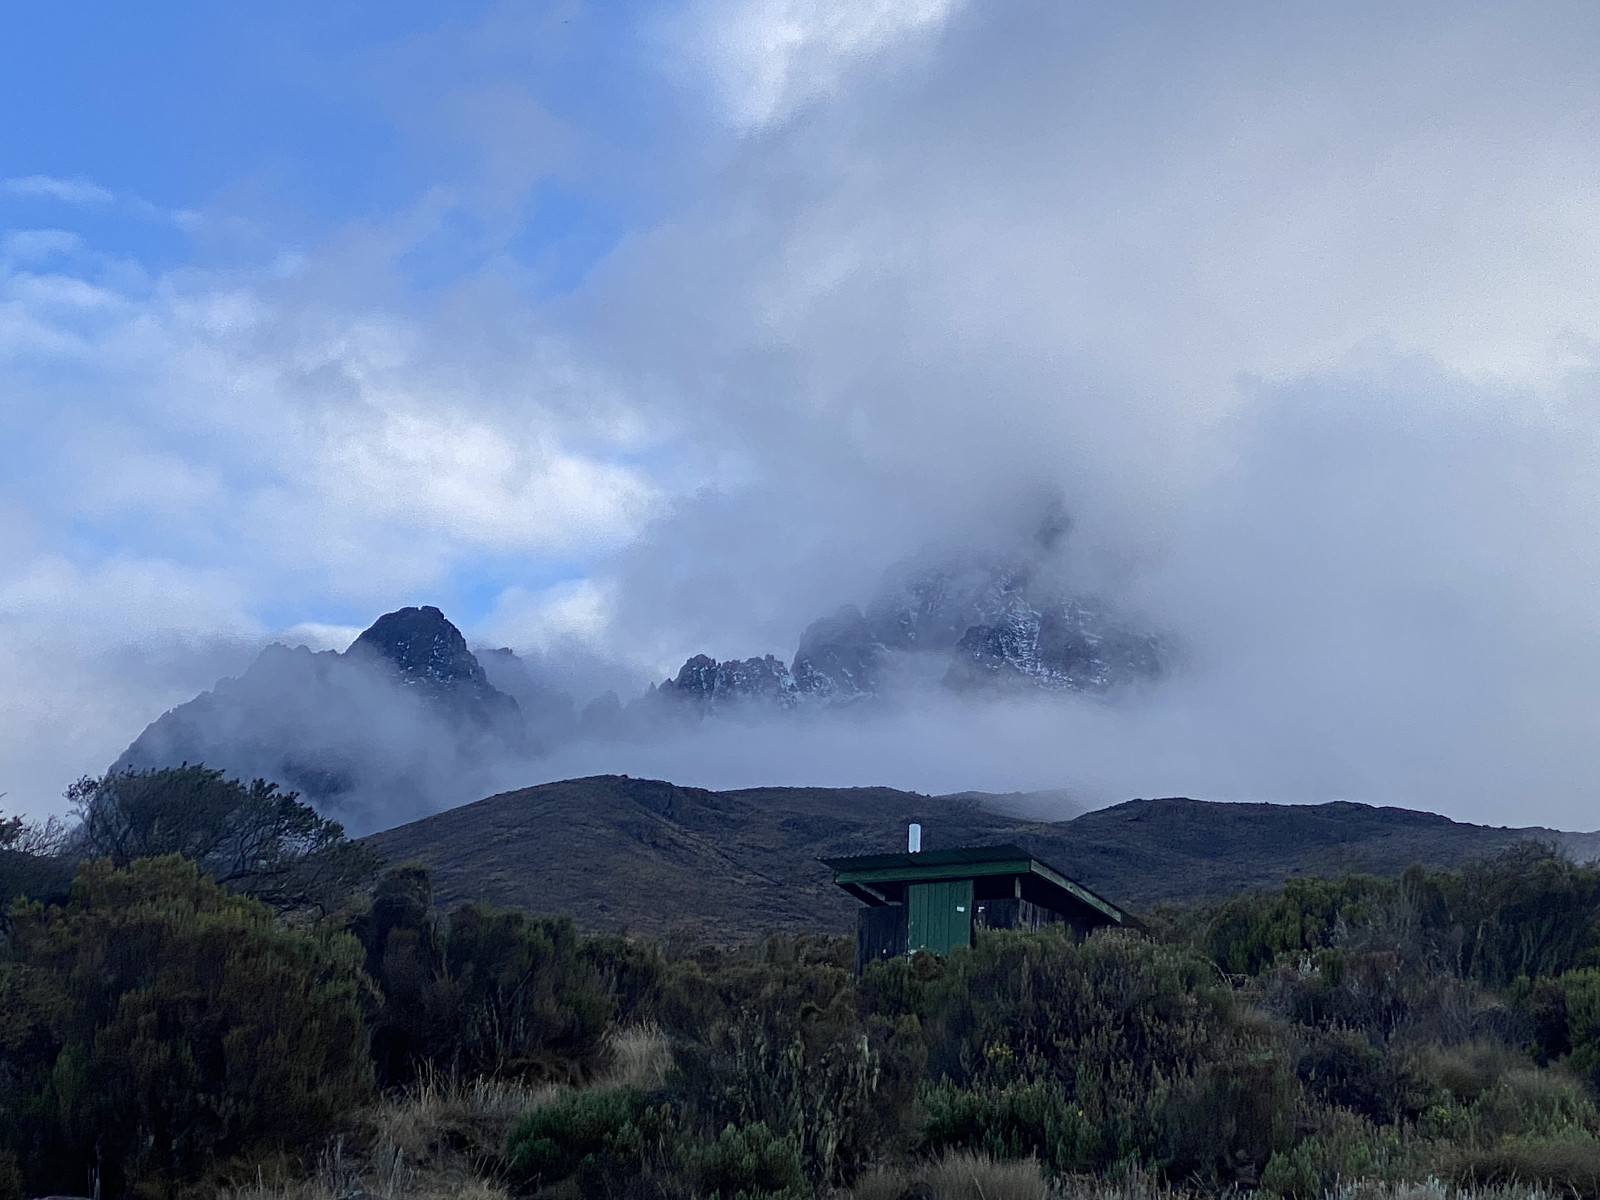
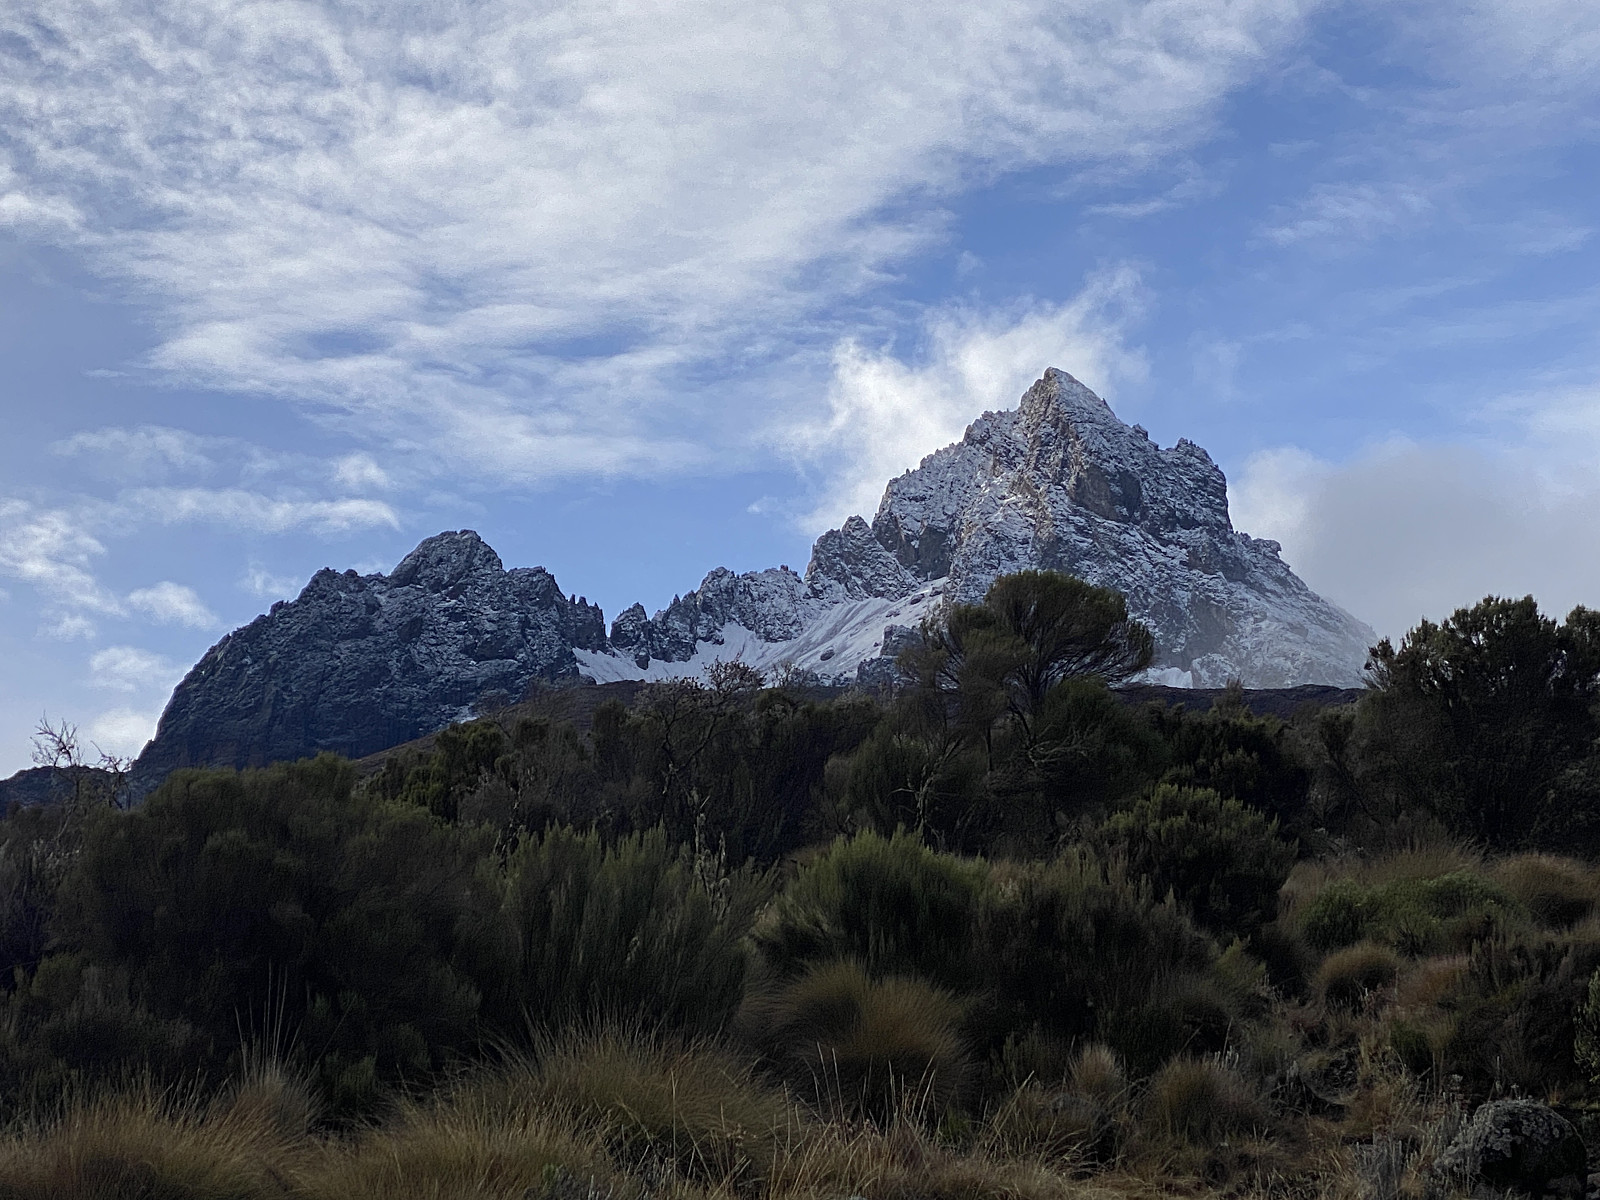
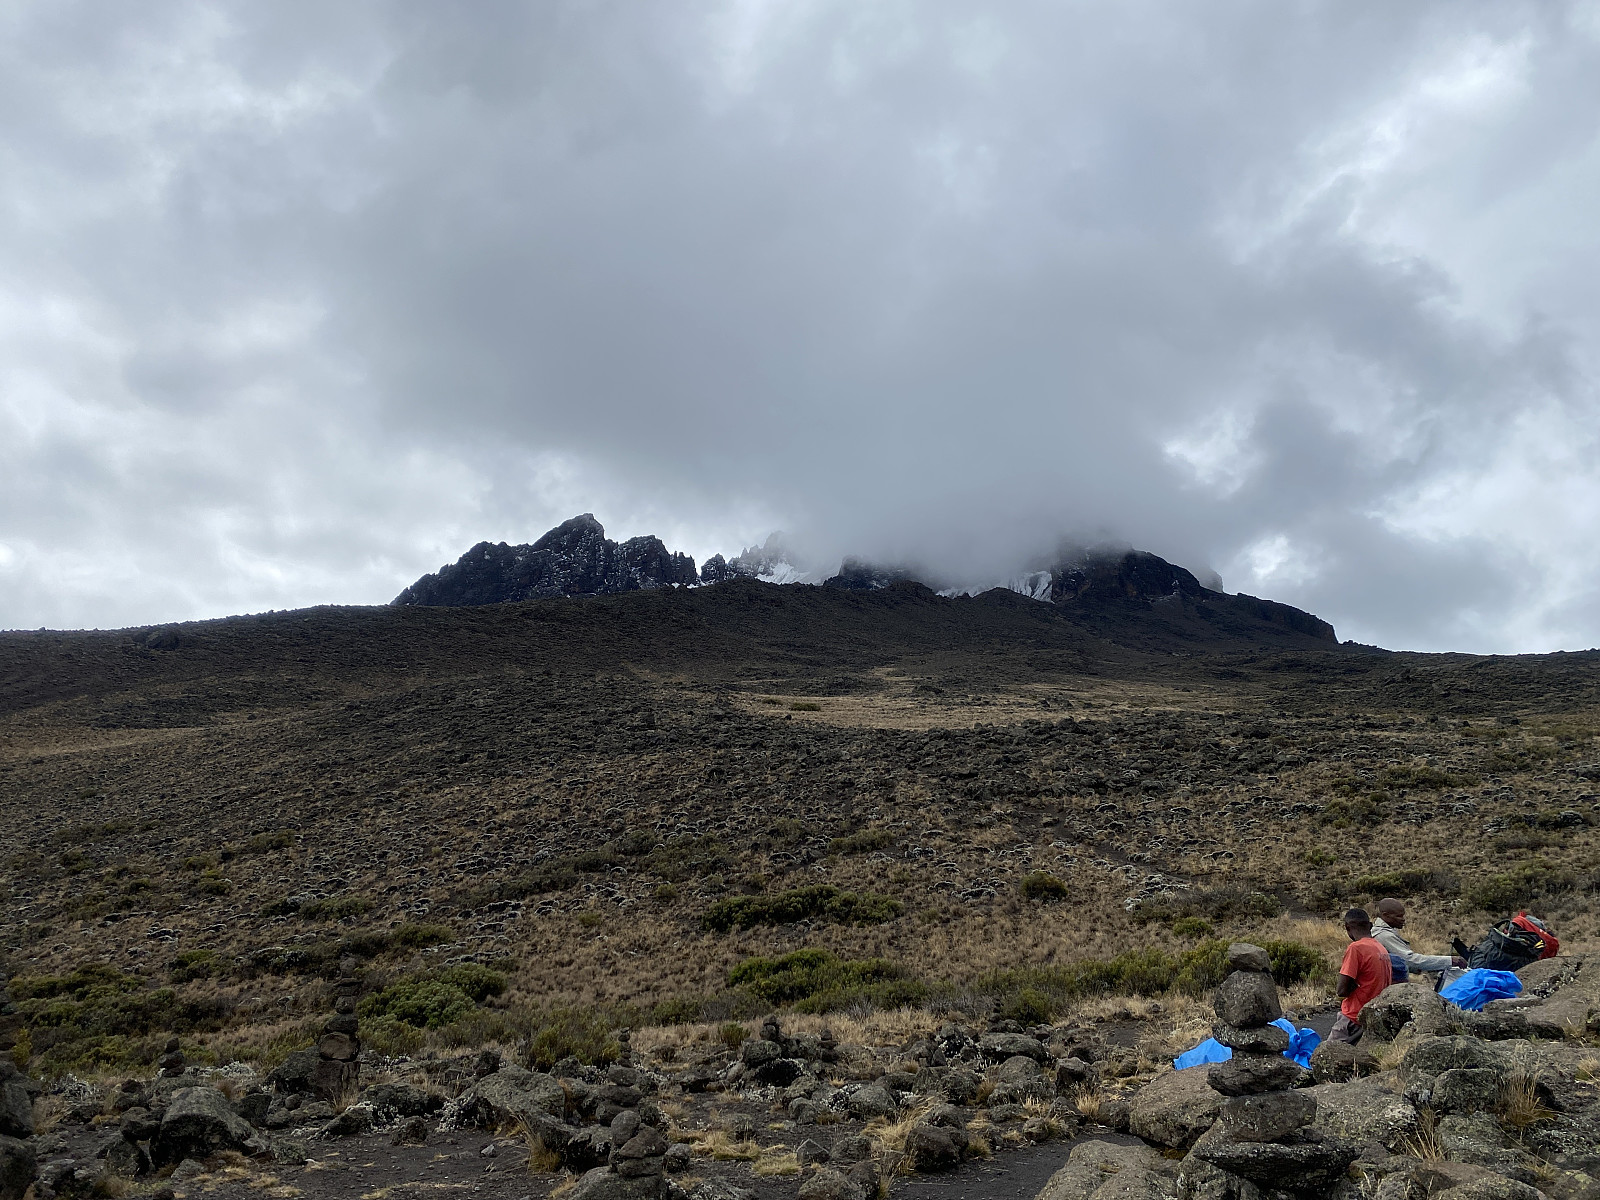
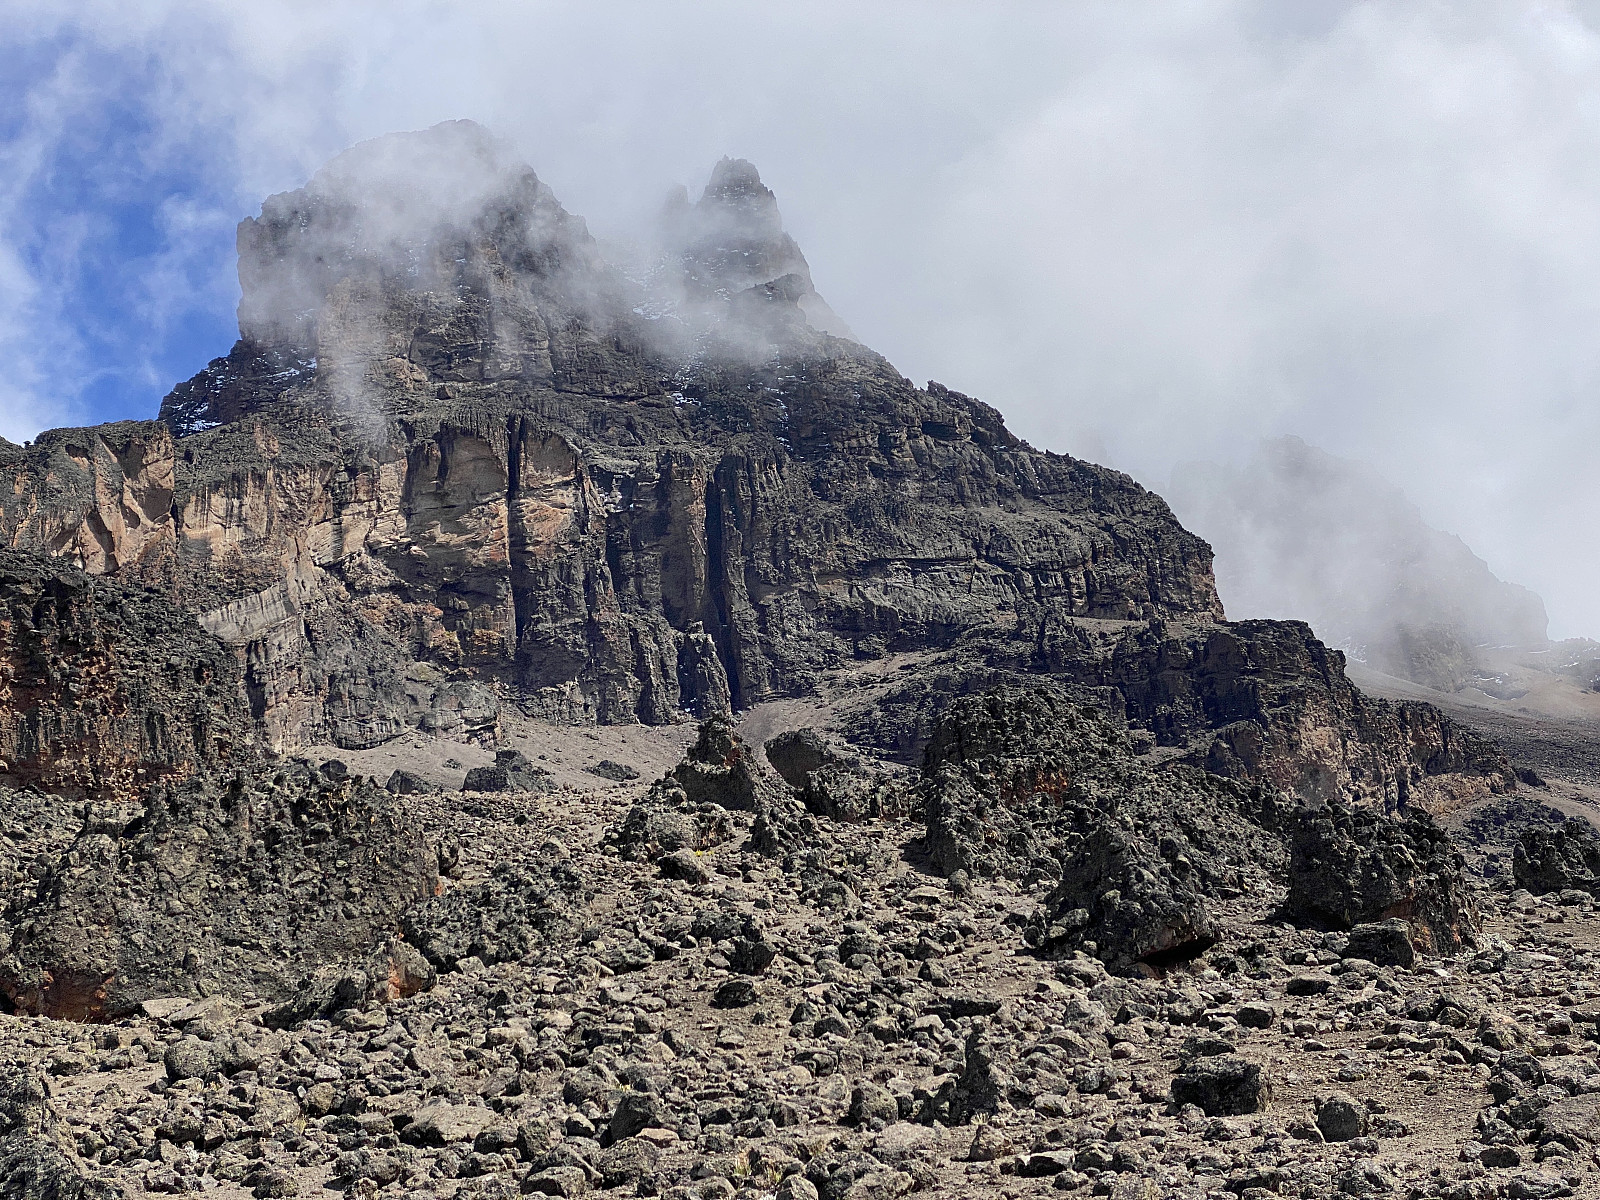
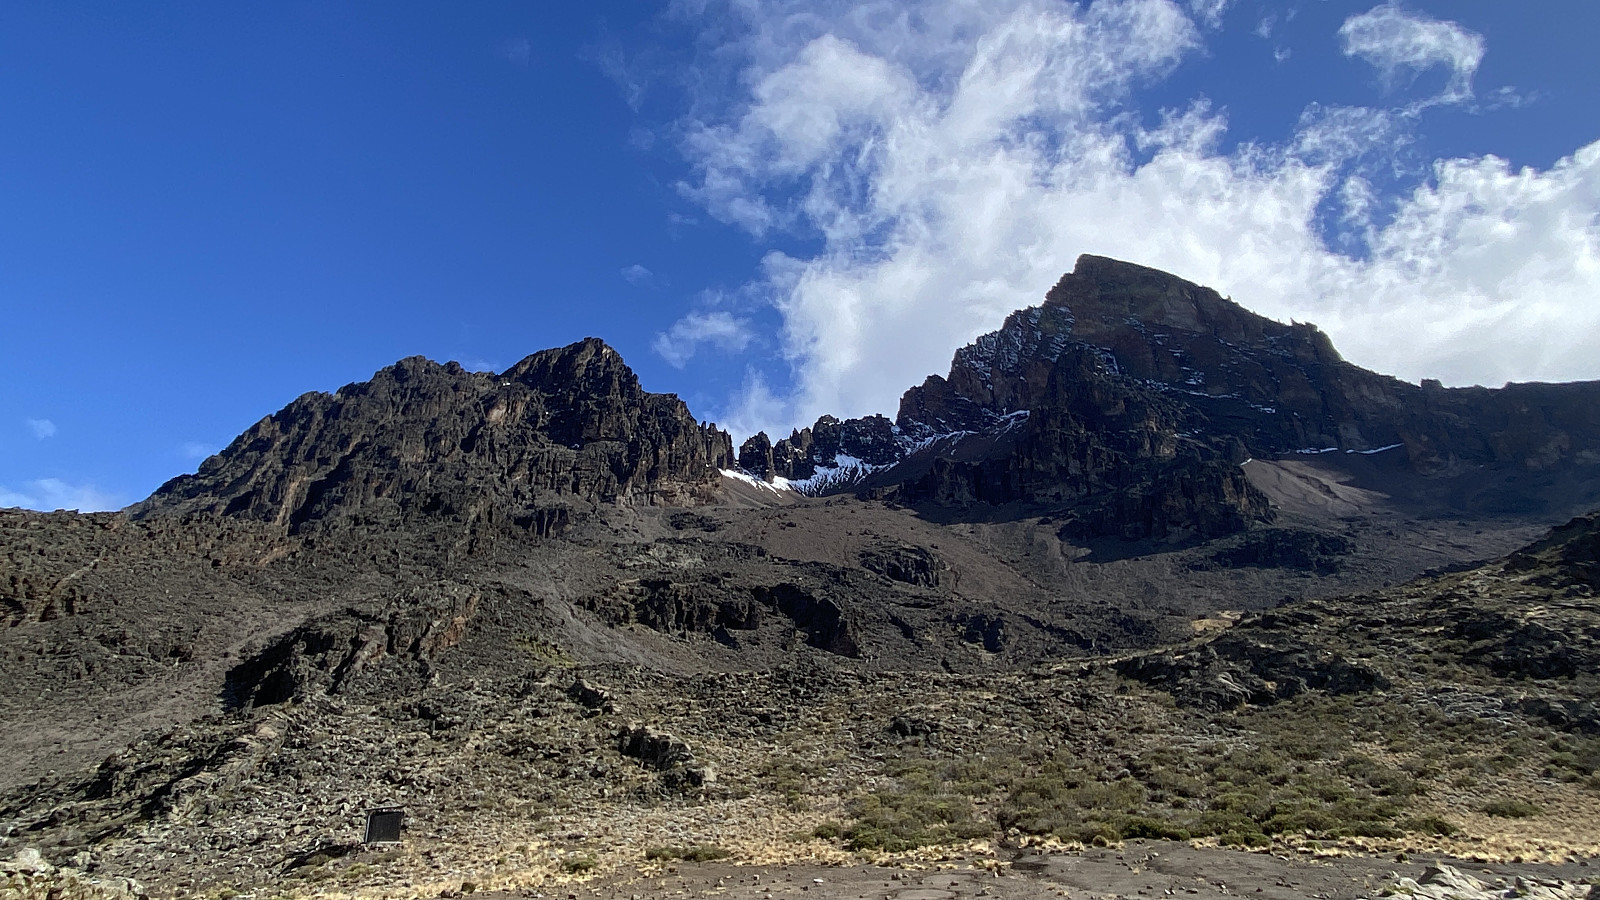
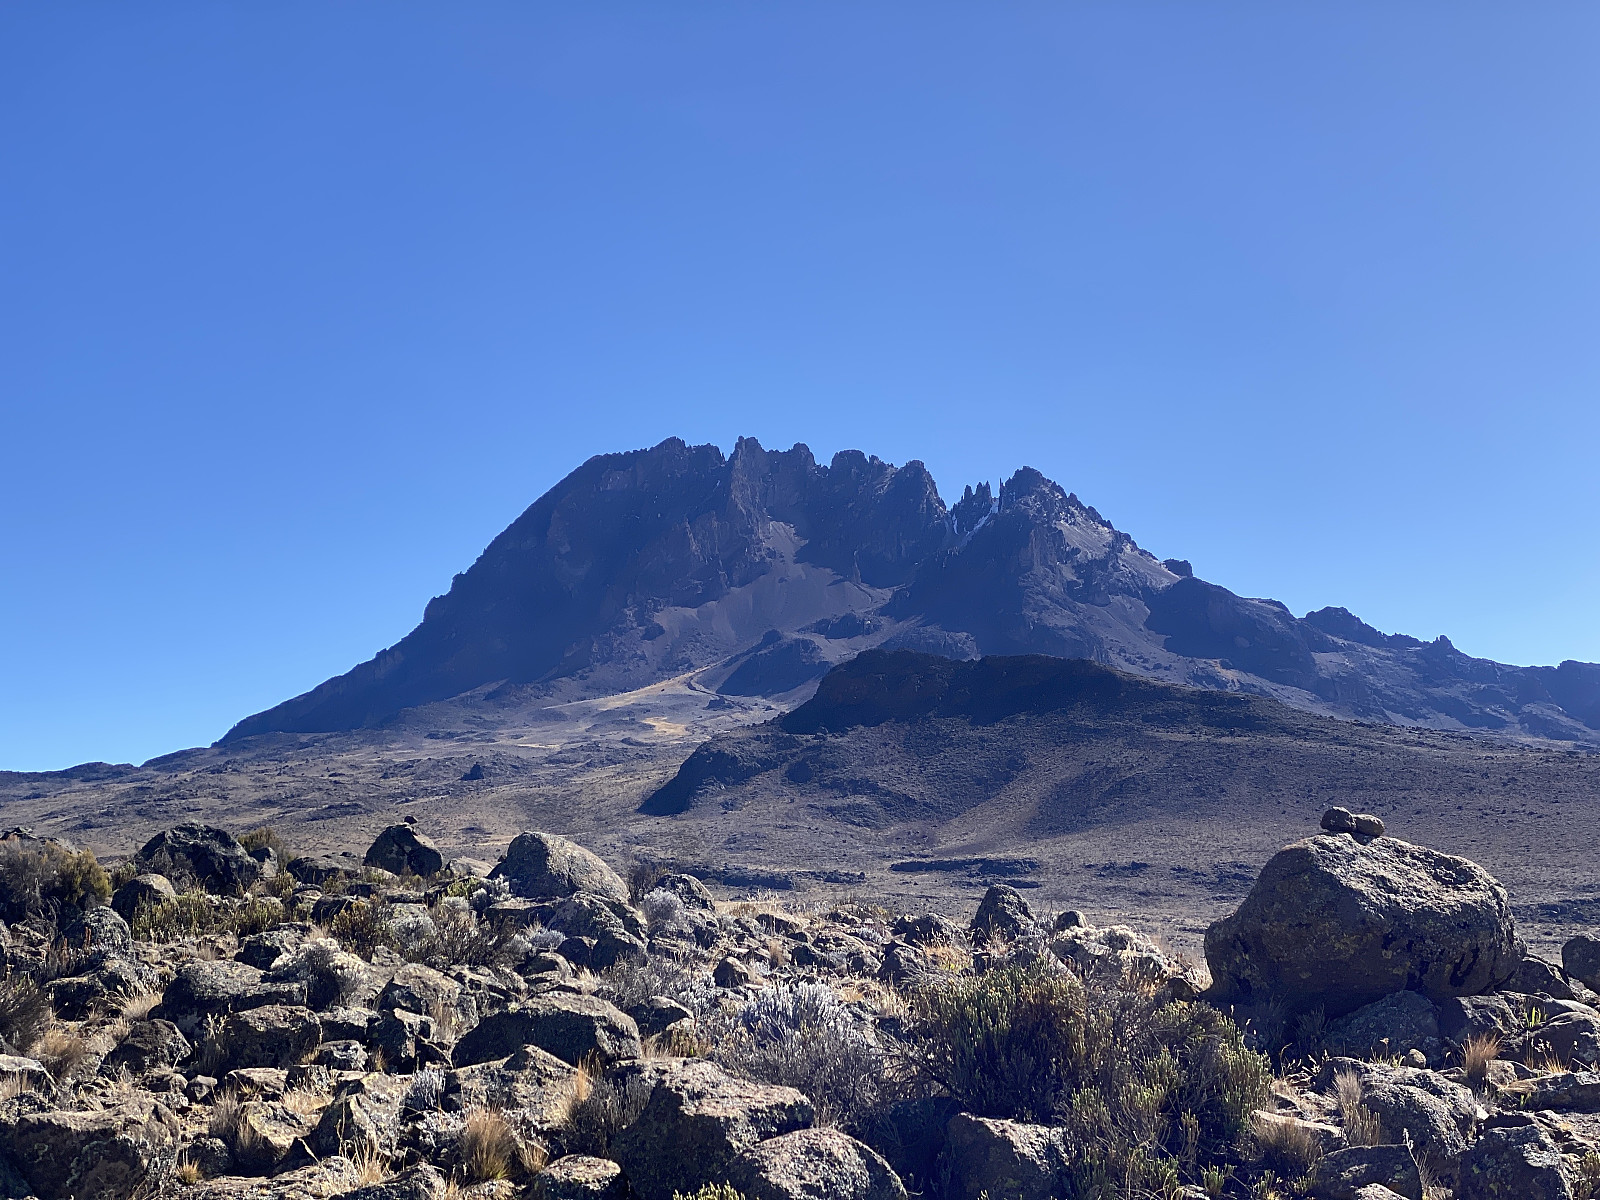
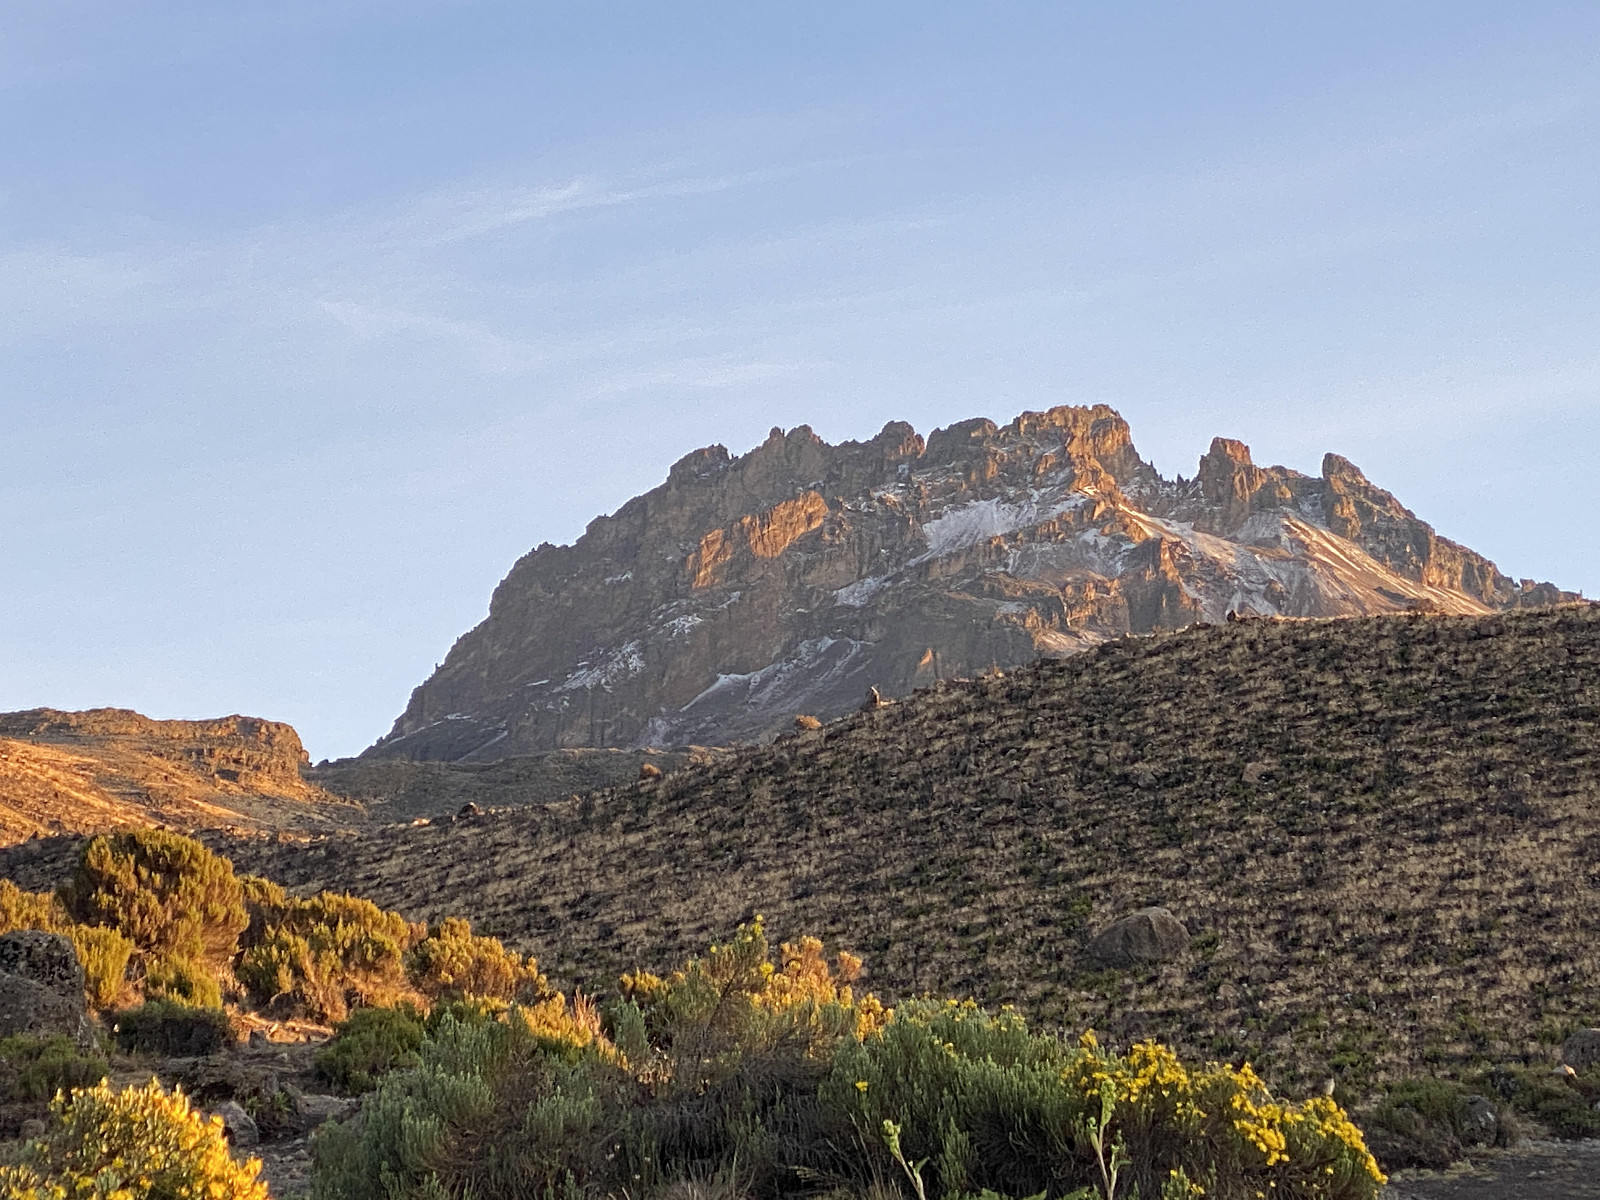
The next morning, we woke up early again. This morning, the weather was a little bit brighter, and to the south east, we could see the peaks of Mawenzi standing majestically in front of us (image #20). In the south west direction, the sky was not quite as clear; we could see enough of Kilimanjaro to get an idea as to the shape of the mountain (image #19), but due to the clouds, we could not see the full outline of it. I had my breakfast in my tent while the others had their in the kitchen tent (as is the custom when you go trekking on Kilimanjaro), and after breakfast we set out for the Mawenzi Tarn Hut.
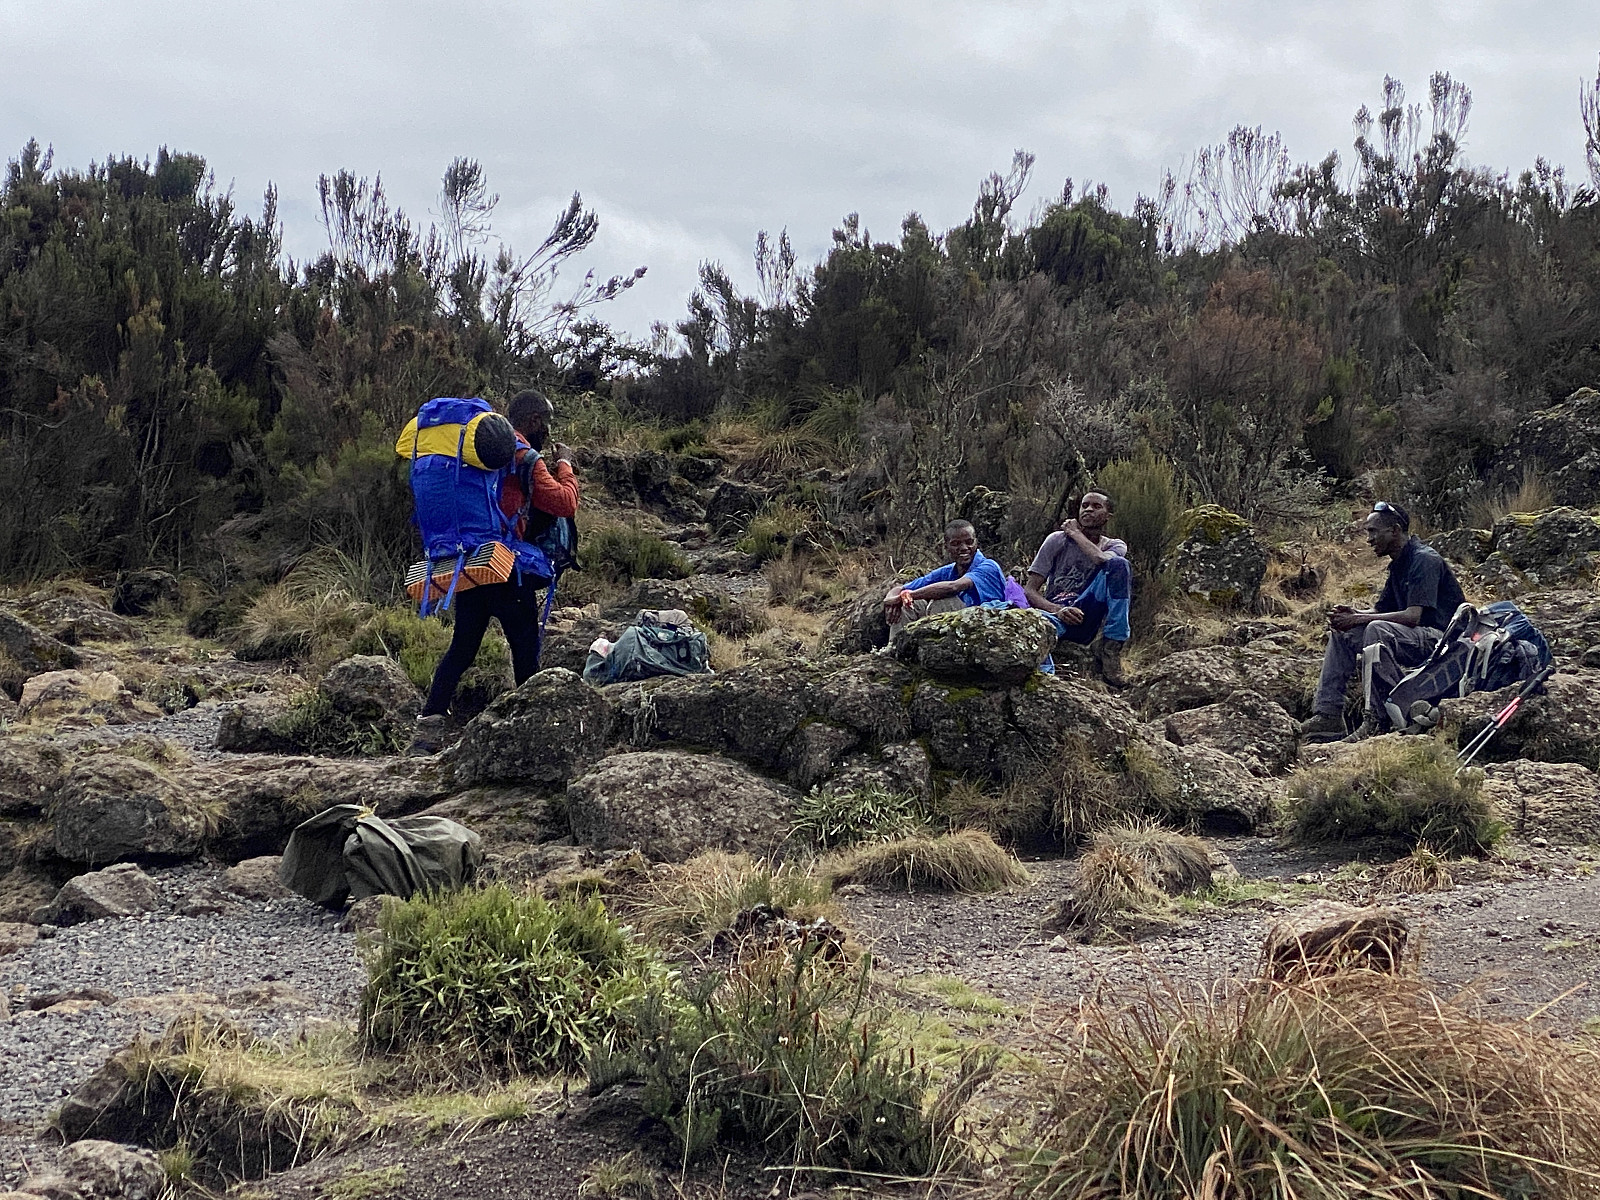
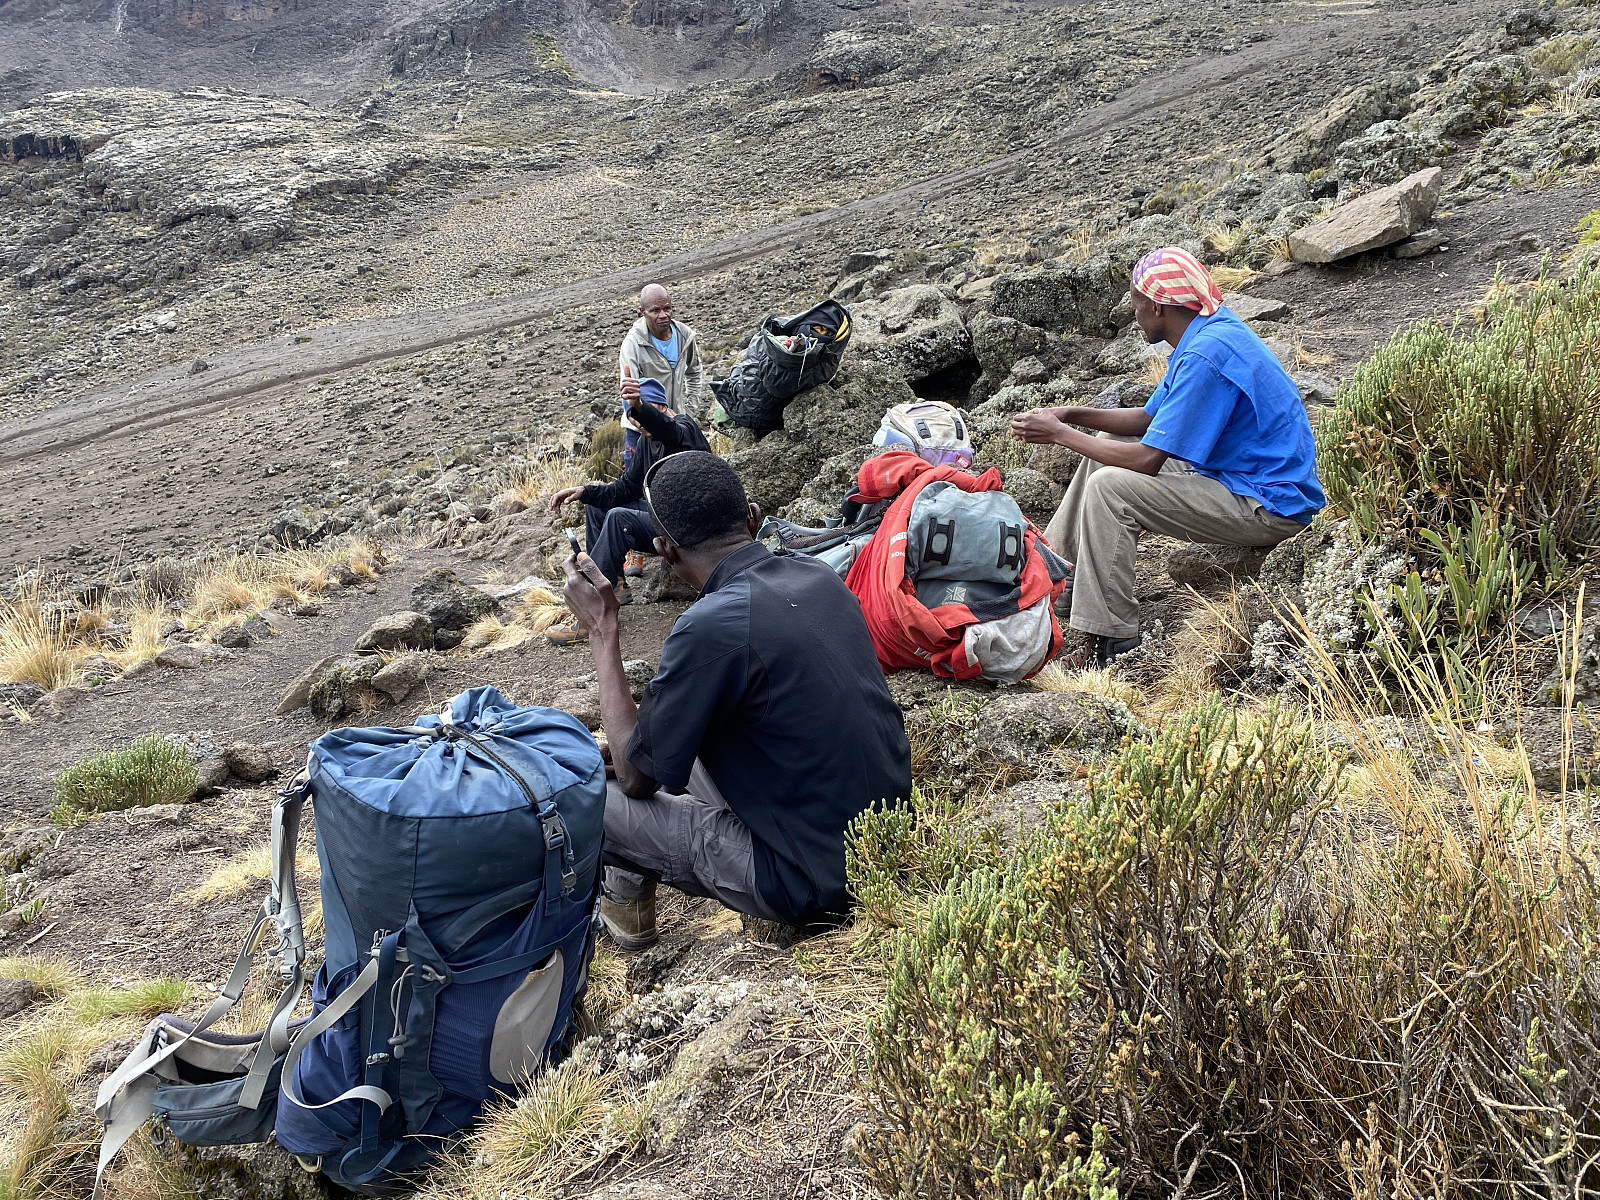
I left the Kikelewa Camp with Frank and Holson at about 10 to 8 in the morning; while the porters were taking down our tents, and packing them into loads that could be carried without too much discomfort. The walk from the Kikelewa Camp to the Mawenzi Tarn Hut isn't long, it's only about 3.5 kms or so. After about an hour and a half, we had a short break of about 15 minutes, just to have a little to eat and drink, before we continued (image #22). The chef and the porters rushed passed us as we were having this little break. About 1 hour later, however, as we rounded a little hill-like mountain ridge, we suddenly encountered them all sitting beside the trail, each one surfing on his mobile device (image #24). It's an internet point, Holson said to me as he saw them sitting there, and then explained to me that this was the only spot along today's trail where you have some sort of a network connection, and therefore everyone was using the opportunity to get in touch with their family at home.
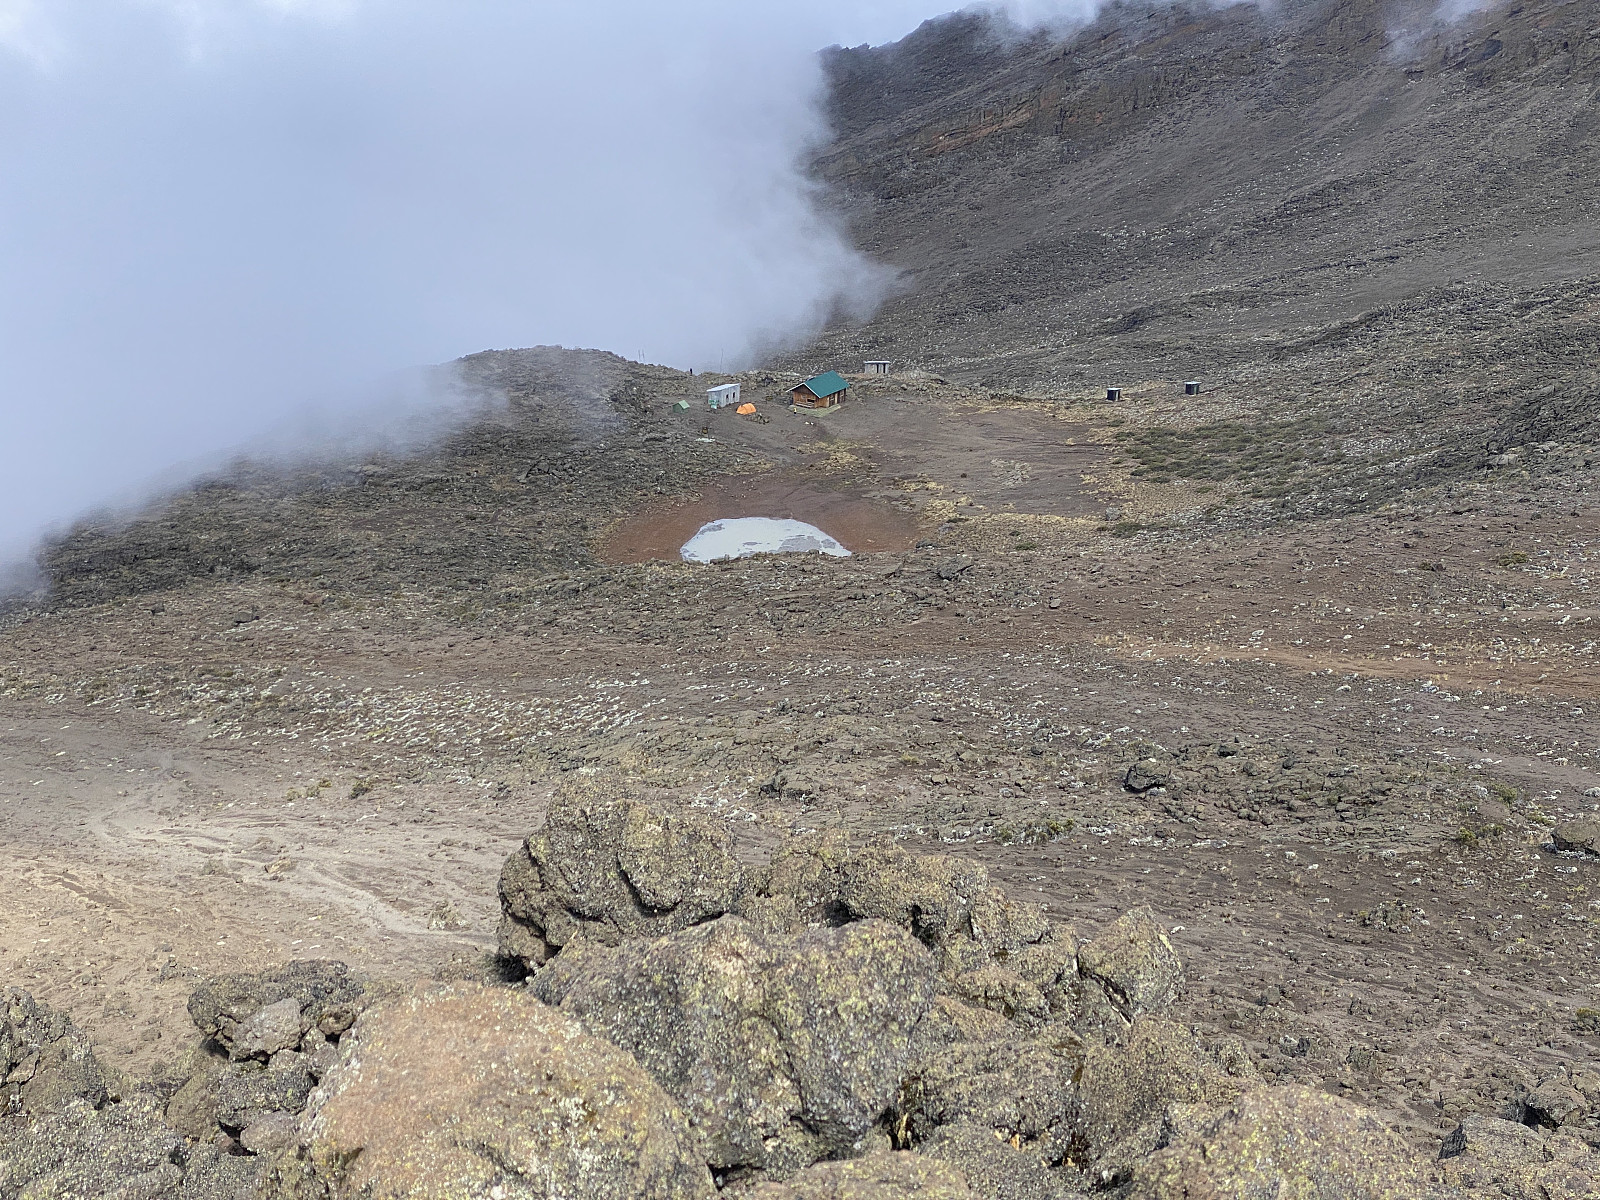
We sat down at the same spot ourselves, not because we really needed another break, but because there wasn't any point in getting to the Tarn Hut ahead of those carrying the tents and the food. After a while the chef and the porters got up, and continued to the Tarn Hut, while Frank, Holson and I remained at the internet point for another few minutes. We arrived at the Mawenzi Tarn Hut at about half past 10. I could immediately feel that this camp site was a lot colder than the previous ones, and it was much more windy. Moreover, due to the Pond, or Tarn, the air humidity was higher, so as to contribute to a feeling that the place was even colder than it really was. This camp site has a little cabin, which is why it has the word Hut in its name; but the cabin is only used by park employees, who come up there from time to time, to maintain things, and to clean the toilets etc. Beside the cabin, there is also a little tin shed, that serves as the kitchen of the camp; and then there is plenty of space for tent pitching around the little tarn, and in the periphery of the camp there are som primitive toilets (i.e. each toilet's just a little shed with a hole in the floor).
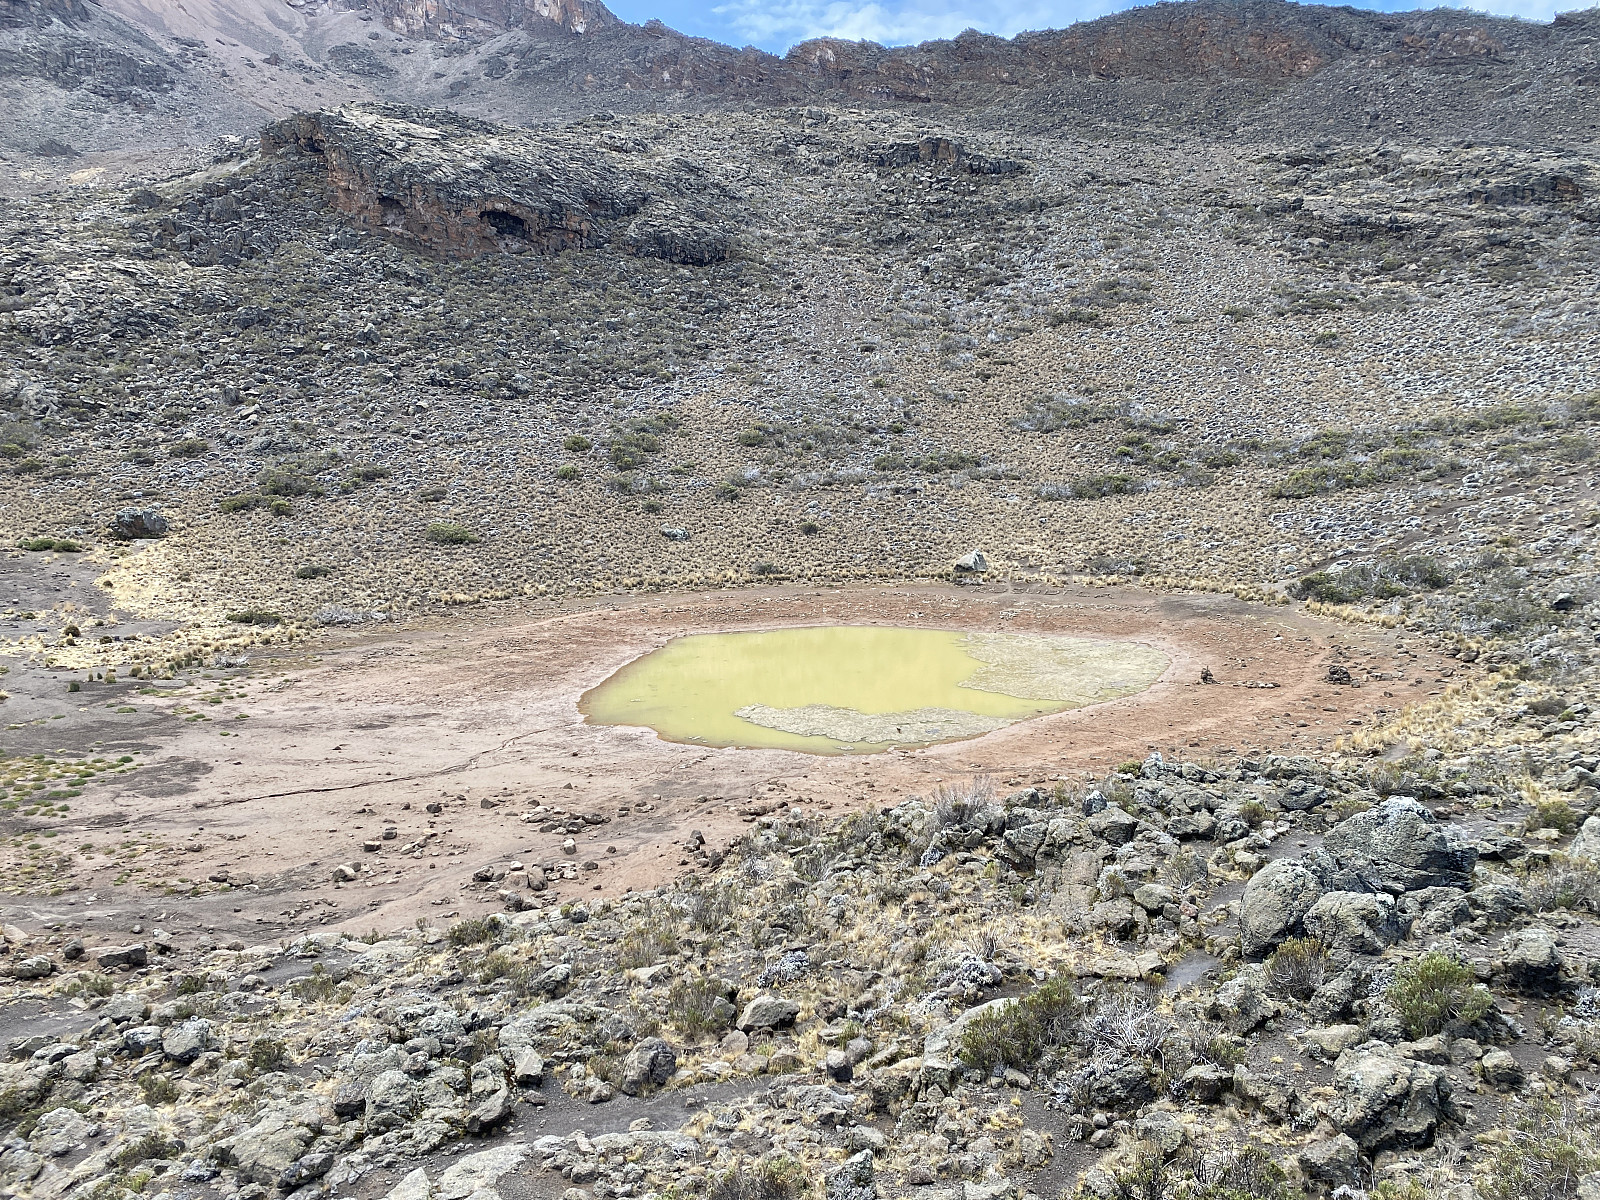
The Mawenzi Tarn is a little, almost circular pond; about 15 metres or so in diameter, and located just north of the mountain of Mawenzi. When we arrived there, the water level had sunk due to draught, however; and so the tarn had shrunk down to a diameter of about 8 metres (images ## 25 & 38). No one actually knows how deep it is, Frank said to me, and explained that the bottom is very muddy, and that you can't just walk into the pond to find out how deep it is, as you might actually become entrapped in the mud. He then went on, and told me there's a story about a man who went too far into the tarn, where he got stuck in the mud; and then disappeared, as those who were with him were unable to get him out of it. According to the story, he said, they found his dead body in the ocean outside of Mombasa about two weeks later. We laughed over the story as we both knew it was just a myth. This is the kind of story that older Kilimanjaro guides tell the younger ones (i.e. the "newbies"), I said to Frank, to see if they're able to fool them. Frank agreed to that, and I told him that we do have similar stories in Norway. Where I live, for instance, there's an old story about a sheep that disappeared in a grotto on one island, just to come out of a grotto on a different island about a week later. But Frank told me that some actually believe the story, whereas others don't. Anyway, had there really been an underground passage all the way from Mawenzi to Mombasa large enough that a man could pass through it; it would have drained the tarn within seconds, so this is definitely just a myth.
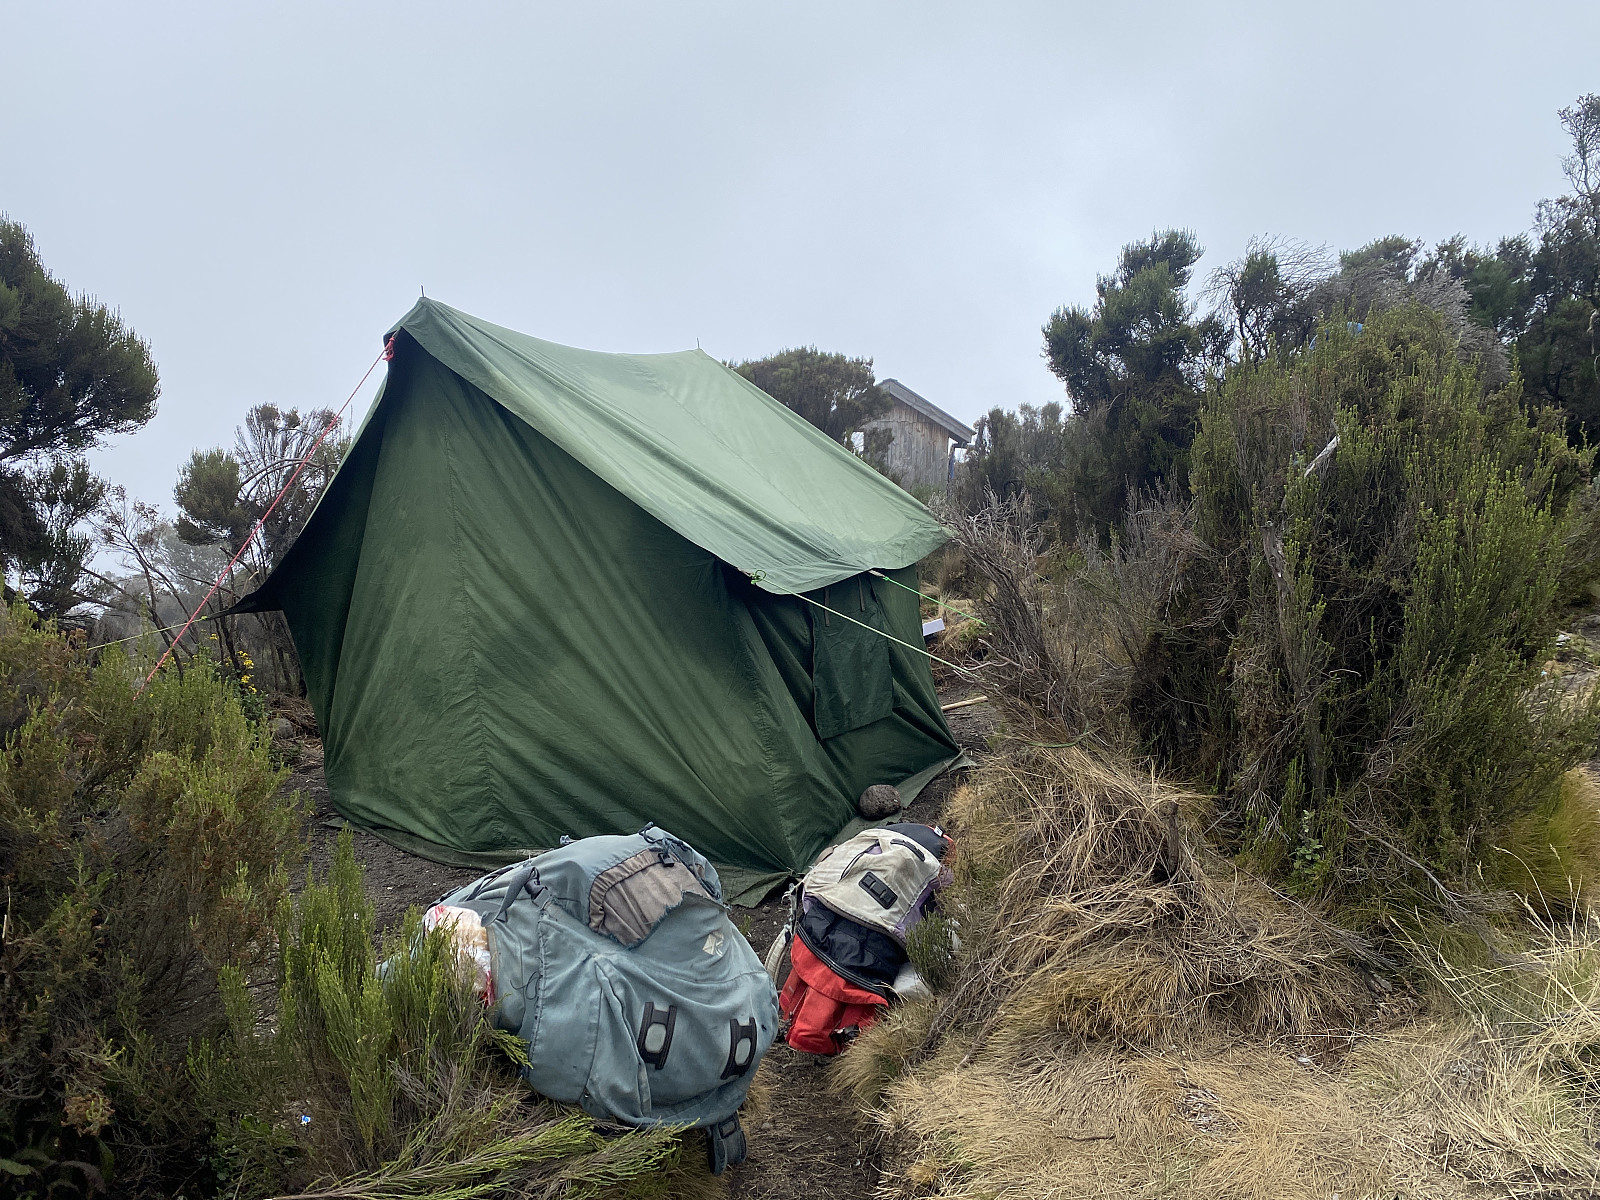
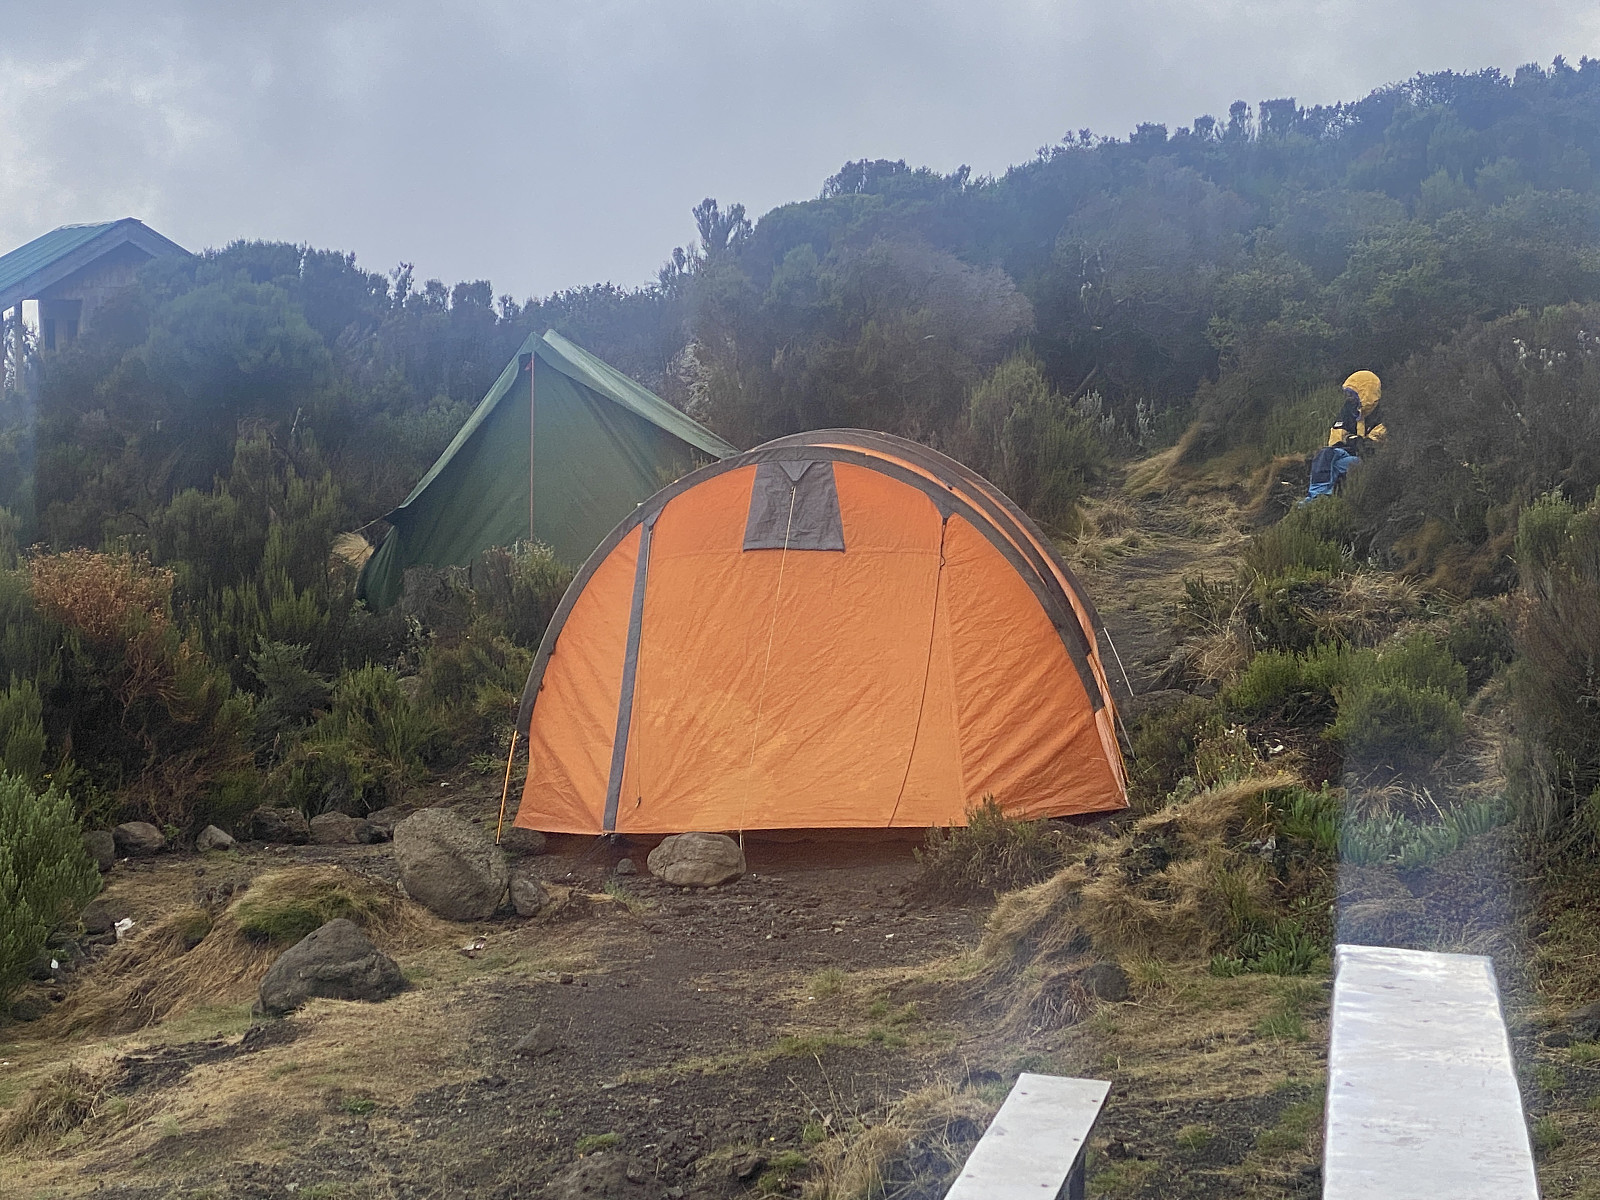
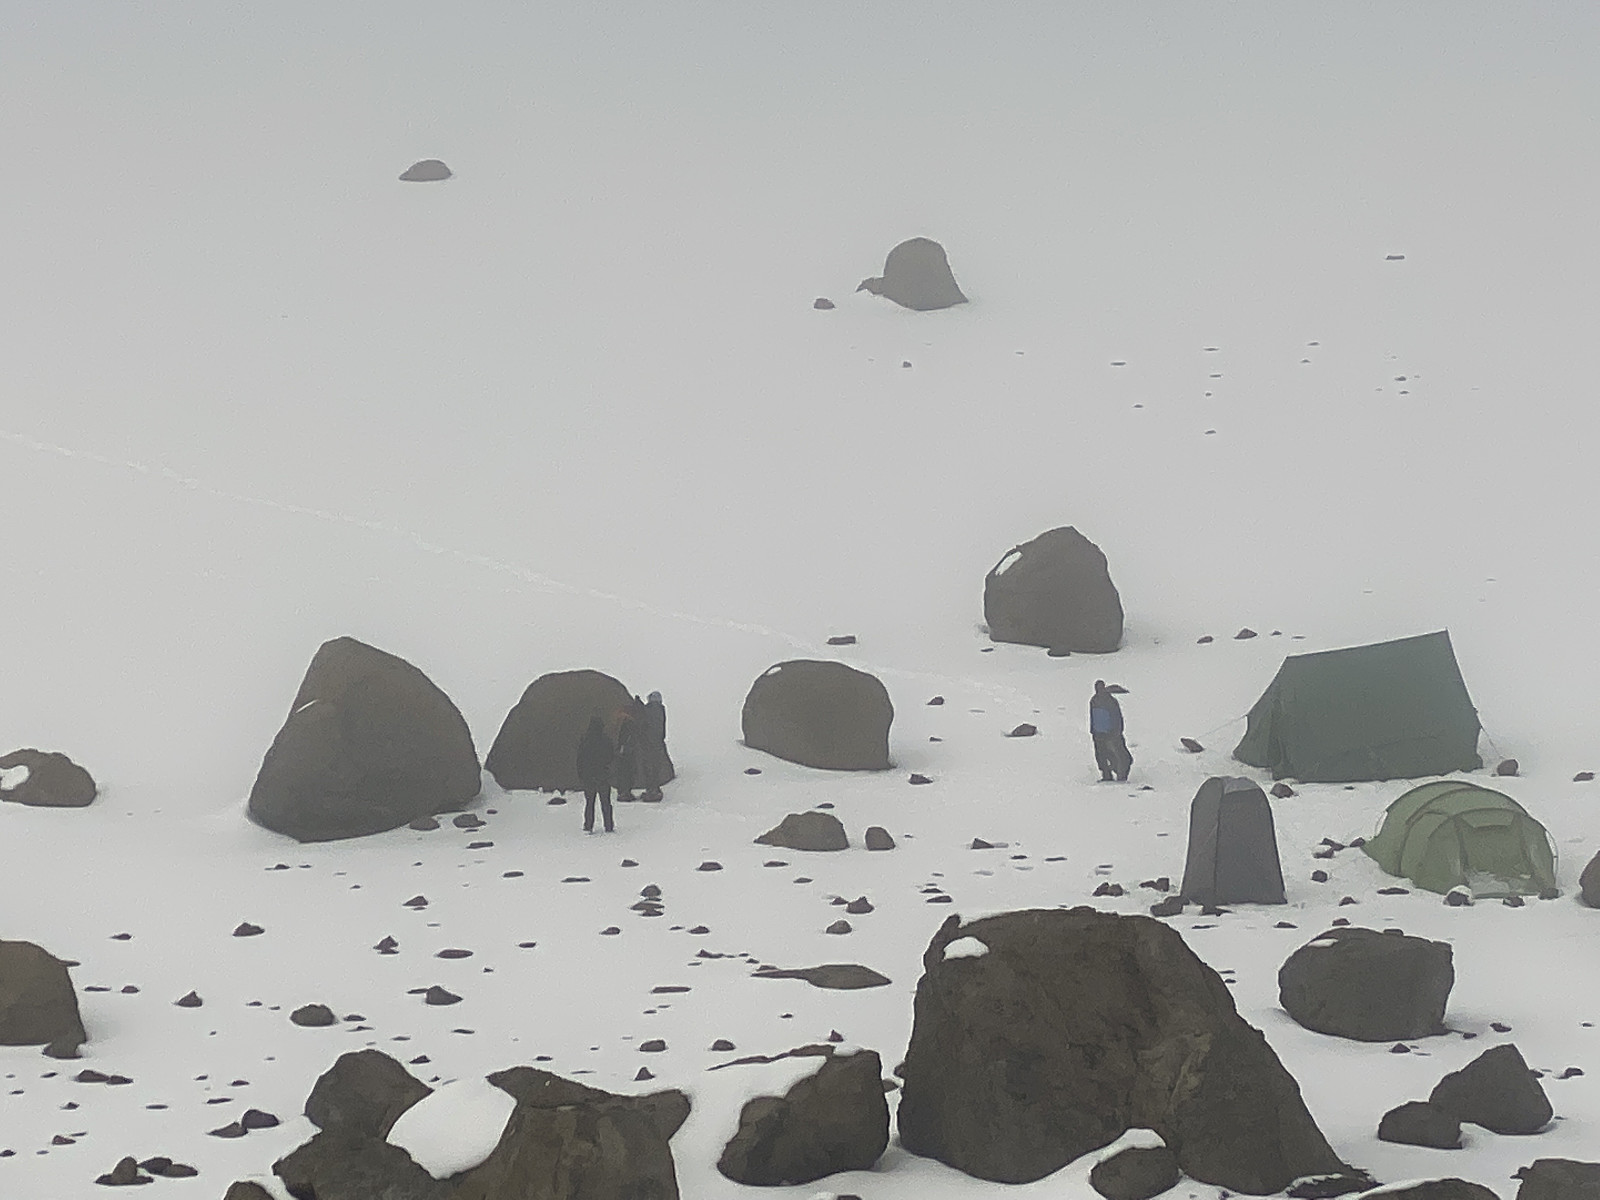
![Image #26: The Mawenzi Tarn Hut [4315 m.a.m.s.l.], with our tents pitched just outside. The hut is for park employees, and the tin shed is the kitchen of the camp site.](https://images2.peakbook.org/images/14939/Solan_20230131_63d99b43091e9.jpg?p=xtralarge)
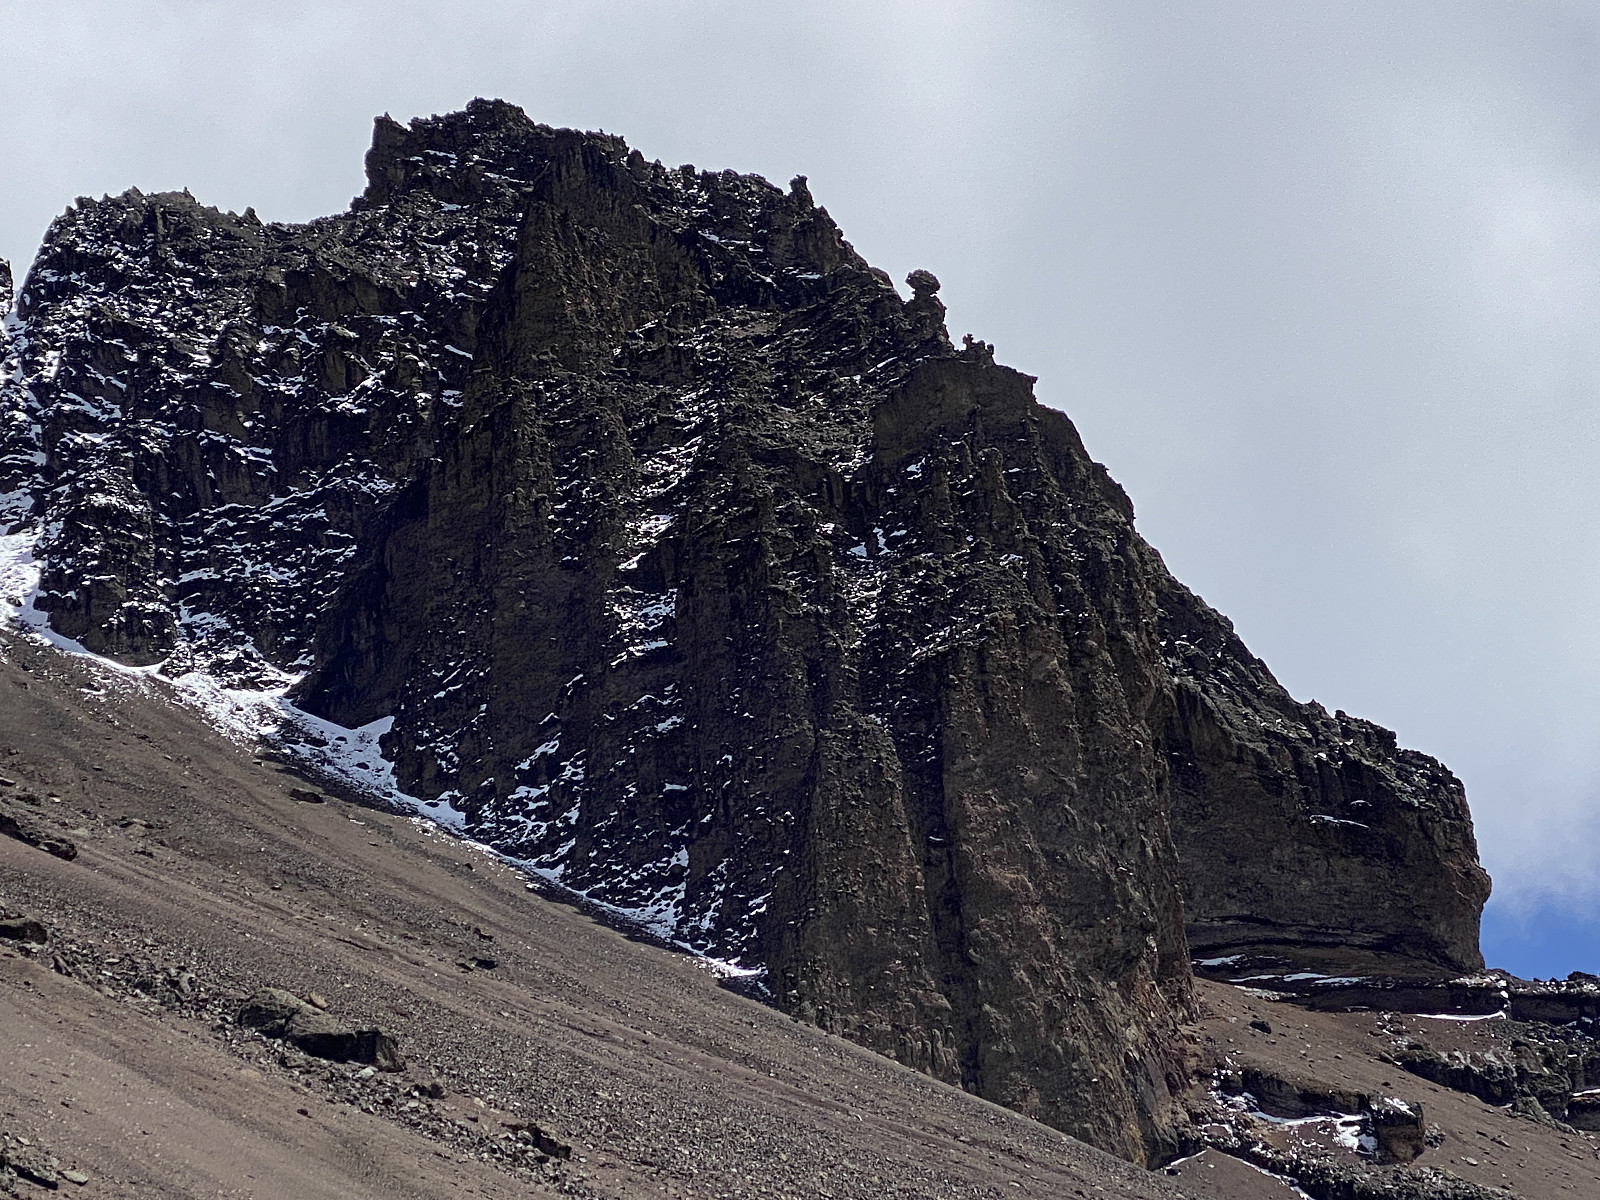
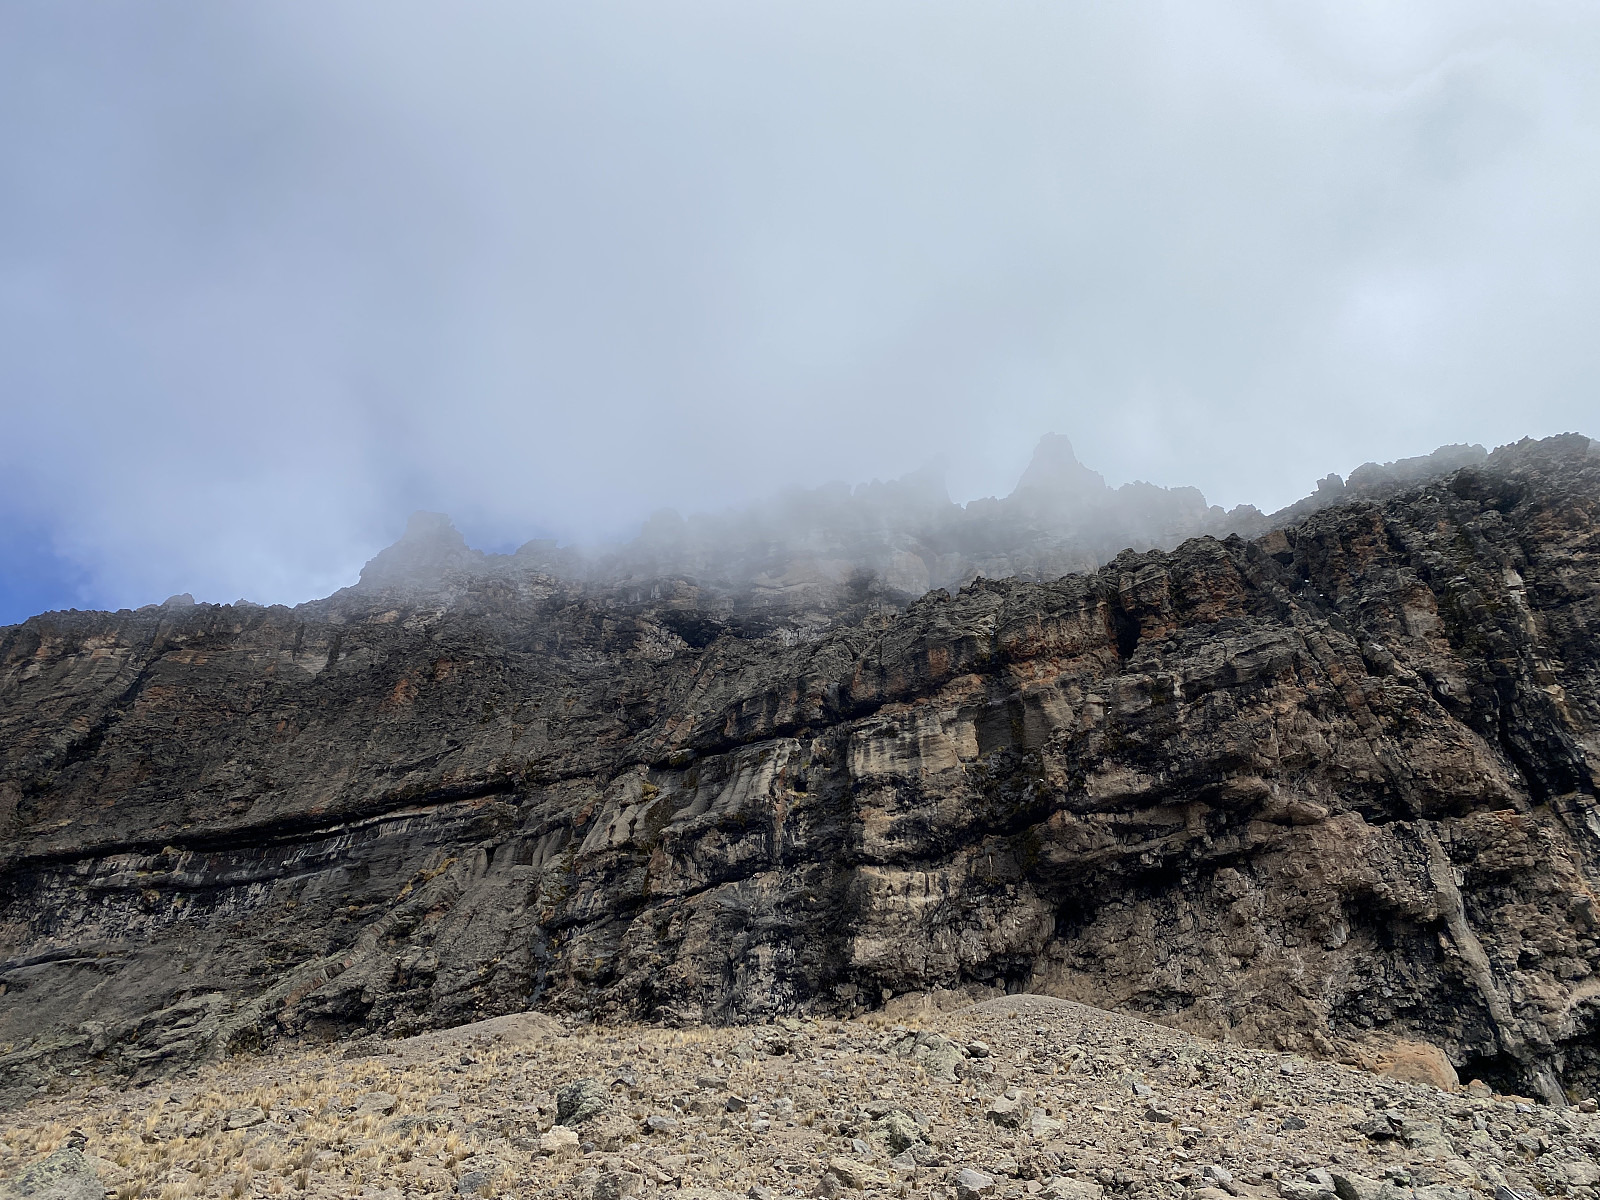
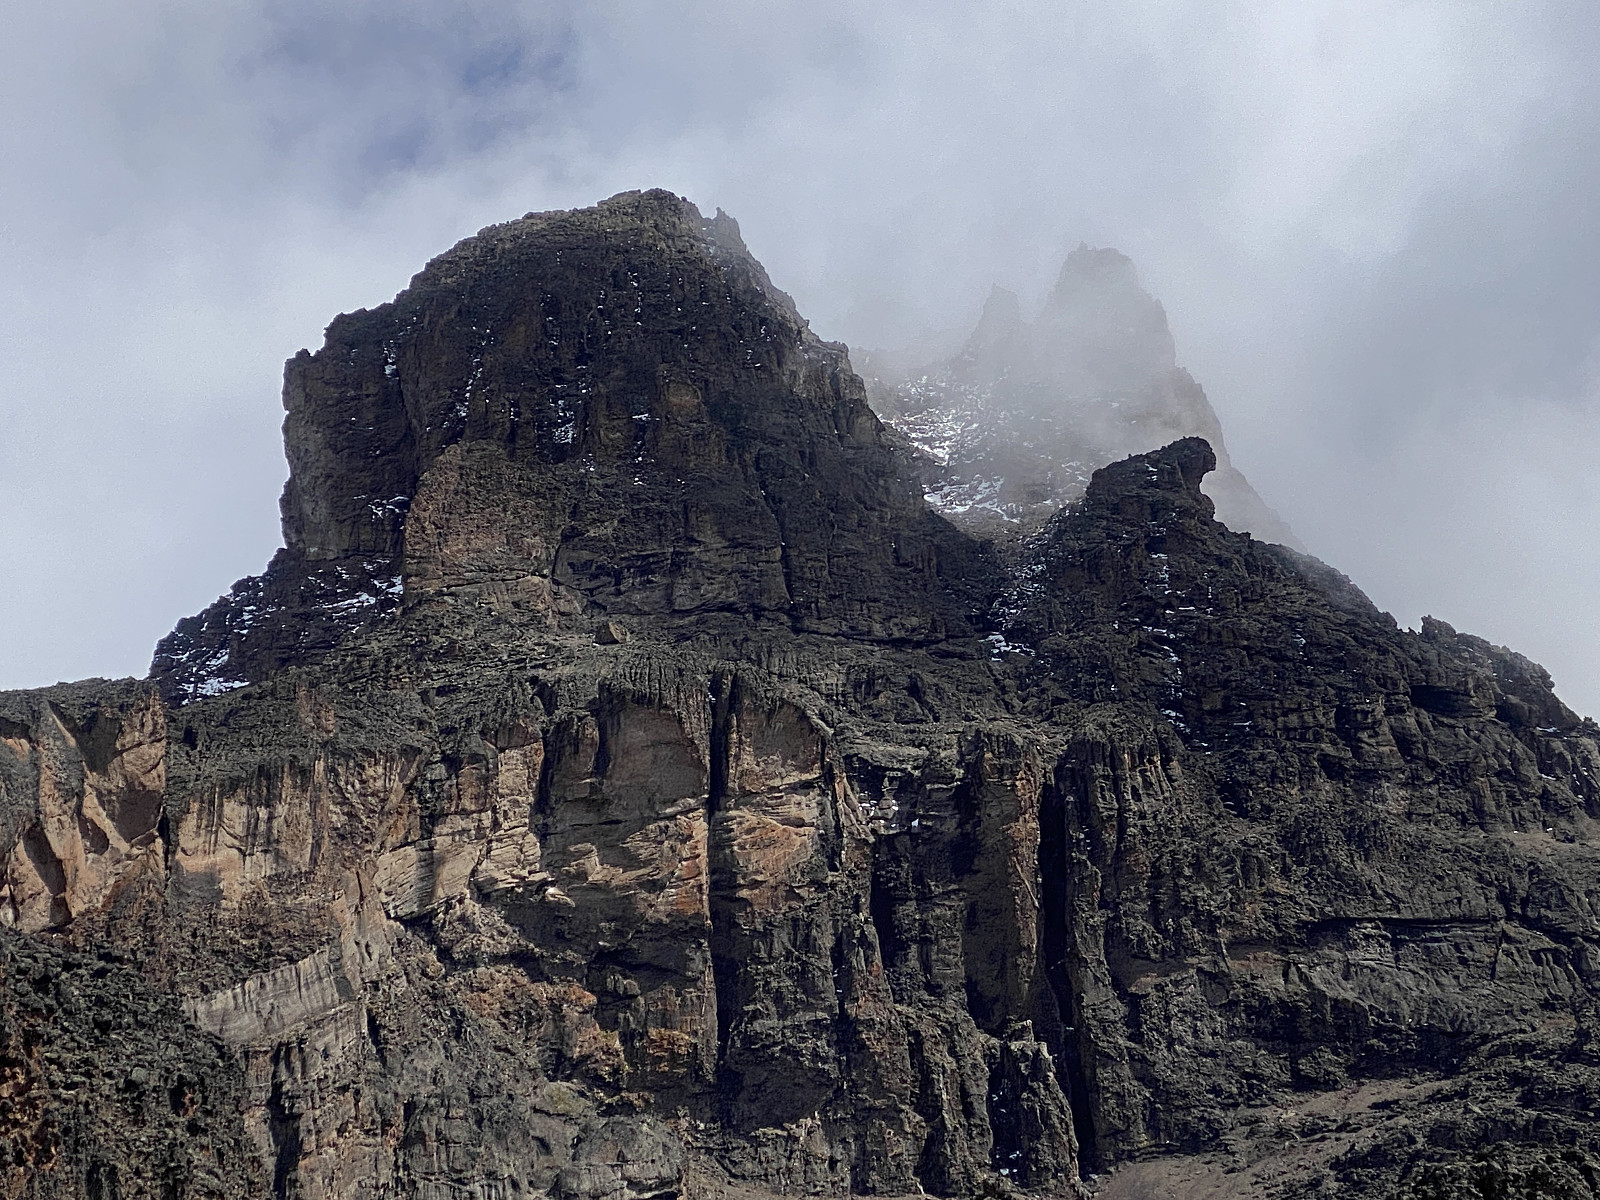
In advance of my Kilimanjaro trek, I had made an agreement with Frank, that they should take me up in the mountain side of Mawenzi, up to a point they call the Mawenzi Midpoint. I had actually tried to book a hike all the way up to the summit of Mawenzi [i.e. Hans Mayer Peak, 5149 m.a.m.s.l.]. Ascending the summit of Mawenzi proved to be a bit tricky at the time, though, as there are quite strict requirements for such a climb; i.e. you are required to use climbing gear, and rock scrambling is prohibited (see below). Nevertheless, my plan as for now, was to come as far up in the mountain side of Mawenzi as I could, and to study the mountain with my own eyes, and with binoculars, so that I could start planning an ascent of the summit at a later time. As we had been trekking up to the Mawenzi Tarn Hut this morning, Holson had mentioned that this afternoon was the time they had set apart for him to take me up to the Mawenzi Midpoint; and so we just took time to have our lunch in the Tarn Hut camp, and thereafter we embarked upon our trek over to the plateau that they have dubbed the Mawenzi Midpoint.
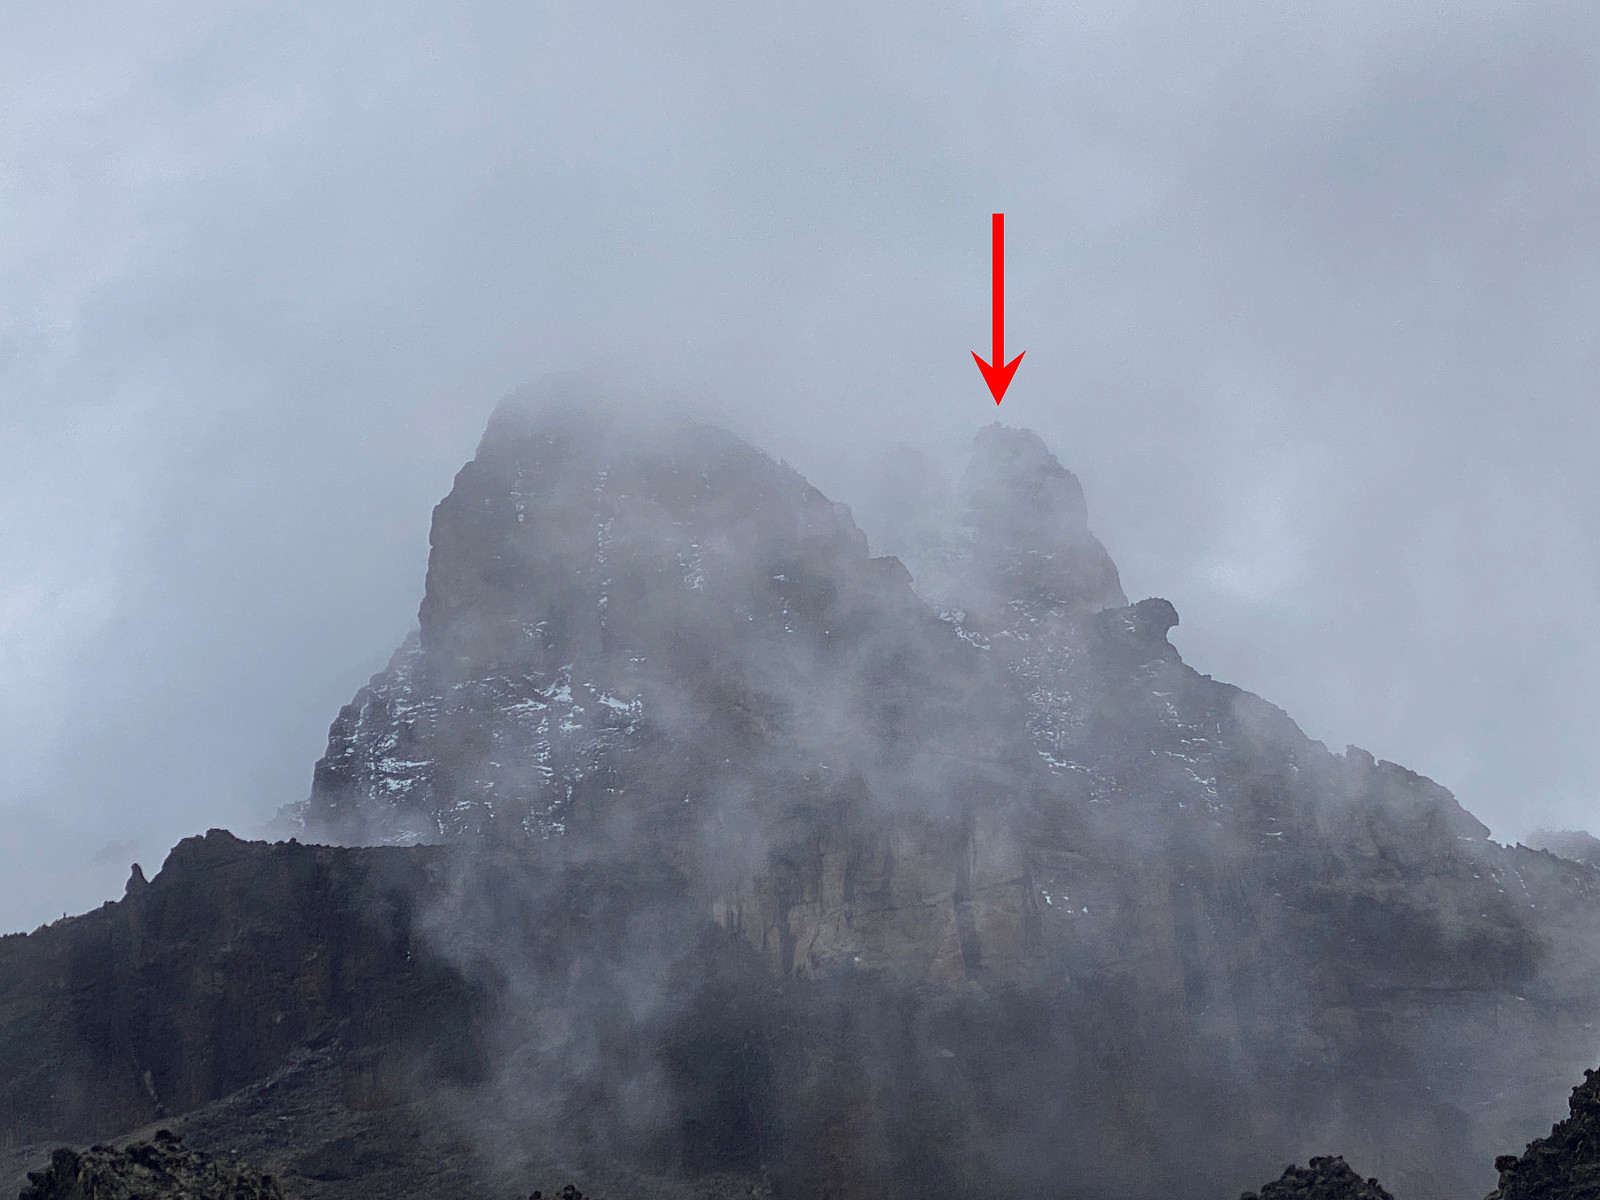
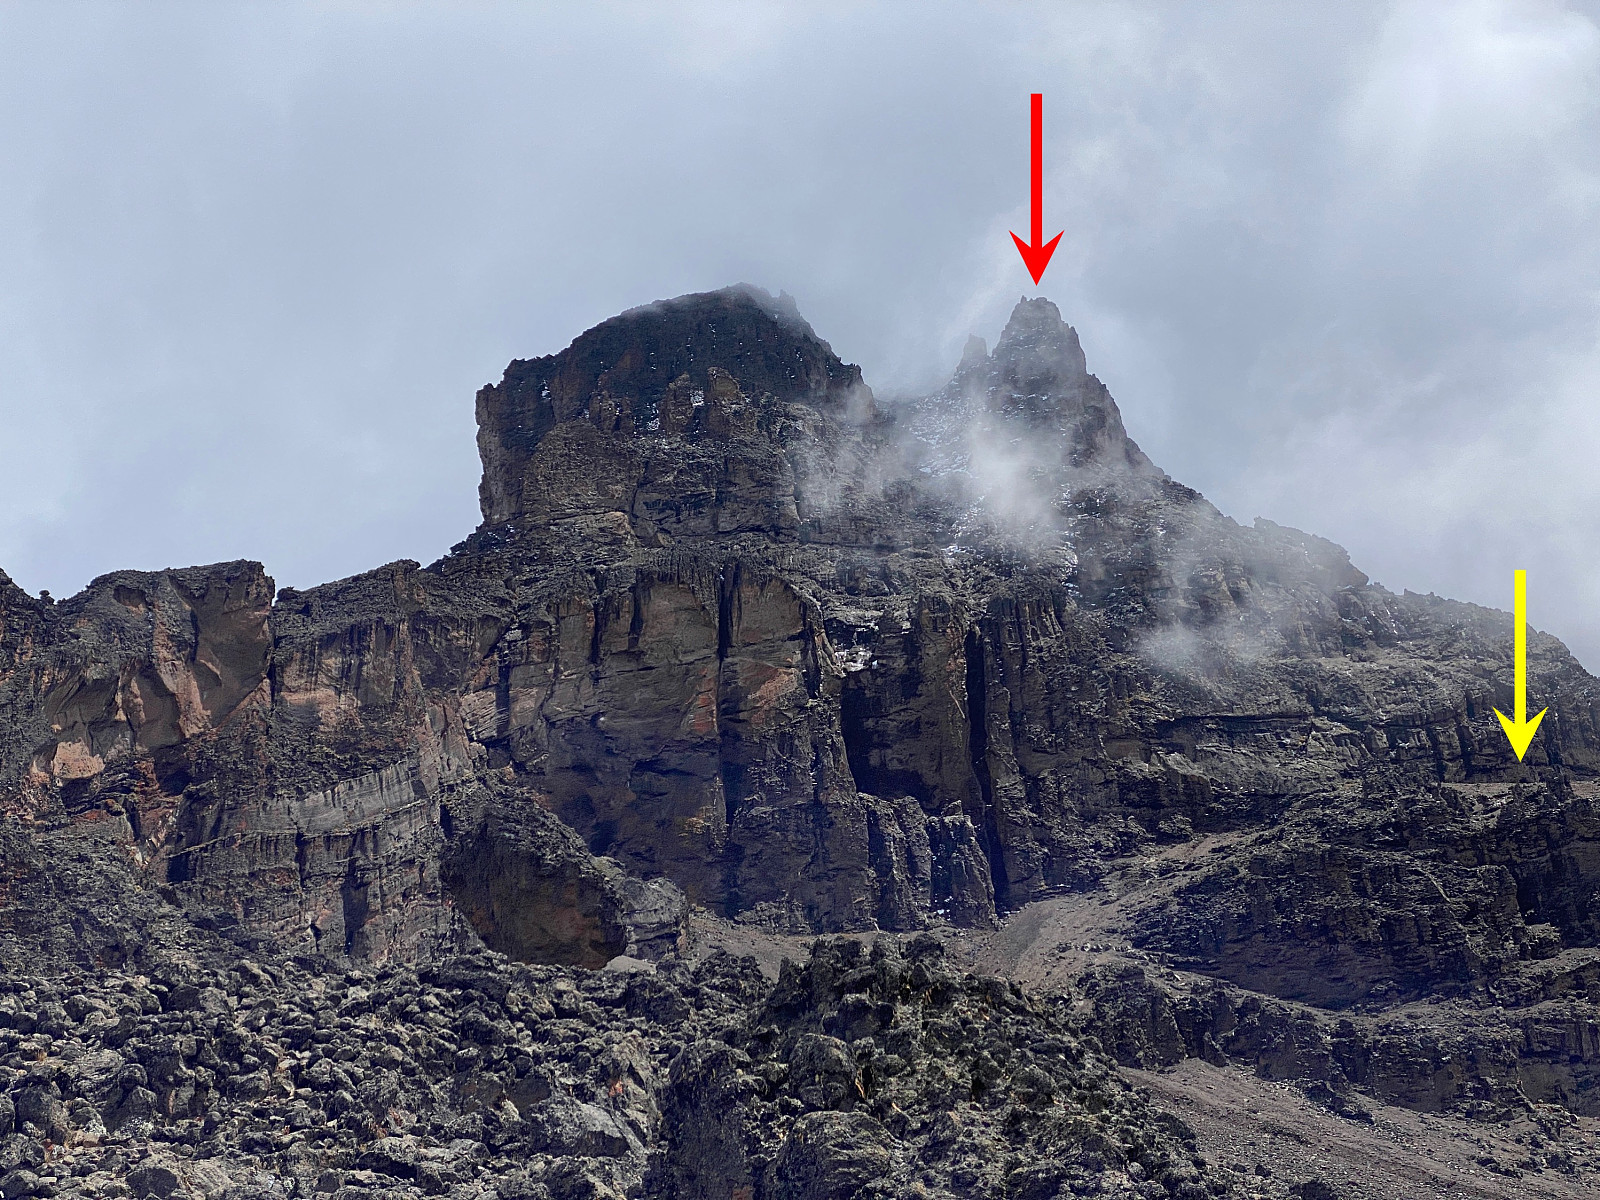
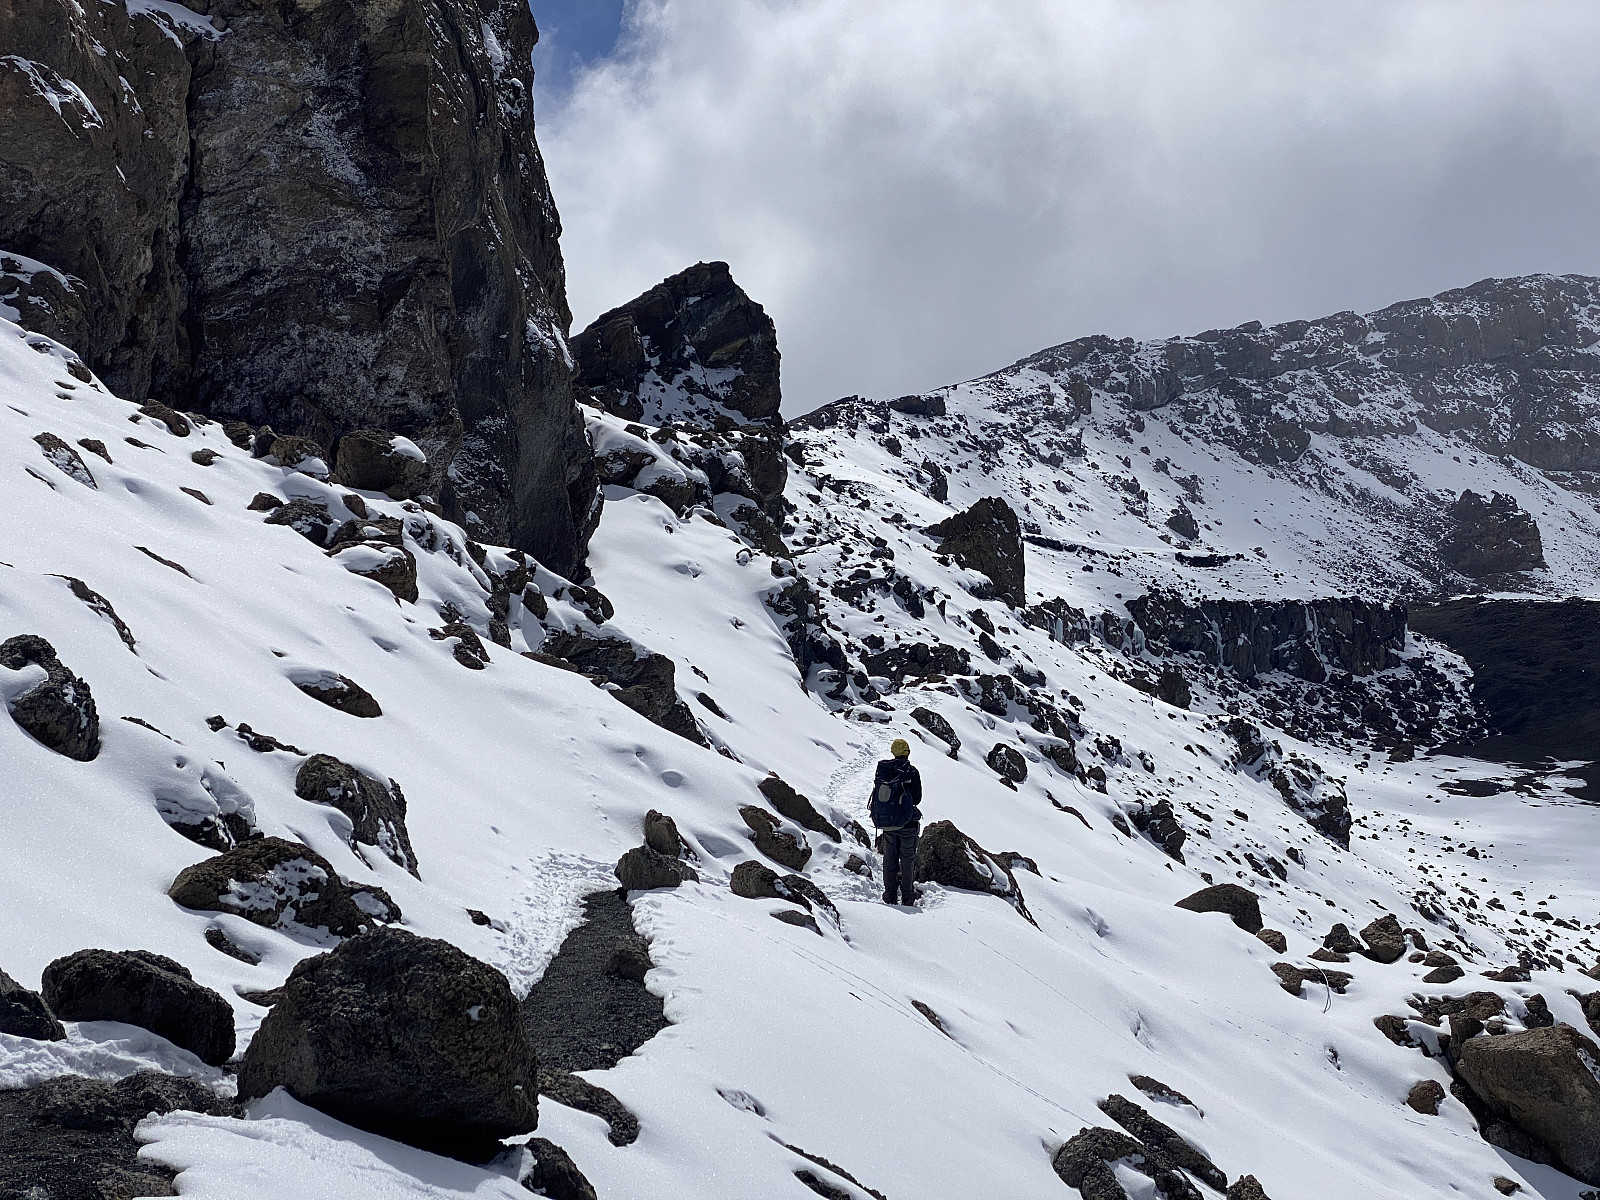
We started out from the Tarn Hut at a quarter past twelve; Holson, myself, and one of the porters, who wanted to come along and see the "midpoint" for himself. We followed a little trail that led up to a mountain ridge just south west of the Tarn Hut; one that extends all the way from high up in the Mawenzi chain of peaks, and almost down to the Kikelewa Camp site. We actually just crossed over this ridge, as we immediately descended on the other side of it, while Holson explained that they sometimes lead tourists high up along the ridge for altitude acclimatisation. You can't reach the summit that way, however, as the ridge gets way too steep at some point higher up, he added. On the south side of the ridge, the landscape was desertlike, with none of the vegetation that we'd had along the way up to the Tarn Hut. There was some moss on the stones at places, and a little grass here and there; but no trees, and not even bushes. This was the saddle area, i.e. the saddle-like mountain pass between Mawenzi and Kilimanjaro. After a few minutes in the saddle, Holson pointed out the summit of Mawenzi for us among the three peaks that could be discerned in the clouds that the mountain protruded into (image #27); and below it, he pointed out the plateau called the midpoint (image #28). Now there are two ways up to that plateau, he explained. You may ascend it from the north, but then you have to follow a very narrow shelf to get there; so the common thing to do is to do is to approach it from the south, he said, and pointed at a gravel chute just beyond the midpoint.
We headed towards the mentioned gravel chute. There was now longer any visible trail to see, but the way over there had once been marked out by small cairns, though at least half of them had over time collapsed into small piles of stones; indicating that this way isn't much in use any longer. Holson repaired some of them as we passed by, as they might be useful to the mountain guides, whenever they have tourists that either want climb Mawenzi, or to go up to the Midpoint. As mentioned above, there are currently quite strict regulations when it comes to climbing on Mawenzi. You can do it, but you have to use climbing gear, and there are written guidelines as to requirements for the climbers, as well as for the tour operators. Furthermore, you have to pay an additional park fee of USD 750 (as of November 2022), and you have to sign a statement that climbing on Mawenzi is done at your own risk. Mawenzi was actually closed for all climbing from around 2002 due to a number of fatalities on the mountain, and the mentioned regulations/guidelines were put in place when it opened up again for climbing in 2017.
There is a pdf document titled Mawenzi Technical Climbing Guidelines, that may be downloaded from the web site of the Kilimanjaro National Park; which outlines the requirements for ascensions of Mawenzi. Basically, a number of requirements for the tour operators are listed, followed by a list of requirements for the climbers:
Tour Operator Requirements- A valid Mountain TTLB license [TTLB = Tanzanian Tourism Licensing Board].
- A clean business record.
- Technical climbing guides.
- The tour operator should submit an application letter with attached technical climbing CVs of the clients to the Chief Park Warden.
- Only experienced rock climbers shall attempt Mawenzi technical climb.
- Briefing will be conducted by guide prior to departure.
- Tour operator shall provide a first aid kit for the Mawenzi climbers.
- Tour operator shall have a reliable communication system and rescue/emergence response plan.
- Visitors must have the following technical climbing mountain gears: Long Slings, medium length slings, carabiners, rappel device, 60m 8.5mm ropes, alpine harness, locking carabiners, climbing boots, helmets, Ice axes and crampons.
- Only one group of two climbers at a time are allowed to climb the peak of Mawenzi. Mountain technical climbers shall be careful to avoid accidents.
- All climbers should adhere with all other park rules and regulations.
- Minimum age allowed in the activities shall be of or above 18 years old.
The document then goes on to say that climbing on Mawenzi is only allowed at daytime [i.e. between 6:00 a.m. and 6:00 p.m.], and it is also emphasised that rock scrambling is prohibited, and rock scrambling is thereafter defined as climbing on a rock formation more than 10 feet above its base without the use of proper climbing gear.
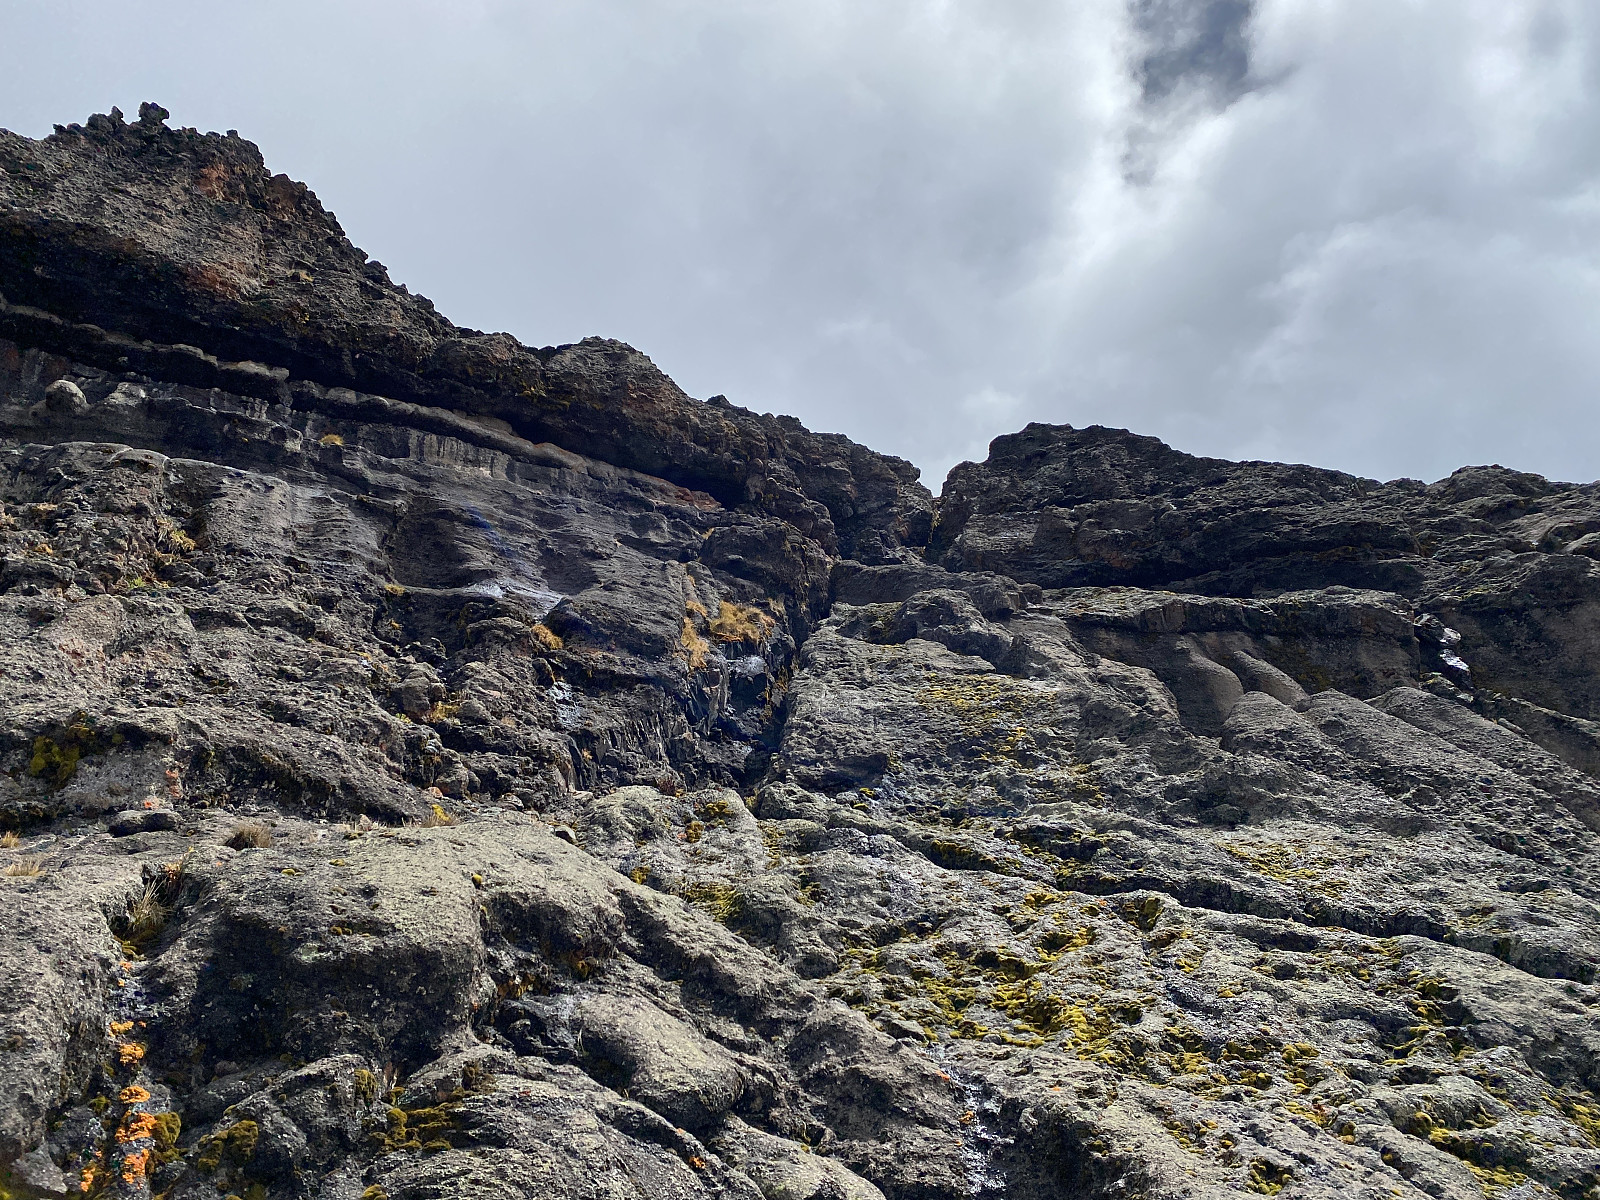
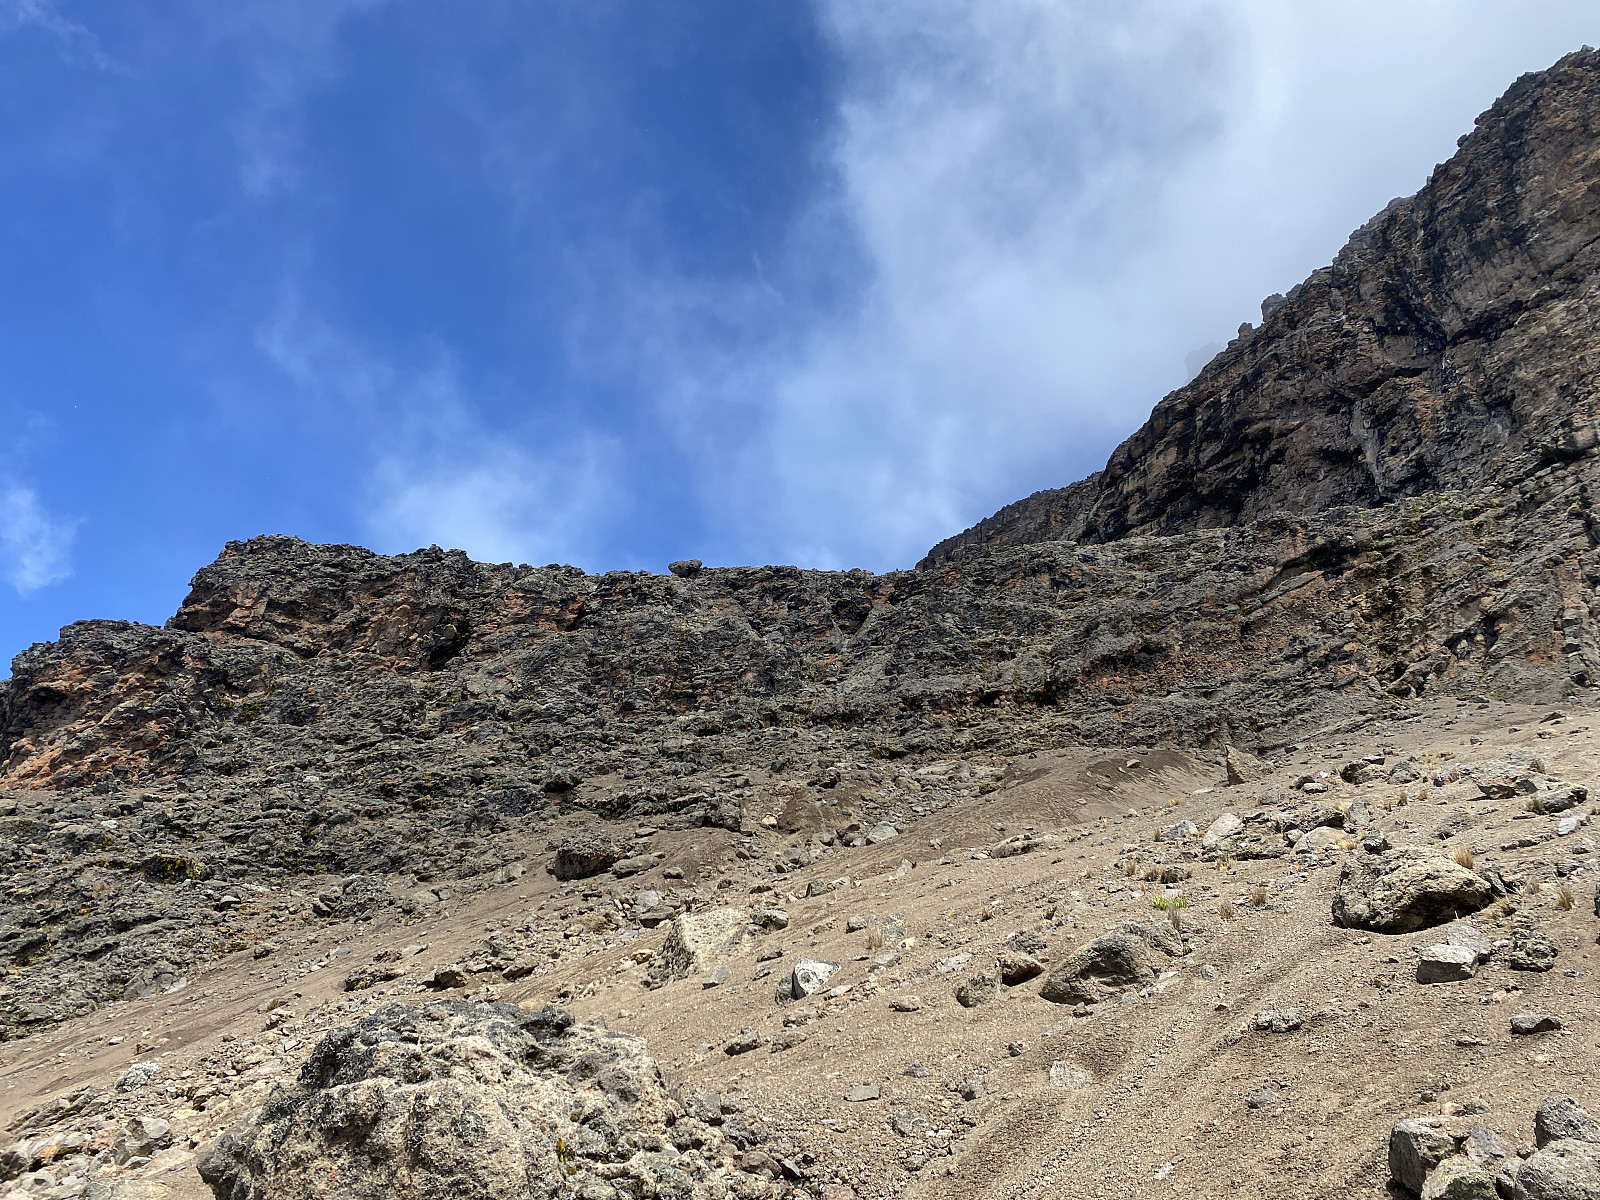
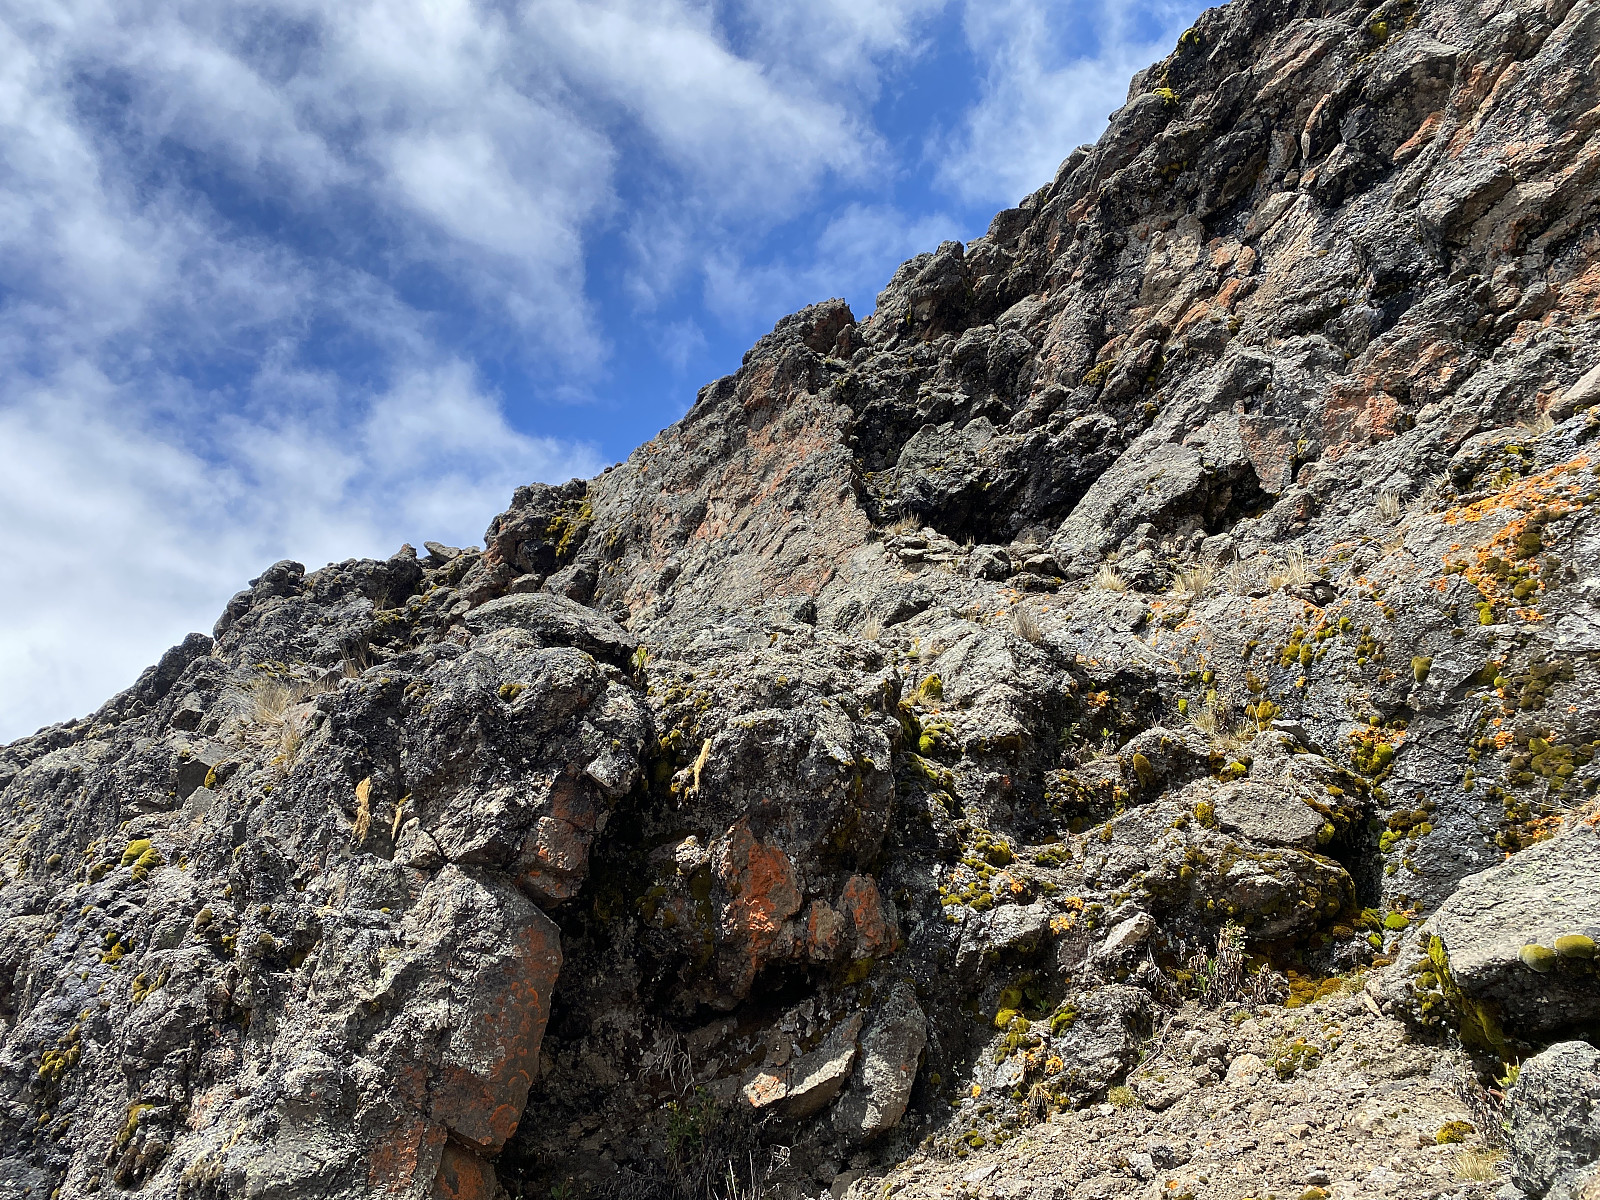
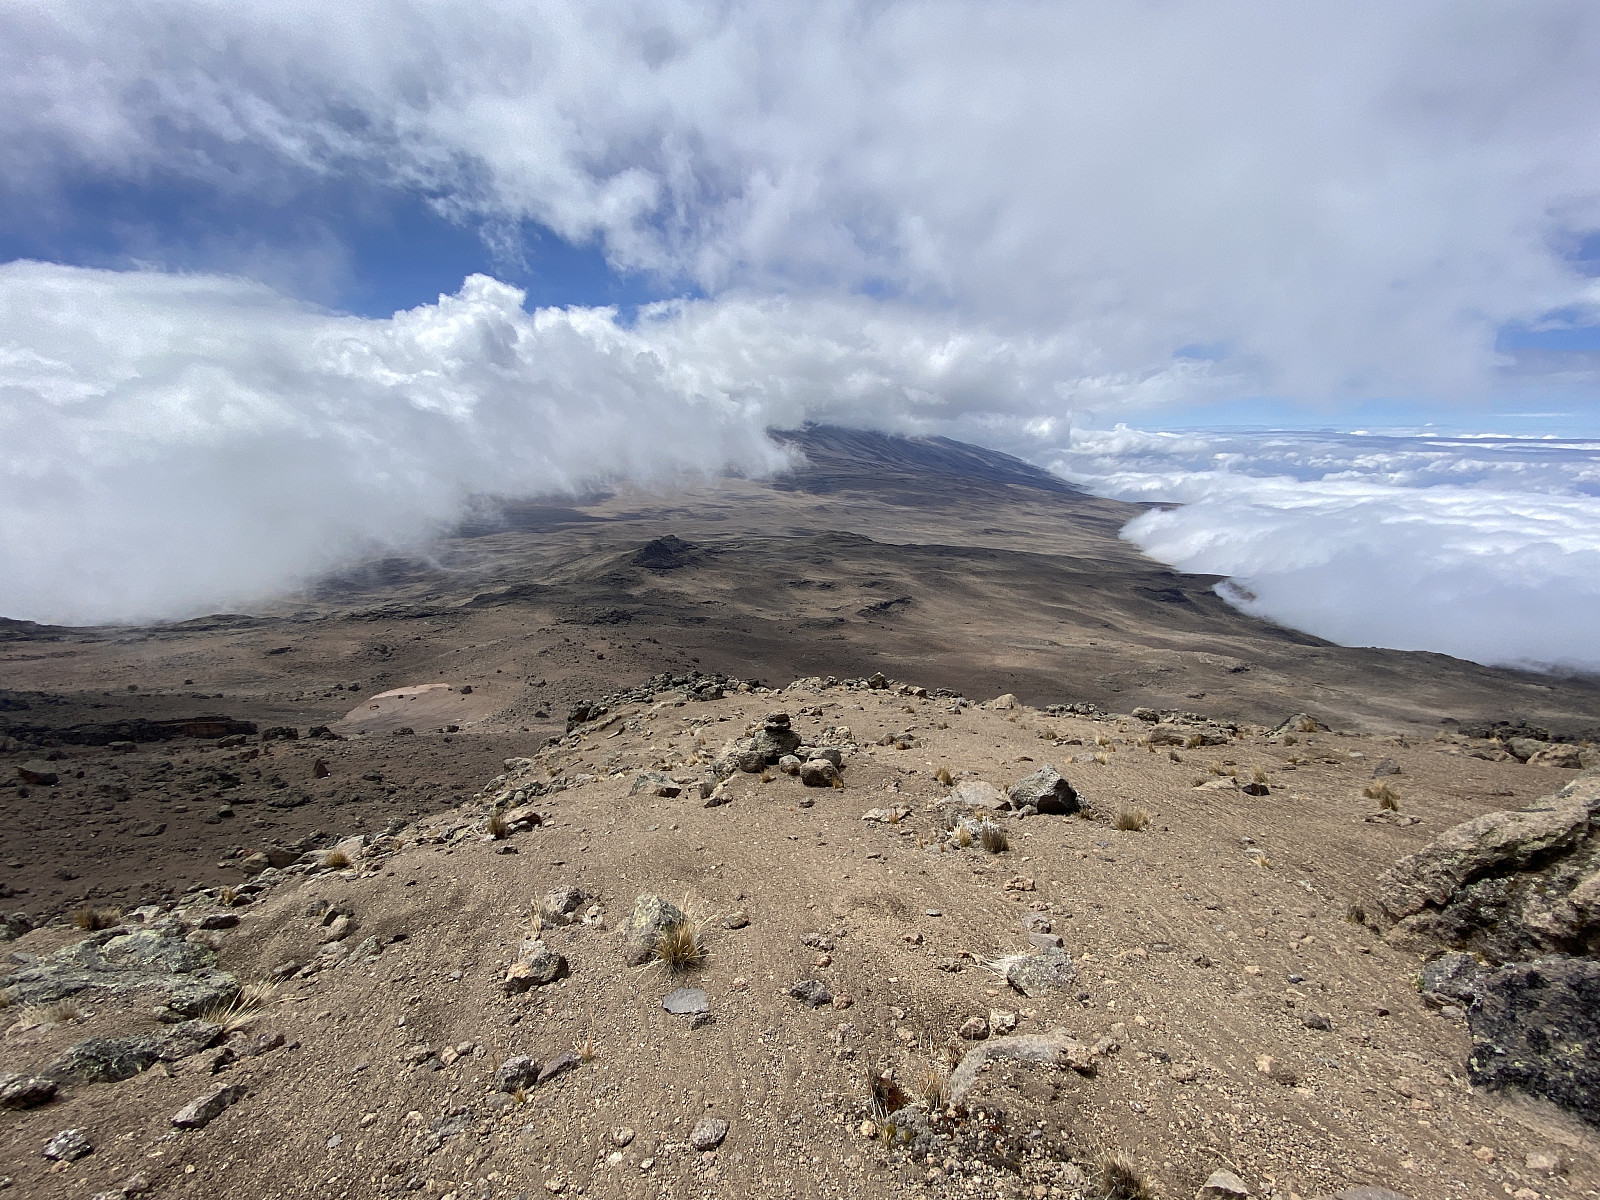
We reached the mentioned gravel chute (i.e. the one seen in image #32), and followed it upwards till we were almost at the level of the Mawenzi Midpoint (image #29); and then I climbed up onto the plateau. Holson, who reached the site along with me, remained in the gravel chute, as he was somehow thinking that the Mawenzi guidelines [i.e. that you should not climb without proper climbing gear etc.] even apply to the ascent of the midpoint plateau itself; and not just above it. The climb up to the midpoint was, however, very light climbing; I would not even call it rock scrambling, and personally, I wouldn't have used ropes etc. at this point, even if I had it with me. The Mawenzi Midpoint proved to be a very nice viewpoint overlooking the entire saddle between Mawenzi and Kibo, thought on this particular day, the view was a bit obscured by clouds below us, I have to say (image #31). The mountain side above it was indeed quite steep, and it would sure require some climbing skills to get up there I said to myself; but when I looked closer at this mountain wall, I found a tiny chute, by which it should be relatively easy to continue upwards. I took some pictures of the chute (image #34), but I resisted the temptation to continue upwards, as I knew it was prohibited; and I didn't want to put Holson in an uncomfortable position, nor did I wish to end up in prison during my short stay in Tanzania.
![Image #35: A view of the plateau itself [i.e. the Mawenzi Midpoint]. The trail back down from this viewpoint is beyond the edge seen in the picture.](https://images2.peakbook.org/images/14939/Solan_20230202_63dafa0276de6.jpg?p=xtralarge)
Suddenly, I heard Holson shouting, calling my name. I responded, but he continued to call, so I figured it was probably a bit difficult for him to hear me, as he was below the edge of the plateau of the viewpoint. I didn't want him to be worried about me, so I hurriedly captured a few more photos, and then I climbed down to were he was. I was afraid you had continued up to the summit, he said, but I told him I had just been studying the narrow chute carefully, and that I believed it should be possible to continue up there. Yes, you saw the chute? he replied, and then told me that he had led some climbers up to the midpoint prior to the prohibition of climbing Mawenzi, and they had told him that in order to continue up to the summit, you actually do climb up that chute. And then after the chute, they had told him, the ascent becomes more like an ordinary mountain hike again, until you reach the foot of the cone on top of which the summit is located; then the climb becomes even more technical demanding than up the chute.
We went down the gravel chute to were our friend, the porter, was waiting for us. He had been unable to keep up with our pace as we were ascending towards the midpoint, and so at one point he just decided to sit down and wait for us to come back down from the mountain side. We followed the same trail back down to the Tarn Hut as we had been using upwards. I had arrived at the midpoint at about ten minutes to two o'clock, and we were back at the Tarn Hut at five minutes to three, hence we had used 1 hour and 35 minutes to get up to the Mawenzi Midpoint, and 1 hour and 5 minutes to get back down to the Tarn Hut. At the Tarn Hut dinner was almost ready as we arrived. I got served the usual three-course meal in my tent, but afterwards, when I entered the kitchen to have a chat with the staff, I discovered they were having ugaly and chicken to eat; and so Frank offered me to have some as well. He later told me that he, Holson and the chef had discussed it, and actually decided not to give me ugaly prior to my summit of Kibo, in case it would make me ill and prevent me from reaching the summit because my stomach wouldn't tolerate it. I know this kind of reasoning sounds a bit weird, but it is a common way of thinking in Africa; i.e. that the white man has a tender stomach, which cannot tolerate African food. I spent much of my childhood in Africa, however, and I've been eating ugaly since I was five years old, so to me this was actually a bit annoying, as I had specifically written to Frank in advance of my journey that I actually wanted ugaly for food during our hike. After dinner, there was time for me to relax a little in my tent, but then it got dark; and so it was just to turn in early, and wait upon the dawn of another day.
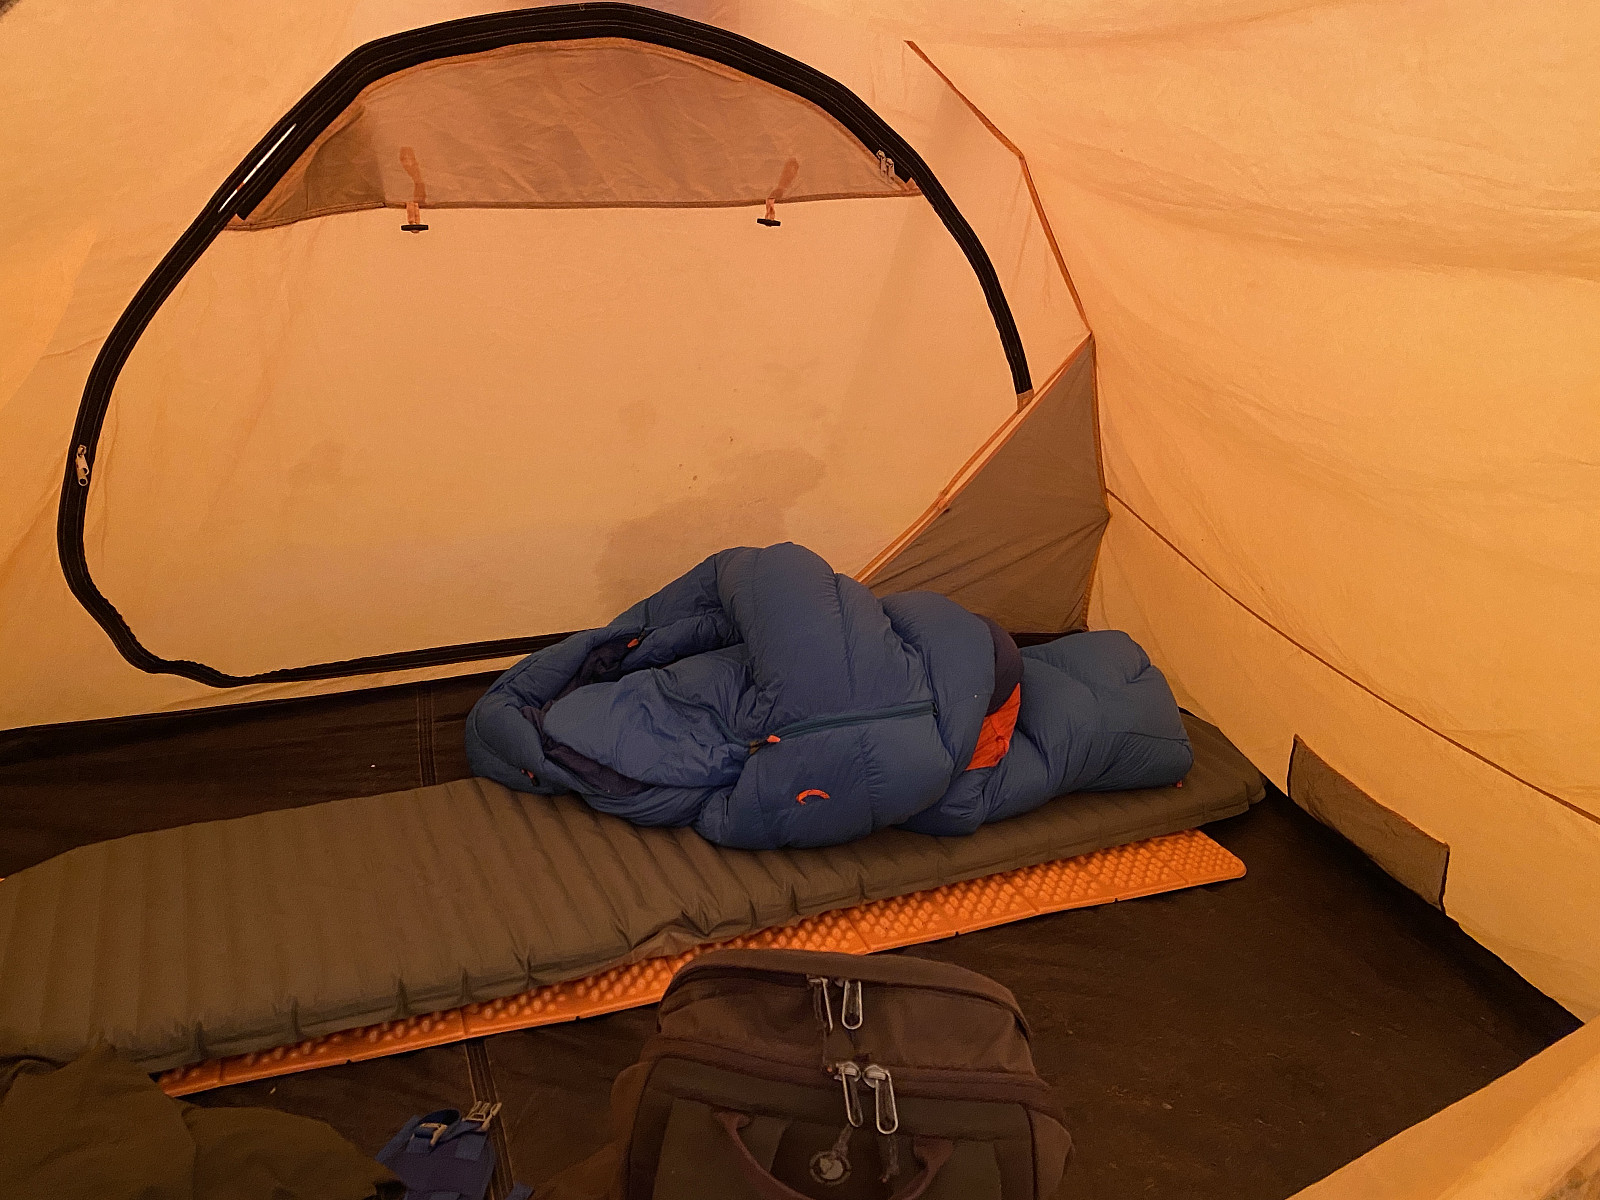
While we were still eating dinner, however, I asked Frank and the others where they were going to sleep this night. At Simba Camp, and at Kikelewa, it hadn't been that cold, but the Mawenzi Tarn Hut is located at 4300 m.a.m.s.l.; and you could feel there was cold in the air, and you somehow got the idea that it might become even colder once the rays of the sun disappear. We're going to sleep in the large tent, they replied. Isn't that going to be cold? I asked. I was a bit concerned on their behalf, as the large tent that we had with us (i.e. the green tent on the pictures) is without bottom, and so the wind may enter the tent beneath its walls. No, they said, it doesn't become cold, since we are many. That night this proved to be wrong, however. I woke up several times from my sleep due to strong winds, and at one point i woke up because the roof of my tent, which had become heavily burdened by snow and ice, came down into my face; and so I had to shake the cloth of the tent in order to get rid of the ice on top. But then in the middle of the night I woke up once again because I heard people moving over from the green tent to the kitchen building. Next day when I asked Frank and Holson, they told me half of the group had moved over to the kitchen due to the cold; but it hadn't been any better over there, as the glass of some of the windows in the building are broken. Nevertheless, everyone had survived the night, and everyone was now eager to continue over to the Kibo Huts Camp, by many also called the basecamp.
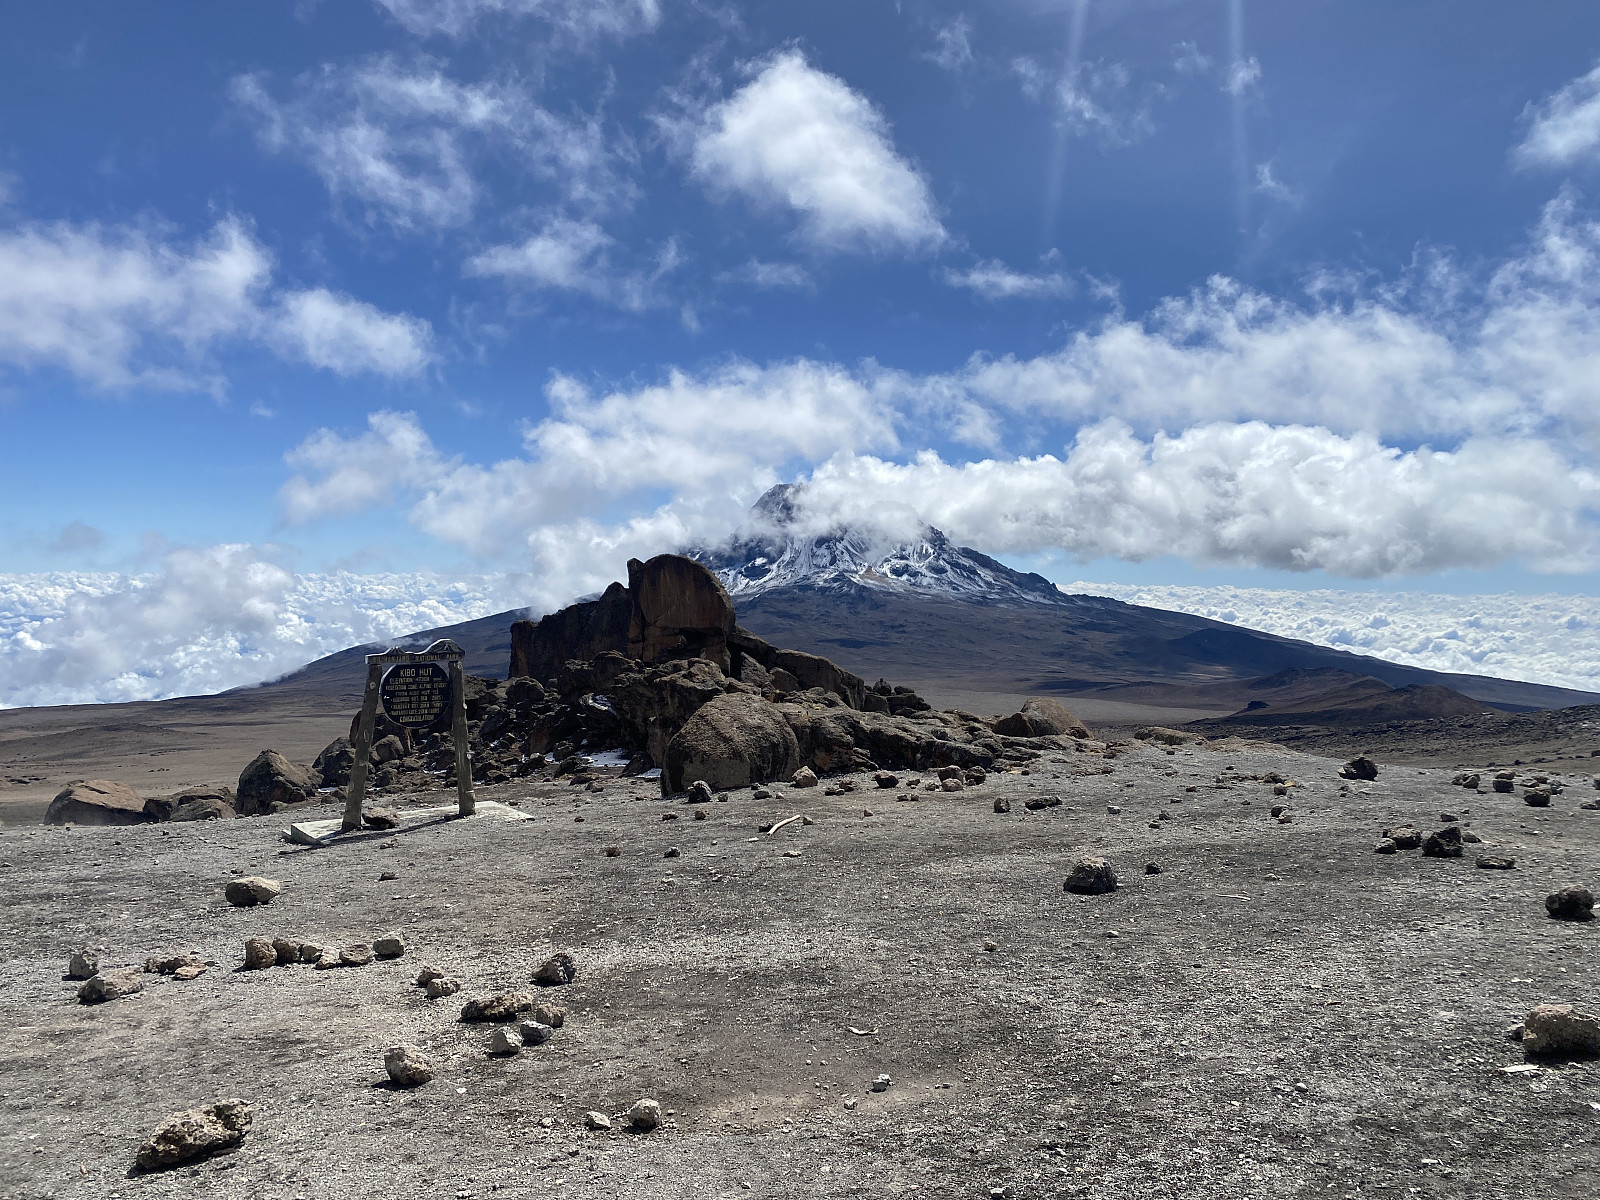
![Image #41: The buildings of the Kibo Hut Camp [4700 m.a.m.s.l.] as seen afar shortly after our departure from the Mawenzi Tarn Hut.](https://images2.peakbook.org/images/14939/Solan_20230204_63de35295897b.jpg?p=xtralarge)
Day 4 - To the Kibo Huts, the Uhuru Peak, and the Kibo Crater
We had an early breakfast as usual this next morning, and then left the Mawenzi Tarn Hut camp for the Kibo Huts at 8 o'clock sharp. I had been a bit cold when we woke up, but the thin layer of ice and snow was disappearing quickly, and posed no difficulty for this morning's trek. The morning was bright, and as soon as we were out of the hollow spot where the Mawenzi Tarn Hut is located, we could see all the way over to Kibo (image #40), and we could even spot the basecamp (image #41). As we were following the trail towards Kibo, Holson said that It's a pity we didn't start a bit earlier, because then we might have ascended Kilimanjaro today, and not tomorrow morning. We might still have time to do that, I replied, as we will arrive at the Kibo huts well before noon. And so Holson agreed that we could make an attempt; i.e. that if we reached the Kibo Huts camp in due time, we could just have some lunch there, and then be on our way up the mountain side towards the peak of freedom.
A little later, when we stopped to have some water, Goodlisten, our chef, caught up with us. Holson then stopped him, and explained to him our new plan; and then sent him away ahead of us. Goodlisten is actually very speedy in the mountain, and walks faster than many guides and porters; and so a little bit later, I could see he was way ahead of us, and actually seemed to quickly approach the Kibo Huts camp site. At the same time, Holson started lowering our own speed, so as to give the chef more time to prepare lunch. This annoyed me a bit, however. Not that I always need to go fast, when I go mountain trekking; I frequently slow down when I go trekking with friends or family that can't keep a high speed. But now that Holson was walking in front of me, at an extremely slow pace, just so that the chef should have time to prepare lunch before our arrival, I did find it frustrating. The landscape was quite open here in the Saddle area, however, without any vegetation; which means there was nothing preventing me from walking past Holson, and so I did. And when I had done that, I continued in a relatively high speed along the trail, passing two of our porters, and finally catching up with the chef; and so the two of us walked together up to the camp site a few minutes later; i.e. at about 10 minutes past 10 o'clock (and image #42 is one that I shot of Goodlisten right after our arrival at the basecamp). I should mention, at this point, that I regard Holson as a very good friend. We did have this disagreement on the speed issue and a few other things, but otherwise we got along very well.
Holson and the others arrived at the basecamp not many minutes after us. We were properly registered in a camp site protocol, and thereafter Frank took me for a walk around the camp, showing me most of what there was to see; and I also used the opportunity to capture some pictures of the surroundings. Soon afterwards the lunch was served. The chef, or the "Kitchen Doctor", as he was sometimes called, had made a delicious dish of French fries embedded in an omelette. Holson and I left the camp site for the Uhuru Peak at 11:27. Frank had been coughing a bit for the last few days, and didn't feel quite well, so he had decided to remain in the basecamp. I have to admit that I initially thought this was just an exuze not to go, because he was afraid of the embarrassment if Holson and I were going to outrun him; but when we came down to Arusha after our mountain trek, he was actually diagnosed with pneumonia, and put on antibiotics, so it was indeed clever of him not to embark upon Uhuru Peak with Holson and me on this day.
![Image #46: Me at Gilman's Point. The summit [i.e. the Uhuru Peak] is hidden behind the sign. The mountain to the right is Kibo, the other peak of Kilimanjaro.](https://images2.peakbook.org/images/14939/Solan_20230204_63de549bc0ed7.jpg?p=xtralarge)
I was thrilled as we embarked upon the final 1200 elevation metres up to the Uhuru Peak. I did three mistakes on this day, however, that I believe made me struggle a bit more than necessary on this final climb up to the summit:
- I shouldn't have gone as fast as I did from the Mawenzi Tarn Hut up to the basecamp, as that made me exhausted prior to our summit push; and there wasn't sufficient time to recover fully from that exhaustion before we were to resume climbing.
- I was carrying too much in my backpack. I had been carrying about 10 kgs in my own backpack for the entire journey, except for the hike up to the Mawenzi Midpoint on the previous day. At the Mawenzi Tarn Hut I had left much of my stuff in the tent when trekking to the midpoint, but at the Kibo Hut there were a lot of people that I didn't know, and it felt risky to leave things in the tent, and so I decided to bring most of the items in my backpack with me. I should, however, have asked Frank to take care of my belongings for me when I embarked upon the summit push, and just taken with me the most necessary things, such as my headlight, and some chocolate. That would've made my summit push way easier.
- I ate way too much of the delicious French fries omelette just a few minutes before we left the camp site, in part because I was hungry, but in part also because I didn't want to make the chef sad, by not eating his food. This lunch remained heavily in my belly for much of our climb, making it even more difficult to go at a speedy pace. I should've eaten much less of the omelette, and rather tried to fill my energy deposits with some chocolate and the similar.
Anyway, despite these three errors of mine, we didn't use more than 4 hours and 18 minutes from the base camp up to Uhuru Peak, Holson and I. Moreover, I was well acclimatised to the altitude (at least to the altitude of the base camp), and so I never experienced any symptoms of altitude sickness like headache or nausea or vomiting. Being acclimatised to 4700 meters of elevation is not the same as being acclimatised to 5895 meters, however; and so from an elevation of about 5000 metres, I started to feel a substantial shortness of breath.
The trail up from the Kibo Huts follow a gravel chute, that becomes increasingly steep as you make your way upwards; and after a while the visible path that people use goes in a zigzag-fashion upwards, so as to lessen the steepness of the trail a little bit. As I felt increasingly exhausted due to the thin air and my shortness of breath, our speed went down; and suddenly Holson looked at me, and asked me: How much do you have in your backpack? And then he went behind me, and tried to lift it, while it was still on my back, and now it was his turn to be angry with me. As stated above, the fact that Holson and I have had our disagreements, does not mean that we don't like each other, or that we are not friends. After all, the two persons that I've argued with the most, are undoubtedly my brother during our childhood, and my wife after I became an adult. And so, even if we had our disagreements, Holson is no doubt a guide that I would warmly recommend to anyone that has a desire to ascend Kilimanjaro. But at this moment Holson said to me in a rather sharp tone: I want you to succeed in reaching the summit, but you try to spoil it by taking too much with you on the summit push. He next started offloading my backpack, until he had reduced the weight of it to about half of what it had been; before he put what he had removed into his own backpack. I tried to protest, saying that this would make his backpack too heavy, but he insisted he would be fine; and thereafter we continued upwards.
Video #3: A short video showing the view just after we passed the Stella Point [5756 m.a.m.s.l.]. In the video I'm first looking back towards Gilman's Point [5685 m.a.m.s.l.], before I turn slowly towards the south. Due to the clouds beneath, there was no view of the city of Moshi on this day, but you do see part of the southern ice field on the video. After seeing the glacier, I continue my turn towards the west and the Uhuru Peak. The summit itself is not seen on the image, but it's located just behind the mountain ridge seen towards the end of the video.
The difference in elevation between Uhuru Peak [5895 m.a.m.s.l.] and the Kibo Huts [4700 m.a.m.s.l.] is nearly 1200 meters, hence when you're at 5300 m.a.m.s.l., you've still only ascended half of what you need to ascend; you're still in the same gravel chute, and the air is still going to get thinner and thinner the higher up you get. As we passed 5600 m.a.m.s.l., however, Holson tried to comfort me by telling me that we were now soon at Gilman's Point, and that it's a common saying among Kilimanjaro guides, that whoever reaches Gilman's Point, will also reach Uhuru Peak. There is actually still an elevation difference of about 300 meters between Gilman's Point and Uhuru, but the mountain ridge that you follow once you've passed Gilman's Point is not nearly as steep as the gravel chute that you follow to get up there. Well, we reached Gilman's Point just a little later. I felt exhausted, but we had a short break there, had something to drink, and a little to eat; and captured a few photos before we continued (images ## 46 & 47). Once you reach Gilman's Point, there's a hidden valley in the mountain that reveals itself (image #46), with the ridge of the Uhuru Peak on the south side, and Kibo with the crater on the north side. We were to continue along the left side of the valley, up to the Stella Point [5756 m.a.m.s.l.], and from there even up to Uhuru.
As we went on from Gilman's Point, we had to walk on snow for a short distance, but it wasn't very slippery, and it posed no difficulty to us. At the Stella Point the path separates into three; i.e. a left one that goes down to the Barafu Camp site, a middle one that continues up to Uhuru Peak; and a right one that goes into the valley between Uhuru and Kibo, and then continues up to the crater on Kibo. We met a man there who was a guide of a group camping in the mentioned upper valley (i.e. at the Crater Camp site), but he had walked over to Stella Point in order to communicate with the outside world, as there's no internet connection in the Crater Camp, whereas there is at the Stella Point. Holson then asked me whether I wanted to go to the crater, or to just continue up to Uhuru Peak, but then the man sitting there interfered, and said to Holson: "Take him up to the summit first, and thereafter take him over to the crater, if he still has strength enough to go there." I had just been about to make the same suggestion to Holson, and so we continued up towards Uhuru Peak.
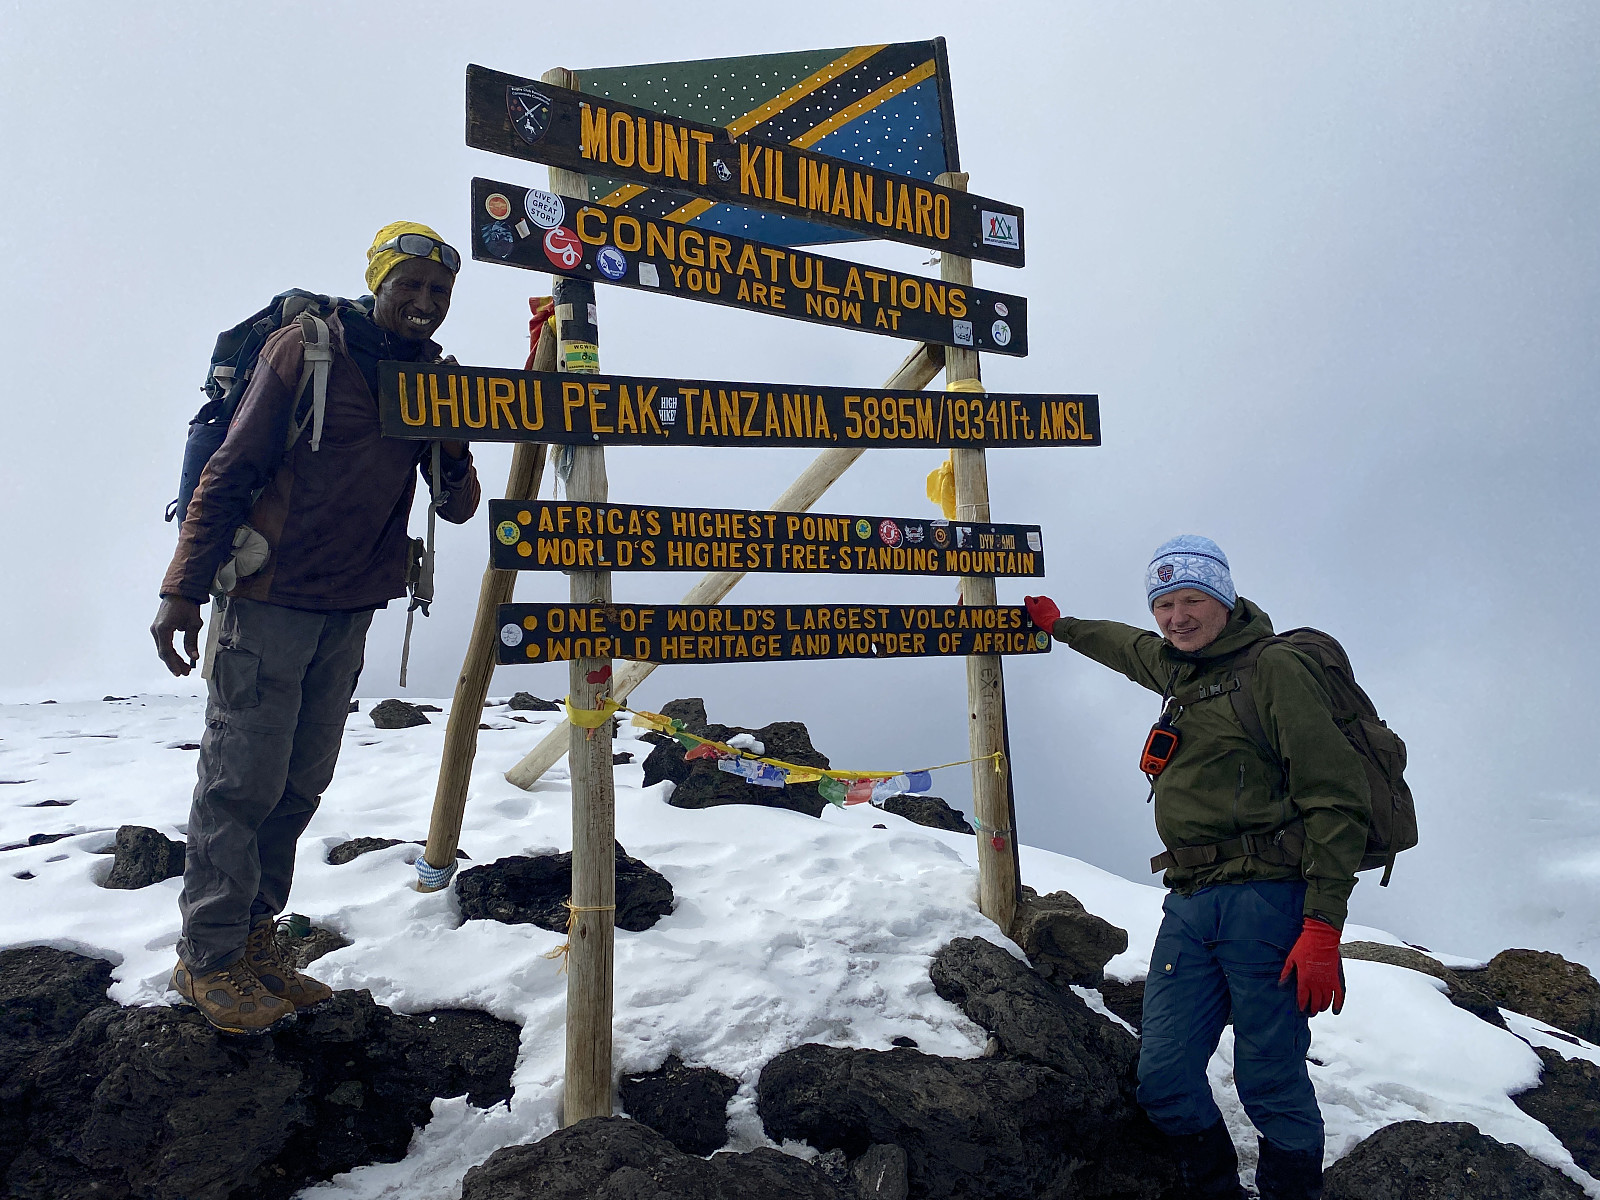
As we walked along the trail between Stella and Uhuru, I felt like I had to stop to take some deep breaths for every third step that I made along the trail. At this time I really liked Holson's attitude towards me; i.e. whereas Kilimanjaro guides usually encourage their tourists to go slowly [i.e. polepole in Swahili], he encouraged me to keep up, and just push on. He probably knew by then that I wasn't going to have any altitude sickness, and that it was just the shortness of breath that bothered me. From the trail we got a fairly nice view of part of the glaciers of the Southern Ice Field of Kilimanjaro (images ## 48-51). As we were approaching Uhuru Peak, we caught up with four guys that were carrying a large solar panel up to the summit. These guys weren't guides or climbers or anything like that, and my impression was that non of them had previously been at the summit. (They might of course have been porters though, because porters generally don't ascend the mountain beyond the base camp). We asked them what the solar panel was for, and they explained to us that it was going to be mounted up there, in order to provide electricity for WiFi at Uhuru Peak. At the Peak itself another three guys were waiting; who had also been carrying some stuff up to the summit. We asked one of them to shoot a summit picture of me and Holson with my cellphone. He so did (image #52), and thereafter they all wanted to have a picture of themselves with the mzungu [i.e. the "white man"] at the summit; and so I had to pose with each one of them up there at the summit; while a number of pictures were shot. Unfortunately, these images were shot with the cellphones that each one of them had, and so I don't have any of these images. Nevertheless, it was quite fun, as I felt like a famous movie star or something at least for a couple of minutes.

The name Uhuru Peak is of course a weird mix of languages. The word uhuru is Swahili for freedom, and a peak in Swahili is kilele. So, in Swahili the summit should rather be referred to as Kilele cha Uhuru, which would then translate into the English Peak of Freedom. While we were up there, at the summit, I asked Holson how many times he had been on Uhuru Peak. About 800 times, he replied. Holson has been working as a Kilimanjaro guide for 27 years, and apart from the last few years when tourism was low due to the Covid-19 pandemic, he's been ascending Kilimanjaro 3 times a month, as he usually take tourists on mountain trekking 3 weeks in a row, and then spend the last week of the month at home with his family. So the math is rather simple, it's 3 x 12 x 27, which is almost a thousand, but then you have to subtract a little for low season periods, and weeks when he guided on Meru instead of Kilimanjaro. Nevertheless, about 800 times on Uhuru Peak is extremely impressive. As we were standing there, in front of the huge sign at the summit, the clouds opened up for a brief moment, so that we could see over to Kibo and the crater for a few seconds. Holson then pointed towards the crater with his right index finger, and asked me if I was still up to a trip over to the crater. I looked over there for a second or two, and then said to him: Let's go there. I know I will regret it tomorrow if we don't. I had payed 150 USD as an additional park fee in advance, in order to have permission to go to the crater, as I thought it would be a little bit silly not to visit the crater when we were this close.


We left the Peak of Freedom, in pursuit of the crater. There's a rather steep and high cliff just north of Uhuru, so you can't just walk directly into the Crater Camp Valley from up there; and we therefore continued ahead, westwards along the mountain ridge on which we were, until we were about 200 or 250 meters beyond Uhuru Peak. At this point, Holson knew about a rather steep slope by which it was possible to descend into the mentioned valley between Uhuru and Kibo (images ## 54 & 55). This slope is on the downwind side of the mountain ridge, however, and that had caused much more snow to accumulate there than on top of the ridge. The snow was more or less up to our knees here, but we found our way through it without any difficulty. Moreover, since we were descending, and not ascending through this snow, we actually didn't get exhausted by it either. As we were approaching the bottom of the valley, we could see three tents that had been pitched there. This is the site that is called the Crater Camp site, even though it isn't actually inside the crater. There was a number of guides and other staff members at the camp site, and Holson spoke with them for a couple of minutes or so, before we continued up the opposite side of the valley, towards the Kibo peak with the crater (image #58). The tourists in the camp were two ladies, but they were inside their tent, so I didn't meet them while we were there. They had also planned to ascend Kibo and the crater ridge this afternoon, however, and they started their ascent shortly after we had left their camp.
When I later on talked with Frank about it, he told me that a night at the Crater Camp site would cost you an extra 300 USD in park fees alone (per person), and in addition there would be extra cost for the little restroom tent needed up there, and for the porters needed to carry all the stuff up to the site. Nevertheless, it would be fun to try it, if at any time I go back to climb Kilimanjaro once again. As Holson and I were heading upwards in direction of the crater, we could see the two ladies from the Crater Camp, along with a couple of guides, following at some distance behind us. I felt quite exhausted due to the thin air at that moment, so I didn't feel like trekking very fast up there. I then somehow got a feeling that the two women and their company were actually catching up with us, and strange enough, that gave me kind of a push. It's a bit funny, 'cause they were sure a bit younger than me, and they had probably been relaxing in their tent for at least a little while; and I would of course have used that as my excuses, had they been able to outrun me up there on Kibo. Neverthess, it's better not to have to use such excuses, so I pushed on in an attempt at catching up with Holson, who was maybe 30 metres or so in front of me. Trying at this altitude to catch up with someone who has been frequenting Kilimanjaro as much as Holson has done, is of course futile, however, and so I arrived at the crater rim a little behind him. And I do think the distance between me and the sporty ladies behind us had shortened down a little bit, but at least they didn't arrive up there before me.
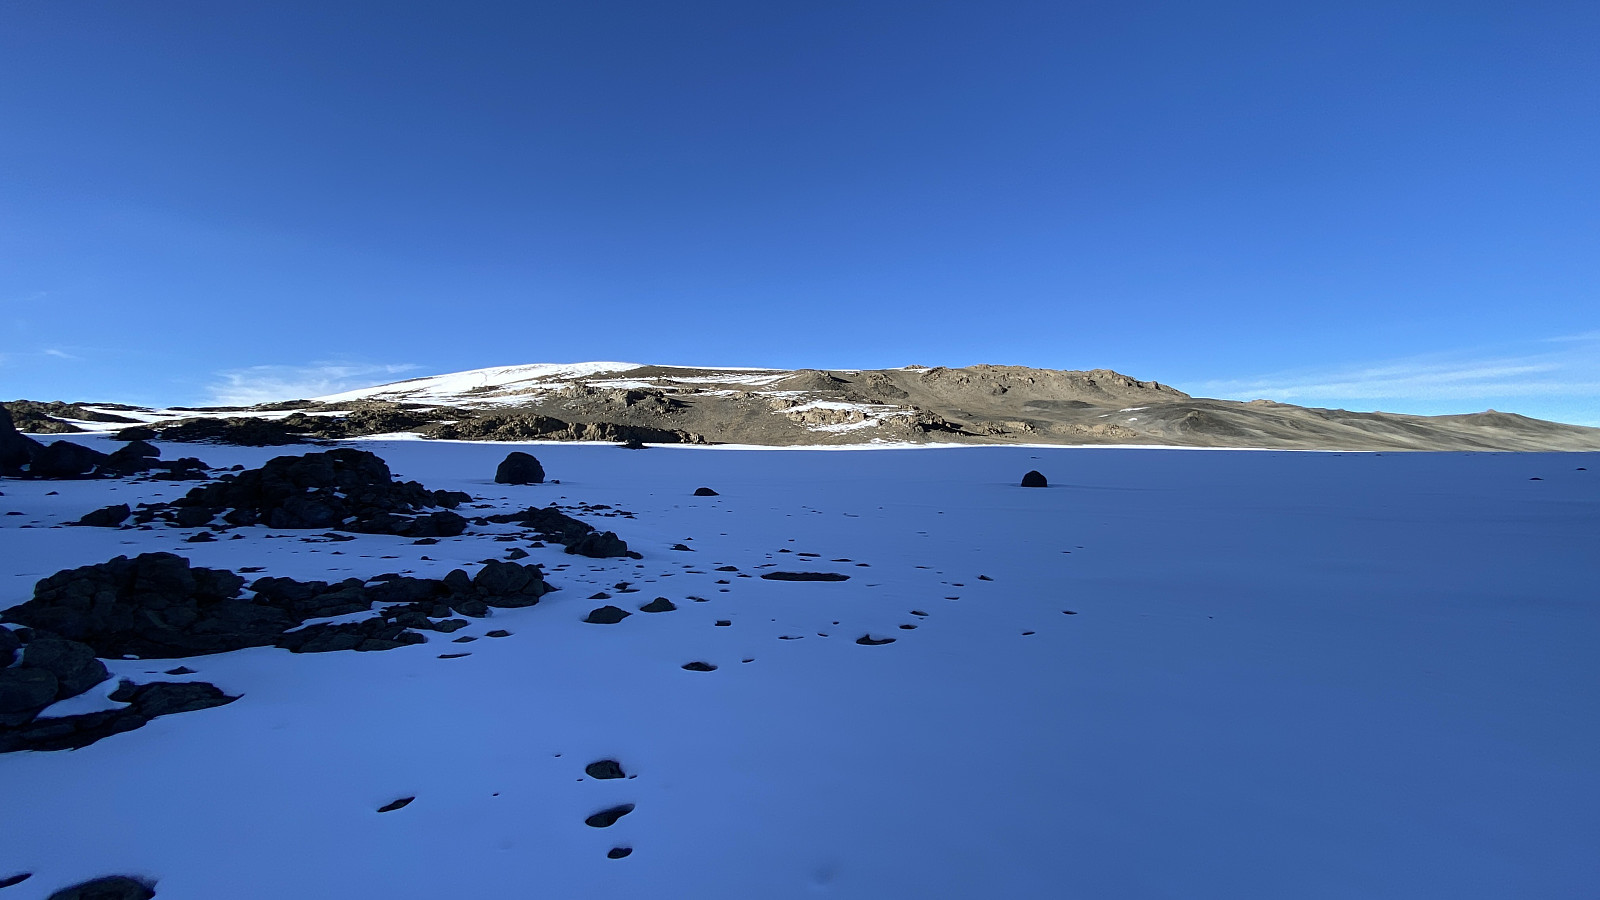
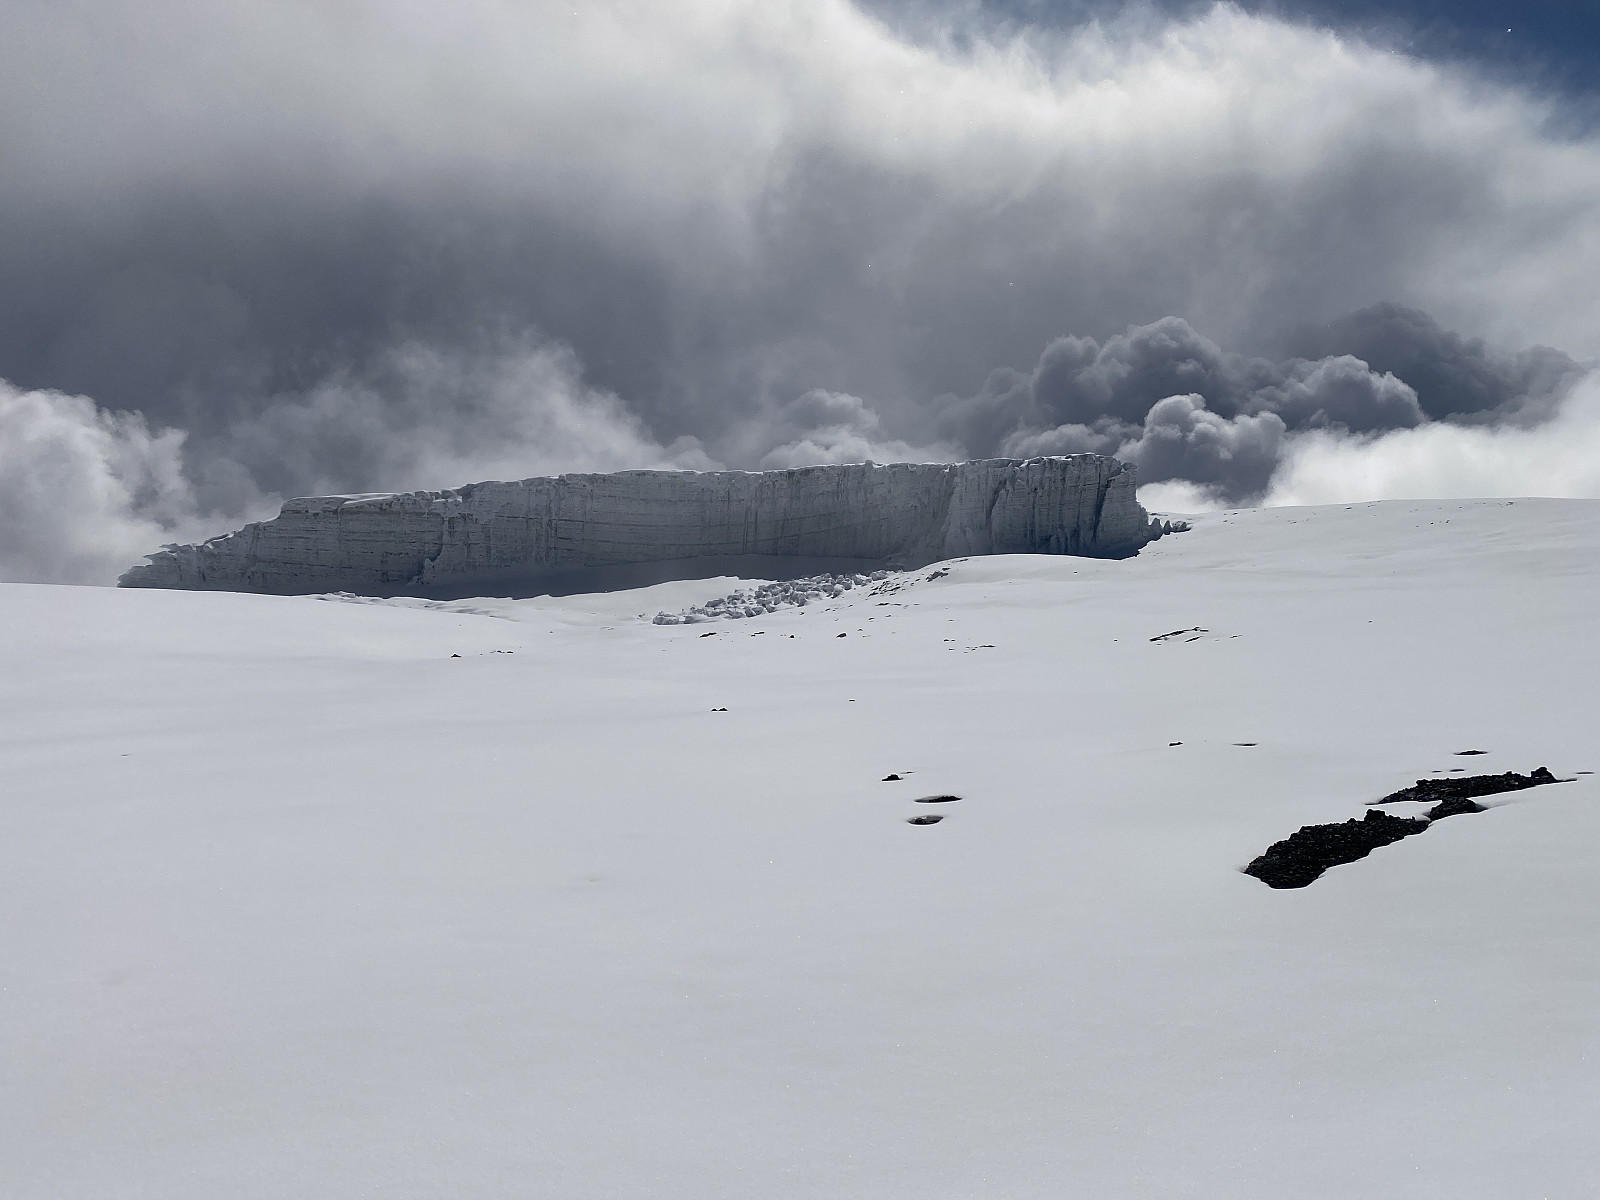
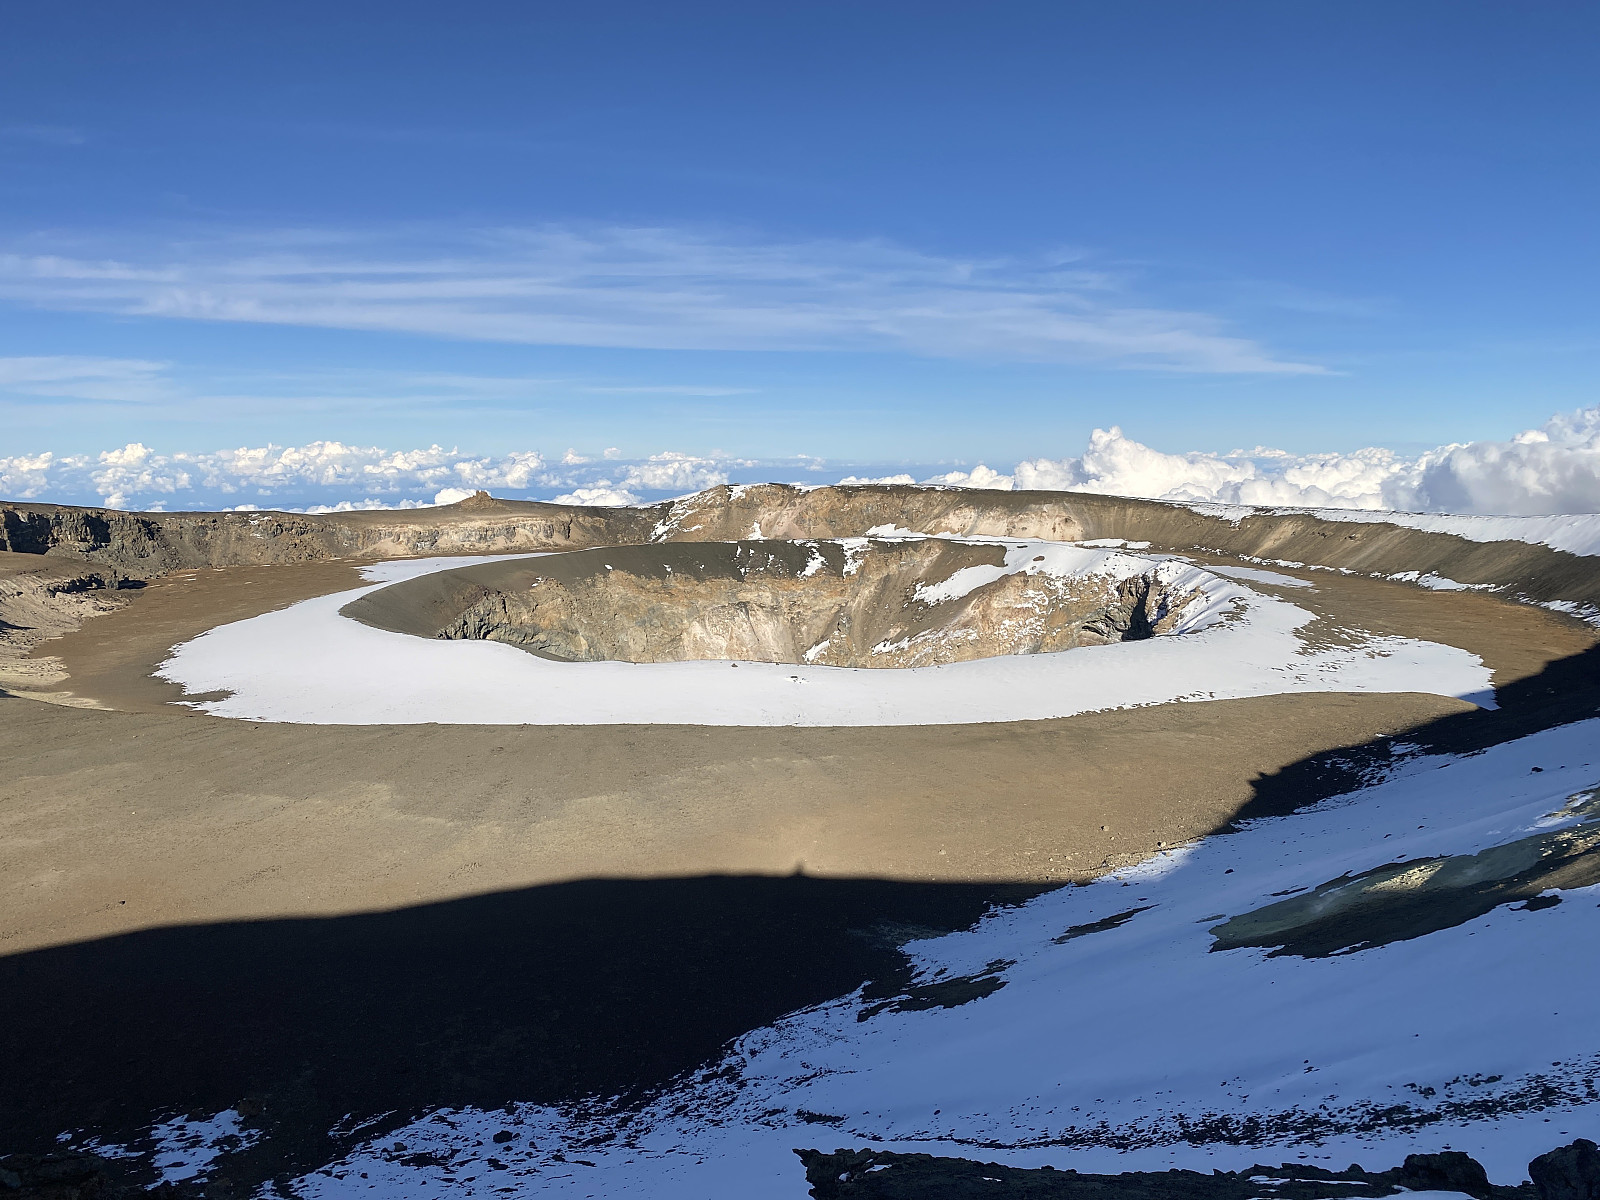
I shot a number of images of the crater and the northern ice field, which was visible from up there (images ## 60 & 61). Holson then explained to me, that had we arrived up there in early morning, it would've been possible even to descend into the crater. Now the crater has a step-like configuration with circular shelves (see image #60), and you can climb down to the first and then to the second shelf, he said to me, but you can't go all the way down to the bottom. As it was now late afternoon, however, and sunset would soon be imminent, we both agreed that it would've been a very bad idea to descend into the crater on this occasion; and so we rather embarked upon our journey back down to the base camp. The descent back into the crater camp valley was uneventful, though my speed was still nothing to boast of. We then followed the bottom of the valley for about half a kilometre or so, still without any speed. Holson was now walking about 50 metres ahead of me, and only waited for me every now and then, as he knew I would then do my best to keep up with him. The ascent from the valley up to the Stella Point was hard. Again, I felt I had to stop for every third step to take a deep breath, and walking with smaller steps was no good idea, as I believe I actually saved some energy by walking in Holsons footprints in the roughly 20 cm deep snow. I finally did reach Stella Point, and then, with much less effort, even Gilman's Point; and once I was there, I knew our descent down to the basecamp would now be much, much easier. It was 6 o'clock. Do you think we'll be able to get back to the basecamp before it's dark? Holson asked me. Let's try, I said, and then we embarked on the task; at first just walking a bit faster, but then gradually increasing our speed as we came further down. Already from an altitude of 5500 m.a.m.s.l., I felt that I could breathe more easily. Holson now showed me how you could move very fast down the gravel chute by moving your feet in a skating manner as you descend; and indeed this was a very speedy way of descending. As we got closer to the basecamp, however, the slopes became less steep, and the method less efficient; but by then I felt like my full strength had returned, and so we started jogging towards the camp site. And funny as it was, just as Holson had indeed been able to outrun me in the higher parts of the trail; I was now the one outrunning him. Frank, who had spotted us high up in the mountain side as we were running towards the basecamp, came walking towards us, to congratulate me, and to welcome us back to the camp. Darkness was ensuing as we were approaching, and we made it back just soon enough that we didn't have to put on our headlights. We were back in the camp at 10 minutes to 7; i.e. about 7 hours and 20 minutes after we had started out in the middle of the day. Frank led us into the kitchen, where the rest of our company were waiting; and where they had Coke and Fanta waiting for my celebration. Everyone congratulated me. They hadn't expected us back this early, so they asked us if we had skipped the crater; and were all impressed by our speed as they learned that we hadn't. A little later even dinner was ready, and after dinner, I just went to bed early, as I was a bit tired, and as there isn't really much to do in such a camp after darkness. I was awakened around midnight by a German group of tourists that were speaking way to loudly as they were preparing for their night ascent to the summit, but otherwise I slept quite well, regaining strength for our descent towards the Marangu gate.
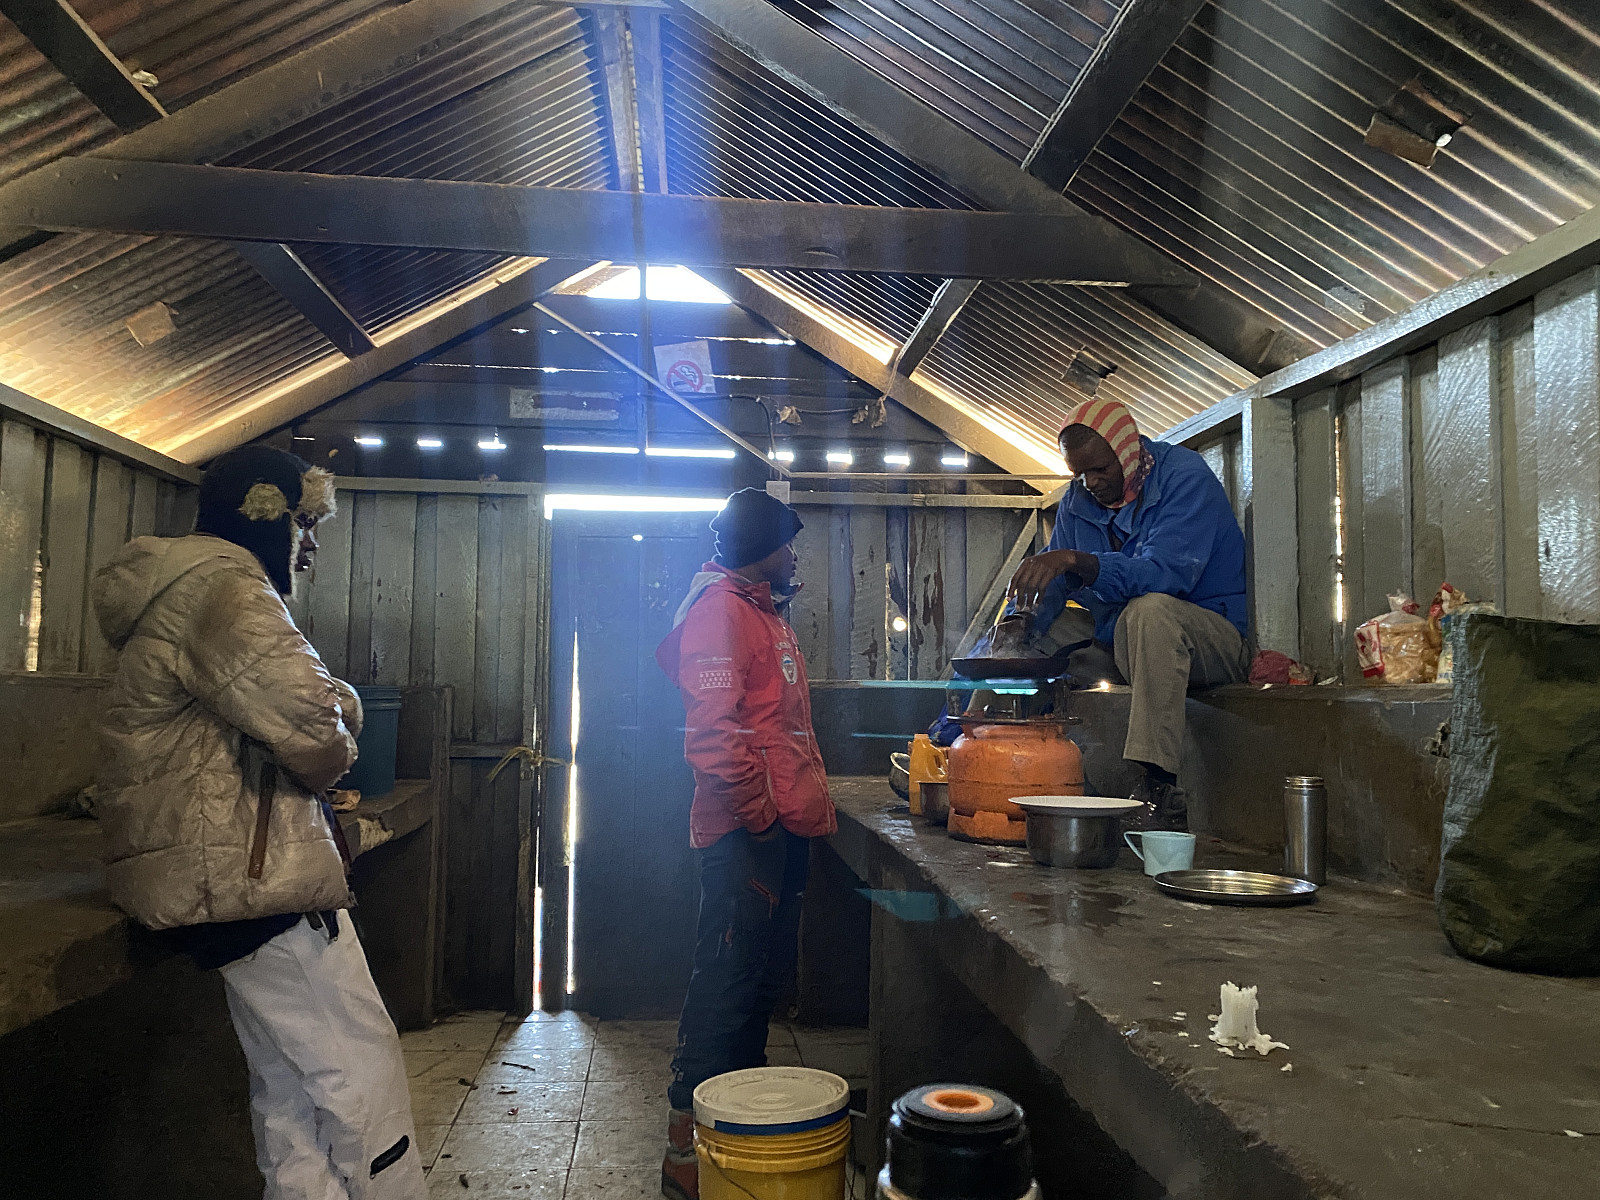
Day 5 - Descending to Horombo
The next morning we got up early, had breakfast (image #64), and then started descending towards the Horombo Camp at about 10 minutes to 8. This part of our journey was quite uneventful. The weather was nice this day, however, so we got a better view of Kibo as well as of Mawenzi than we'd had most of the other days (images ## 65 & 66). The trail down to Horombo is less than 10 km, and it took us less than two hours.

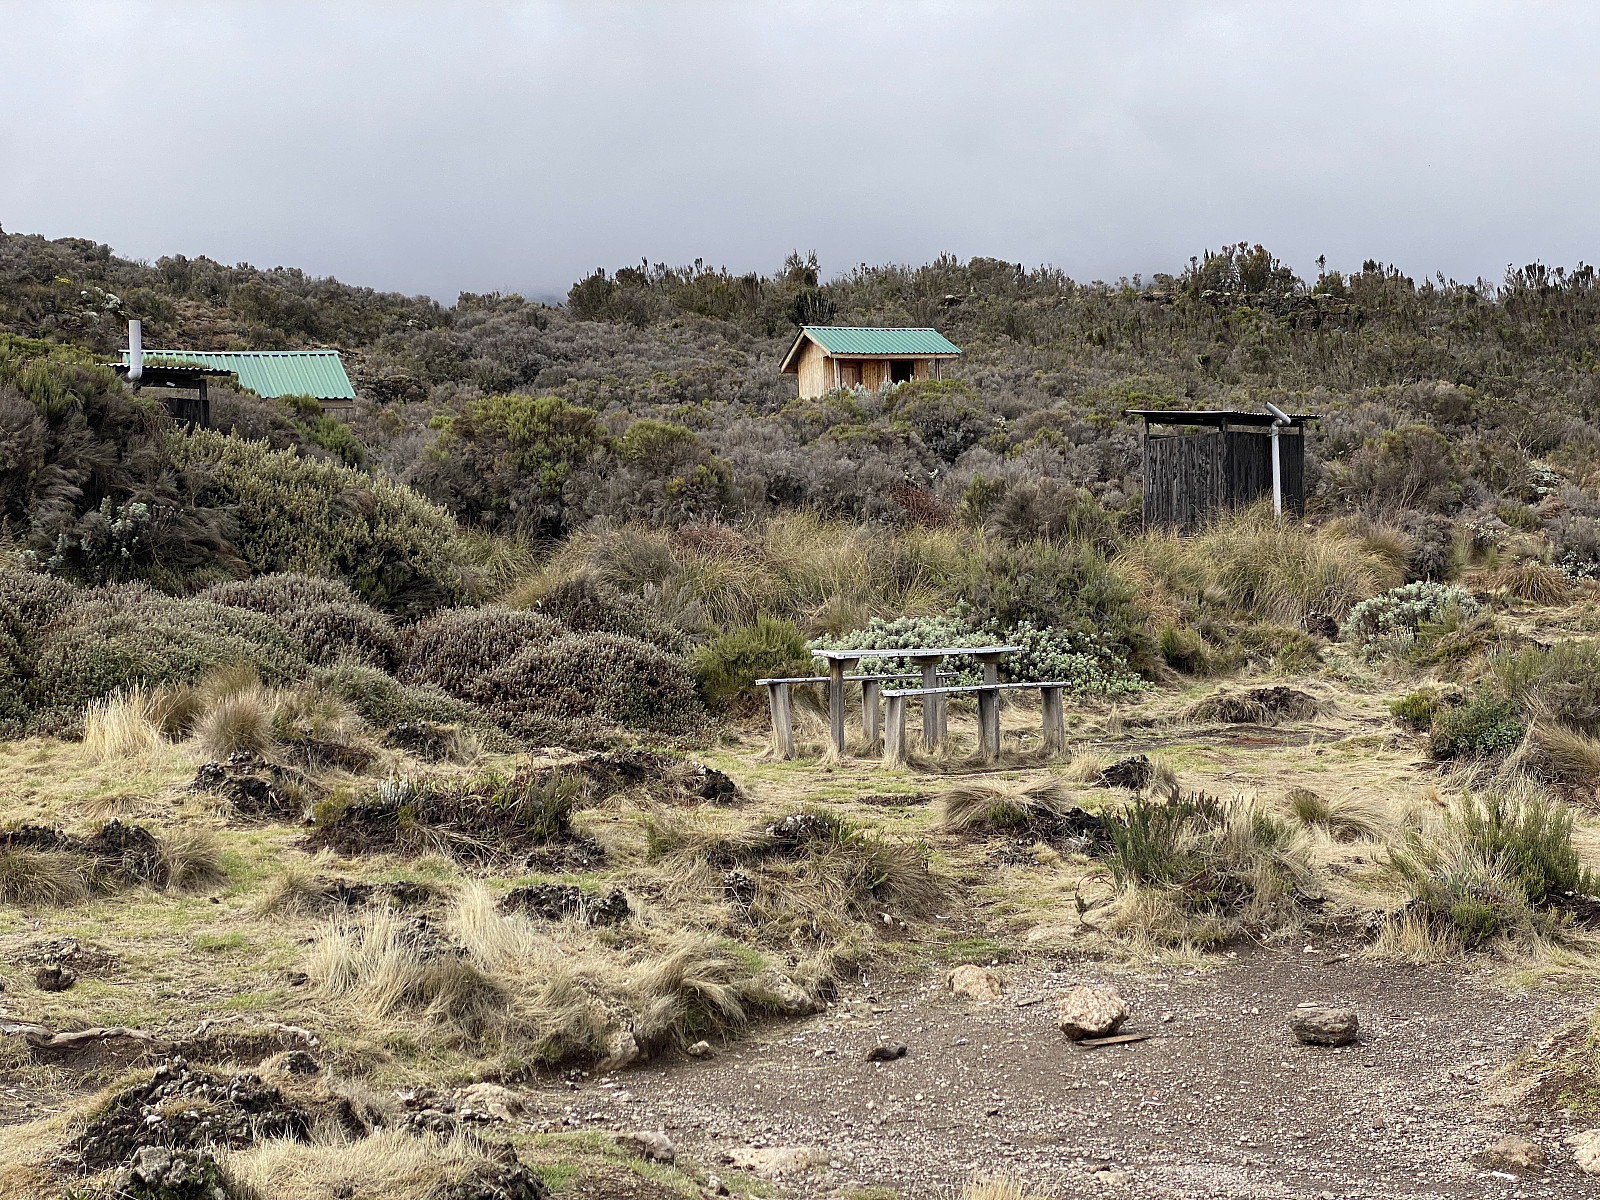
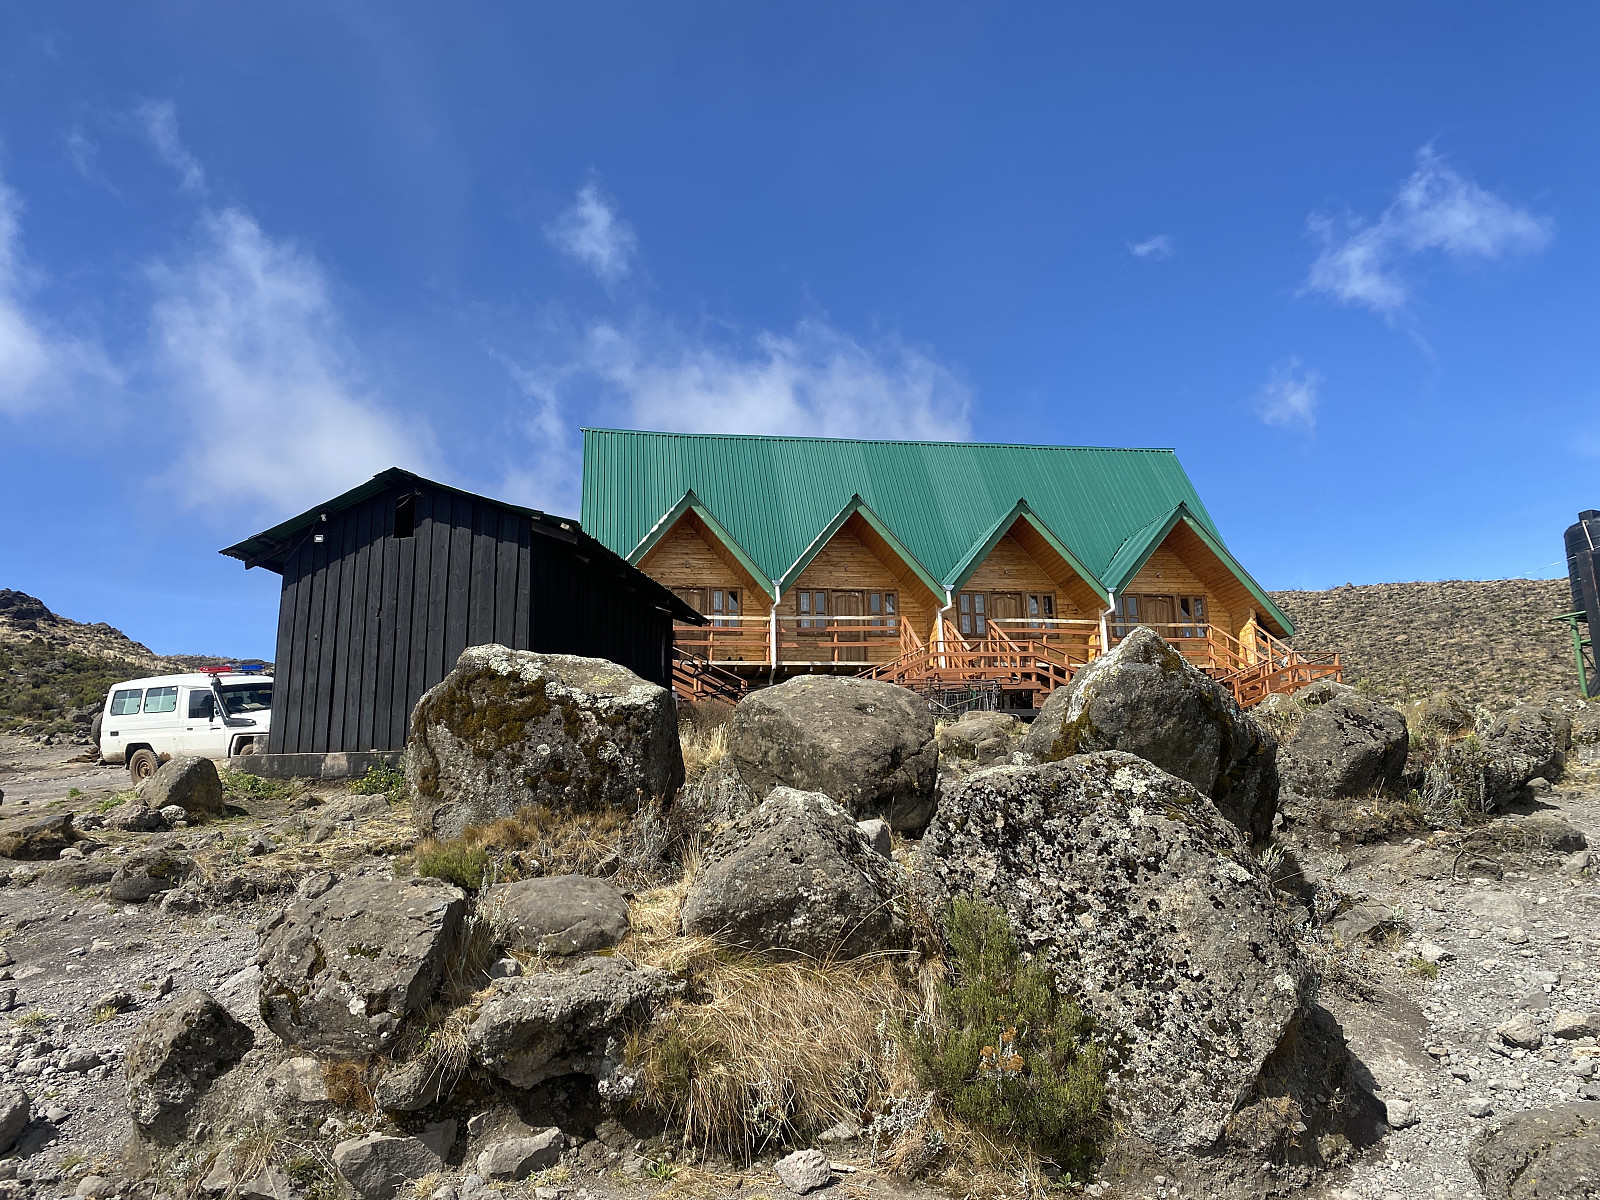
In Horombo it's possible to have a room in one of the cabins (image #68), but since Frank had rented the tent; and a cabin would pose an additional cost, the plan had always been that I sleep in the tent. I did almost end up in one of the cabins, however, as one of the aluminium arches of the tent proved to be broken in two places when we arrived at the camp site. Fortunately for our finances, however, one of our porters managed to repair it with some rubber bands that he had brought along.
In the evening, after I had been served dinner in my tent, I sat down with the others in the kitchen hut, as we enjoyed each others company talking about everything from mountain trekking to football. At one point, Holson laughed, and said to me: Atle, do you know, that if you at any time come back and bring with you a larger group of friends or colleagues, you aren't going to sit down and have dinner with them. You are going to join us, and eat dinner with us in the kitchen. One of the features of Horombo is that you have good internet access there, and so before going to bed, we ended up watching YouTube-videos of Kilian Jornet running up to Uhuru Peak in just about 5 hours from the gate; and also a video where he ascends and descends Mount Romsdalshorn back home in Norway in just 52 minutes.
Day 6 - Descending to the Marangu Gate
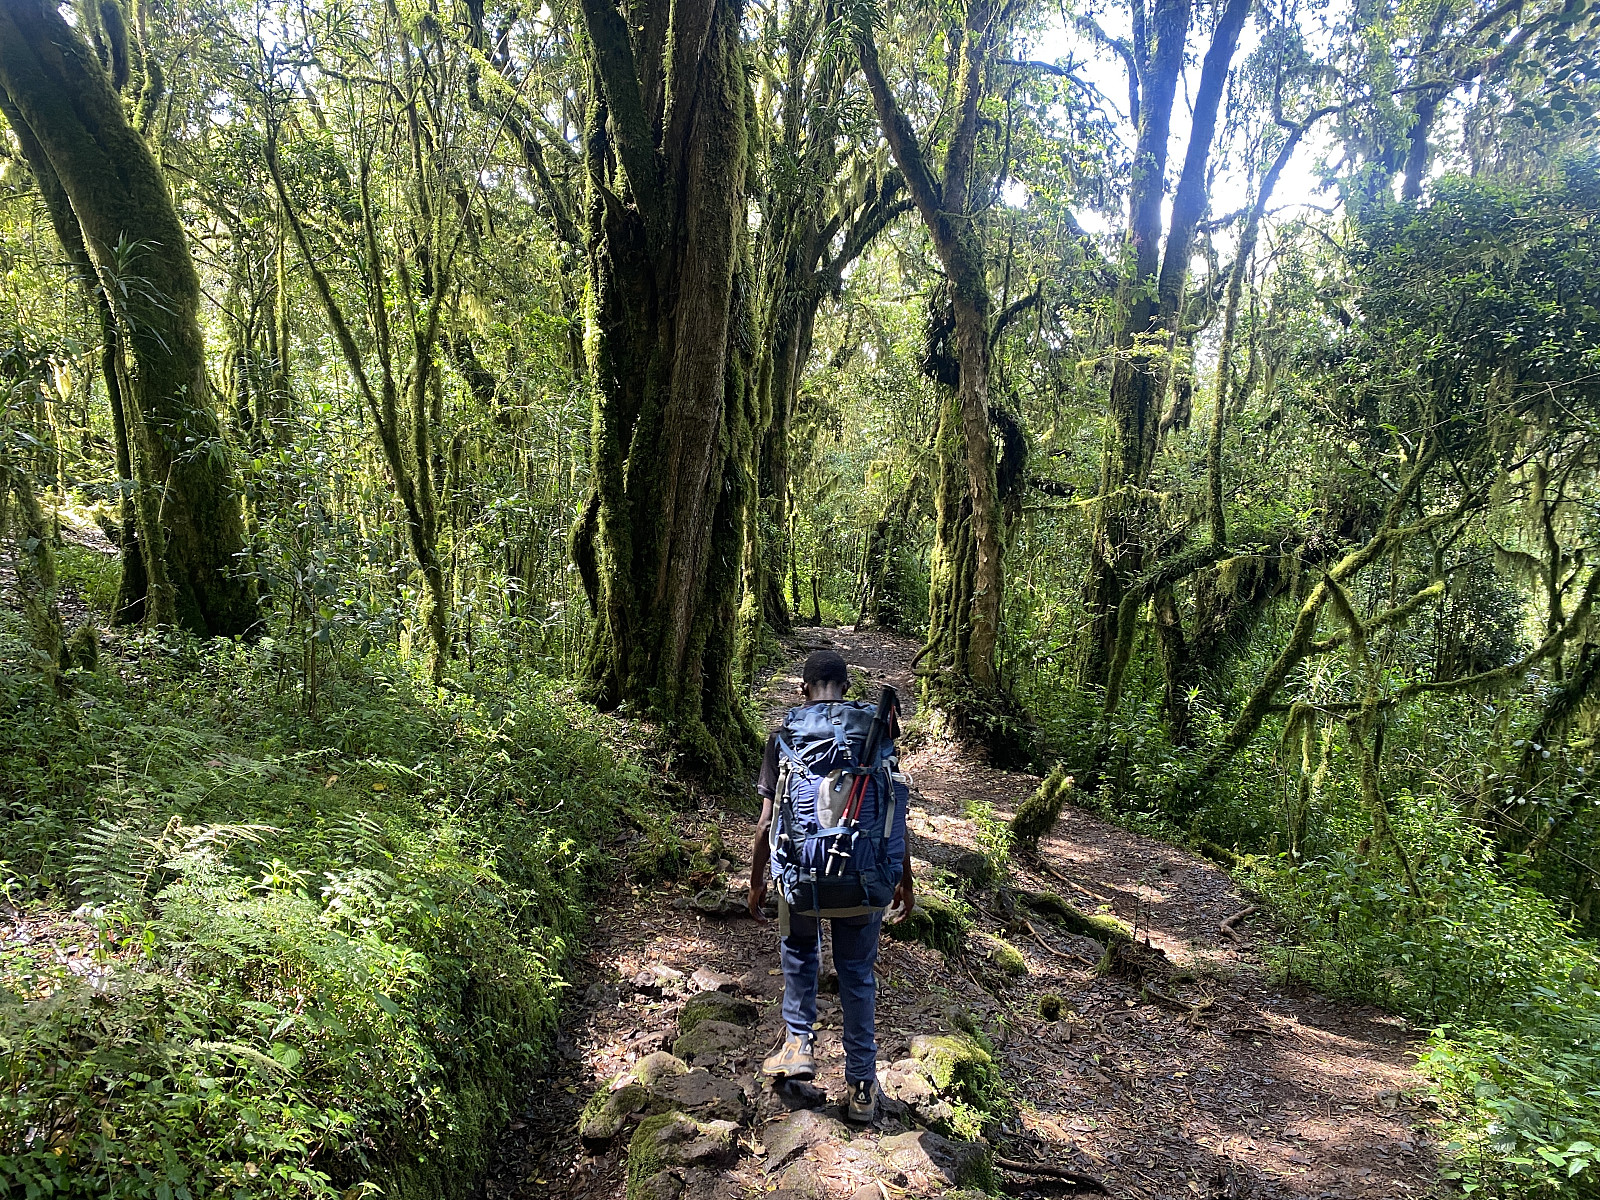
The next morning was our final day in the mountain. The distance from Horombo to Marangu is almost 20 km, so we got up even earlier than on the previous days, and started trekking at 20 minutes past 7. Shortly before the Mandara Huts (images ## 71 & 72), we entered the rain forest. At Mandara we had a 20 minutes lunch break before continuing. We arrived at Marangu at a quarter to twelve, which means this final leg of our mountain hike took us a little less than 4 and a half hour.
![Image #71: The Mandara Huts [2710 m.a.m.s.l.], where we stopped to eat our lunch.](https://images2.peakbook.org/images/14939/Solan_20230204_63de7bff7d330.jpg?p=xtralarge)
At Marangu I bought a Kilimanjaro map at the souvenir shop, along with two bags of coffee beans to bring home to my wife; and a Fanta for celebration right there and then. We then drove down to the Nakara Hotel, which is located about 1700 m.a.m.s.l., and which was where I was going to spend the coming night. Before my companions left the hotel, I gave both Holson and the chef each a very nice tip. The chef also received the tips for the porters, which I had learned from Frank ought to be about 1/3 of what you've paid for the entire hike (i.e. 500 USD if you've paid 1500 USD). At this point I had spent all the cash that I had brought to Tanzania, so Frank received his tip by bank transfer later on.
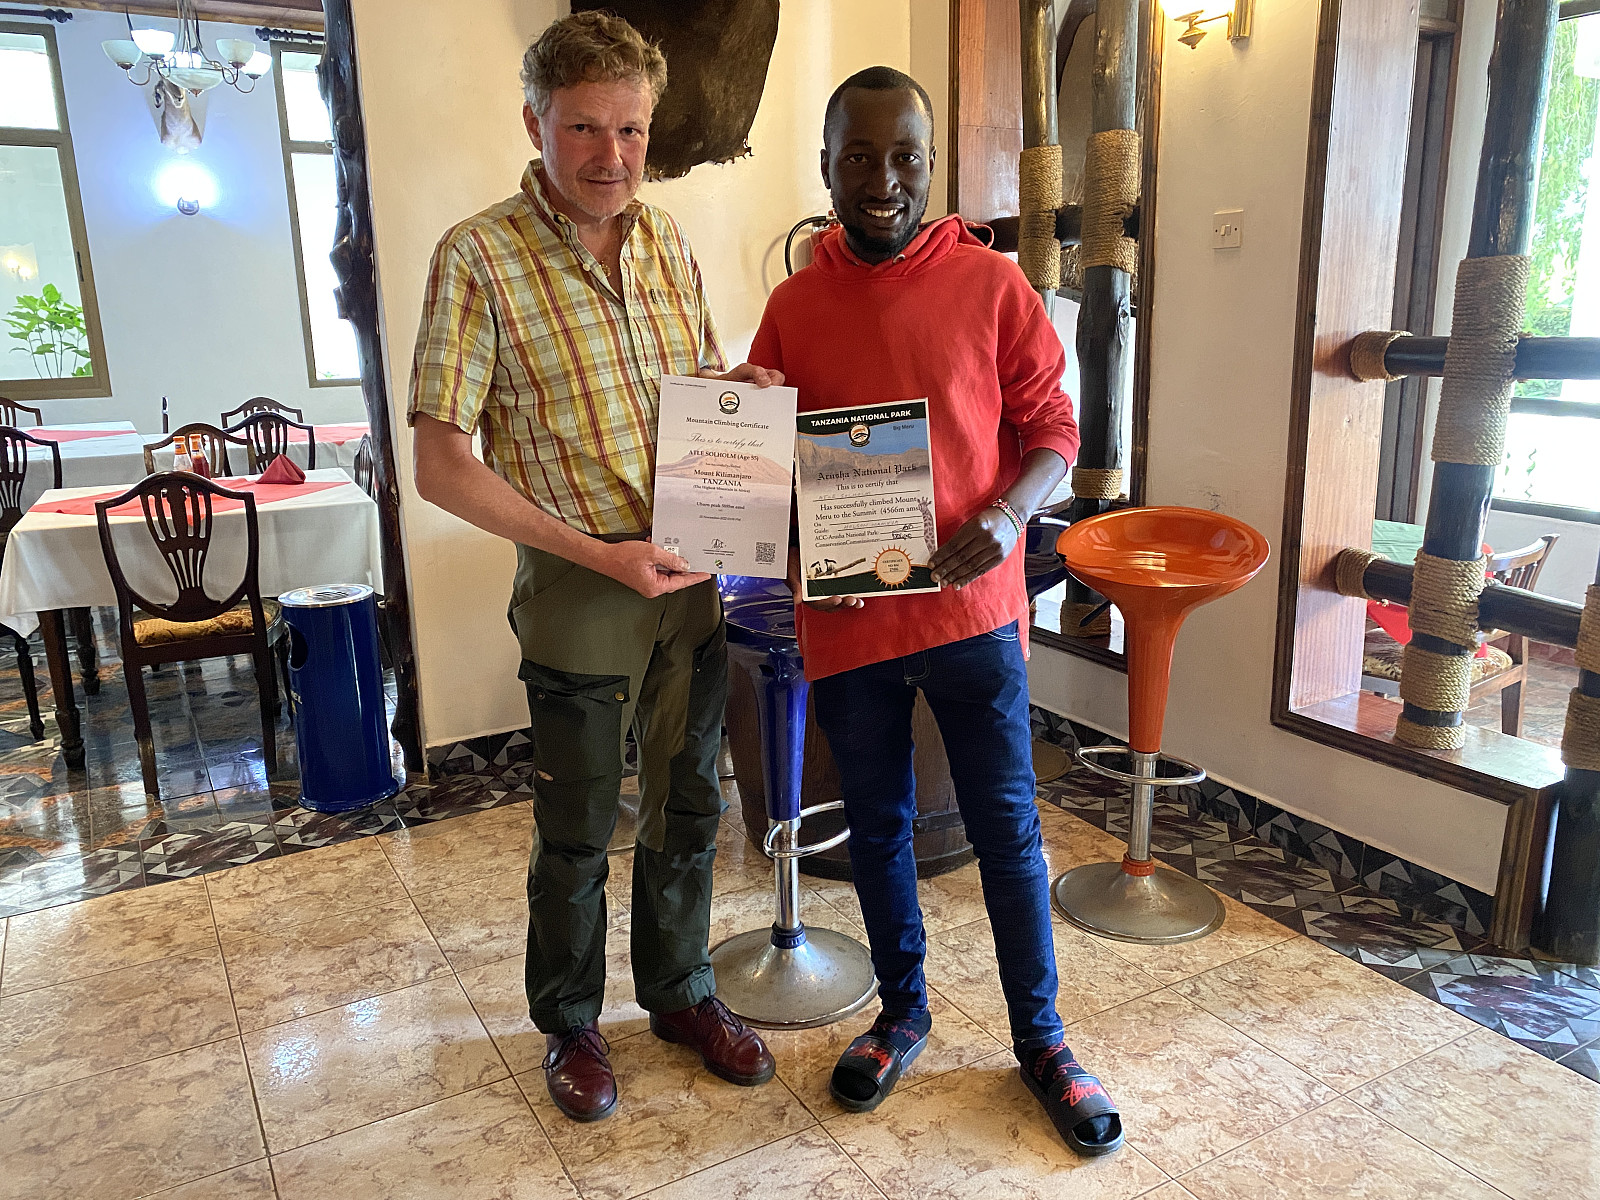
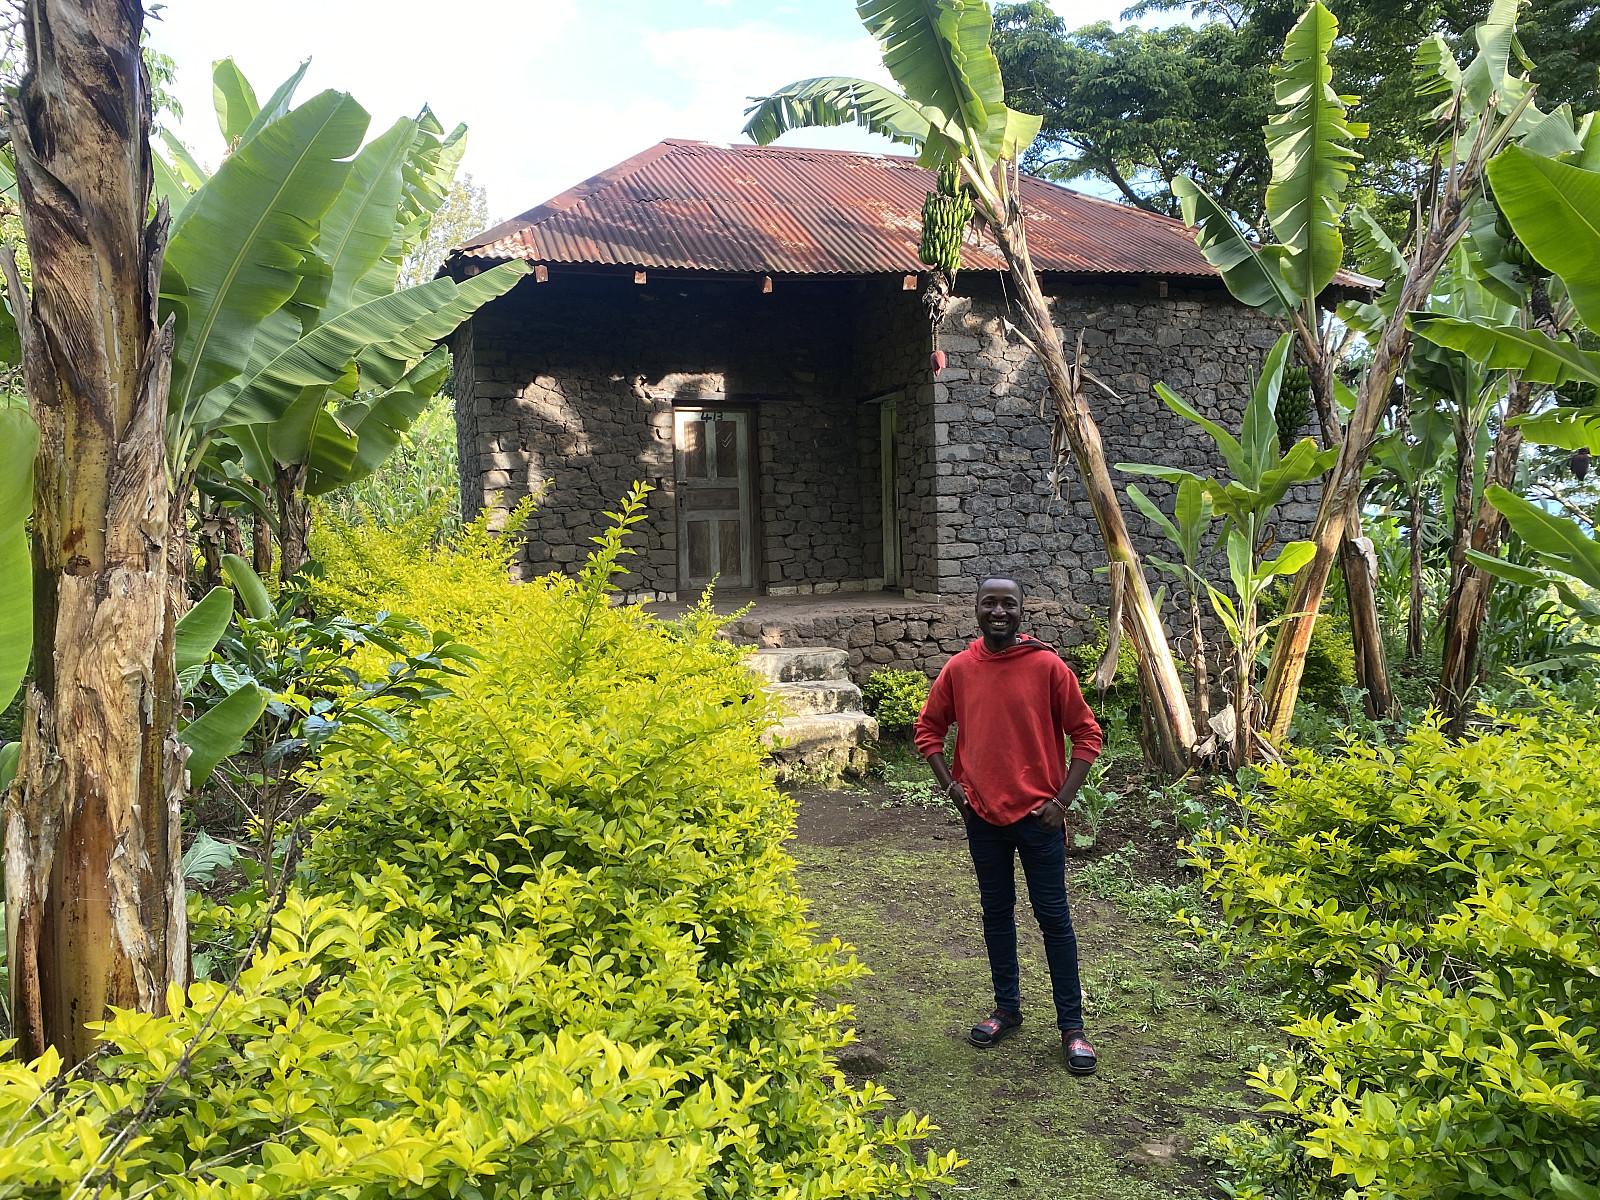
In the afternoon, Frank came back up to the Hotel, to officially hand over my diplomas to me (image #75), i.e. one for Meru, and one for Kilimanjaro; and thereafter we went for a long walk in the Marangu area. Frank himself actually grew up in Dar es Salaam, but his mother was from Marangu, and so he had spent a considerable time even in Marangu as a child, i.e. whenever they visited his grand parents. Frank took me around in the village, and even showed med his grandfather's house (image #76).

User comments