To Mount Heggdalshornet and Mount Opstadhornet (12.12.2020)

| Start point | Nordheggdal Kapell (48m) |
|---|---|
| Endpoint | Nordheggdal Kapell (48m) |
| Characteristic | Hike |
| Duration | 4h 27min |
| Distance | 15.8km |
| Vertical meters | 1,499m |
| GPS |
|
| Ascents | Heggdalshornet (684m) | 12.12.2020 |
|---|---|---|
| Opstadhornet (737m) | 12.12.2020 | |
| Visits of other PBEs | Nord-Heggdal kapell (48m) | 12.12.2020 09:44 |
Winter had definitely arrived by now, and there was snow up in the higher mountains, especially in inland areas; though it was still not enough snow for skiing in most places. There had been some snow in October and November, but then most of it had disappeared again. Nevertheless, many of the smaller mountains in the coastal area were currently without snow (or without any amount worth mentioning), and so on this day my son and I opted for two of the peaks on an island called Otrøya. So, we drove to the village of Brattvåg, and went by the ferry over to the tiny island of Dryna. Dryna is connected to the larger island called Midøya with a little bridge, and Midøya is in turn connected to Otrøya Island with an even larger bridge (see map). I had previously never ascended any of the many mountains of Otrøya Island, though my grandfather actually came from this island; and so my forefathers were actually keeping their sheep in these mountains for generations, and had to get up in the mountains every autumn in order to search for their sheep and get them down for the winter.
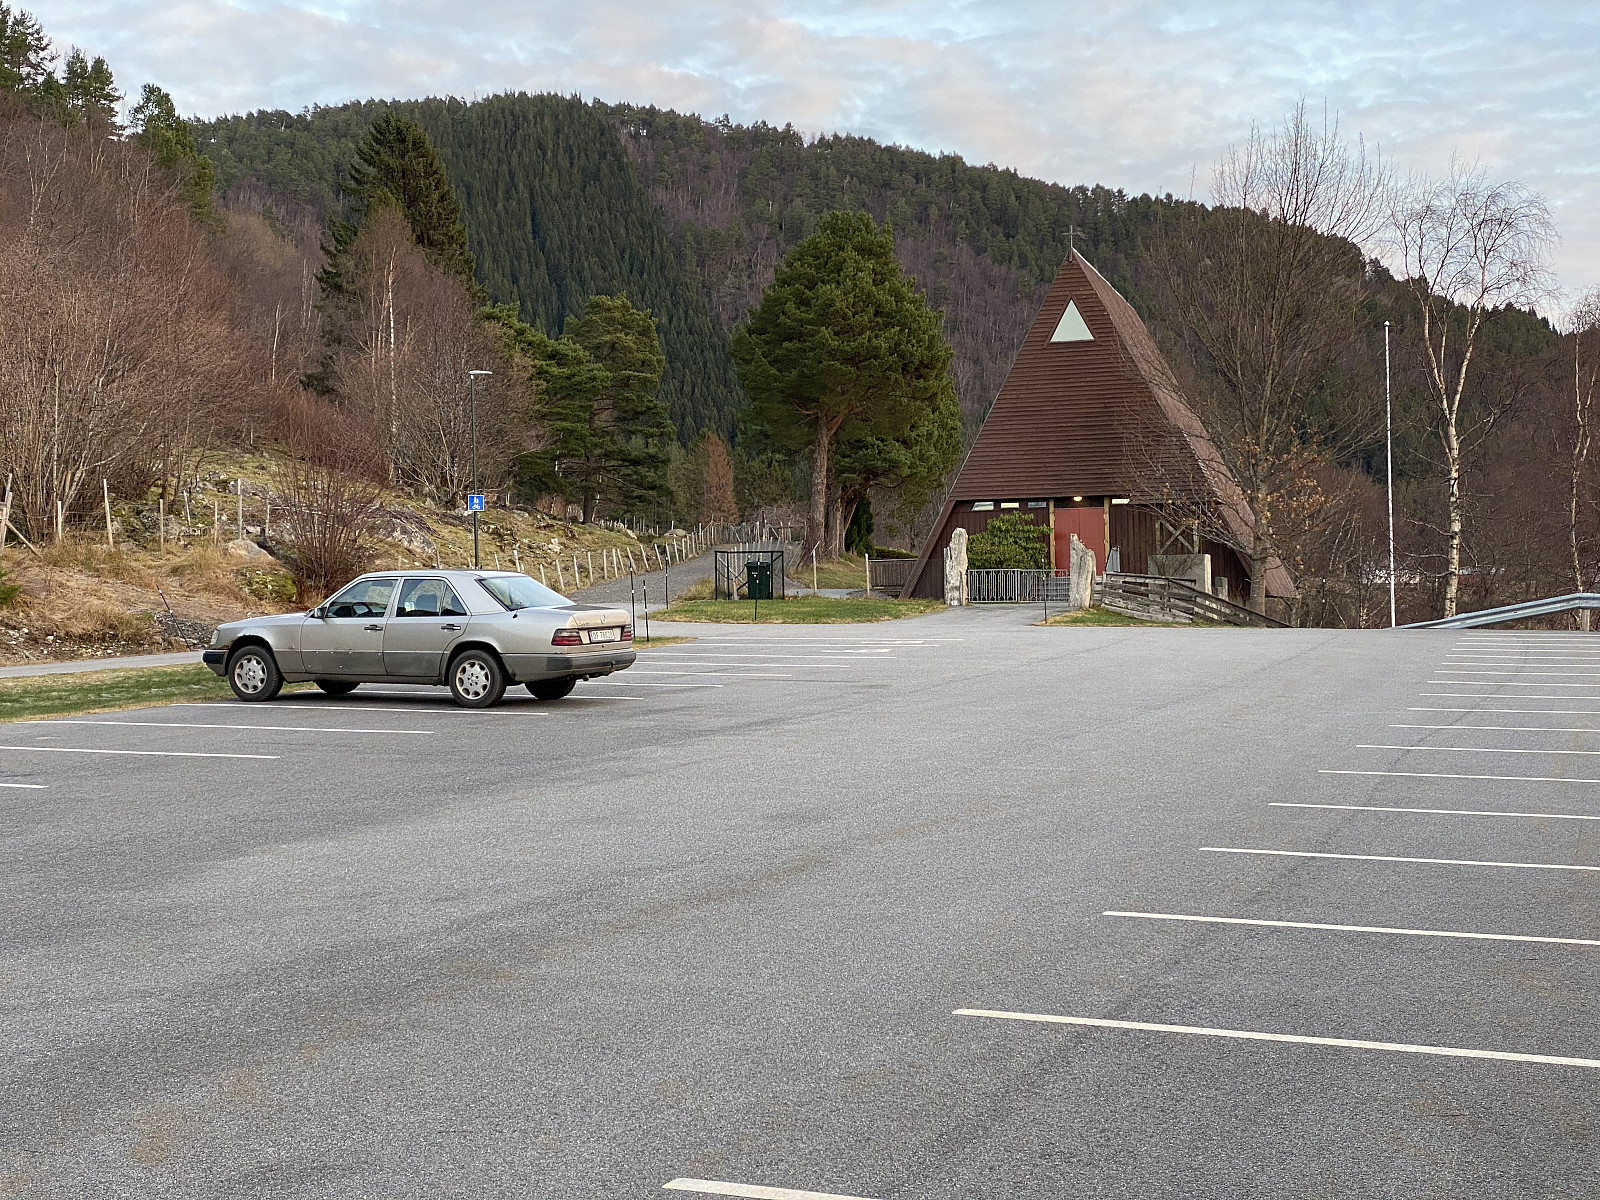
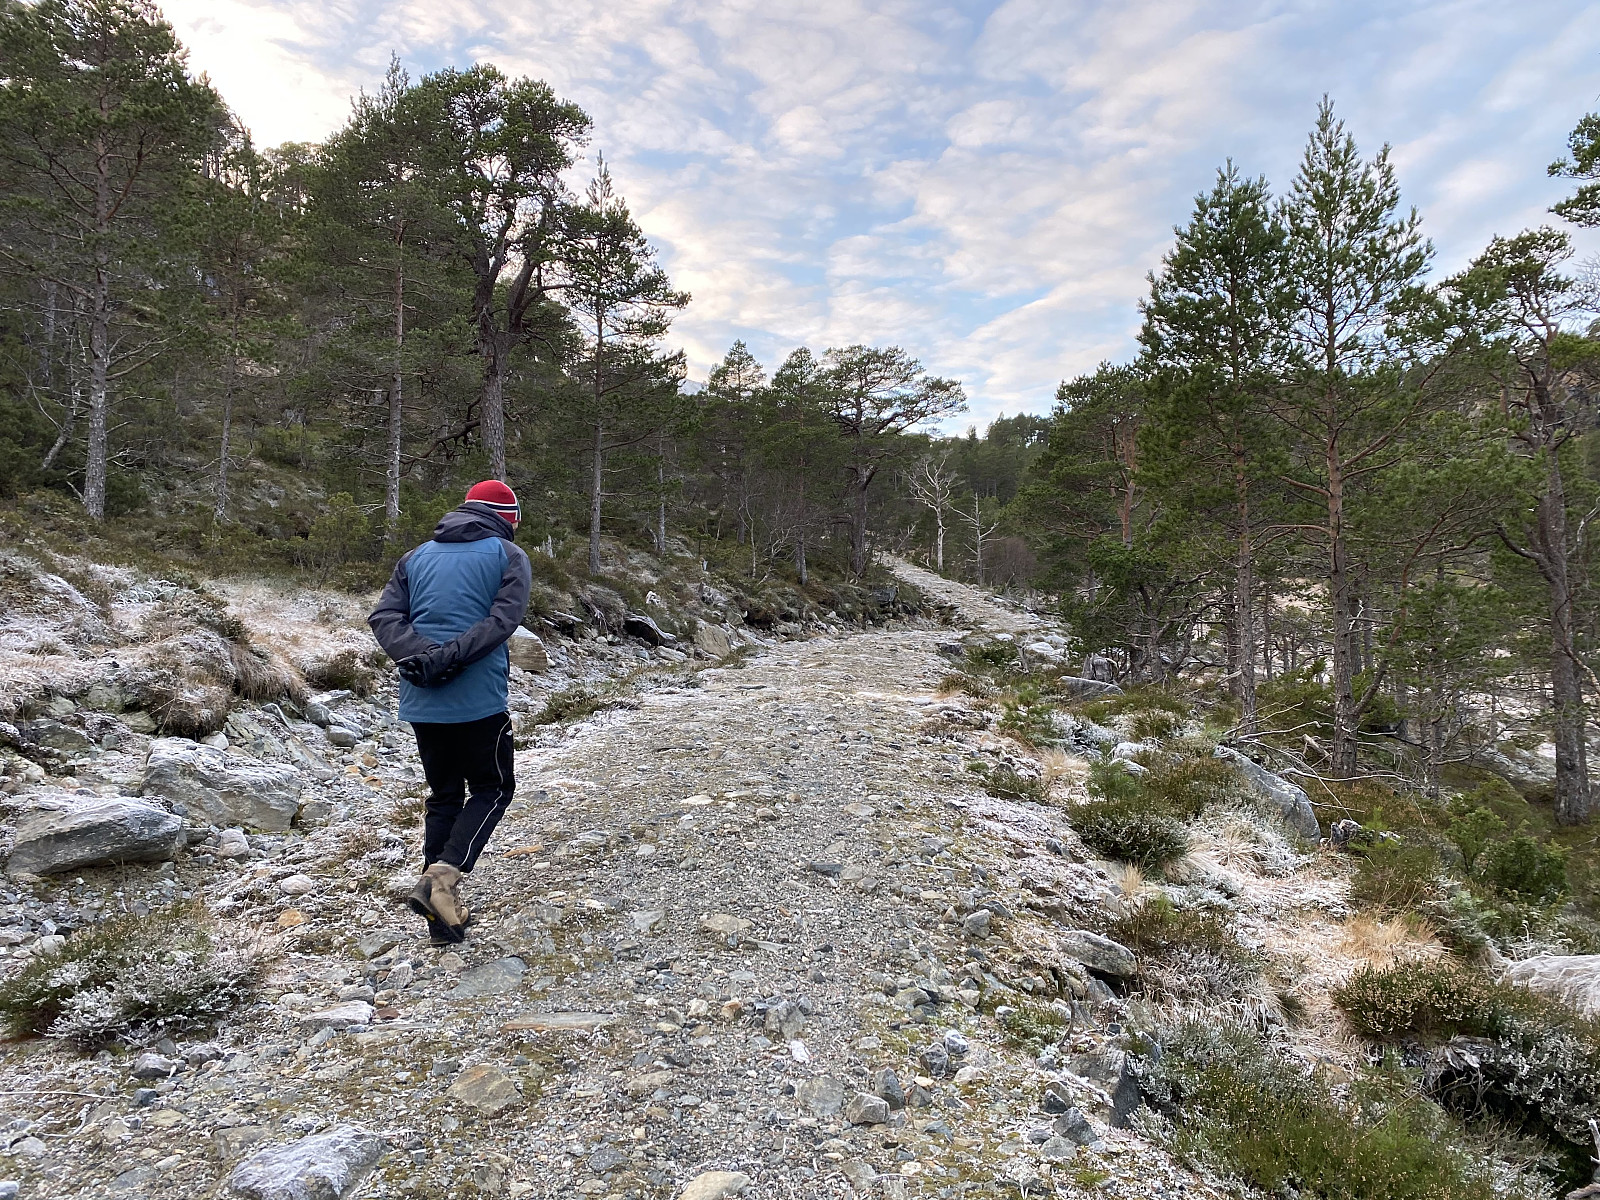
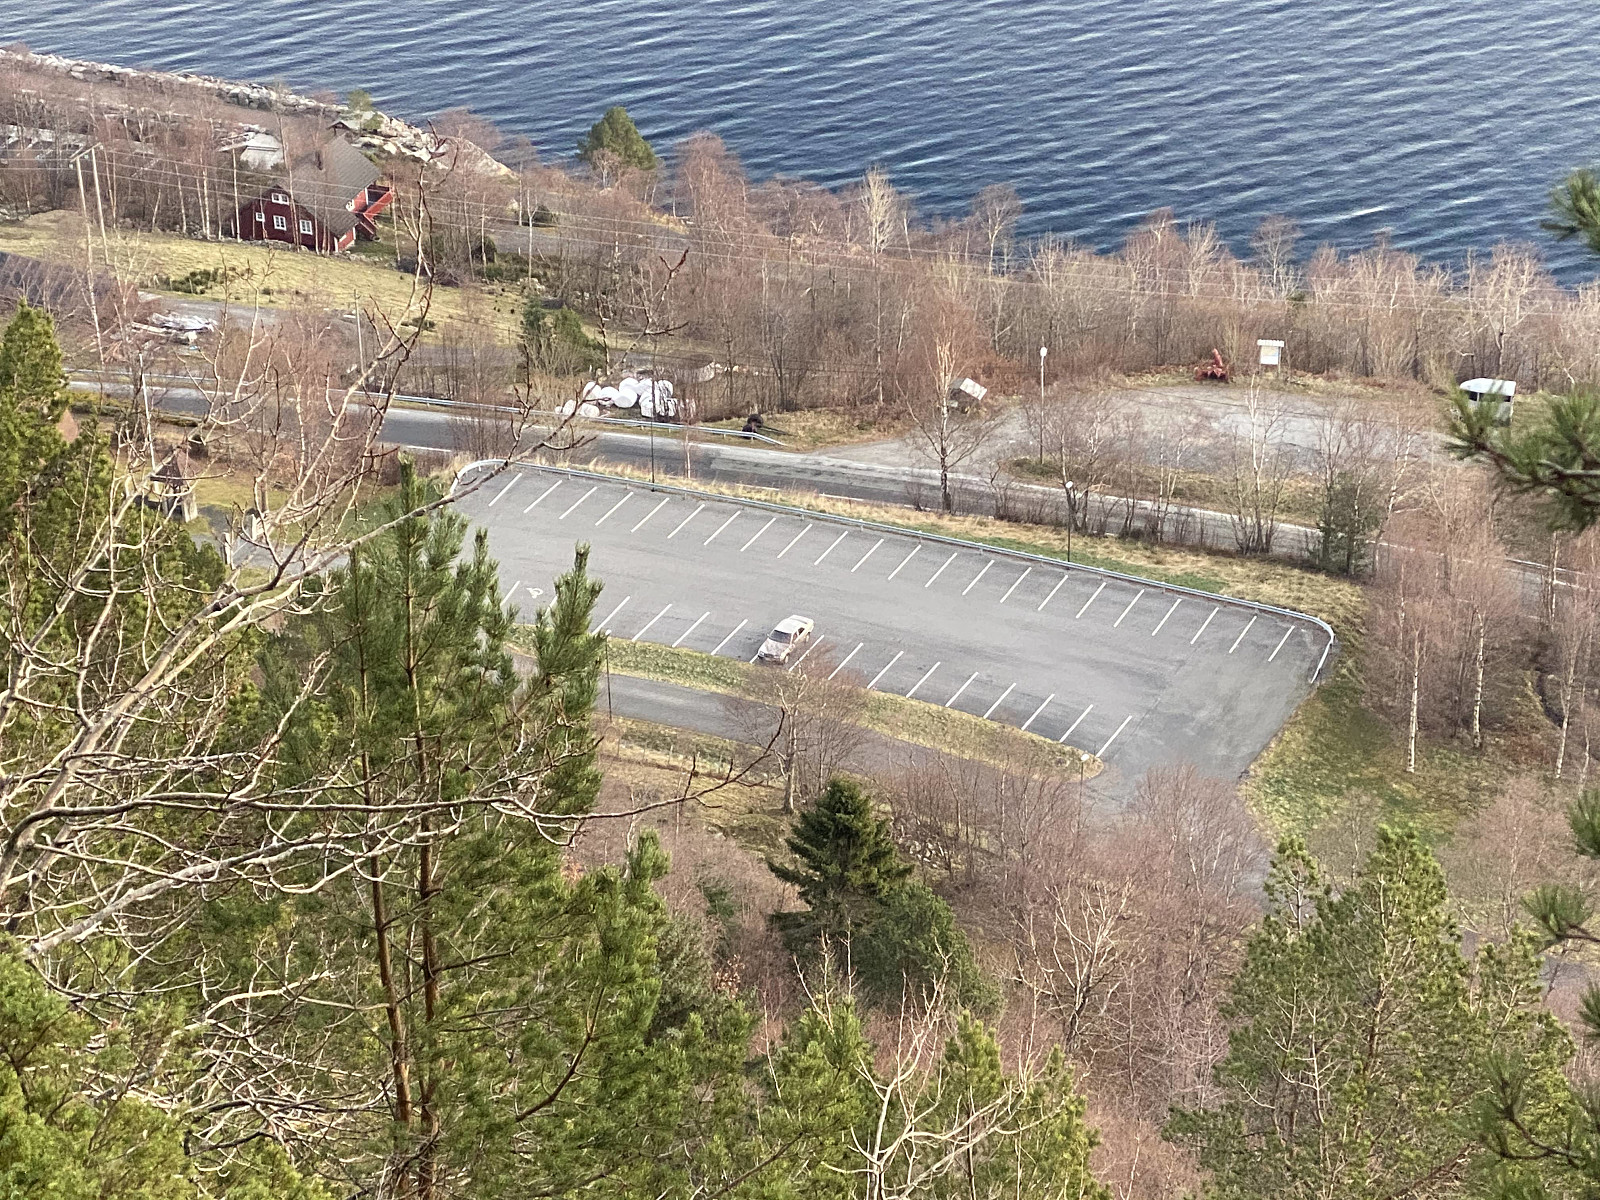
We parked at the parking lot at Nord-Heggdal Chapel. "Hegg" is the Norwegian word for Hagberry or Bird Cherry, and so Heggdal is a name not infrequently given to a valley where this plant [Prunus padus] is growing, "dal being the Norwegian word for "valley". Now on Otrøya Island there are two such valleys, and so they've been named Nord-Heggdal and Sør-Heggdal [i.e. North-Heggdal and South-Heggdal, respectively]. Anyway, there's a quite large parking lot by the Chapel at Nord-Heggdal; unless there's a funeral going on; you're almost guaranteed to find a vacant parking spot there (see images ## 1 & 16). The first part of the trek up to Mount Heggdalshornet and Mount Opstadhornet goes along a gravel road that you'll find just to the left of the Chapel (see Image #1). This road takes you from the south side of the island, deep into the valley of Nord-Heggdal (see map). The first kilometer or so of the road has been well maintained (Image #2), but then comes a part of the road that hasn't been quite as well maintained (Image #3). Nevertheless, as a trekking trail, even this part of the road is quite nice; and it eventually takes you up to a lake called Heggdalsvatnet at 255 m.a.m.s.l. I believe this road was once used as a construction road for work of some sort up there by the lake, but I don't think it has been used for driving for many years now.
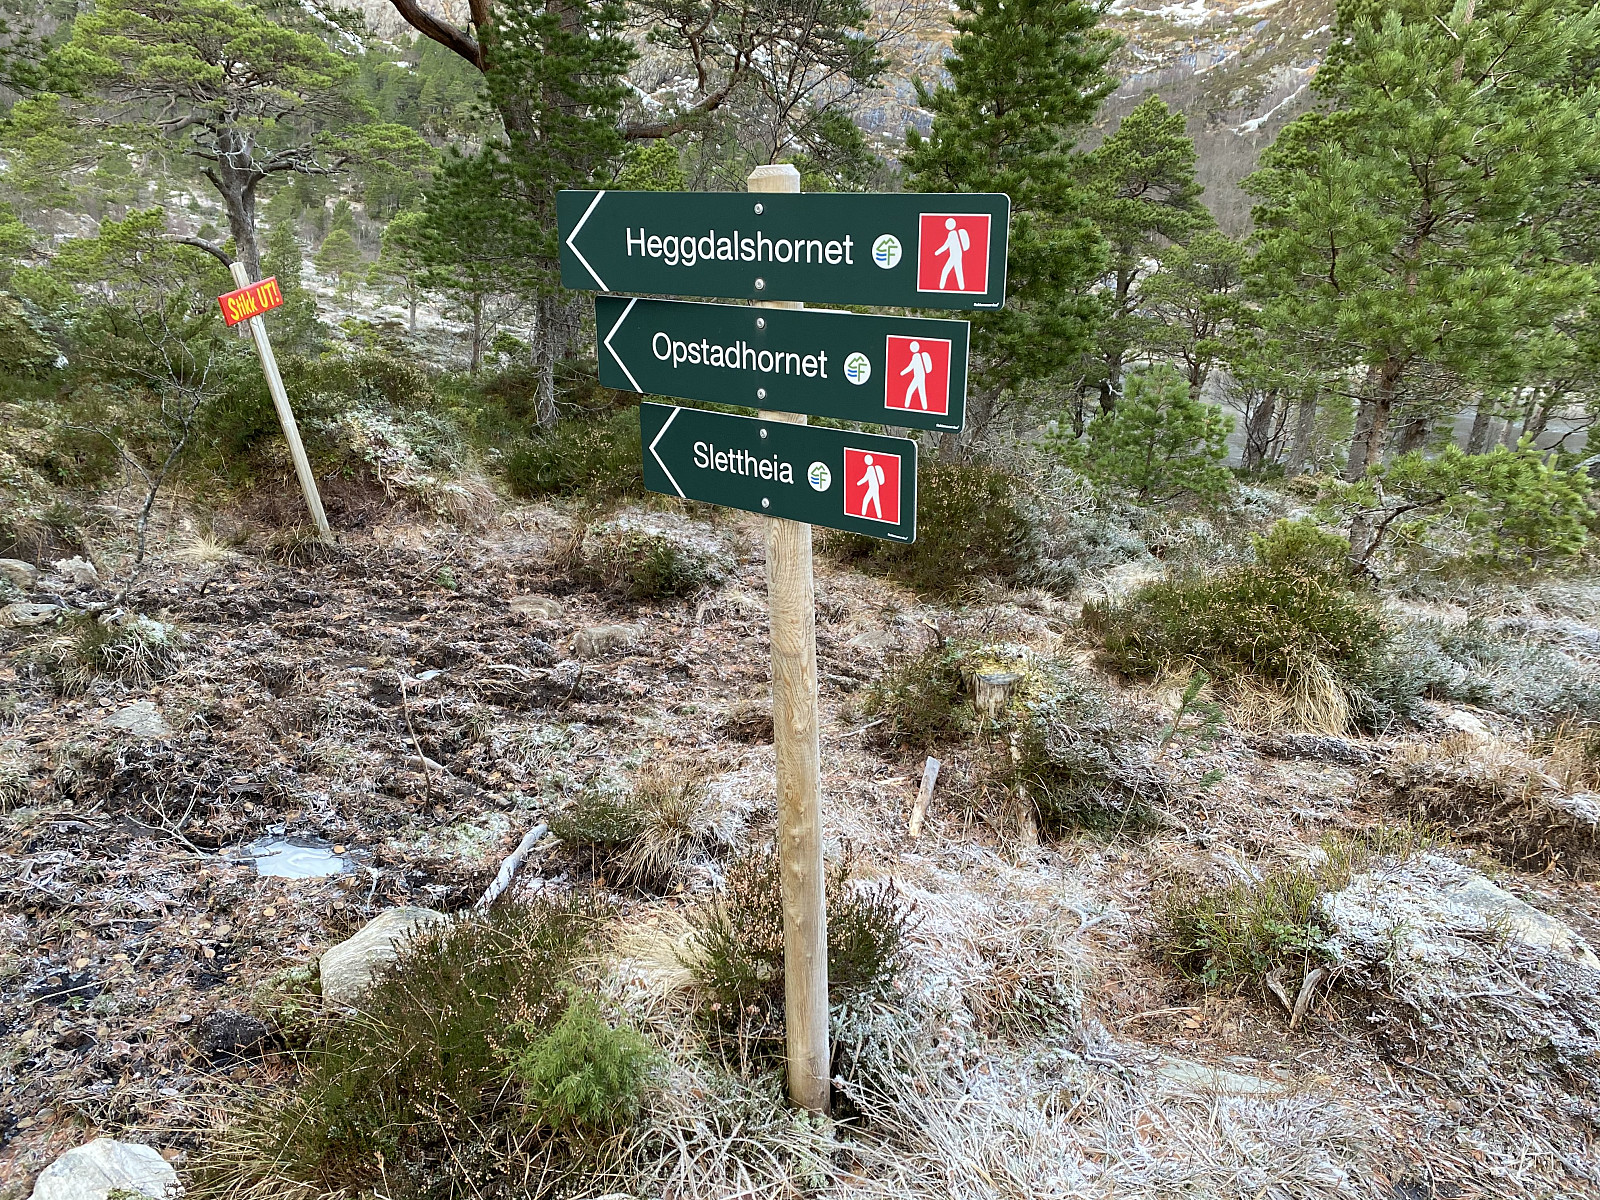
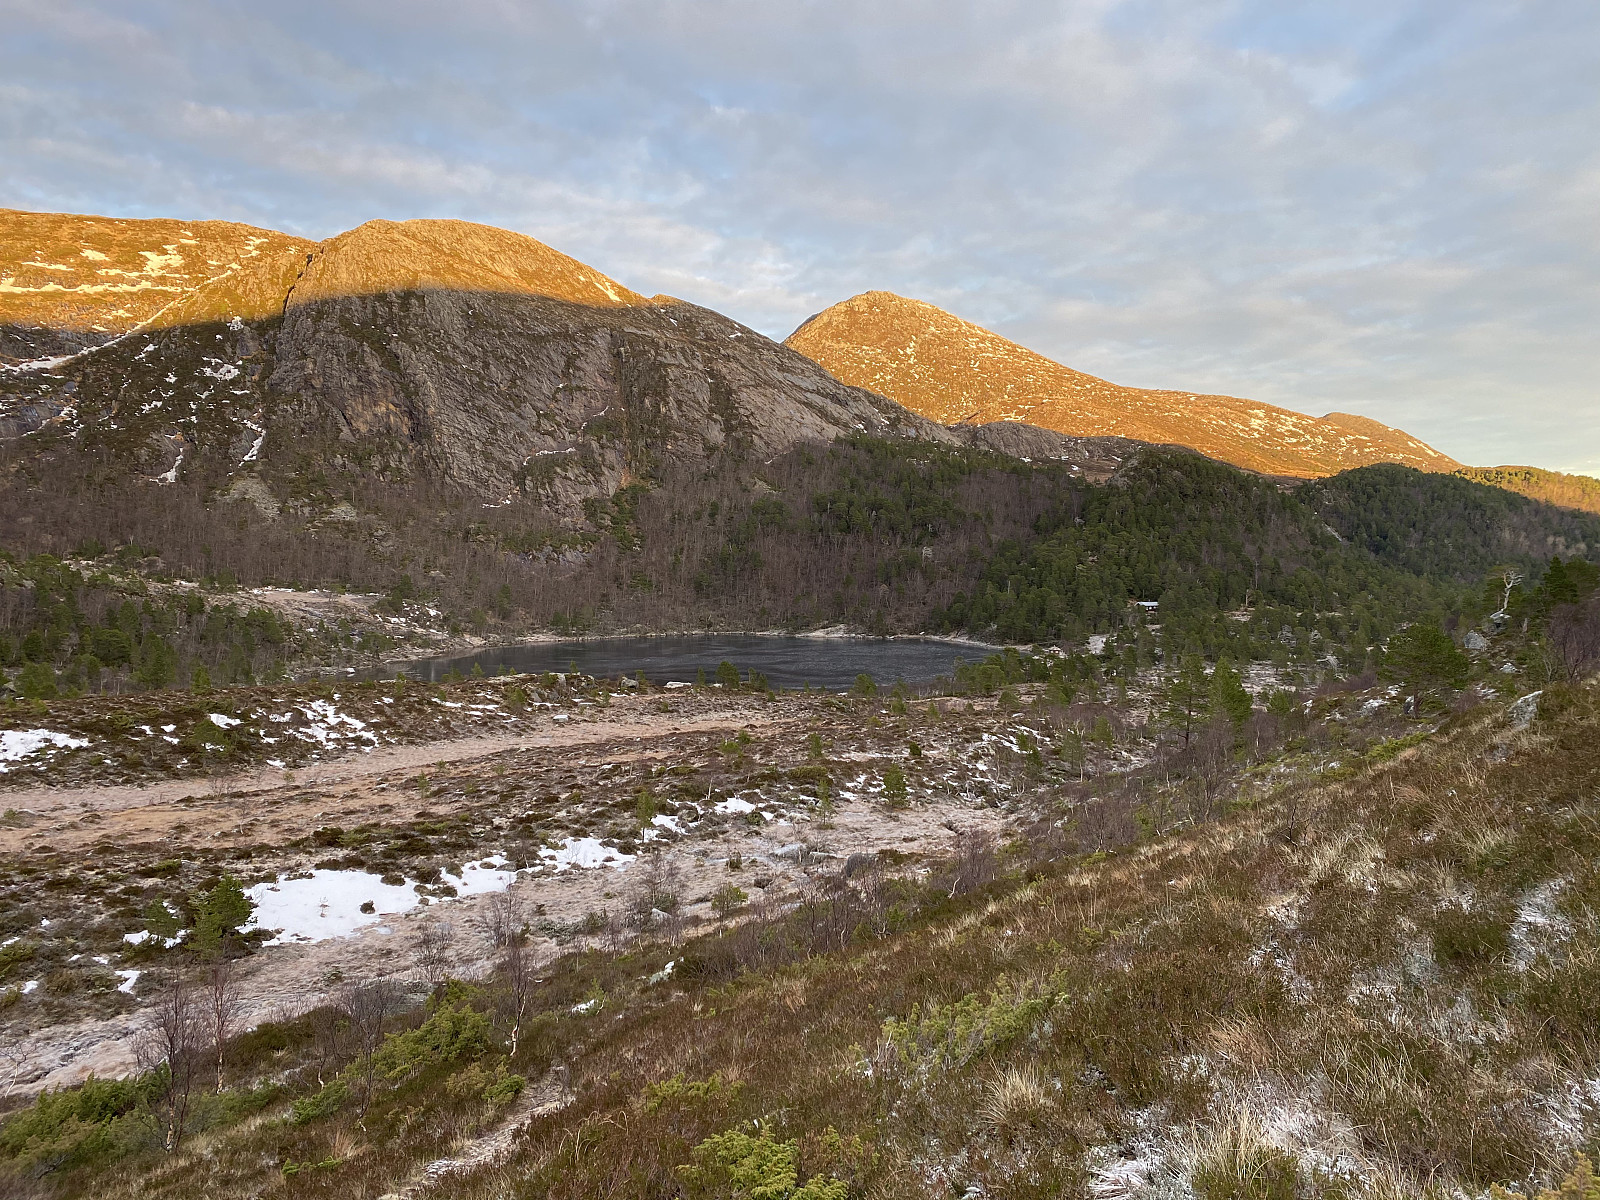
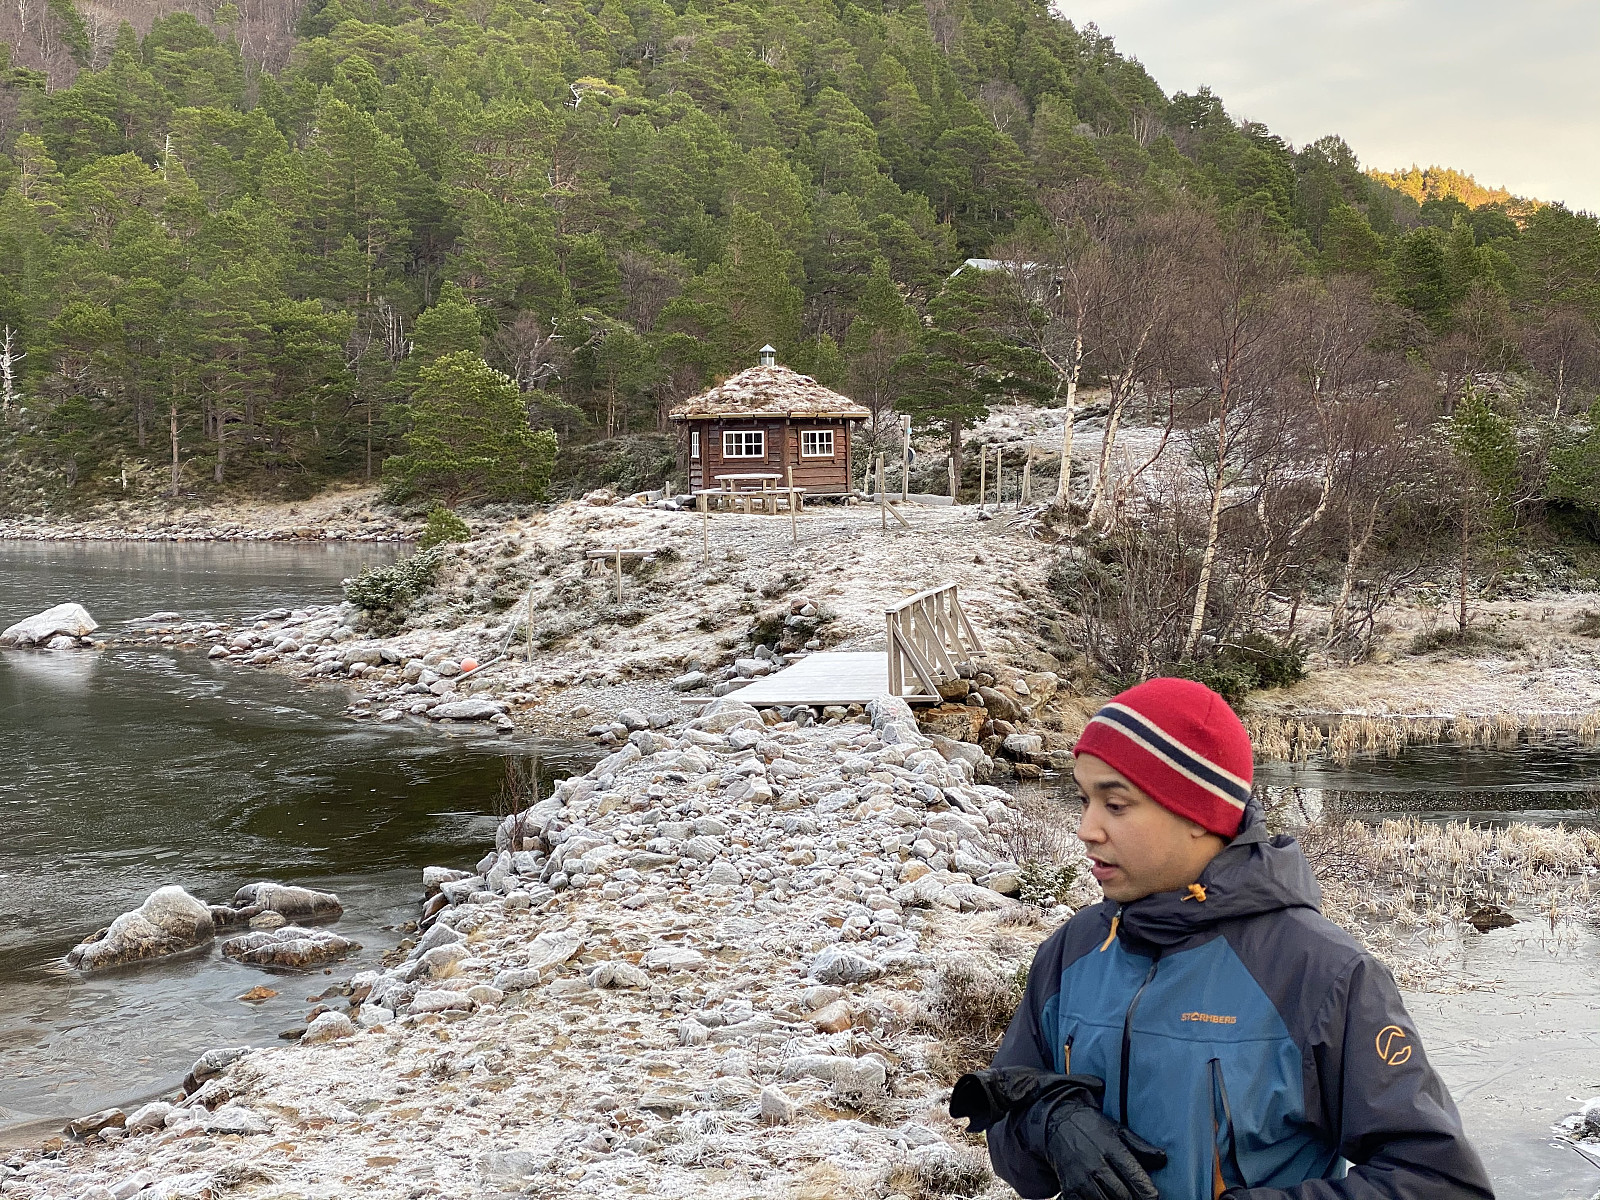
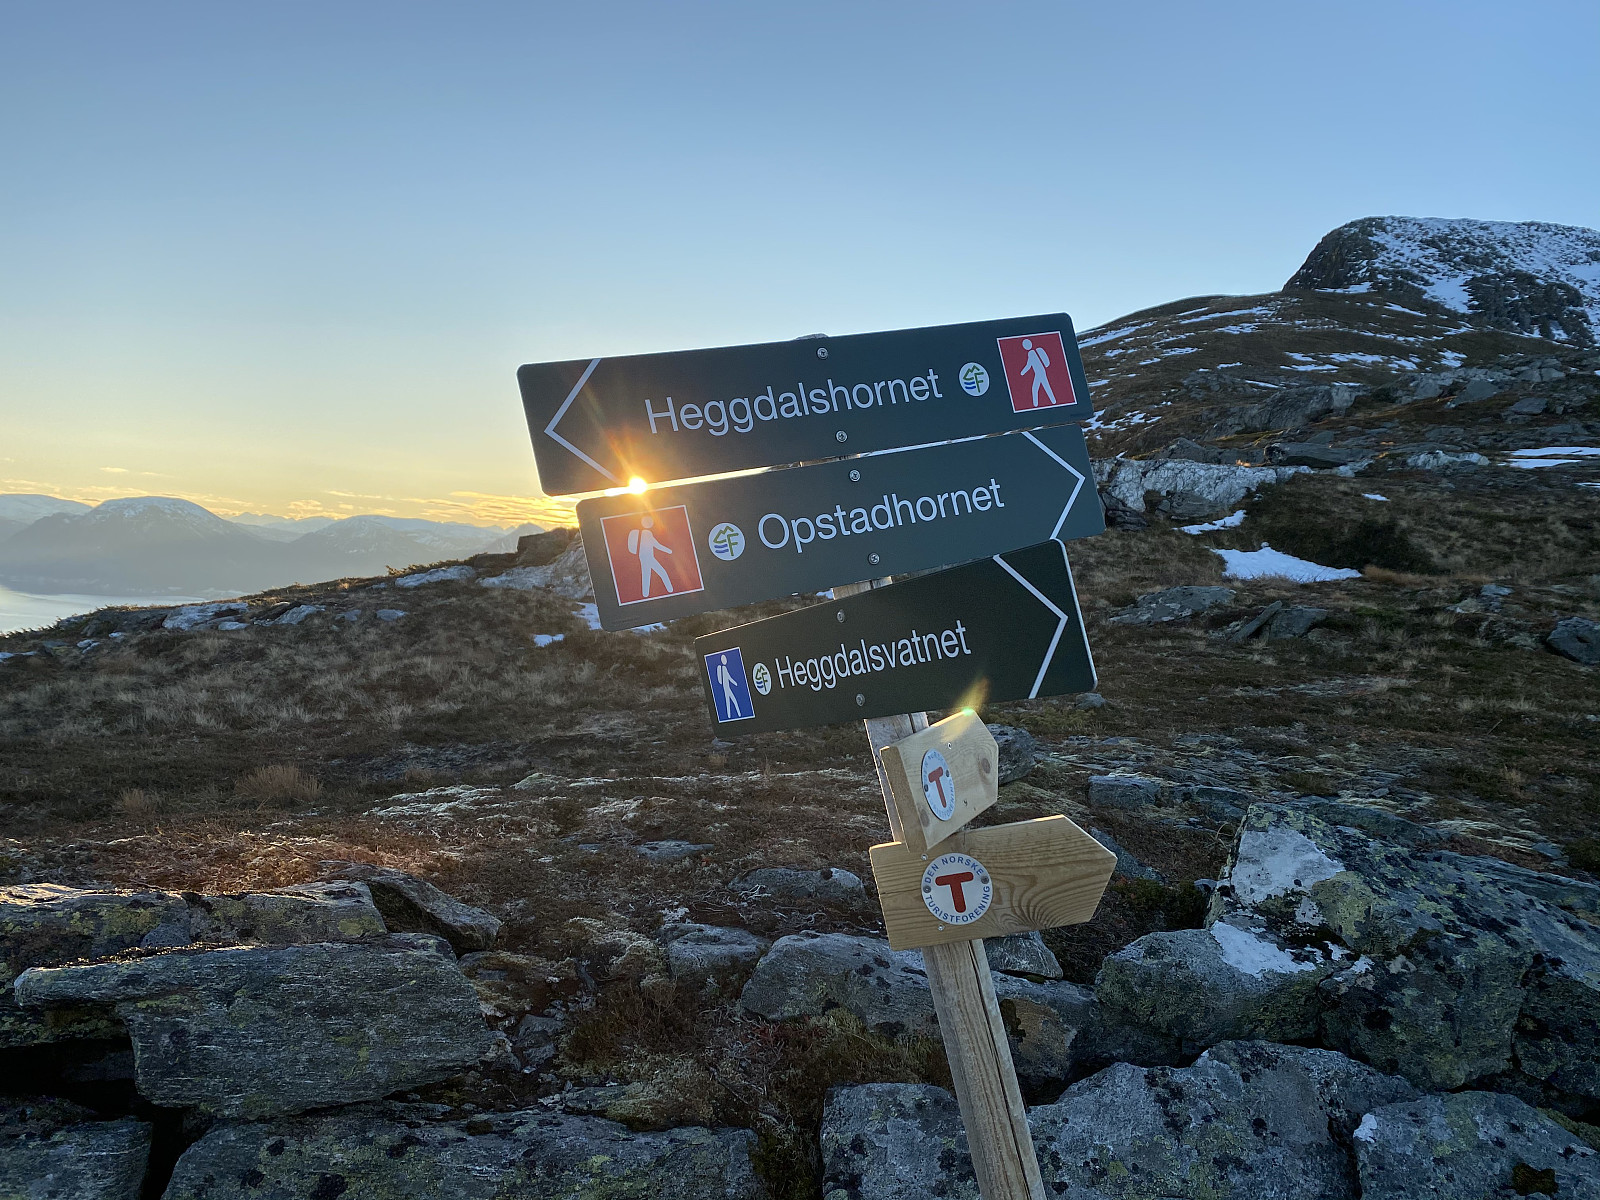
Just before you come to the lake, you'll encounter a sign (Image #5) that tells you the trail to Heggdalshornet as well as Opstadhornet goes to the left. The gravel road itself was leading down to the right, however, and we could actually se the surface of the lake down there in between the trees; and we immediately decided to pay the lake a brief visit before continuing our trek, and so we took the gravel road down to the lake. The lake actually offers quite a picturesque scenery (Image #6). We felt like we had just embarked on our trek, however, and there was no reason to stop for a rest or to have any food; so we shot a few images with our mobile cameras down there, and then continued along the trail up the mountain side south of us.
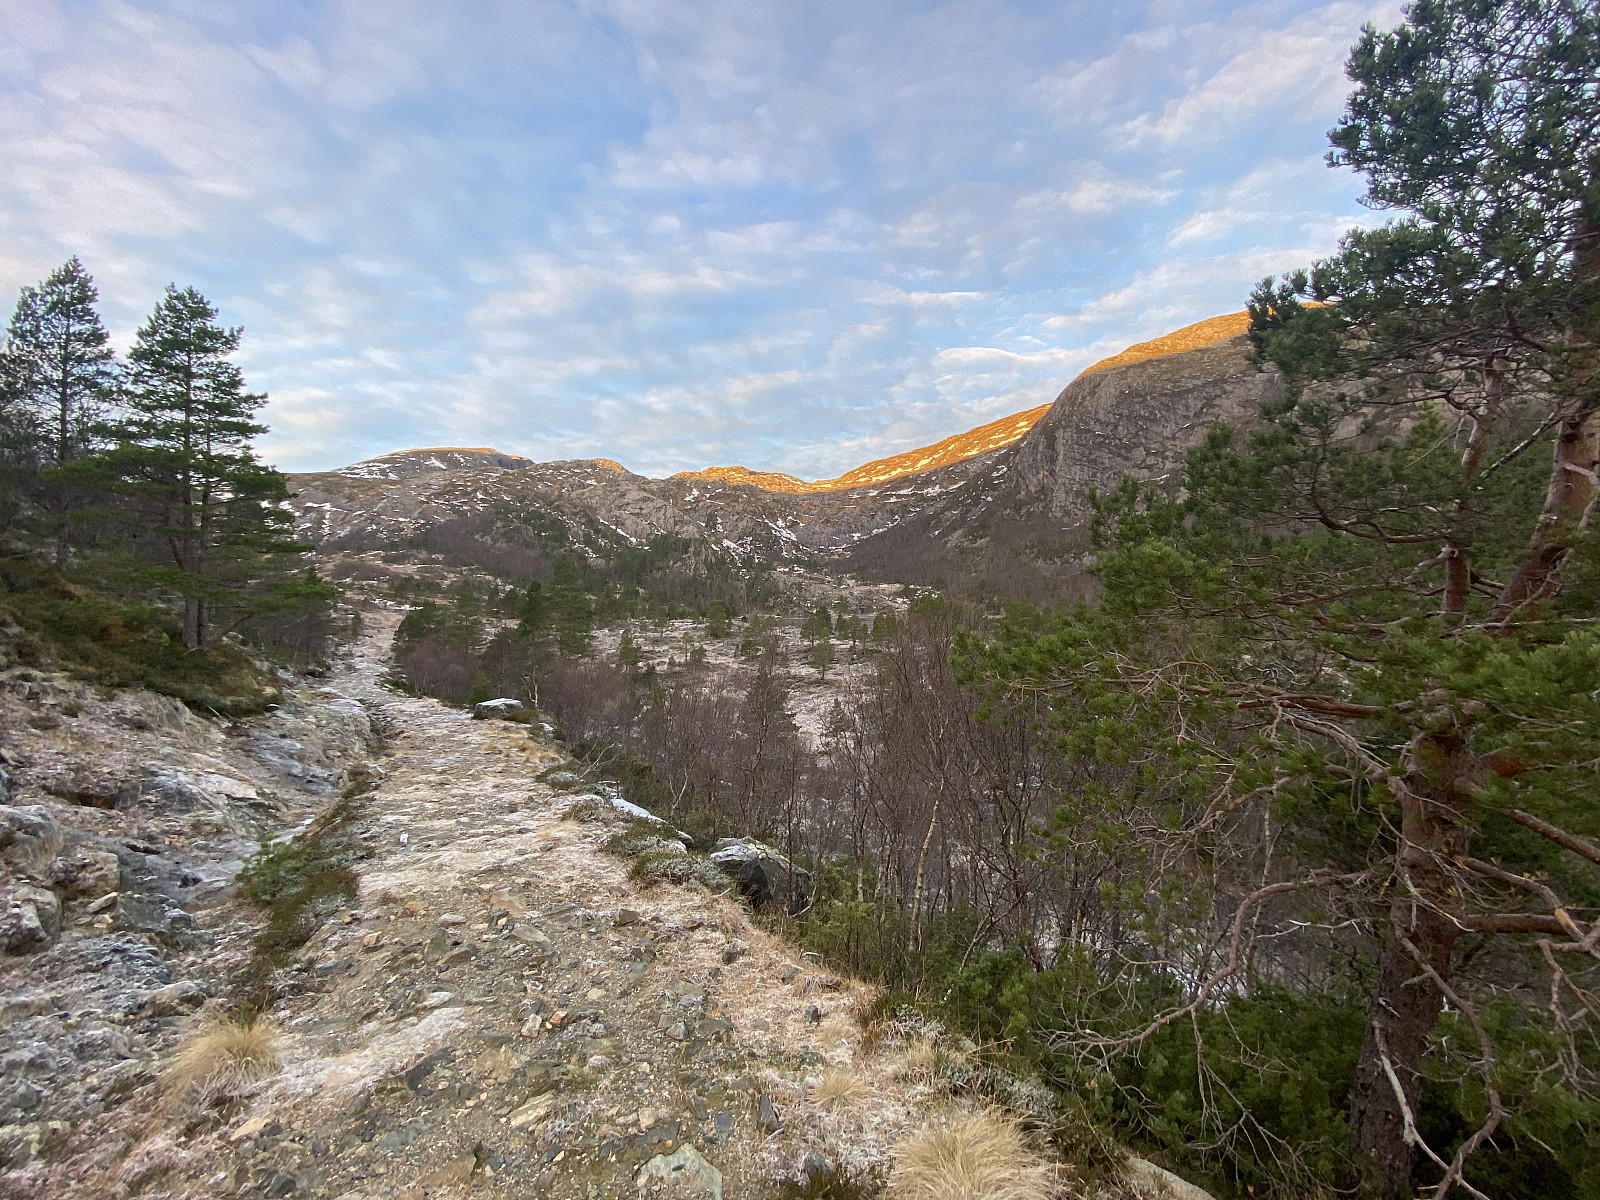
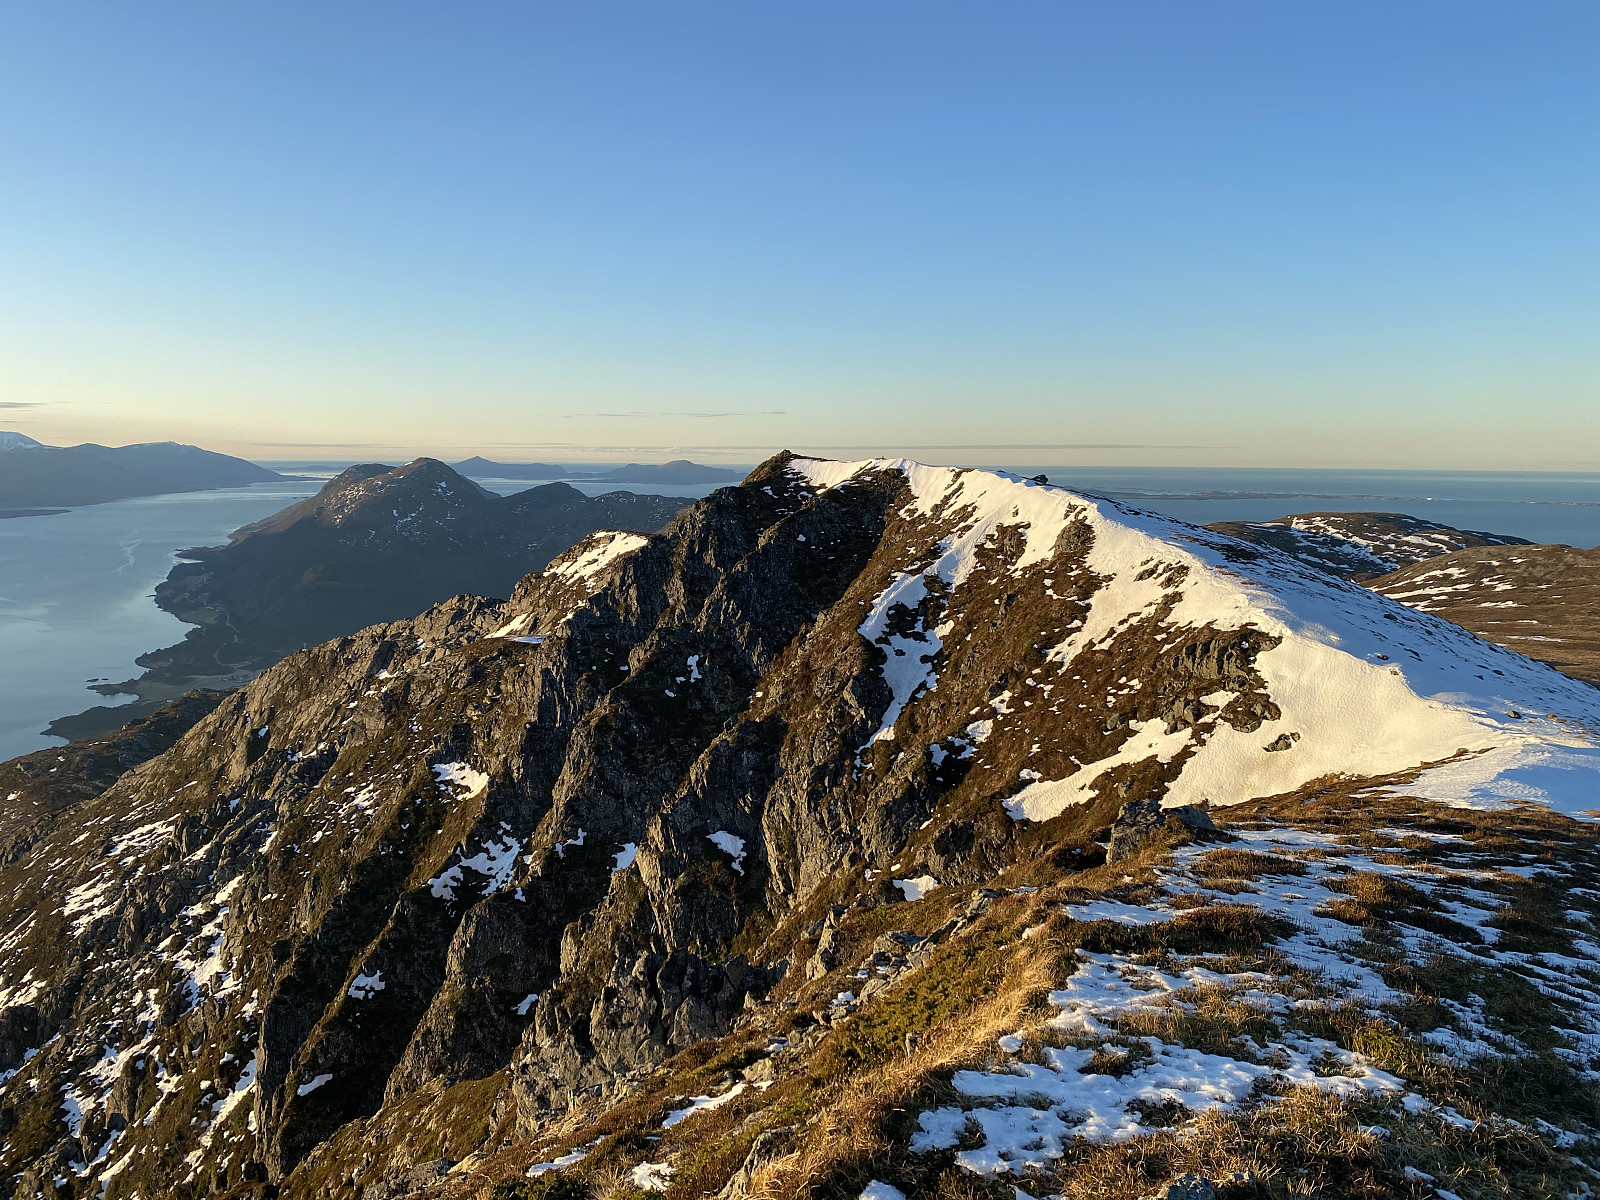
We were kind of walking in a valley of shadows (Image #7), as the sun only reaches very low in the southern sky even at midday at this time of the year; and so the rays of the sun doesn't even reach down into the lower parts of the valley. As we were trekking up the mountain side, we encountered some snow every here and there; and the trail was even icy and slippery at places, making you wish you had brought with you some kind of crampons for the journey. We followed a little side valley with a little creek for a while, and as we came up on a plateau of sorts, we left the trail, and headed more or less directly up the mountain side towards the summit of Mount Opstadhornet. The northern side of Mount Opstadhornet was quite icy with frozen ground, however, as the sun doesn't reach this side of the mountain at this time of the year; and I have to say even this part of the trek would've been a lot easier, had we just brought with us some crampons.
![Image #9: On top of Mount Opstadhornet [737 m.a.m.s.l.]. In nice weather this summit offers a spectacular view of the fjord between this island and the mainland.](https://images1.peakbook.org/images/14939/Solan_20210306_604379f84be97.jpg?p=xtralarge)

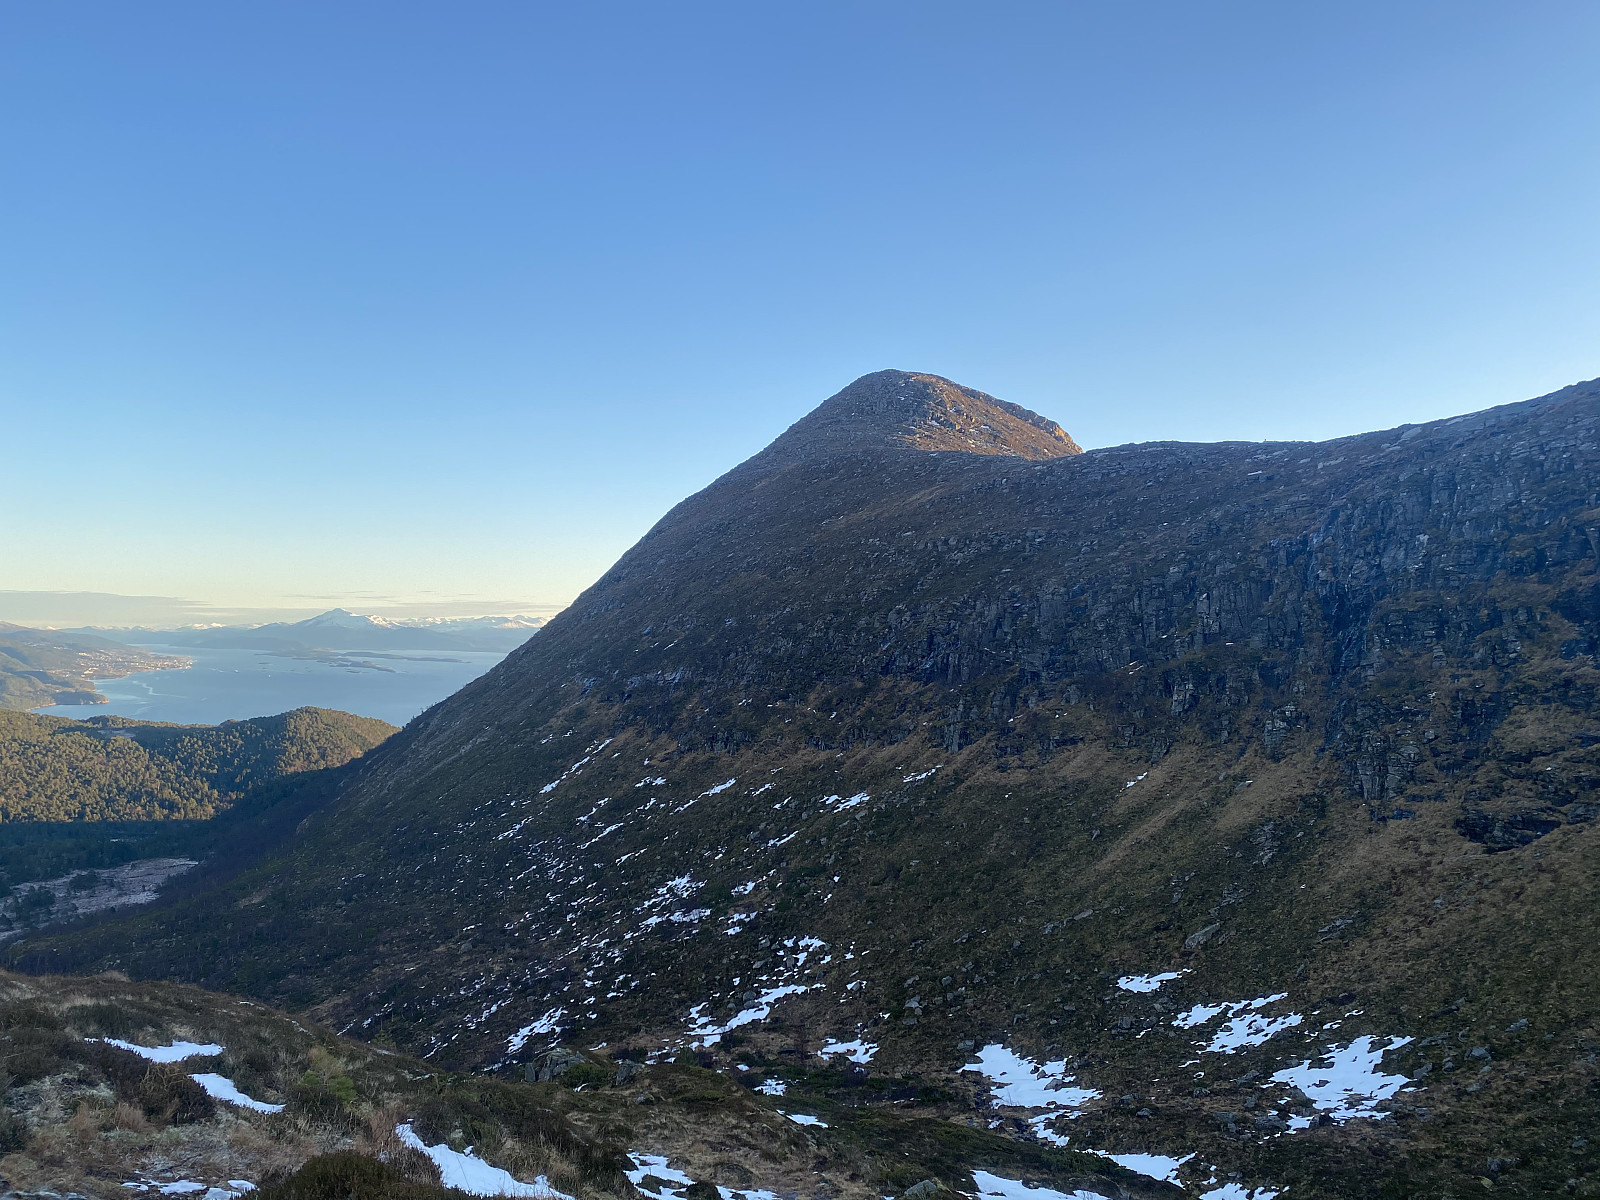
We eventually made it to the summit of Mount Opstadhornet, however (Images ## 9-11). Up there, there were some remnants of huge snow shelves hanging from the edge of the mountain ridge (Images ## 10 & 11), but apart from that, the sun had removed most of the snow and ice, and so it was much easier to move along the ridge up there, than it had been to climb the mountain from the north side. And due to this observation, we decided to follow the east ridge towards Mount Heggdalshornet (Image #10), and into the notch between the two peaks. The trail into the notch was readily visible, and virtually without any snow or ice, as the sun reaches up here even in midwinter whenever it's shining.
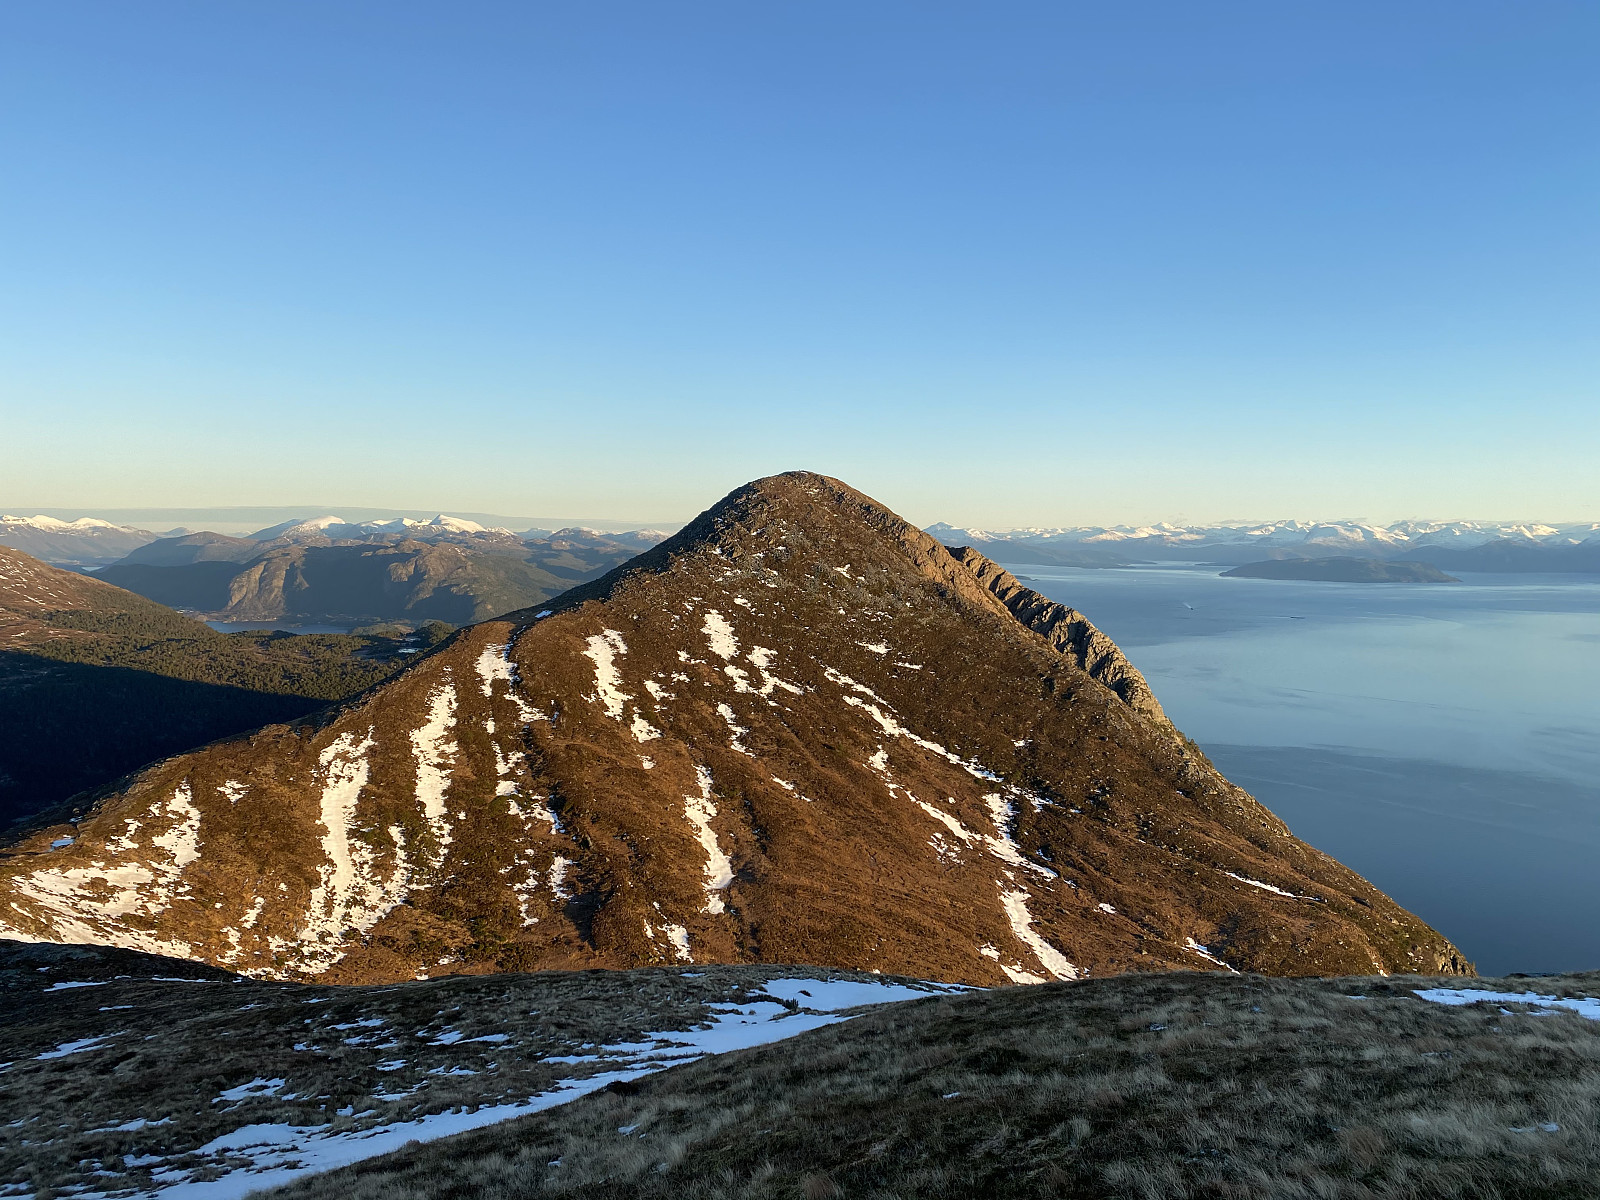
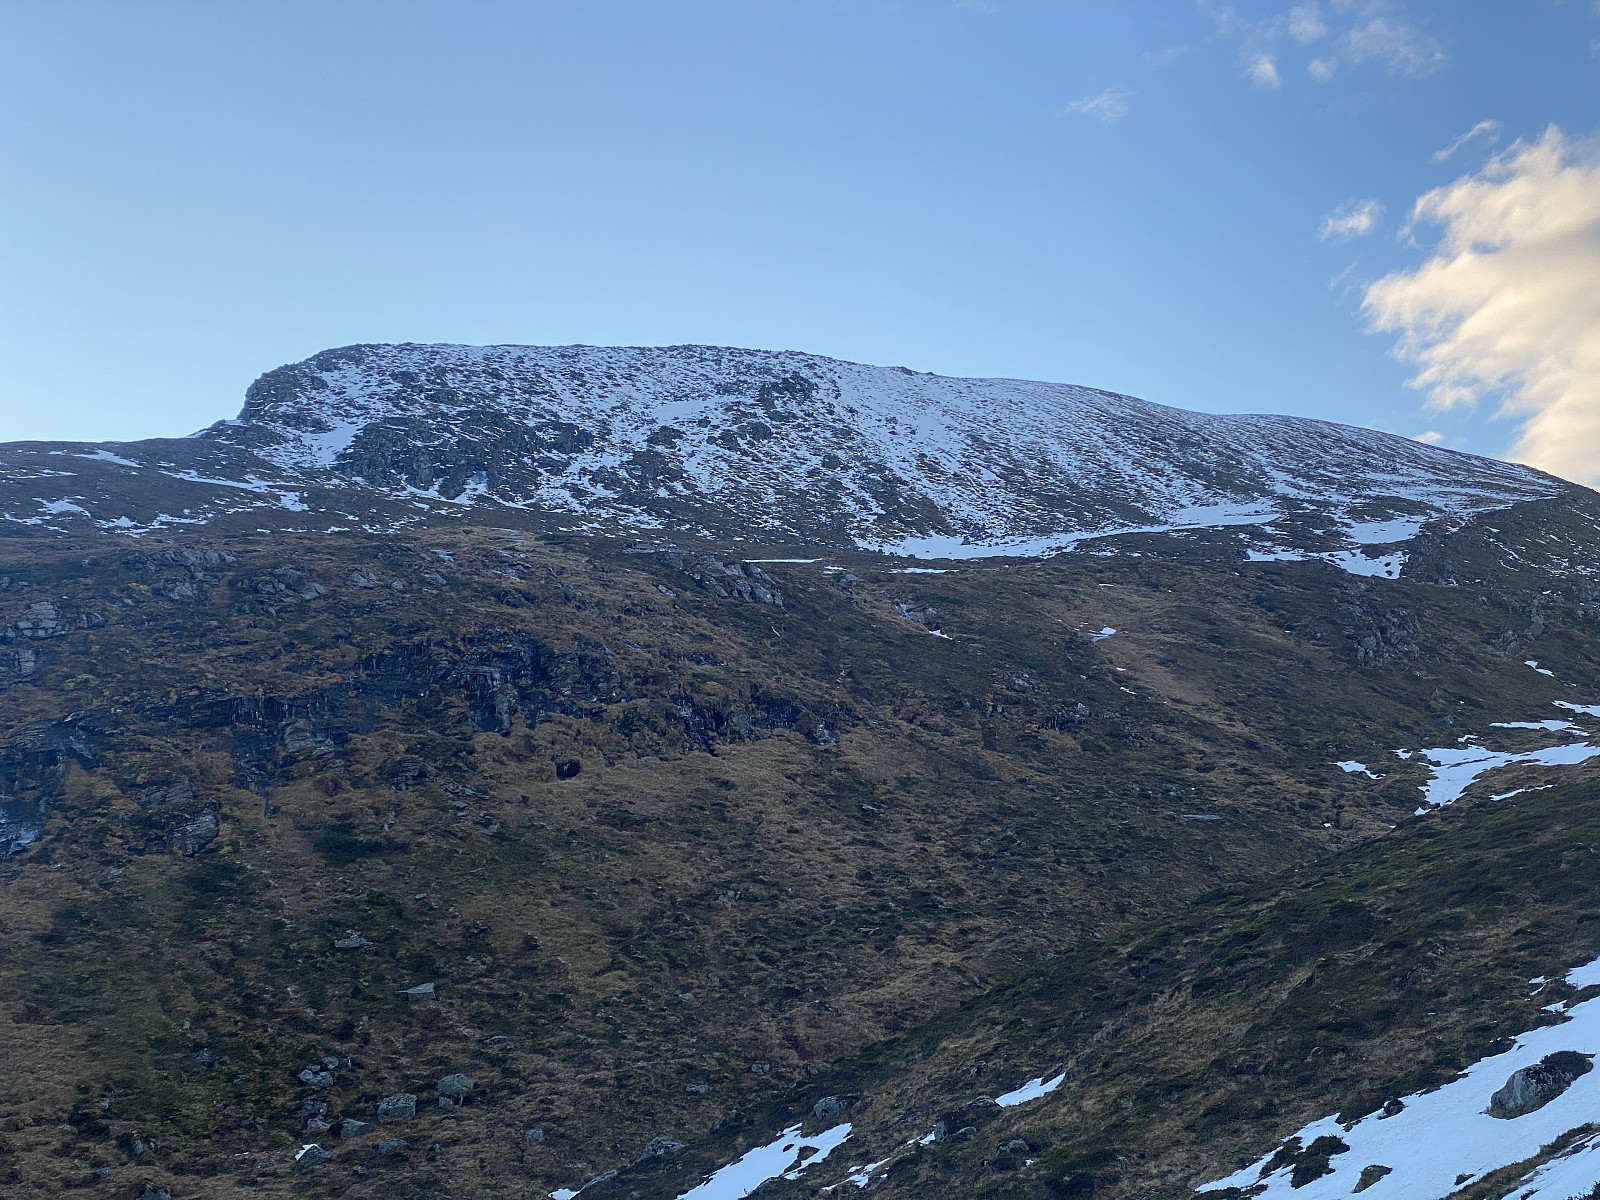
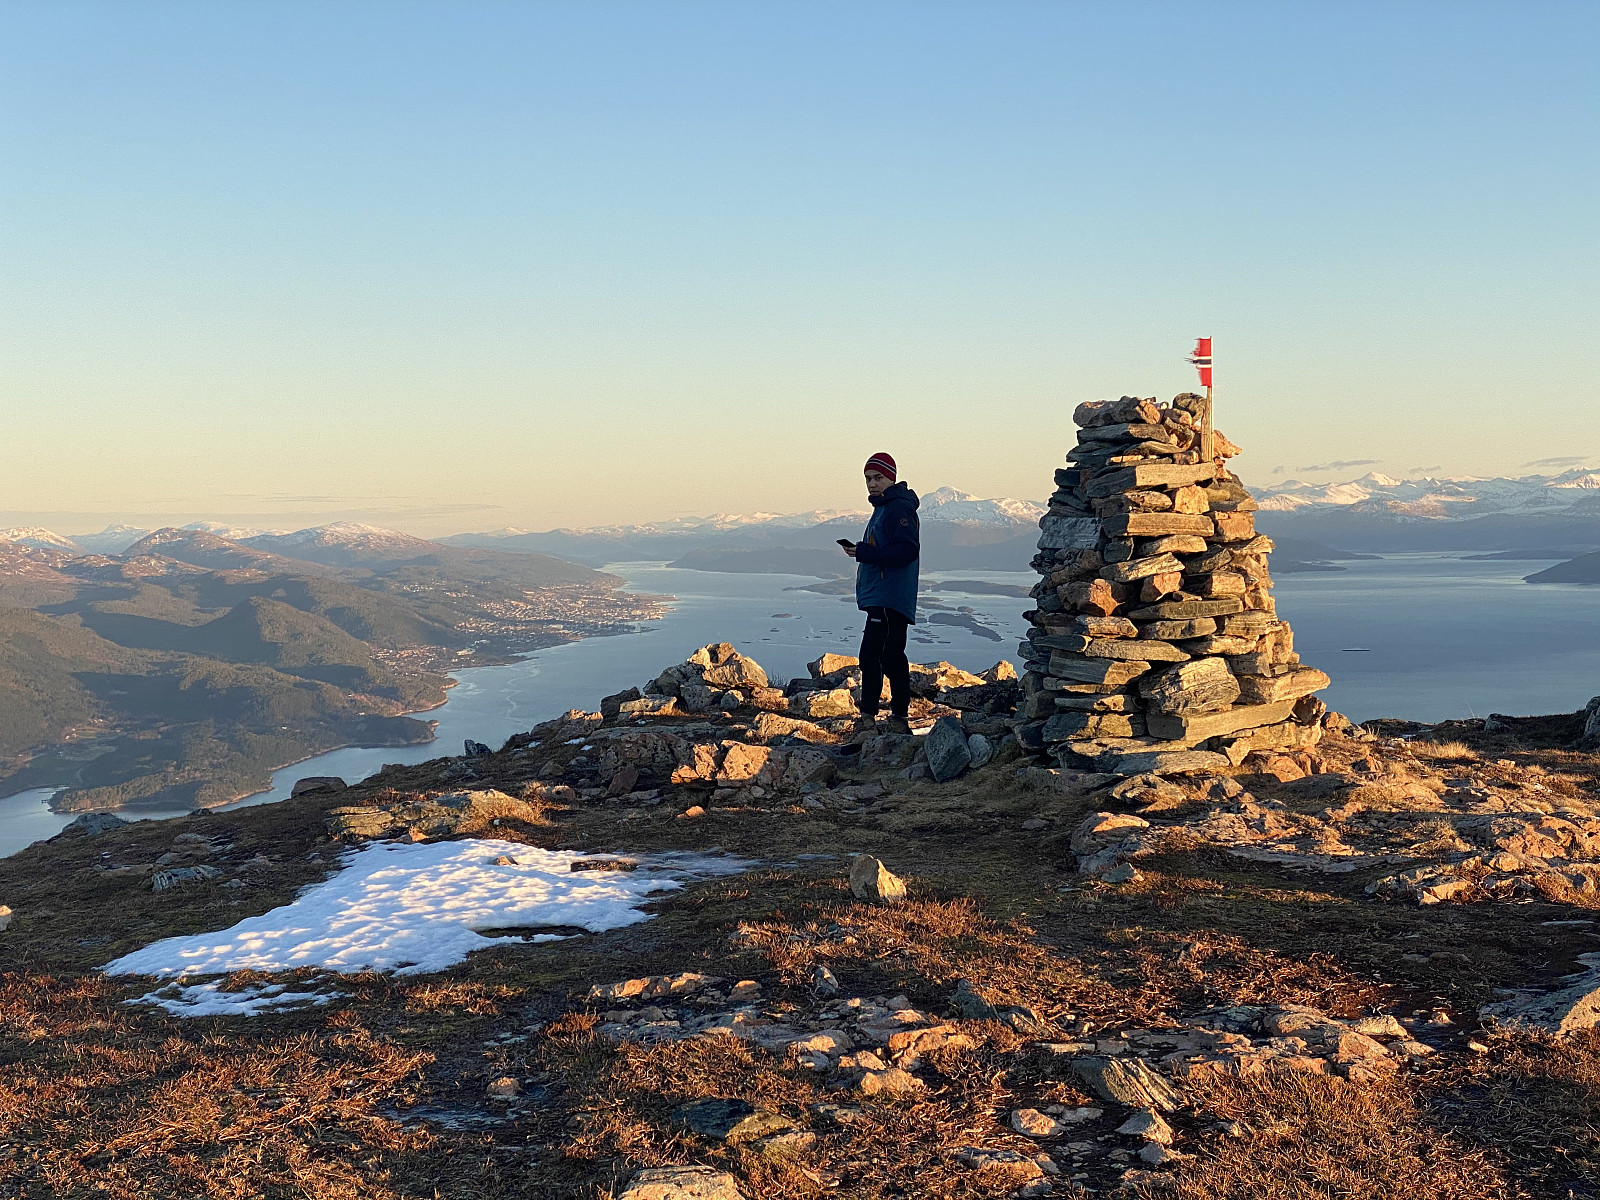
In the bottom of the notch, we came across another signpost (Image #13), with one sign pointing towards Mount Opstadhornet, and another pointing towards Mount Heggdalshornet. We followed the latter sign, and found a nice and readily dry and visible trail that we followed up to the summit (Image #14). From up there, we had once again a marvelous view in all directions (Images ## 14 & 15). We shot a number of pictures even from up there, and then embarked on our descent. As we had encountered a quite icy trail on the north side of the mountain, at least in the upper parts, I insisted we try an alternative route down. I was a bit eager to try to follow the eastern ridge of Mount Heggdalshornet directly down to the parking lot were we had left our car, as there seemed to be very little snow along this route. In the upper part of this ridge, there was a nice trail that we could follow. It was not marked in any way, but it was clearly visible, and you couldn't miss it. As we came down to the forest around the foot of the mountain, however, the trail became less visible; and after a while it disappeared completely. Nevertheless, we continued downwards, using my GPS device to direct us towards the parking lot. The last part of our descent proved to become a bit steeper than we had anticipated, however; but we managed to get down little by little, at some places holding onto trees as we were climbing down, and at other places just holding on to fissures in the rock.
We got an amazing view of the parking lot with our car shortly before getting down there (Image #16). Once back down in the car, we checked the ferry routes; and learned that there were several hours left before the ferry was due to leave Dryna Island for the village of Brattvåg on the mainland side of the fjord, and so we decided to go on a family visit. It's only about 3 kilometers from Nord-Heggdal Chapel to the farm of Solholmen, where my grandfather grew up; and so we drove there and called upon a cousin of my father, who still lives there, and payed him and his family a visit. We were warmly invited in, and had a splendid evening there, before we returned home with one of the late evening ferries.


User comments