Hiking to Mount Honndalsrokken with My Oldest Son (29.08.2020)


| Startpunkt | Honndøla Bru (347m) |
|---|---|
| Endpunkt | Honndøla Bru (349m) |
| Tourcharakter | Wanderung |
| Tourlänge | 8h 24min |
| Entfernung | 18,6km |
| Höhenmeter | 1.791m |
| GPS |
|
| Besteigungen | Hornindalsrokken (1.527m) | 29.08.2020 11:38 |
|---|---|---|
| Lidafjellet sør for (1.201m) | 29.08.2020 11:38 | |
| Sætrenibba (1.374m) | 29.08.2020 11:38 | |
| Trollaksla (1.256m) | 29.08.2020 11:38 |
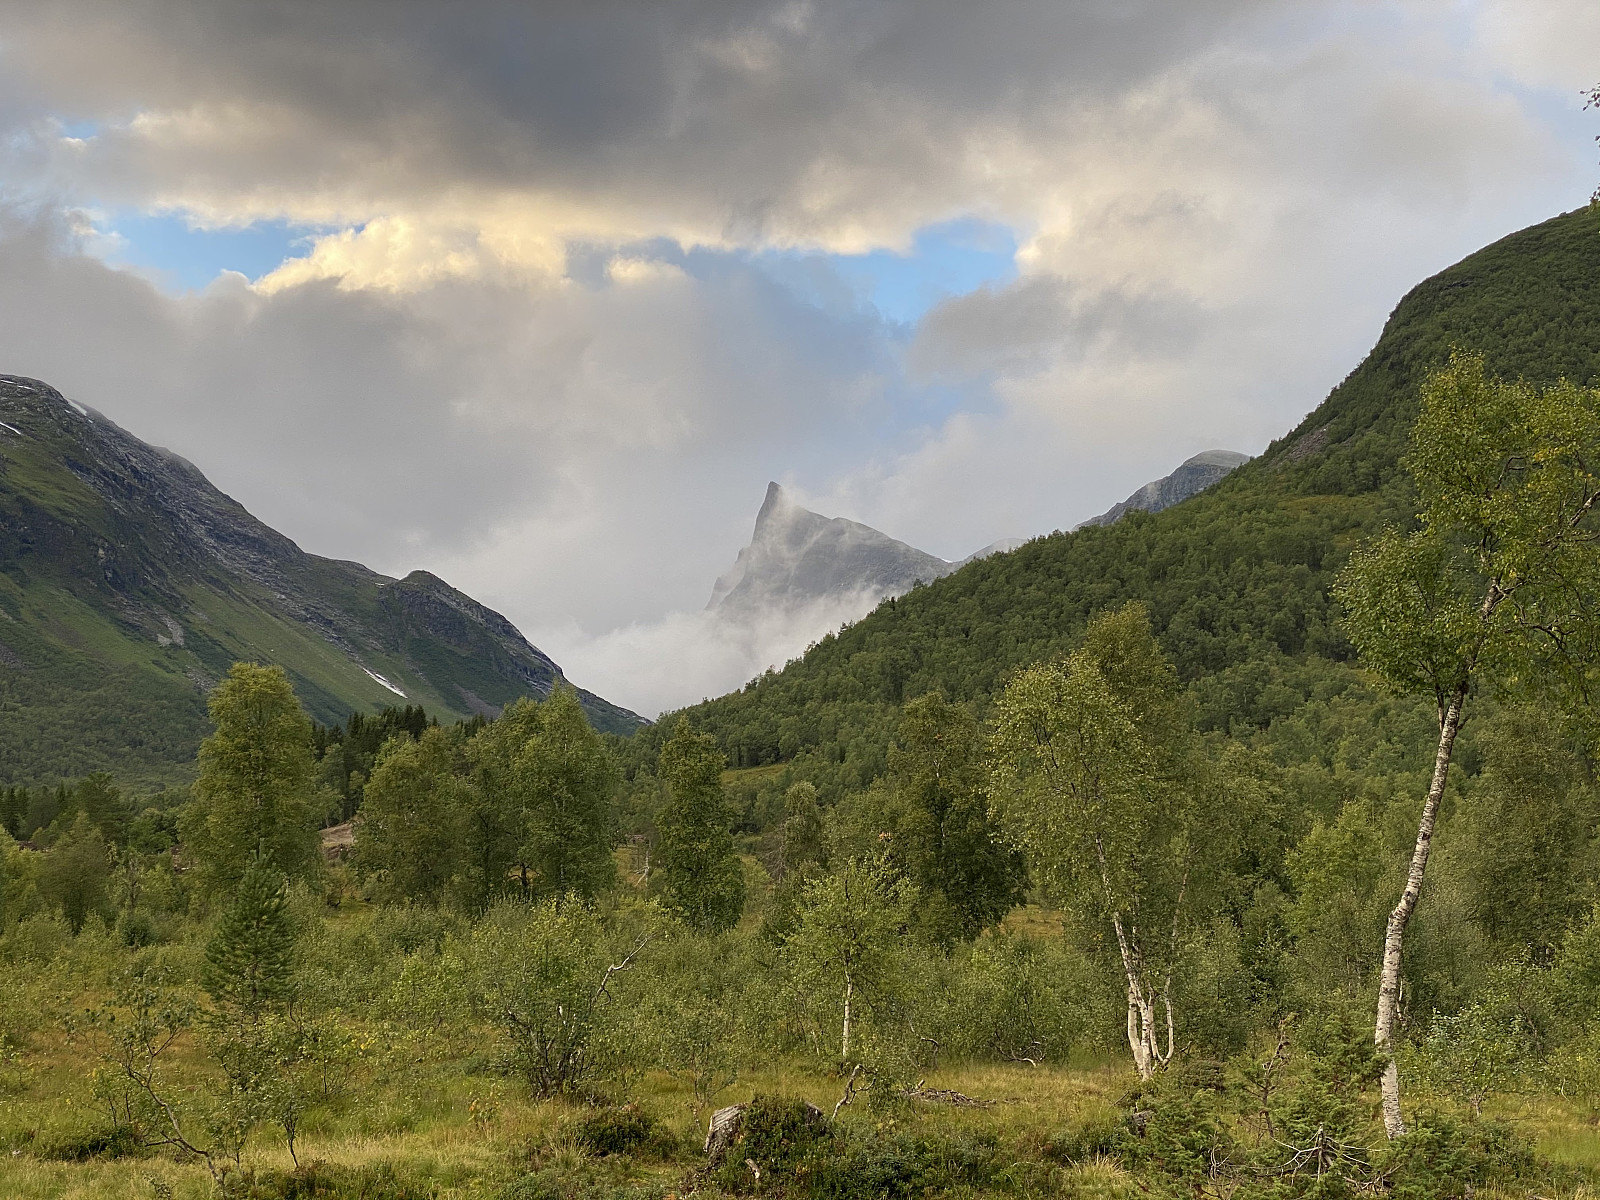
On this day my son Dag asked me to join him for a hike to Mount Honndalsrokken. This mountain is widely known in our part of Norway, as its characteristic spikelike shape may be spotted from afar. The name of the mountain is actually also derived from its shape: The spikelike summit of the mountain looks a bit like the spindle of a traditional spinning wheel, and rokk is the Norwegian word for such a spinning wheel. [Officially, the mountain is actually called Hornindalsrokken, but most locals refer to it as Honndalsrokken]. I have for several years been thinking of hiking this mountain, and so I immediately agreed to his suggestion, and went with him.

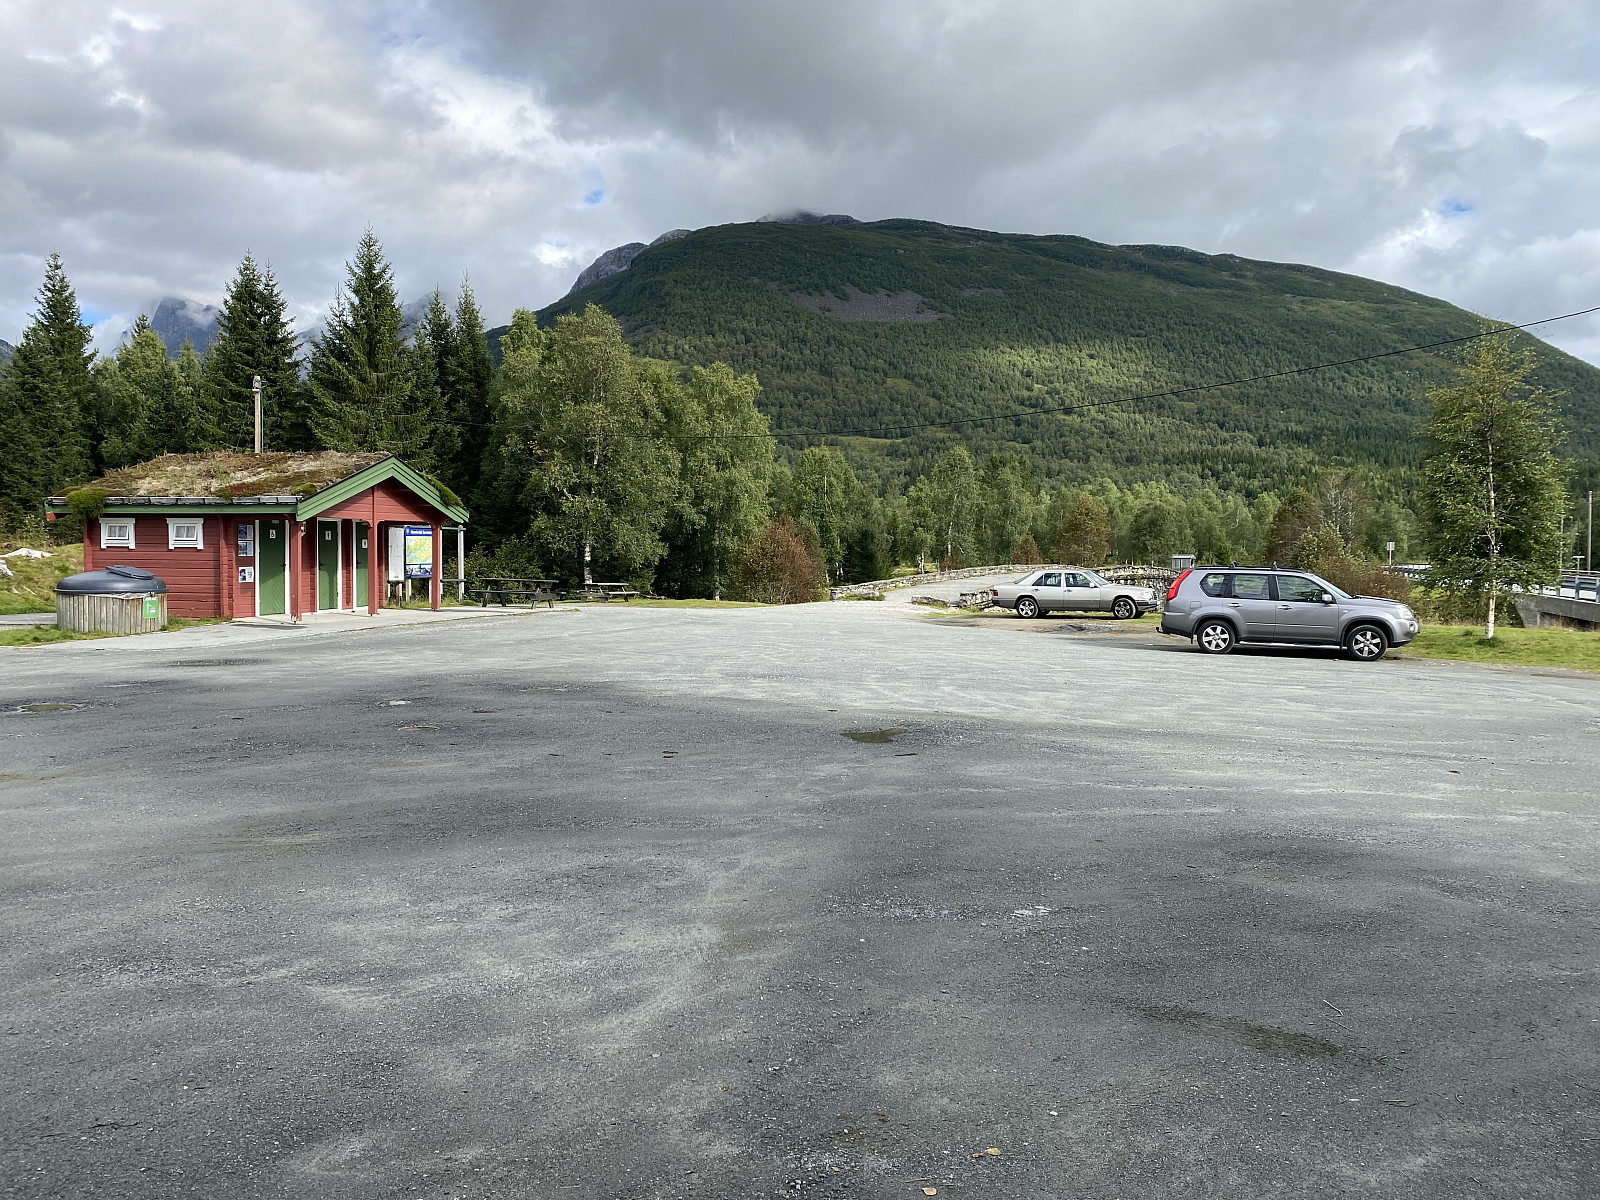
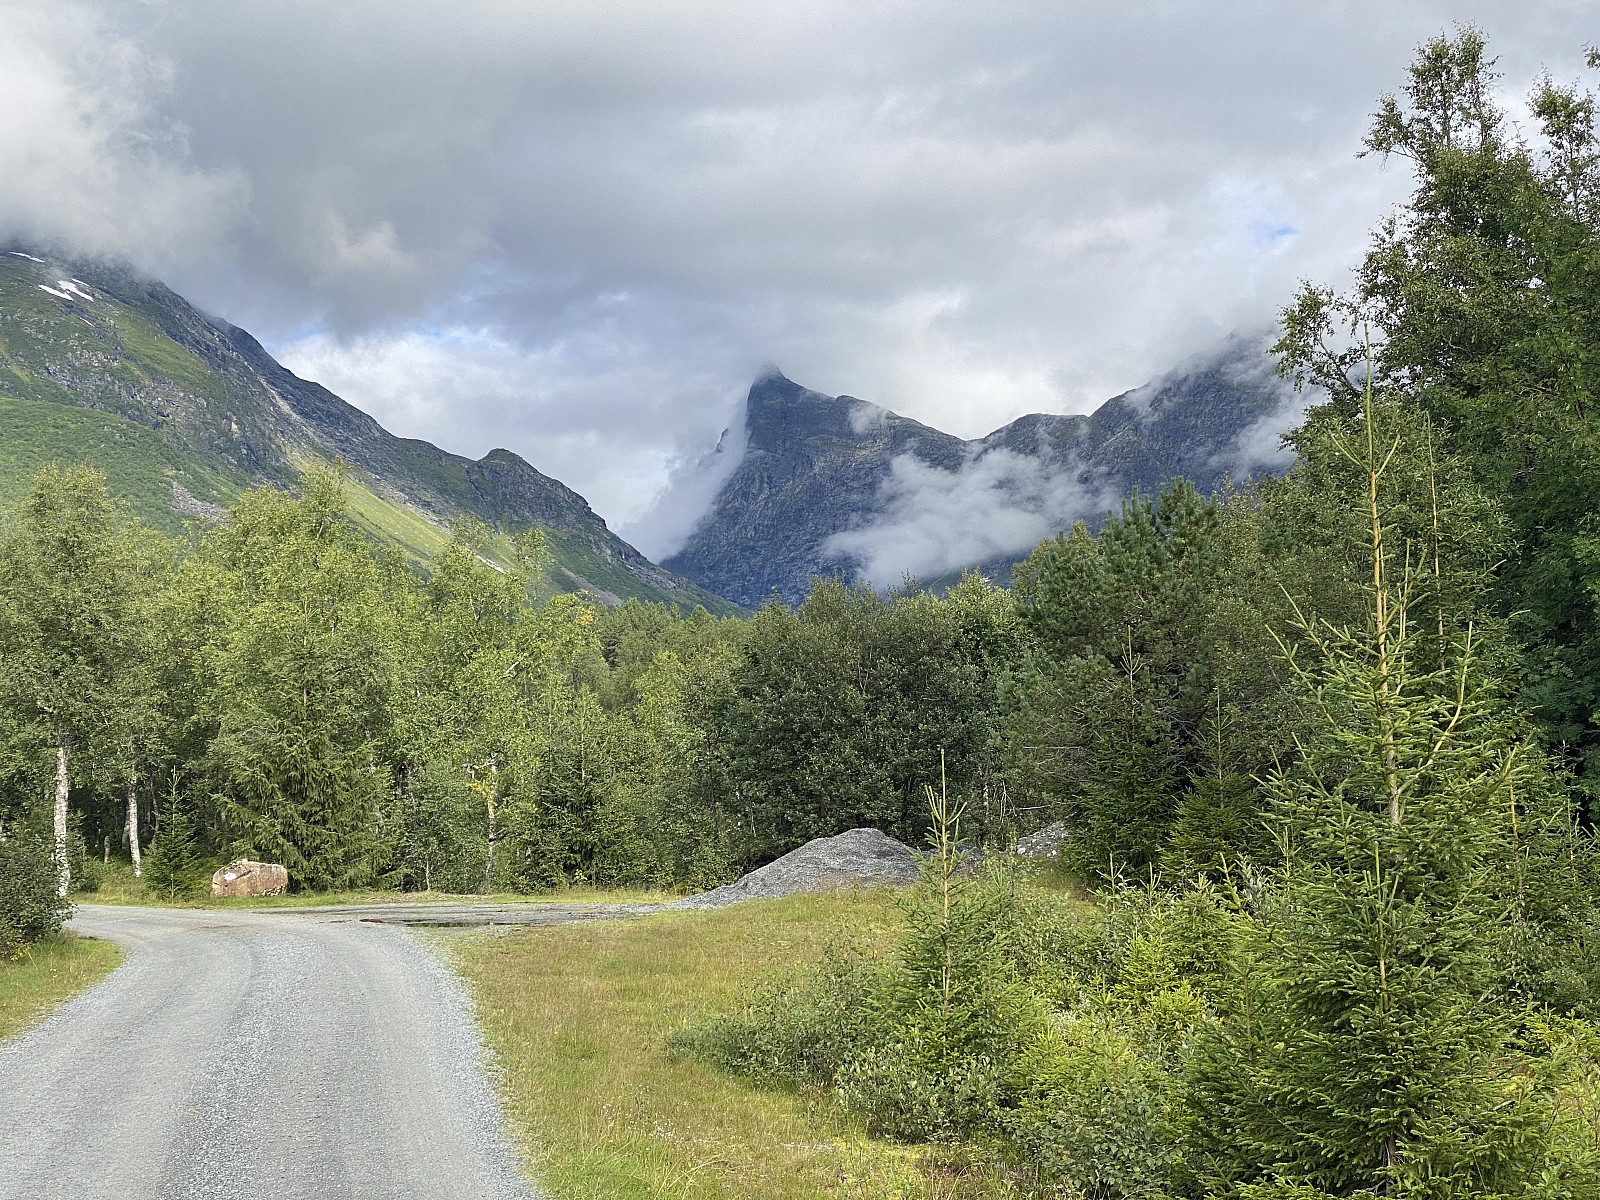
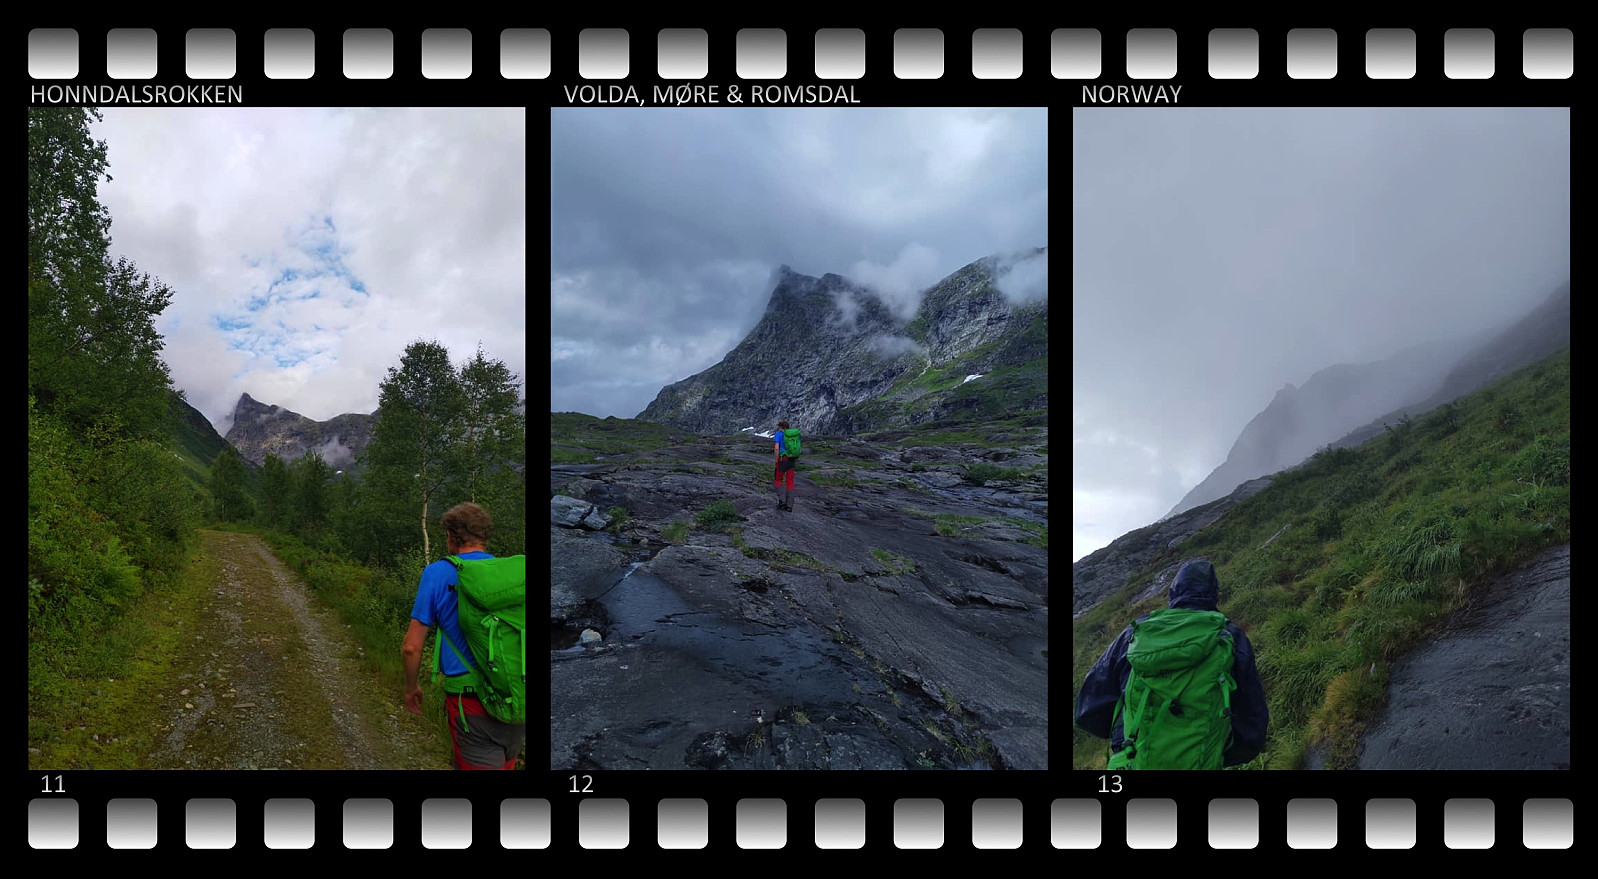
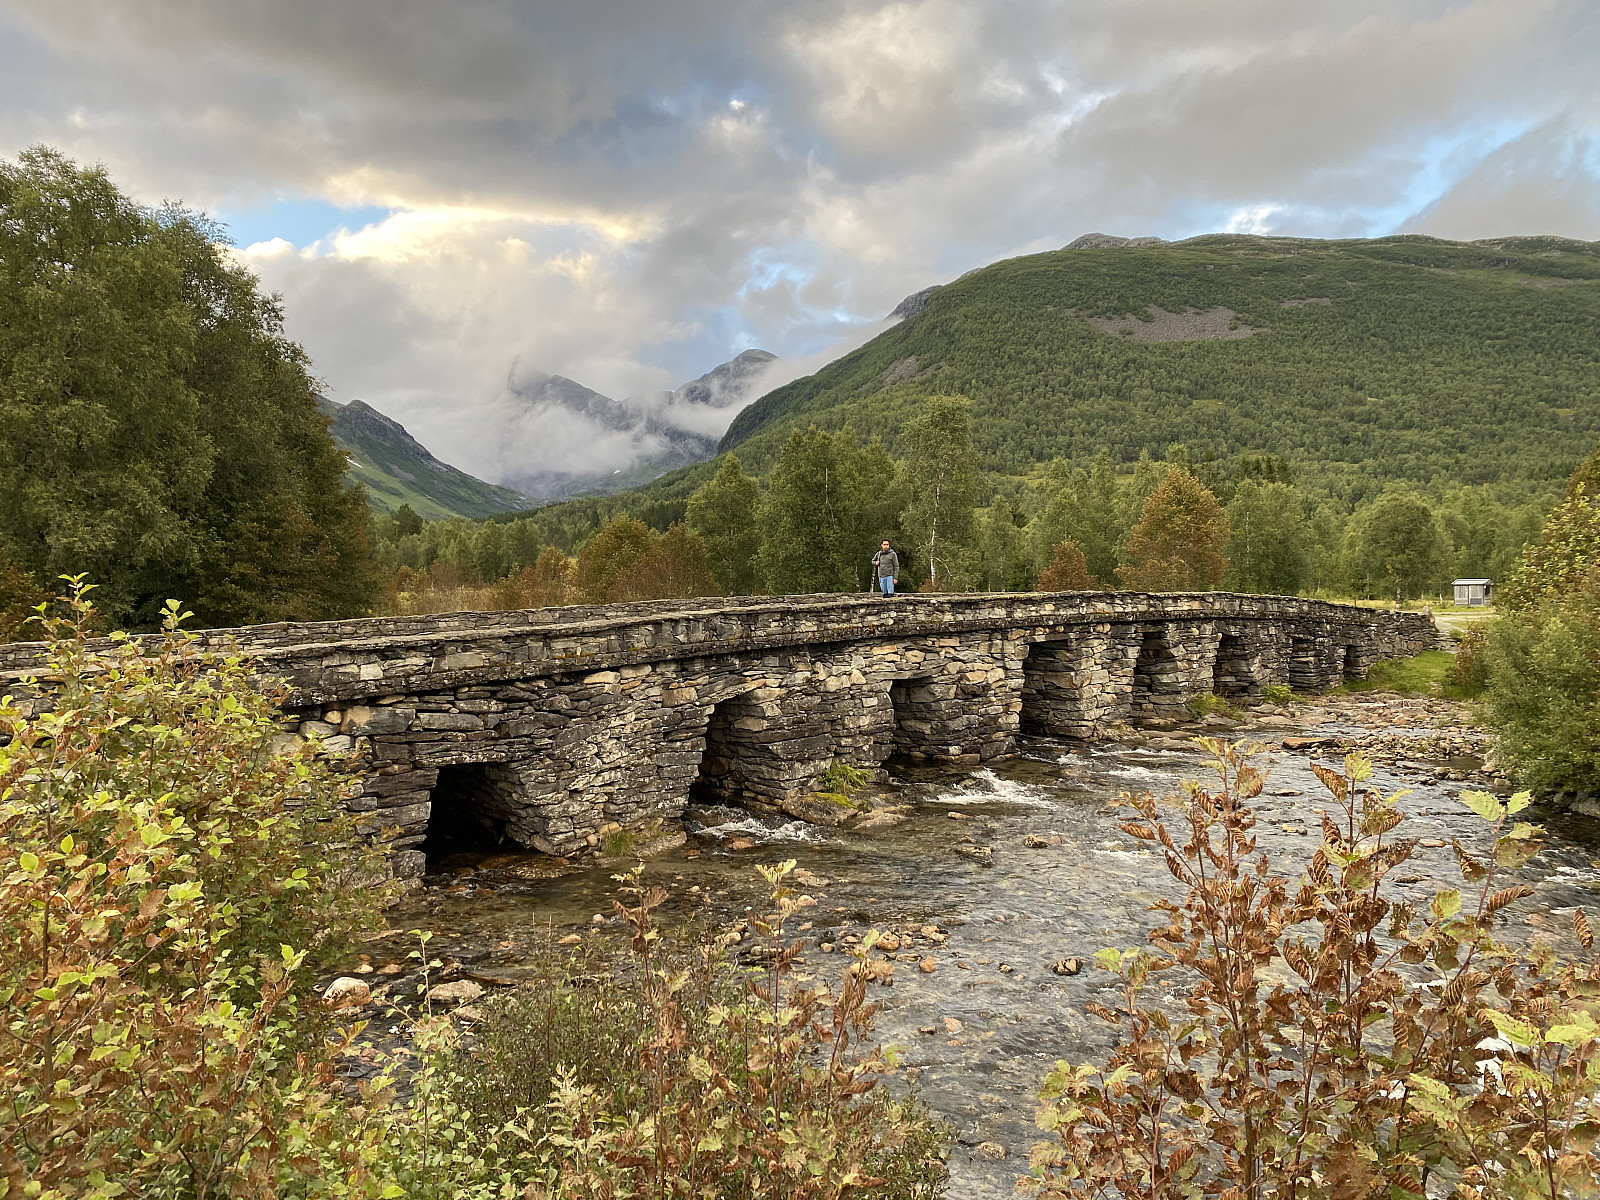
We parked our car in the parking lot just by Honndøla Bru, i.e. the bridge across Honndøla River (see image ##1 and 26), and from there we embarked upon trekking. The first kilometer of the trek goes along a nice graveled road (image #2), up to a cabin field called Honndalsætra. From there, it goes along a construction road (image #3) that has been built in connection with the construction of a water supply unit high up in the valley. We followed this road all the way up to some small lakes in the upper part of Honndalen Valley, and then continued along a marked trail leading up to the summit of Mount Honndalsrokken.
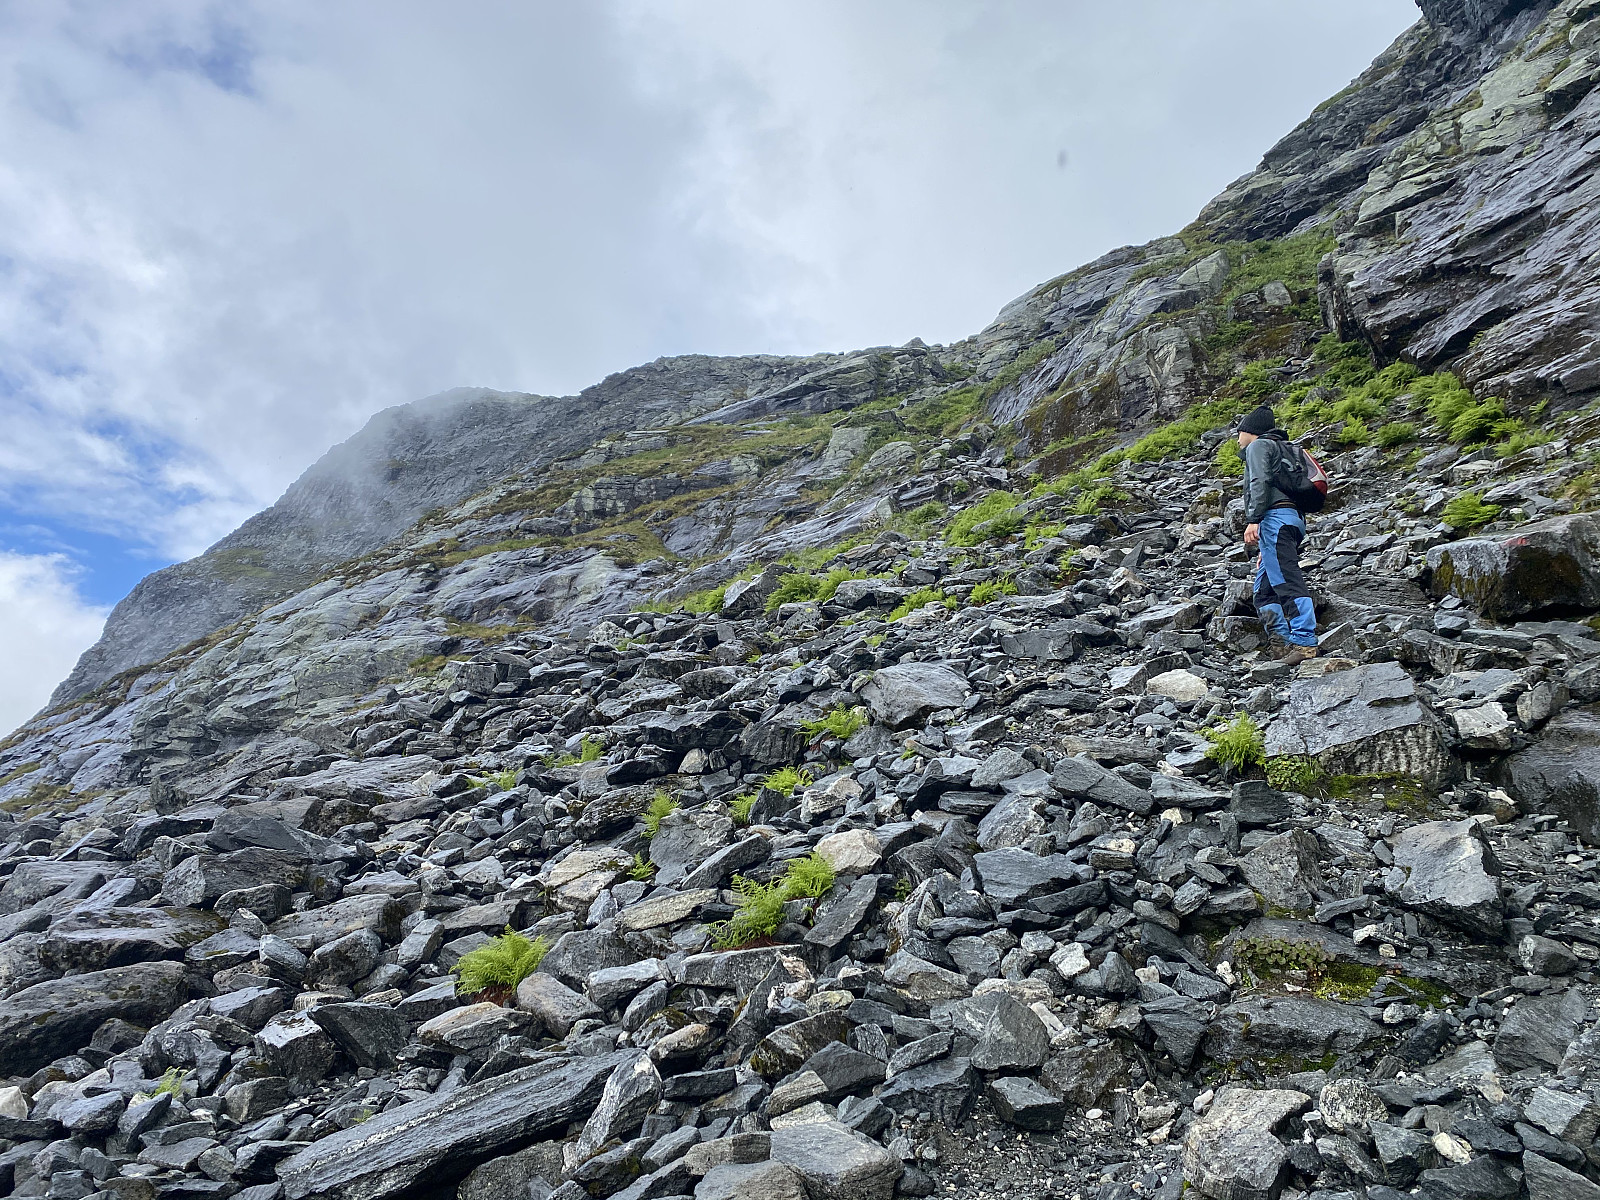
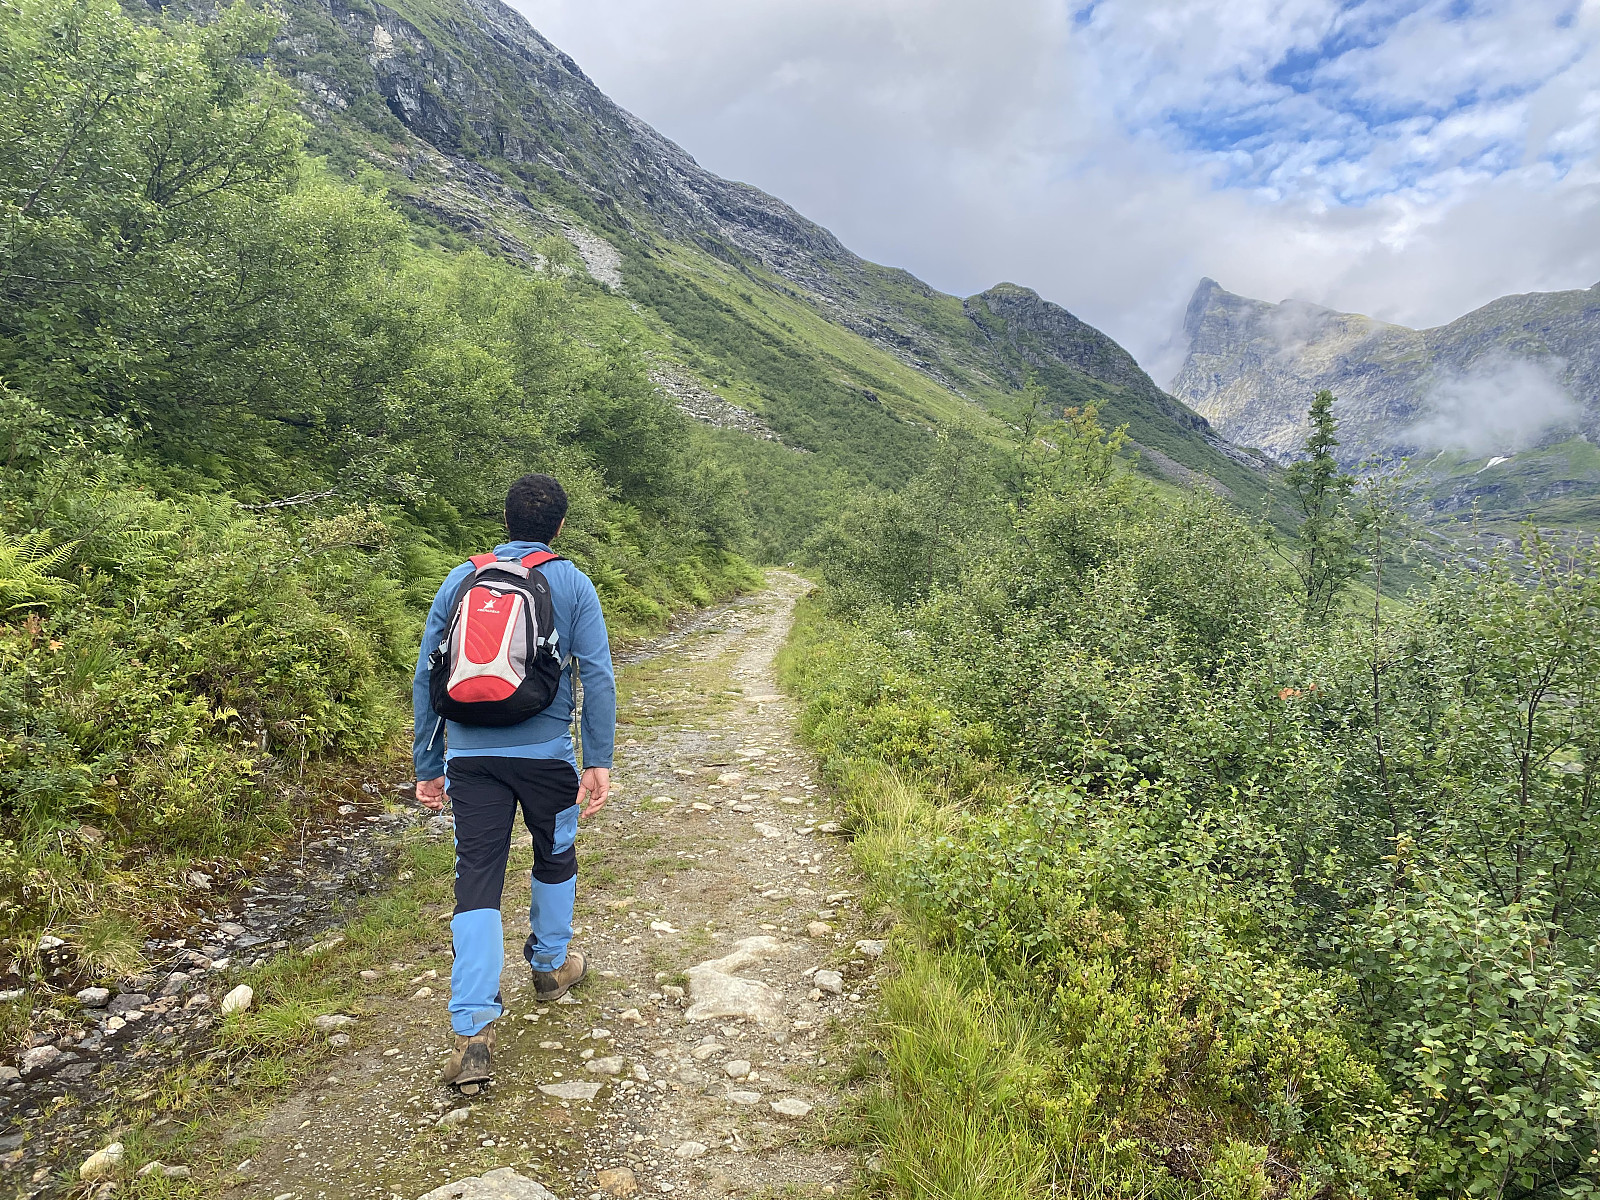
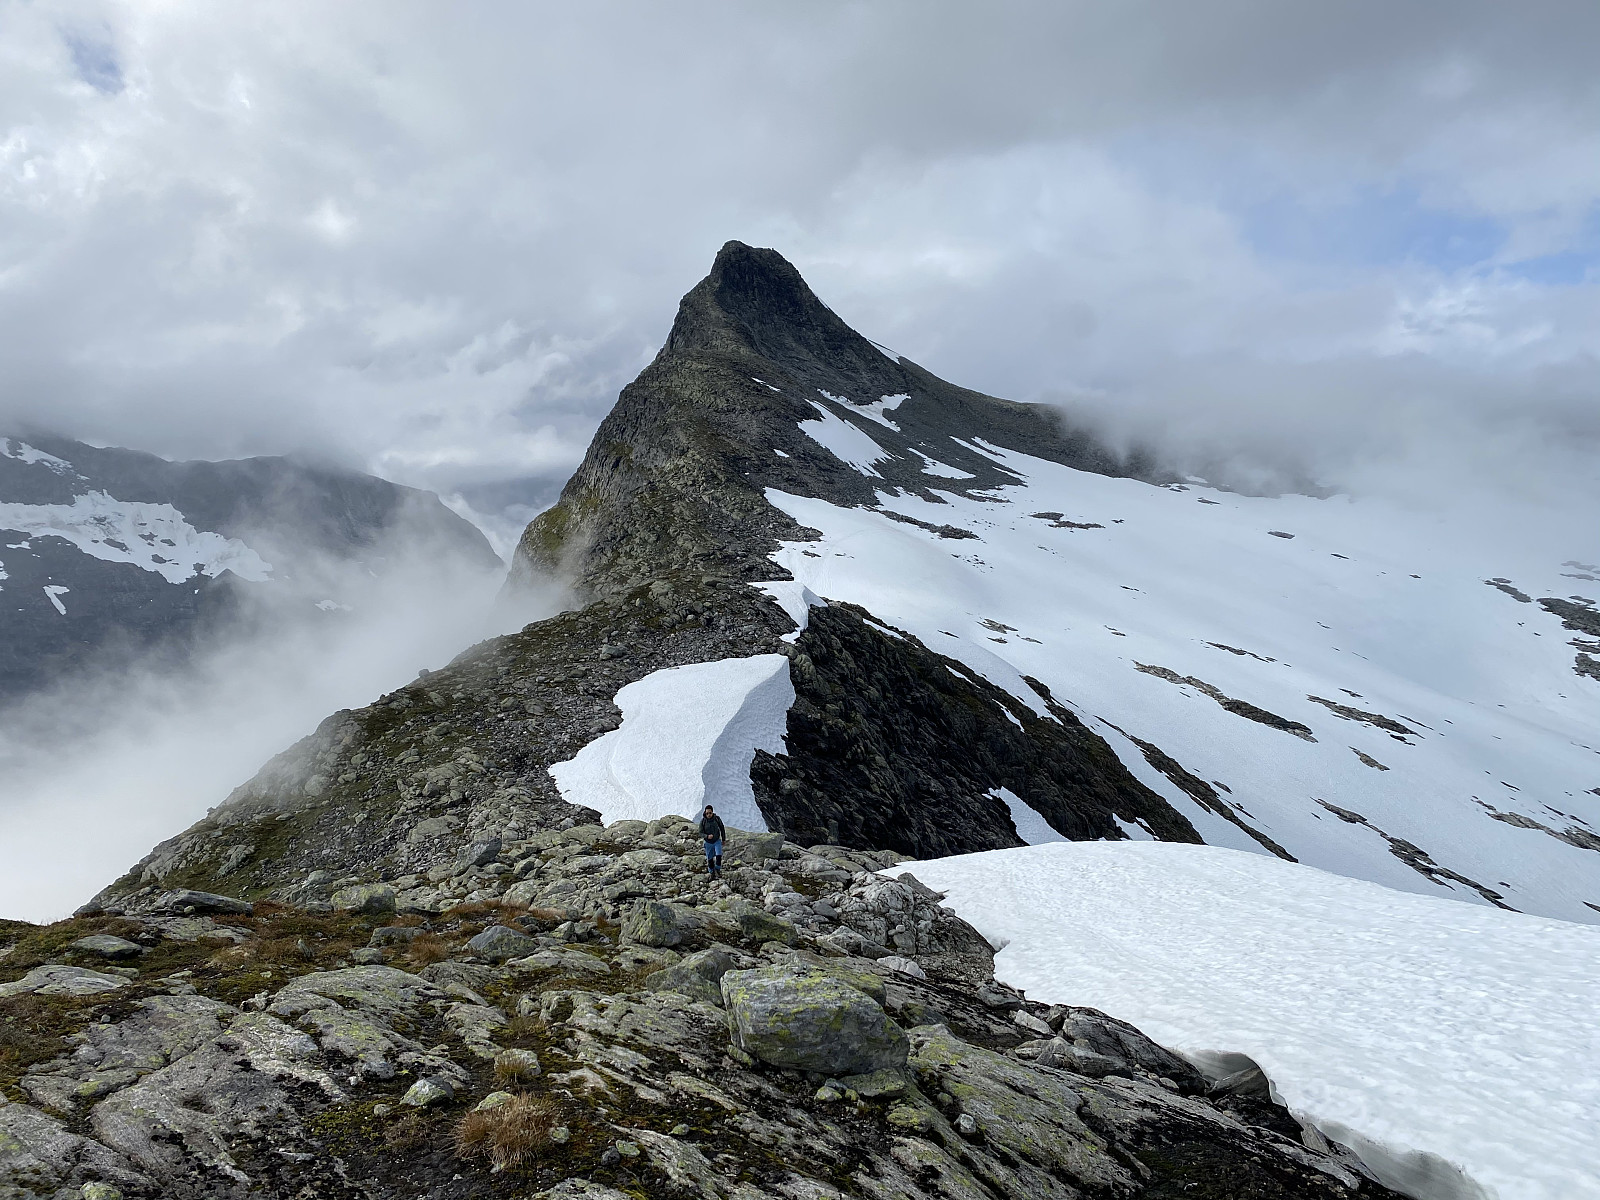
As we were approaching the foot of the mountain (Image #4), we met two ladies that were on their way back down. They were returning without reaching the summit, as they had met some really dense fog up there. We were not quite in the mood to abort our own hike, however, and we were determined to continue. Moreover, I was having with me my Garmin InReach Explorer+ GPS device, which had a nice map with the trail marked on it; so we had the advantage of safe navigation. The climb up from the area with the small lakes, to the plateau beneath the summit is quite steep, but not difficult or challenging, as long as you stick to the trail (Images ## 6, 13 & 14). The main concern when climbing up these steep slopes is to avoid setting loose stones and rocks into motion, as they may hit people that are climbing beneath you. Halfway up the slopes, we met a couple that were on their way back down having reached the summit; and as they were continuing down, while we were continuing up, we had to take great care so as not to loosen any stones that could be tumbling down their way.
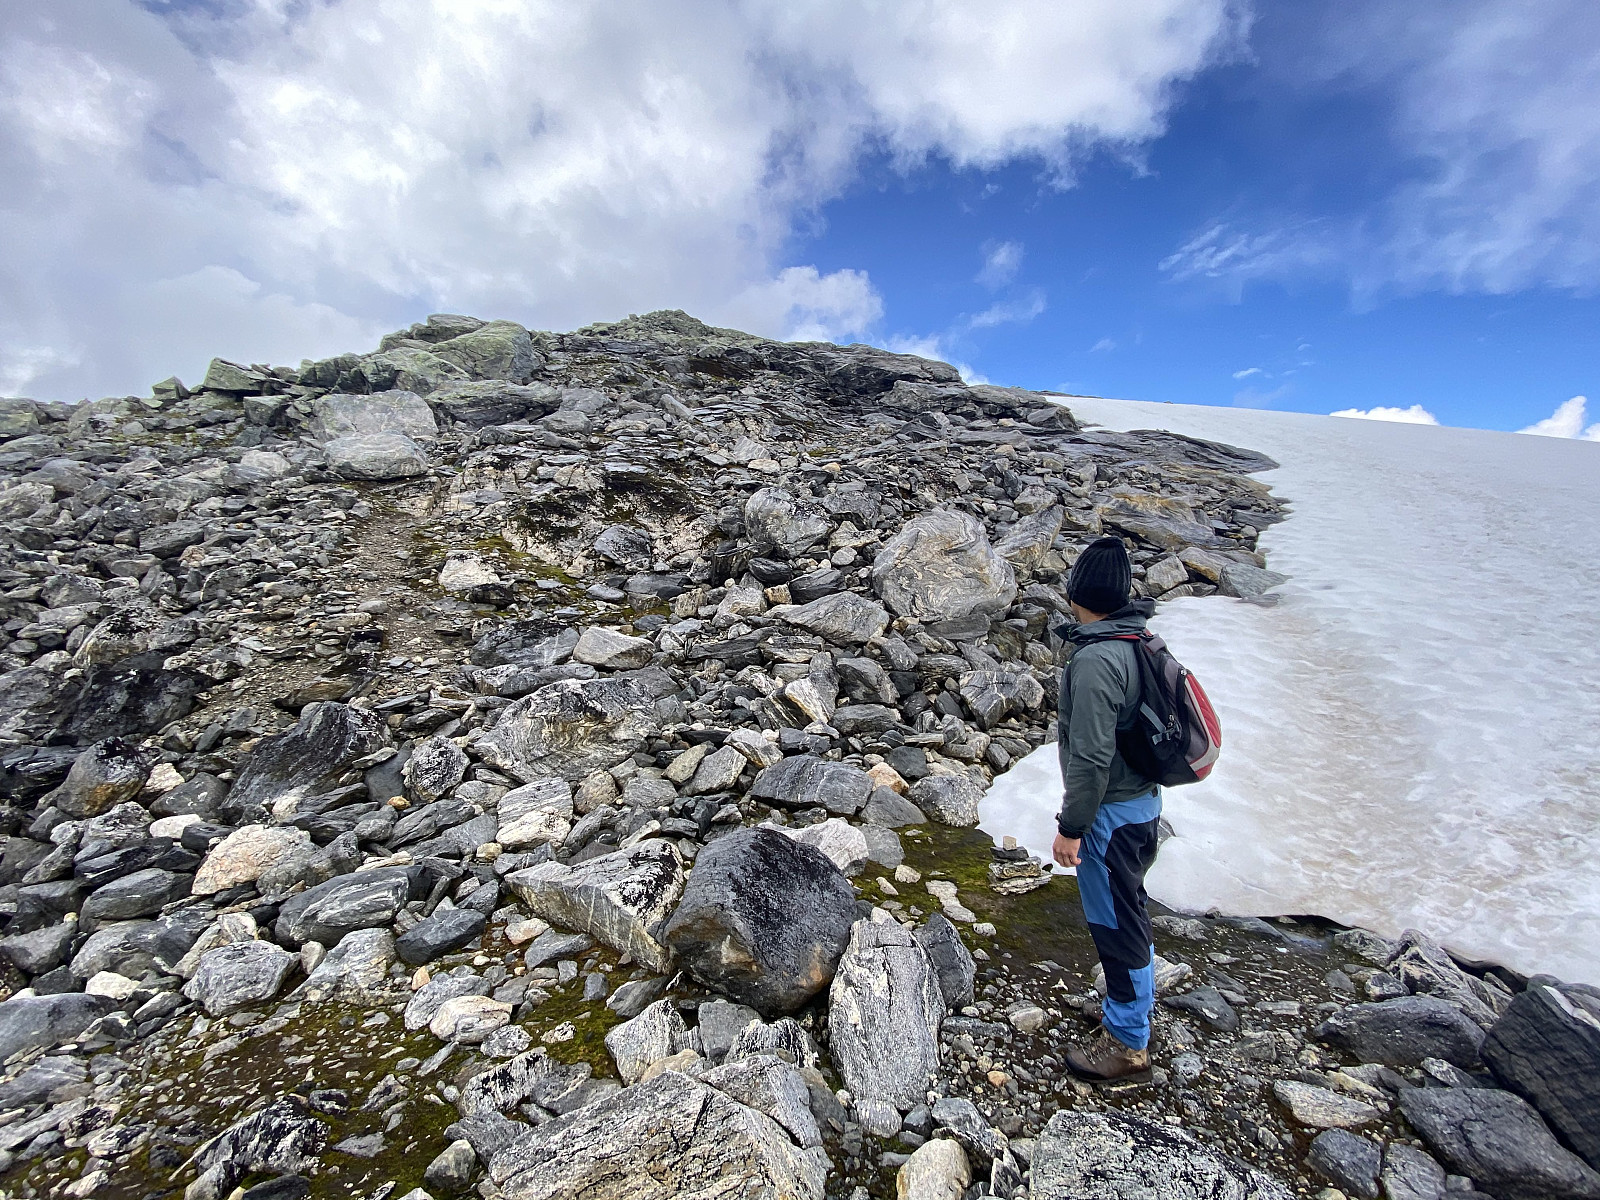
As we reached the edge of the mountain ridge between Mount Honndalsrokken and Mount Sætretinden, we arrived at a huge snow patch (Image #7). I believe this snow patch, or at least most of it usually melts away during the summer months, but due to the heavy snow falls that we had in April and May this year, it's quite unlikely that all of it will go away this year. This snow patch is not really located on a plateau, as I have described it above; it's just that after the steep climb up to the edge of the ridge, the other side of the ridge kind of feels like a plateau, though it's actually also a slope, that just has a much more moderate inclination (Image #20).

Had the weather been nice, we might have tried to climb directly up from the southeast ridge of Mount Honndalsrokken up to the summit, but as weather was foggy, and the ground was wet and slippery, we decided to follow the regular route to the top. Now, in order to follow the regular route, you traverse the slopes of the north east side of the mountain, and then the trail turns left, making a loop on the map; and finally you approach the summit from the northwest (see map). Now, in order to circumvent the top of the mountain along this trail, we first had to cross the huge snow patch described above. Our shoes weren't that well suited for snow, but a lot of people had walked the trail throughout summer; and so there was a fairly easy trail to follow across the snow.

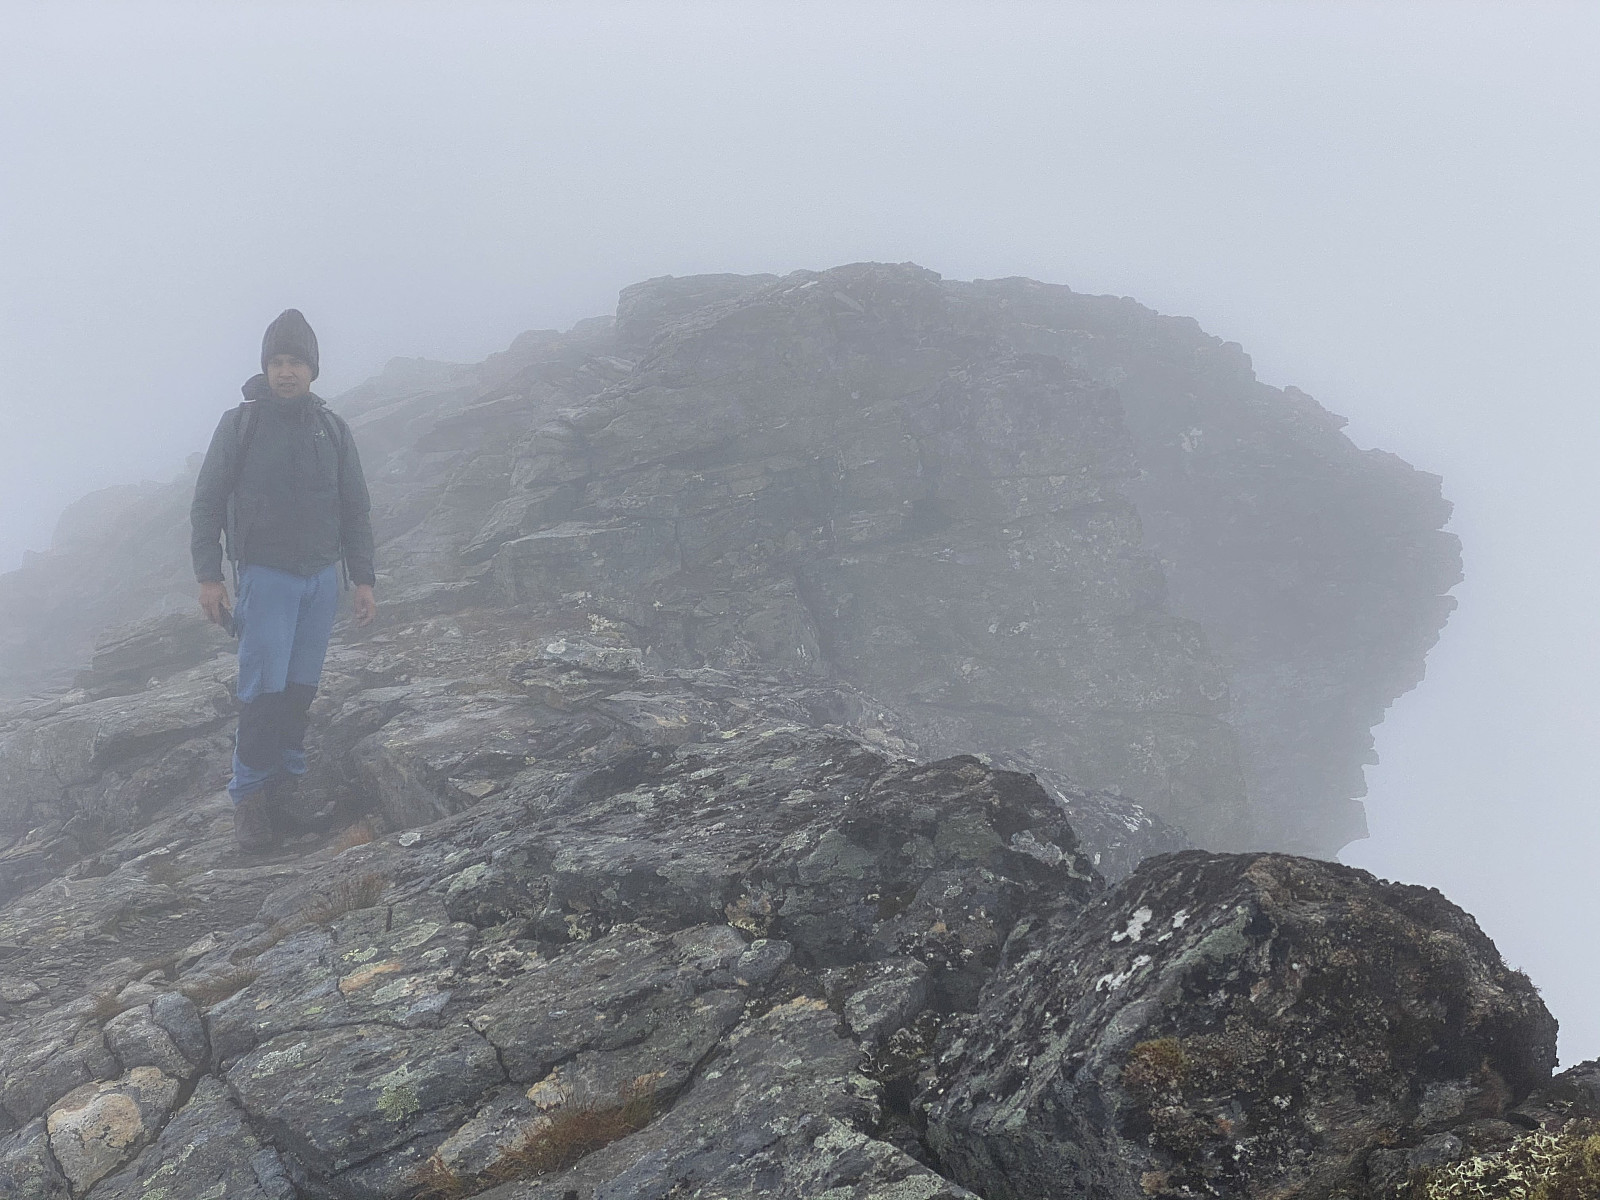
When we reached the other edge of the snow patch, we were about to enter into the fog. Nevertheless, following the trail was fairly feasible, as it had been marked by a little cairn every 50 meter or so. The fog gradually became more dense, however, and soon it was no longer possible to see from one cairn to the next; and this was when I opened the map of my GPS device, and just followed the trail marked out on the map, keeping one eye on the map, and the other on the ground in front of us. We soon reached the edge of the northwest ridge of the mountain (Image #8), and then followed the edge to the mountaintop. This northwest ridge has a cliff of several hundred vertical meters on the west side, whereas the east side of the ridge is a slope with much more moderate inclination; and so the important thing right here was to mind every step that you were taking, in order to make sure you don't fall down on the west side. This even illustrates the limitations of a good GPS: Even though you may use it to navigate to the summit of this mountain, you still need to have sufficient visibility that you're able to actually see the cliff, and make sure you don't step over the edge. Had the visibility been virtually zero, we would've had to abandon our attempt on reaching the summit.
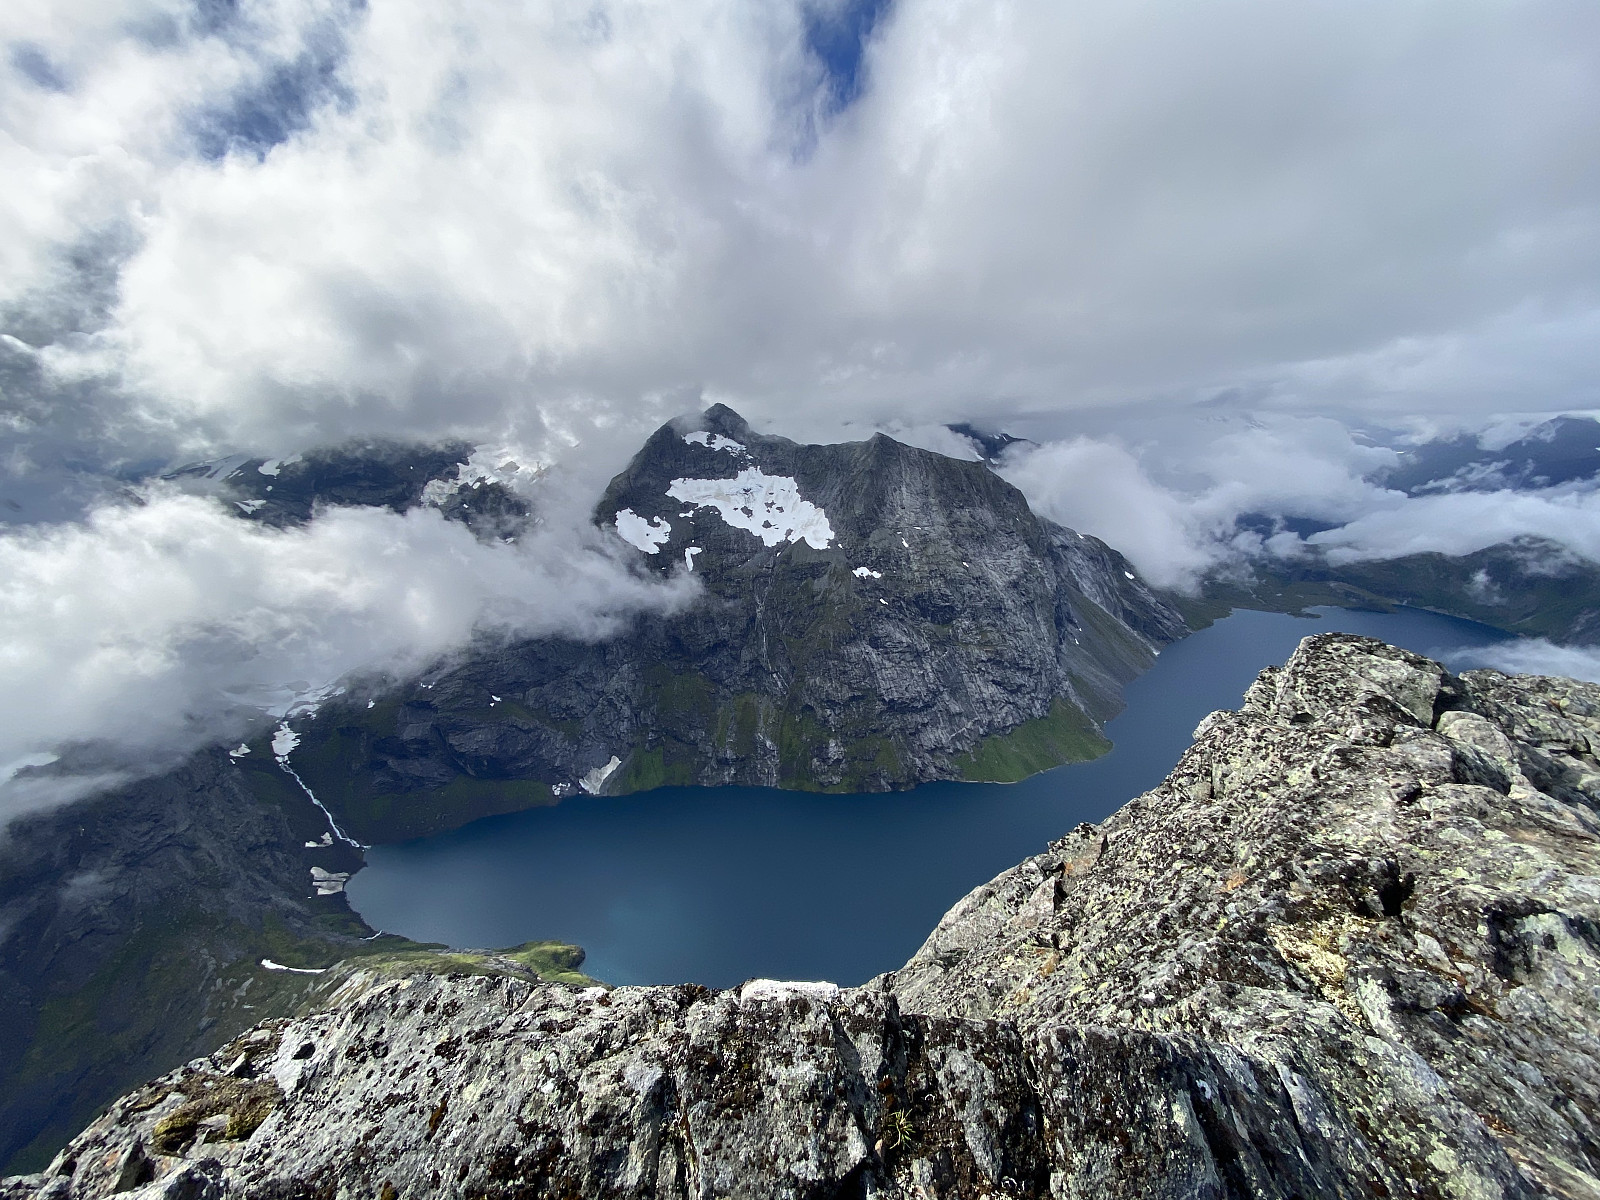
As we approached the summit from the northwest, we encountered another group of people that were heading back down from the summit. They departed from the ridge about where we met them, and followed an alternative trail slightly lower down the northeast slope of the ridge (Image #9). We continued up to the summit, where we had something to eat and drink, and also shot some pictures (Images ##10 & 15). The clouds were coming and going all the time. One moment there was no view to be admired at all, and the next moment part of the sky cleared for a few seconds, so that you go a glimpse of the surrounding lakes and mountains (Image #17). Nevertheless, we never even got a short glimpse of the fjord called Hjørungfjorden; which is a pity, because that view is supposed to be breathtaking from up there.
![Image #18: The ridge up towards Mount Sætrenibba [1374 m.a.m.s.l.]. At this time of the year, there was still some snow along the ridge.](https://images1.peakbook.org/images/14939/Solan_20201228_5fea415bc11f3.jpg?p=xtralarge)

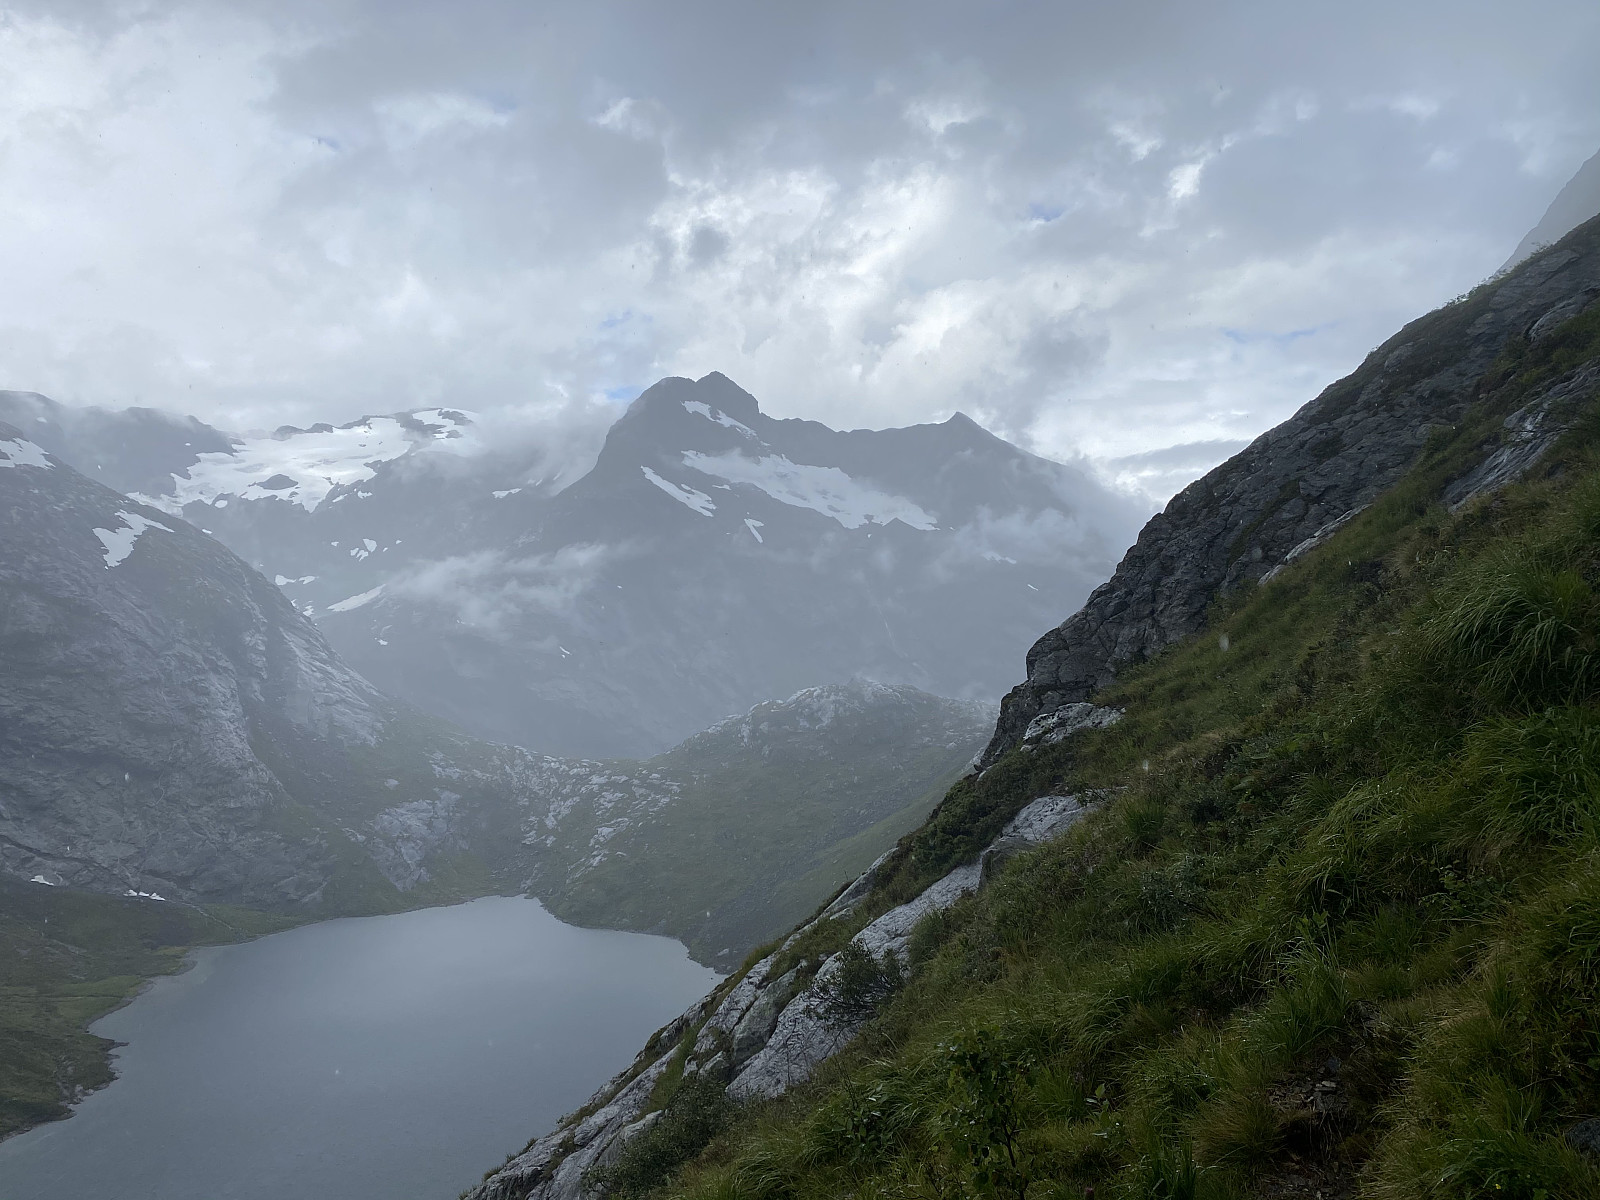
We chose to descend along the same route as the group of people that we met just before summiting the mountain, as it seems safer to avoid the very edge of the ridge as long as the fog was still coming and going. This route was not much different from the one by which we had ascended, however, and soon we were back by the large snow patch seen in the northeast slope of the mountain on image #20. We crossed the snow patch along the same route as we had crossed it during our ascent, and not much later we were back in the notch between Mount Honndalsrokken and the neighboring Mount Sætrenibba.
![Image #21: View from Mount Sætrenibba towards Mount Trollaksla [1387 m.a.m.s.l.] to the left and Mount Kvitegga [1699 m.a.m.s.l.] along with Mount Kvanngrønibba [1478 m.a.m.s.l.] in the middle part of the image. The valley under the rainbow is Kjellstaddalen Valley.](https://images1.peakbook.org/images/14939/Solan_20201228_5fea43f4c8325.jpg?p=xtralarge)
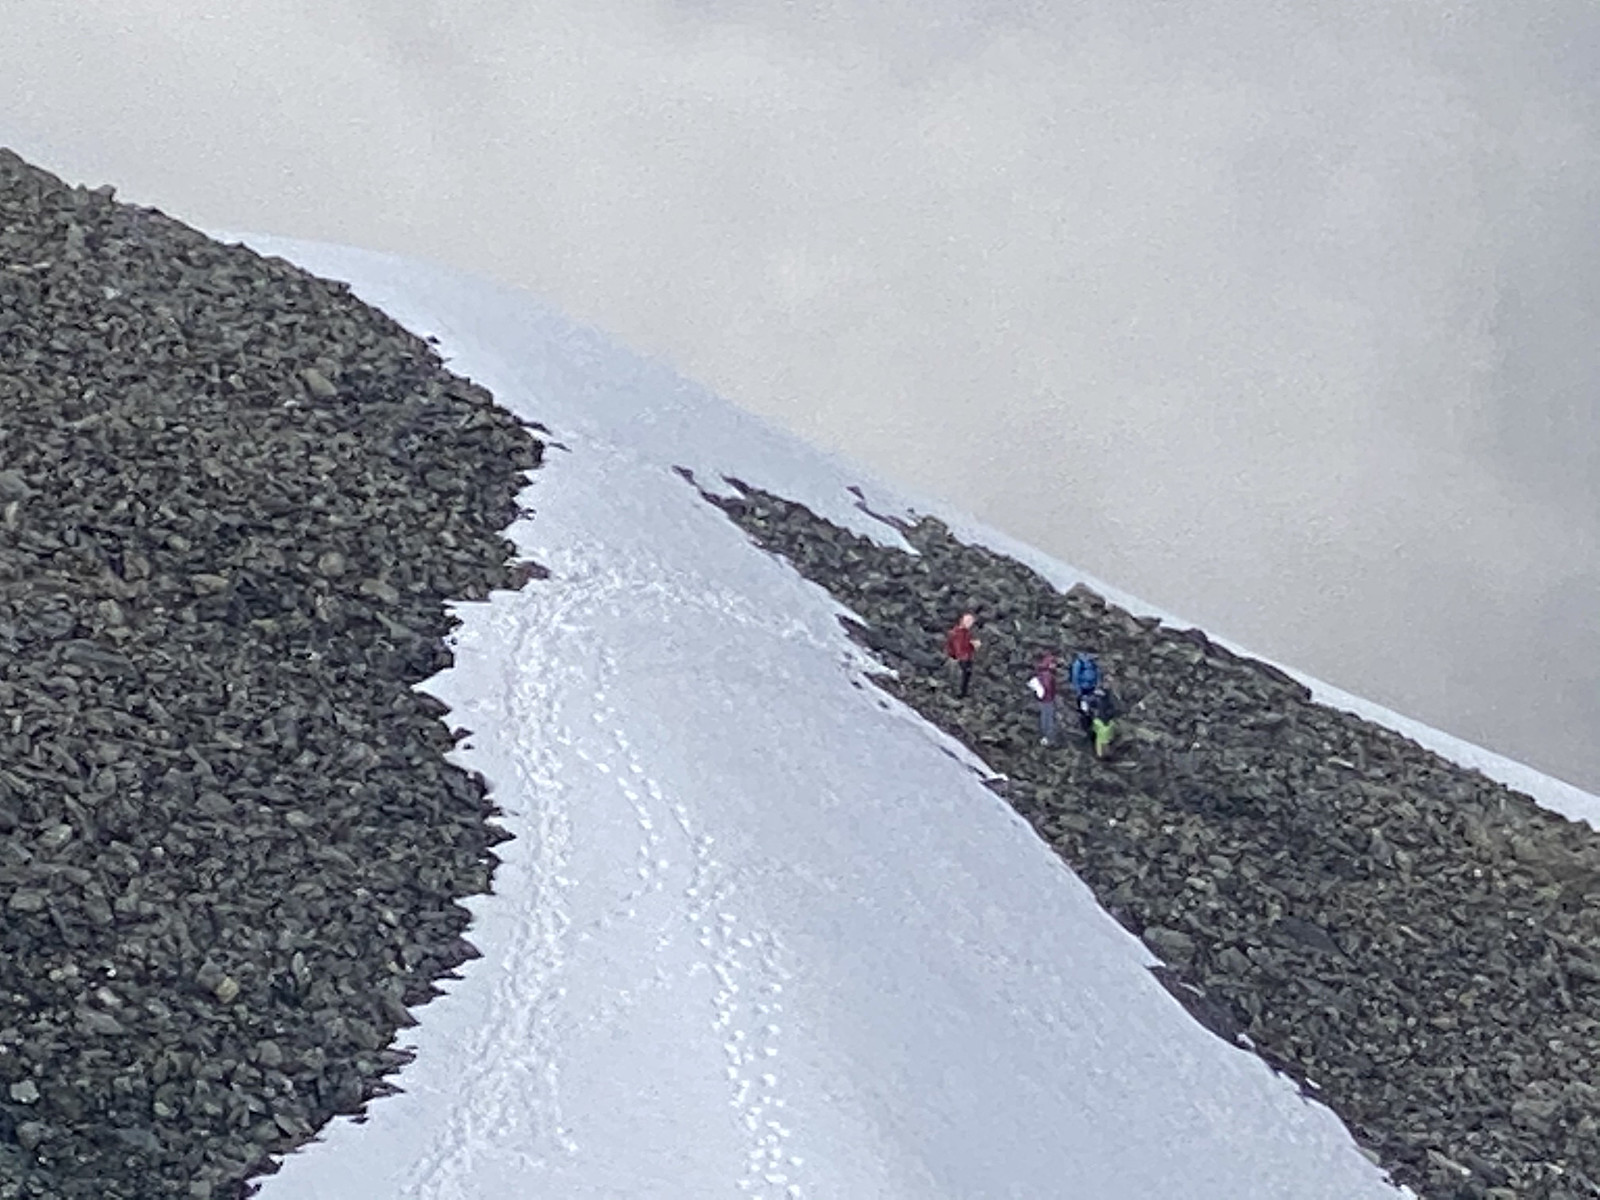
The three mountains of Mount Honndalsrokken [1527 m.a.m.s.l.], Mount Sætrenibba [1374] and Mount Trollaksla [1256] together forms a mountain range going in a northwest-southeast direction; and as we could see that the two mountains ahead of us [i.e. Sætrenibba and Trollaksla] were currently not embedded in fog, we decided to return to our car via these two summits, and so we embarked upon the climb. In the notch between Mount Honndalsrokken and Mount Sætrenibba, there was still a snow shelf that has been formed by the wind during the winter months (Images ##18, 19 & 20). We figured it was best to avoid this snow shelf, and so we circumvented it on the right side. It believe it would probably have carried our weight without any problem, but you never know; and so in order to stay safe, we just avoided it completely. As we climbed up the ridge towards the mountain top of Mount Sætrenibba, we realized that most of the fog on Mount Honndalsrokken had lifted by now, and when looking back you actually had a very nice view of the summit of Mount Honndalsrokken (see image #20).

![Image #23: The mountain ridge towards Mount Trollaksla [1256 m.a.m.s.l.].](https://images1.peakbook.org/images/14939/Solan_20201228_5fea47f5b5a3b.jpg?p=xtralarge)
We continued up to the summit of Mount Sætrenibba, where we had a little more to eat and drink. From there we continued along the interconnecting mountain ridge towards the summit of Mount Trollaksla [1256]. Some fog was still coming an going every now and then, but most of it had lifted by now, and whenever visibility was declining for a few minutes, we used the GPS to make sure the trail that we were using was heading in the right direction. There's actually two different peaks referred to as Trollaksla [i.e. the Troll's Shoulder] in this area. One of them is the peak visible in the left part of image #21 (i.e. the picture with the rainbow). This mountain is 1387 m.a.m.s.l., but was a little bit off trail for us on this day, so we didn't visit it. The other, which is 1256 m.a.m.s.l., is the third mountain in a chain, forming this mountain range along with Mount Honndalsrokken and Mount Sætrenibba (see map).
![Image #24: Approaching the summit of Mount Trollaksla [1256 m.a.m.s.l.]. Clouds were still coming and going.](https://images1.peakbook.org/images/14939/Solan_20201228_5fea48e0de9f2.jpg?p=xtralarge)
From Mount Trollaksla [1256], we descended back down to where we had parked our car. There was no really good trail to follow down that way. There probably is a trail descending along a ridge that goes in a westward direction, but had we descended along that mountain ridge, we would've had to walk quite long afterwards to get back to our car; so we chose to descend along a ridge going in a southward direction in stead. We did see remnants of a trail here and there, and we actually tried to follow them, but they always disappeared after a while. Little by little we were realizing it was unlikely that these trails were man made at all; the trails that we were encountering along this ridge were probably animal tracks. After a while we came down to a mountain knoll where a cairn has been built, and then, of course, we thought the trail descending from there had to be made by humans, and so we opted to follow it down through the forrest. After it had taken us down some steep places, however, even that trail disappeared, and now hiking further down the mountain side became more challenging as the forrest became denser. We continued down the mountain side, however, following new animal tracks every now and then, frequently checking the GPS to ensure we were really heading towards the car; and not too much later we were out of the forrest, and from there it was just to cross a mire, and then the old river across Horndøla River (Image #26), and we were back by the car.

Benutzerkommentare